24
$\begingroup$

I have a sphere having a planet material MADE WITH NODES, and I want to convert this material into an image texture; because this material is made with nodes and only works in Blender, but I want to use in another software. This is my sphere material :

enter image description here


For Example :

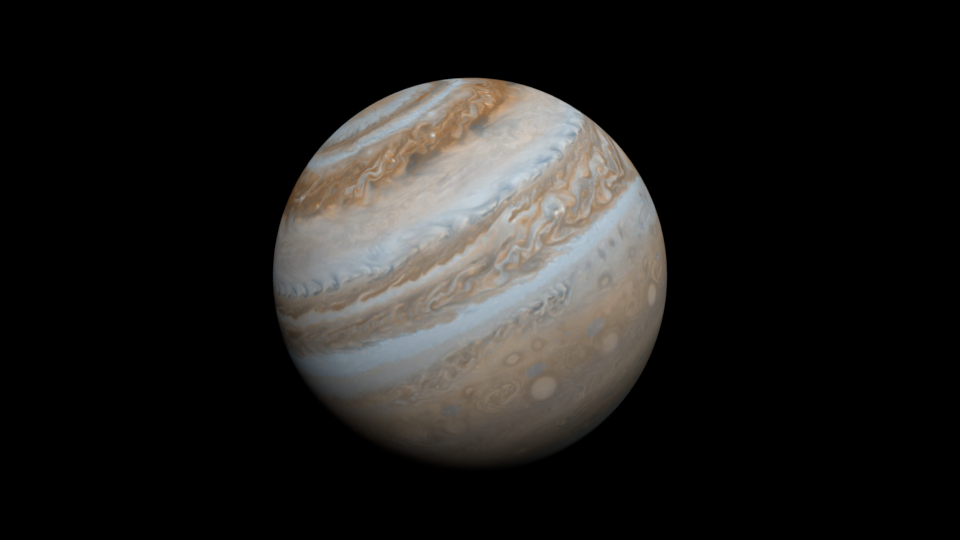
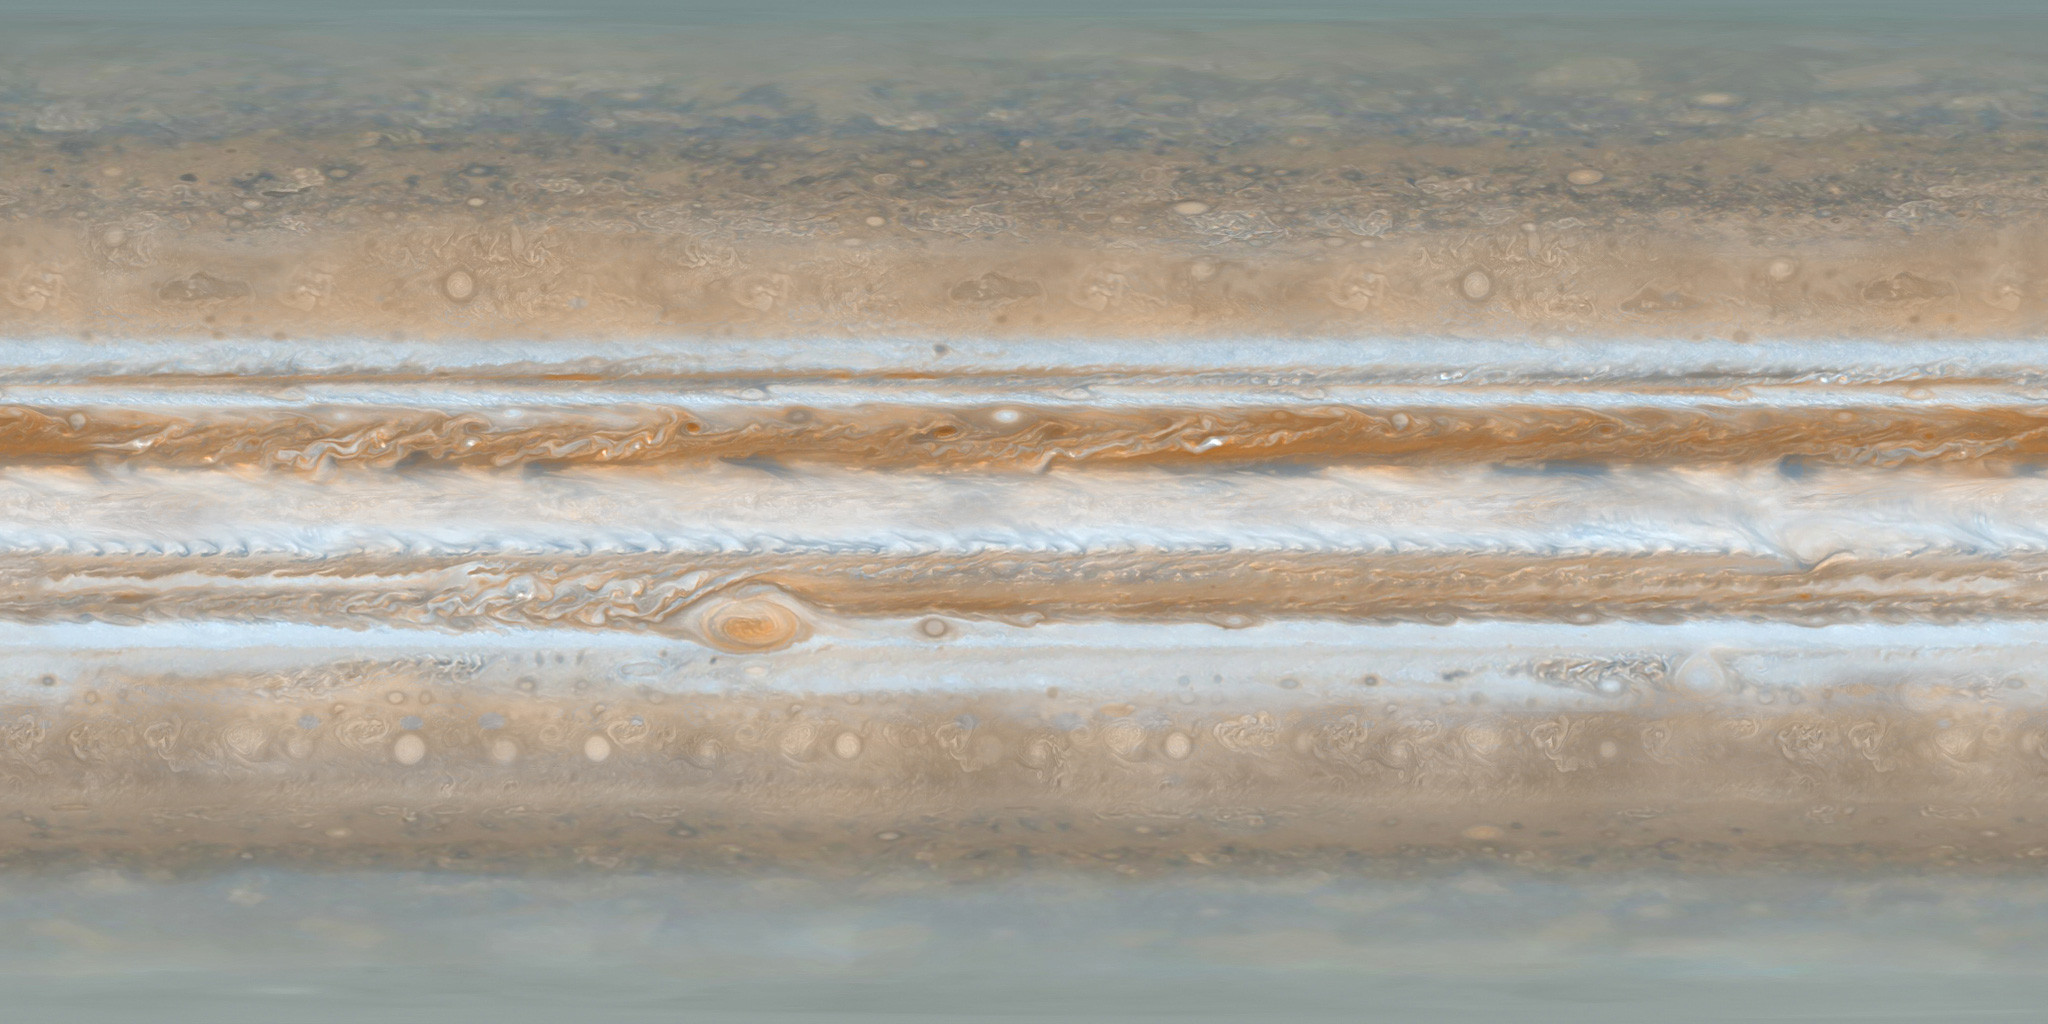
This is Jupiter :

enter image description here

And this is the texture :

enter image description here

In this case I used a downloaded image for Jupiter to be the material but I want the opposite, I want to change the material to image texture Like The shape of Jupiter texture.

Is there anyway in Blender that can achieve my goal ?

This is the file with my sphere material .

Textures Needed :

  • Albedo / Color / Diffuse
  • Normal Map
  • Roughness
  • Glossines

I am using normal nodes and I am not useing the new Principled-shader

$\endgroup$
4
  • 2
    $\begingroup$ You can successfully bake the output of any view indipendent nodetree, but you'll not get good results by the view dipendent nodes. Could you explain better what you mean by "convert a material into an image"? Is the intended image meant to reproduce the whole nodetree or only a part of it? $\endgroup$
    – Carlo
    Commented Sep 12, 2017 at 17:05
  • $\begingroup$ @Carlo I mean that i want the material of my sphere to be only an image texture, and yes i want all my nodetree to be baked to an image texture. $\endgroup$ Commented Sep 12, 2017 at 17:53
  • $\begingroup$ There are some peculiarity in your shader that doesn't go well with baking. You have a glossy shader (and the mix shader controlled by viewing depth...), that is reflecting. Think of a mirror: if you take a still of of what a mirror is reflecting, it would be a good representation of the behaviour of the shader only from that precise point of view. I'll suggest you to read blender.stackexchange.com/questions/62026/… $\endgroup$
    – Carlo
    Commented Sep 12, 2017 at 21:05
  • $\begingroup$ You can bake your material to an image. "Render" tab, at the bottom. $\endgroup$
    – WolfiG
    Commented Oct 6, 2017 at 16:37

3 Answers 3

37
+50
$\begingroup$

The method of creating textures is called Texture Baking. Different kinds of textures (normal map, specular map, albedo map, etc.) take different sources, from which you 'bake' the texture - it can be surface normals, materials, lights, etc.

How do I bake a texture using Cycles bake

Not every material can be easily baked into single image without visual loss. Many materials have properties like refraction, surface normals, roughness and many others, which rely and change with lighting. Usually you need to bake several textures from a single material to be able to re-create it in other app's shader system.

You might need textures like:

  • albedo
  • normals
  • transparency
  • emission
  • sub surface scattering color
  • and others..

plus if the shader system is modern PBR based engine, you will also need:

  • roughness
  • metalness

and if it's specular based, you will need:

  • specular
  • glossiness

Cycles materials can have very complicated node networks, so what I recommend is to build your material using the new Principled BSDF shader, and when you are satisfied with the result, bake all the inputs of this shader one by one into textures with 1st method (to not do this manually you can also search for addons that bake textures for specific engines, like this Unreal texture baker):

  • 1st method - bake as Emit pass - anything that goes in, you get exactly out:
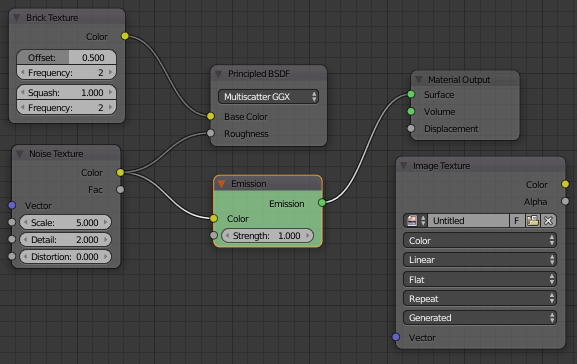
    enter image description here

    pass through emit shader

    enter image description here

    fool-proof method for any RGB, B&W, Value or Vector shader input.

  • 2nd method - render the surface into a texture - it's like rendering into UV space instead of Camera space:
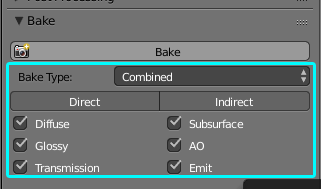
    enter image description here

    You can choose to bake with direct, indirect (bounce) or both lighting and to include or exclude different render passes (diffuse, glossy,..).

    This is useful when the other app's shader engine is not that powerful and you would like to bake lighting, shadow or other information into the texture(s).

  • 3rd method - You can choose each pass from 2nd method as a separate Bake Type option. It's the same as Combined and leaving only that one pass enabled. There is however an extra option to bake Color only without any lighting taken into account:
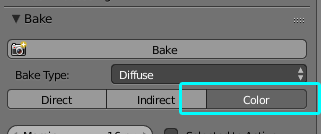
    enter image description here

  • 4th method - Bake Type: Shadow. Bakes shadows, but only in B&W. For colored bounced shadows the surface has to be baked twice as type: Combined - with light source on and off - and then the result obtained with difference of those 2 textures.

  • 5th method - Type: Environment - bakes environment lighting into texture

  • 6th method - Type: Normal - bakes normal map. Depends only on geometry in the scene. Rendering samples do not influence this baking process.

For anyone not familiar with Render passes this might be confusing. This is how the passes work and how they are combined into the final render:
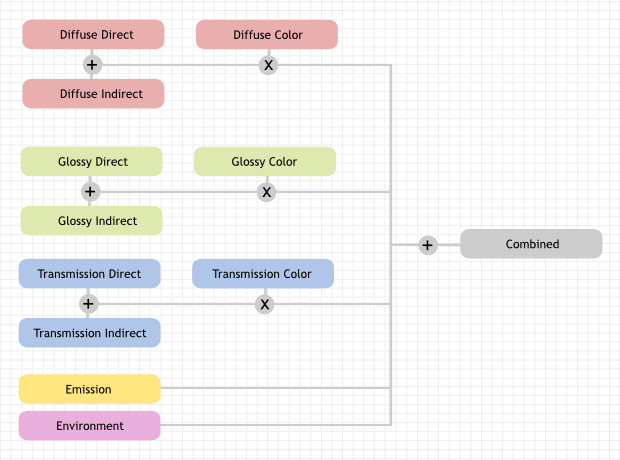
enter image description here

More on this and image used is here: Cycles Passes


Since you uploaded your .blend file, I can show you the steps in a practical way.

If you want a rectangular output like in your Jupiter example, we need to redo your UV unwrap. Left is how it is now, right is what we need:
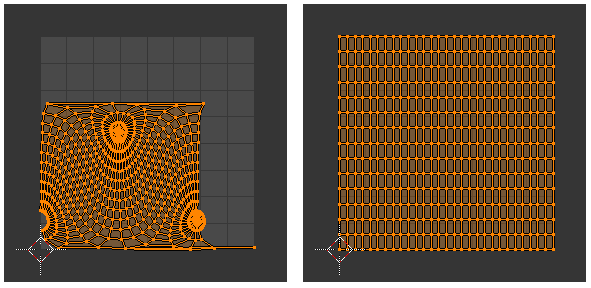
enter image description here

Unfortunately a sphere geometry cannot be unwrapped like that, but a warped plane can. The more geometry towards the poles, the better it will be:

Rectangular plane into a sphere

Download the file attached, append the plane, unwrap it to the whole UV space (unwrap from top - Project from View (Bounds)), move to frame 60, apply all the modifiers and scale the sphere to your liking. Since your material is procedural, it will look on this new sphere the same (left original, right fixed UVs):
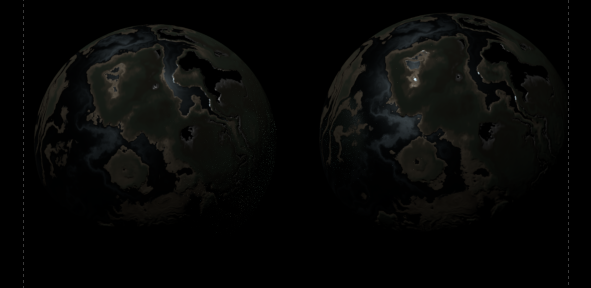
enter image description here

As a side note, there is an issue with the material. There are black lakes, that behave like a sharp mirror. These areas will likely generate artifacts when trying to bake some information from them:
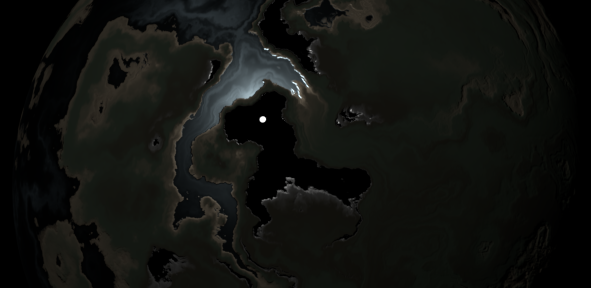
enter image description here

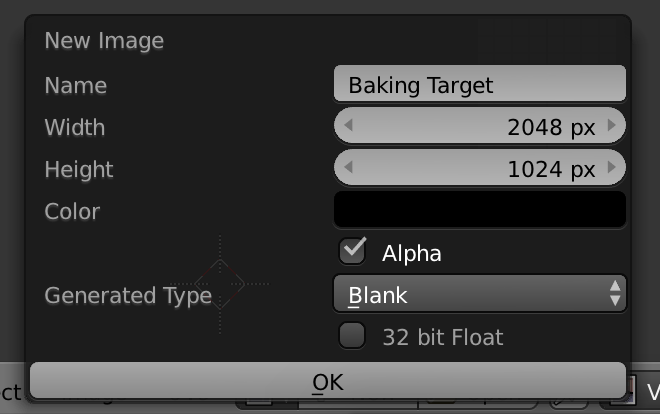
Now comes the baking. Every equirectangular texture has to have a ratio of 2:1 (like in the Jupiter example), so I will create a new texture for baking with dimensions 2048x1024, color black (does not matter), no alpha channel.

Since I don't know how you want to use this sphere in the other application, I will go through several baking options and results:

  • Bake everything. Type: Combined, all passes and lights enabled. The resulting texture:
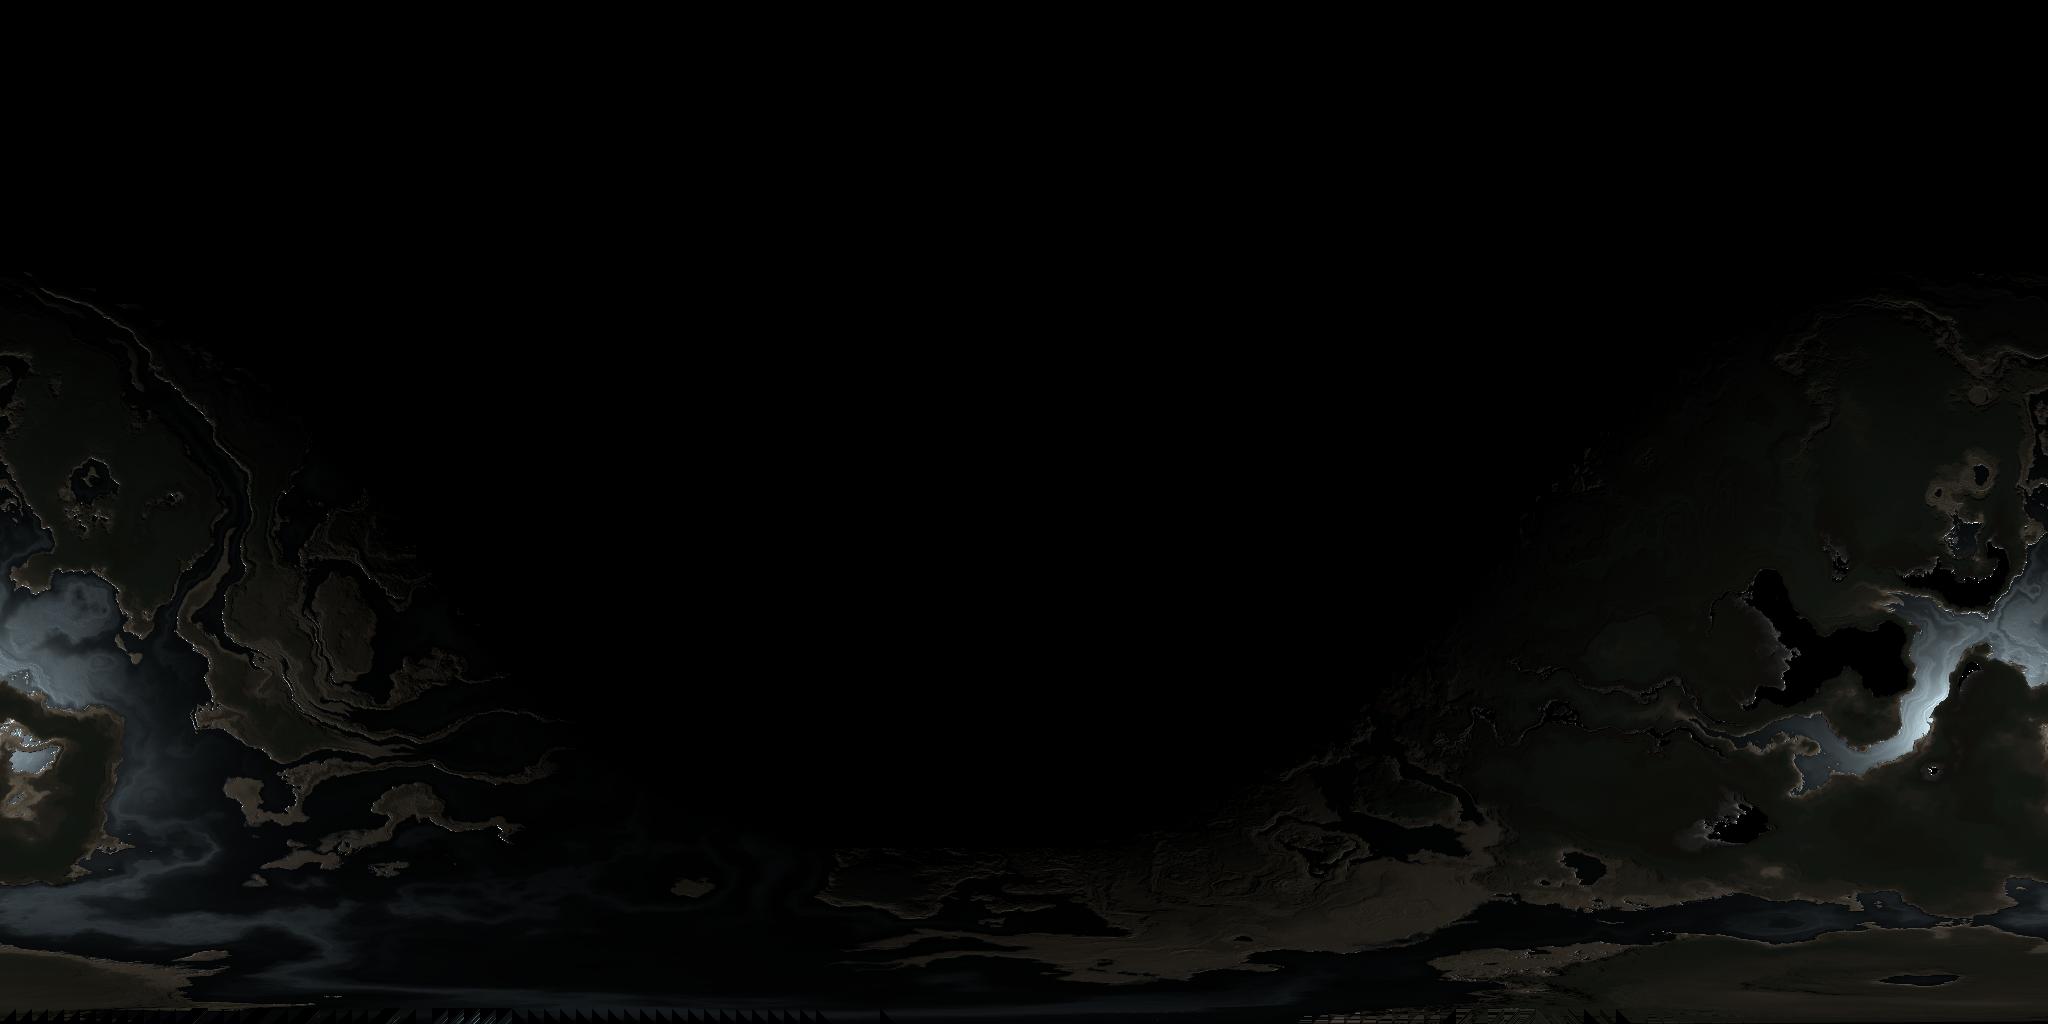
    enter image description here

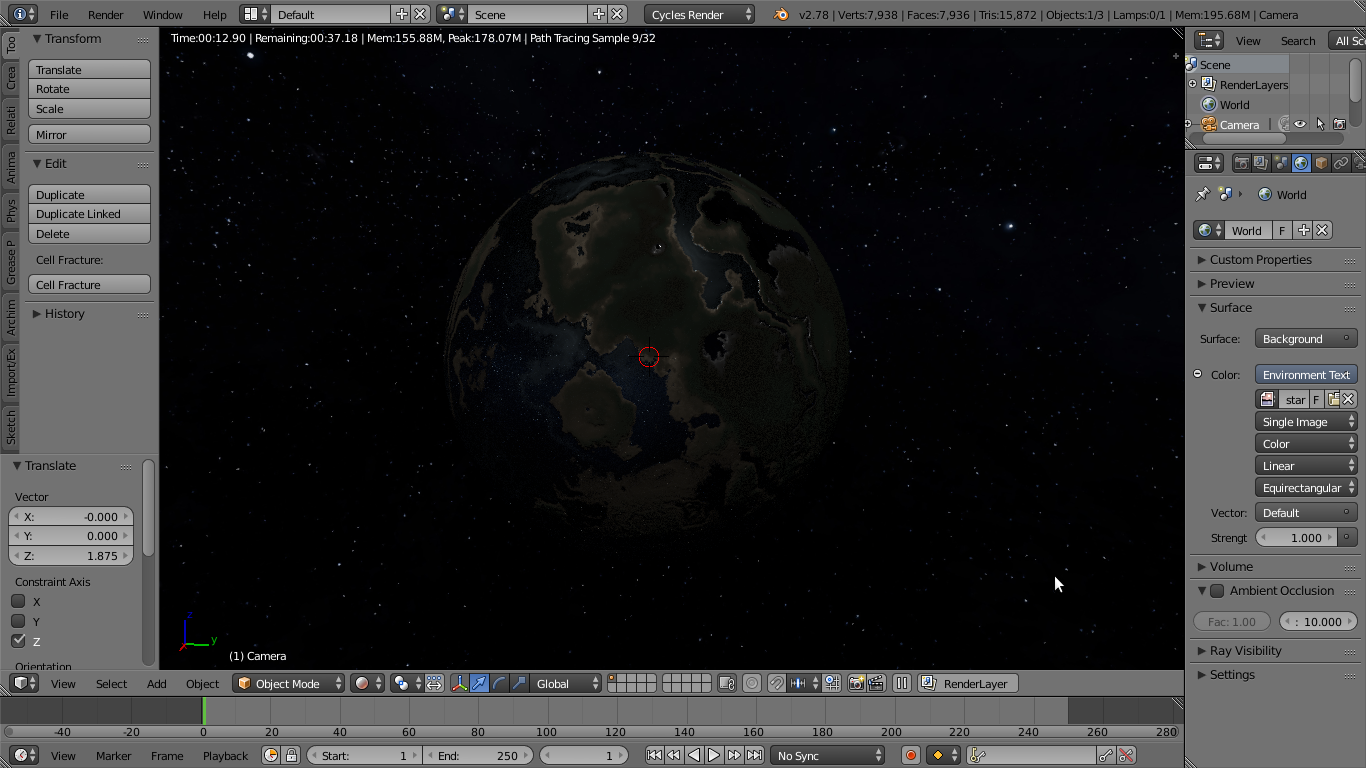
    As you can see, the light is baked in, so is the darkness. If you view this texture on the sphere, you get exactly what you would render from the camera:
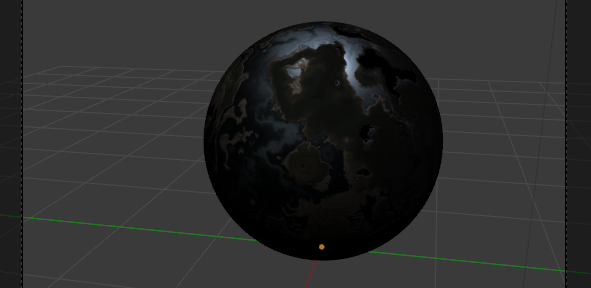
    enter image description here

  • To fix the darkness, we can delete the light, light the sphere from all directions with the environment, and do the same bake again:
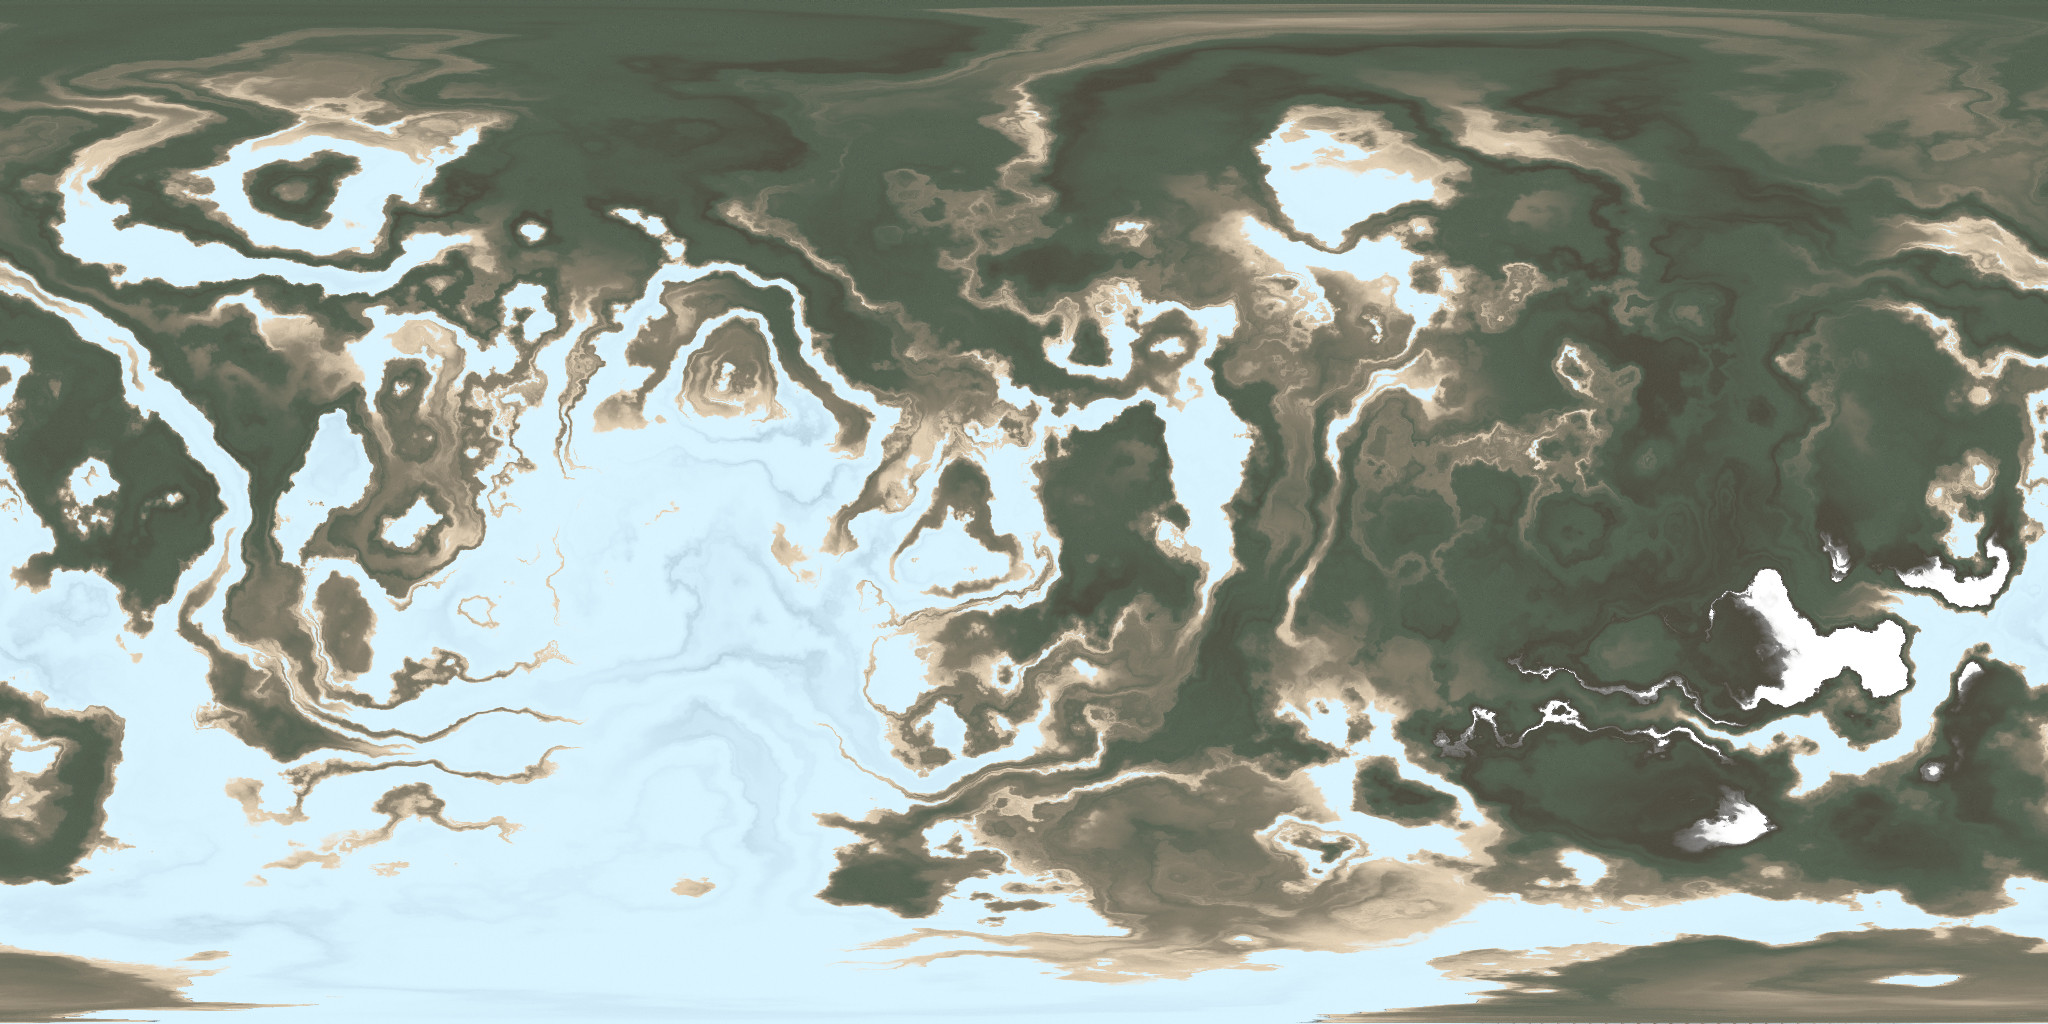
    enter image description here

    Now when we add this texture to a sphere and we light it with a lamp, we get this:
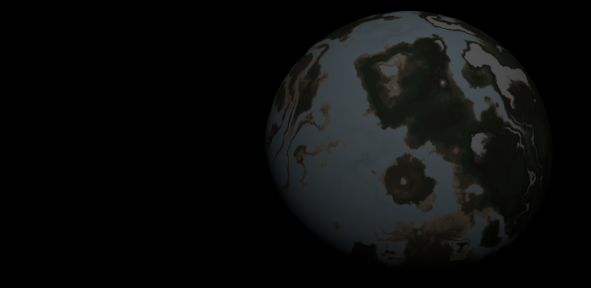
    enter image description here

    The lighting will behave correctly, but the material not. We lost the specularity and roughness information. The oceans are no longer shiny, everything behaves the same.

  • I guess the previous one is what you wanted. But if you would like to create all the diffuse, roughness, normal from displacement, etc. textures for some game engine for example, it is best to bake it from the Principled BSDF shader (very easy to get PBR textures). Luckily I was able to optimize your material - turns out it is just a glossy shader and some redundant nodes, you can delete them:
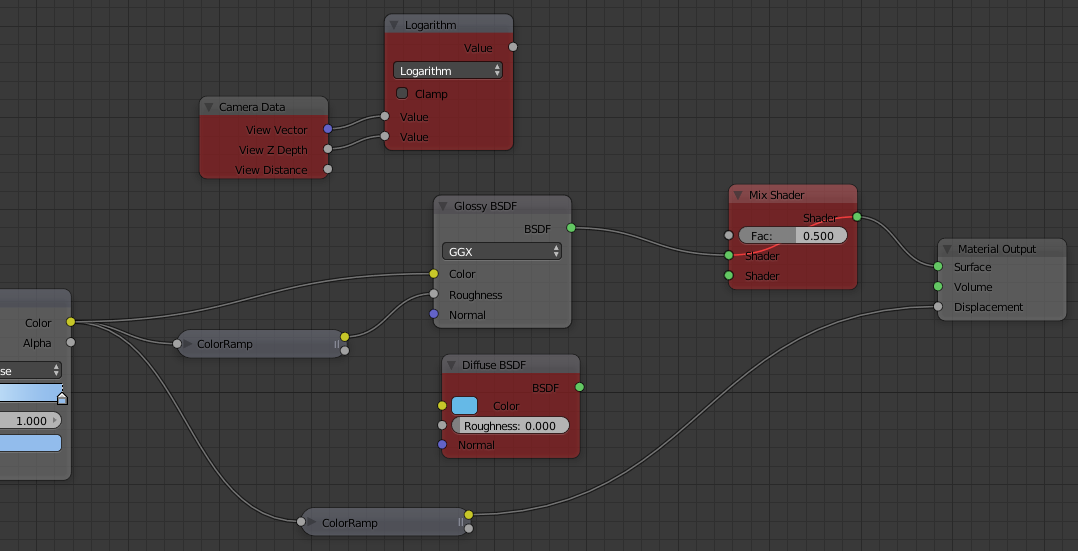
    enter image description here

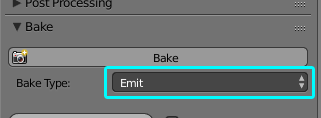
    From this we have 3 inputs - glossy color (specular), glossy roughness (by inverting it we get glossiness) and displacement. First two bake using 1st method through Emission shader and Type: Emit option:

    Specular:
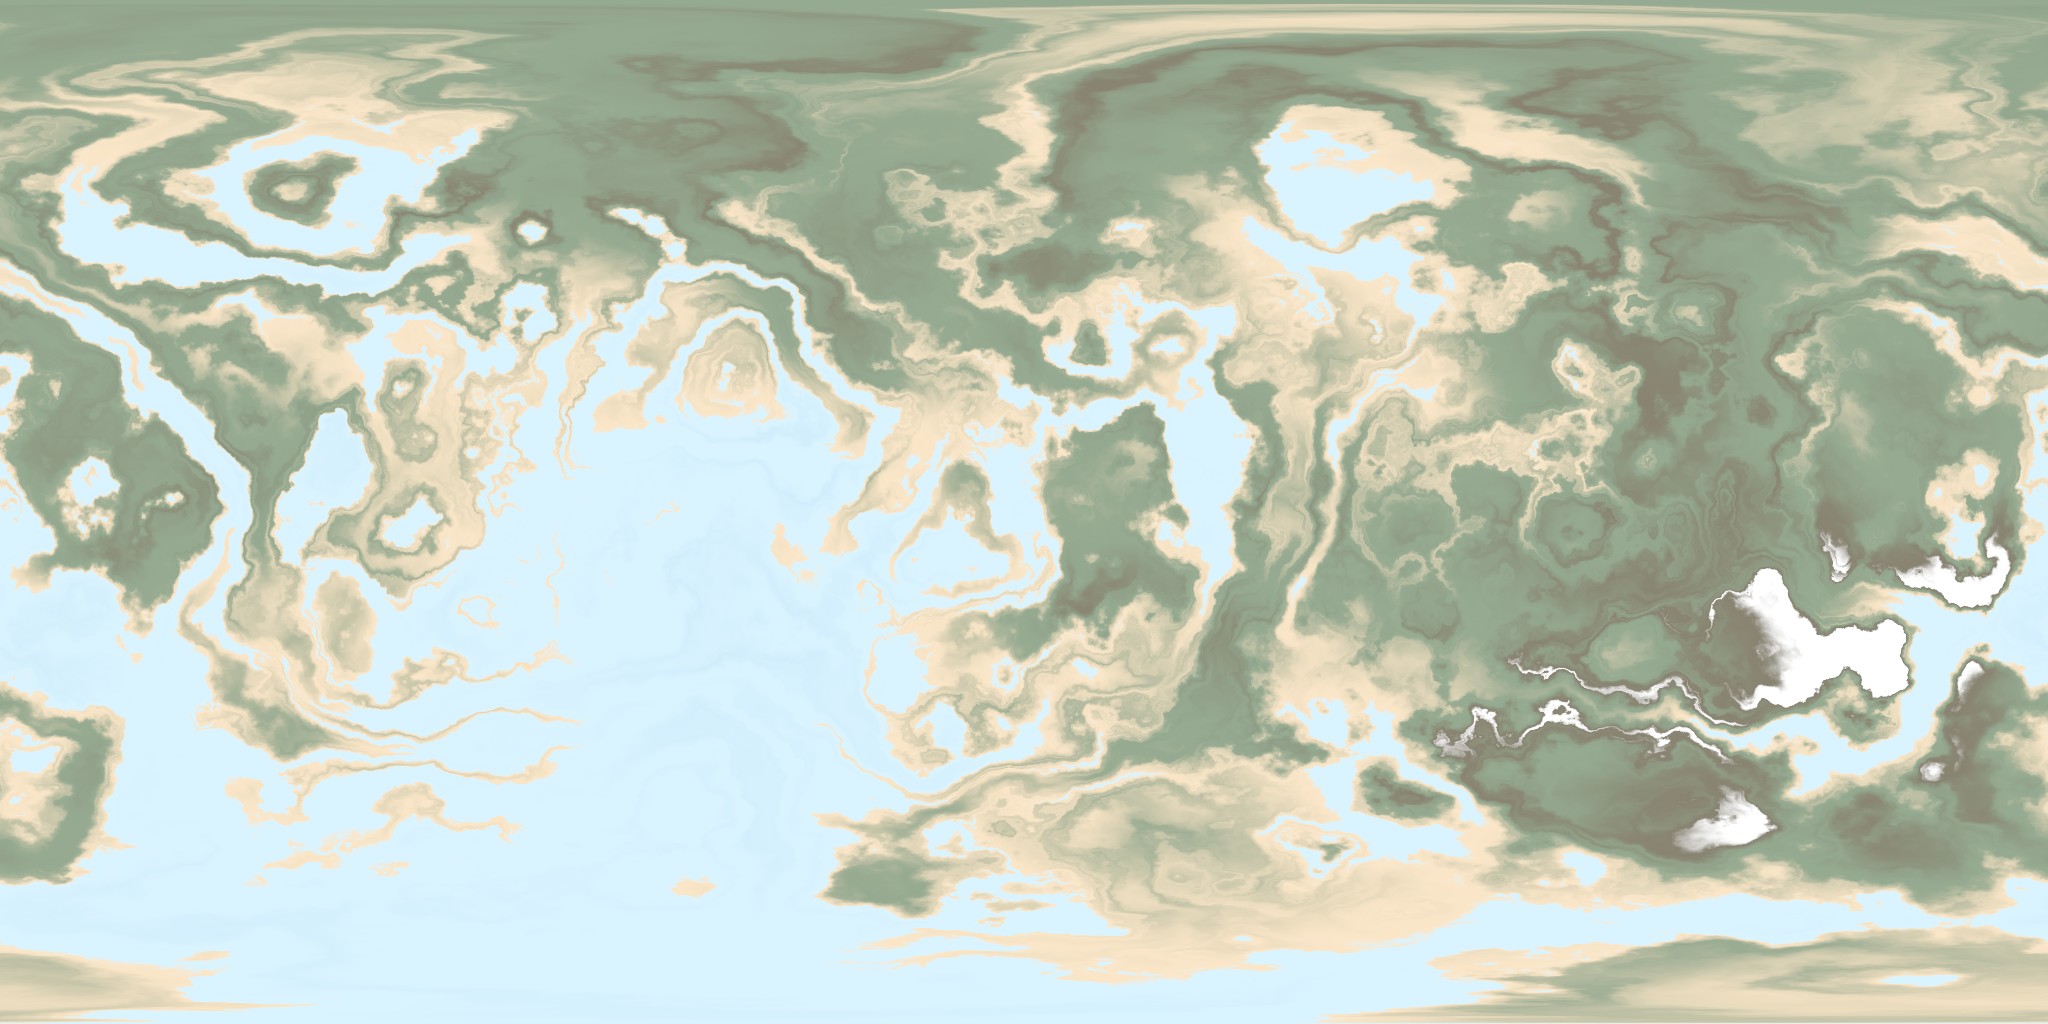
    enter image description here

    Glossiness (in Blender Internal this is called Hardness):
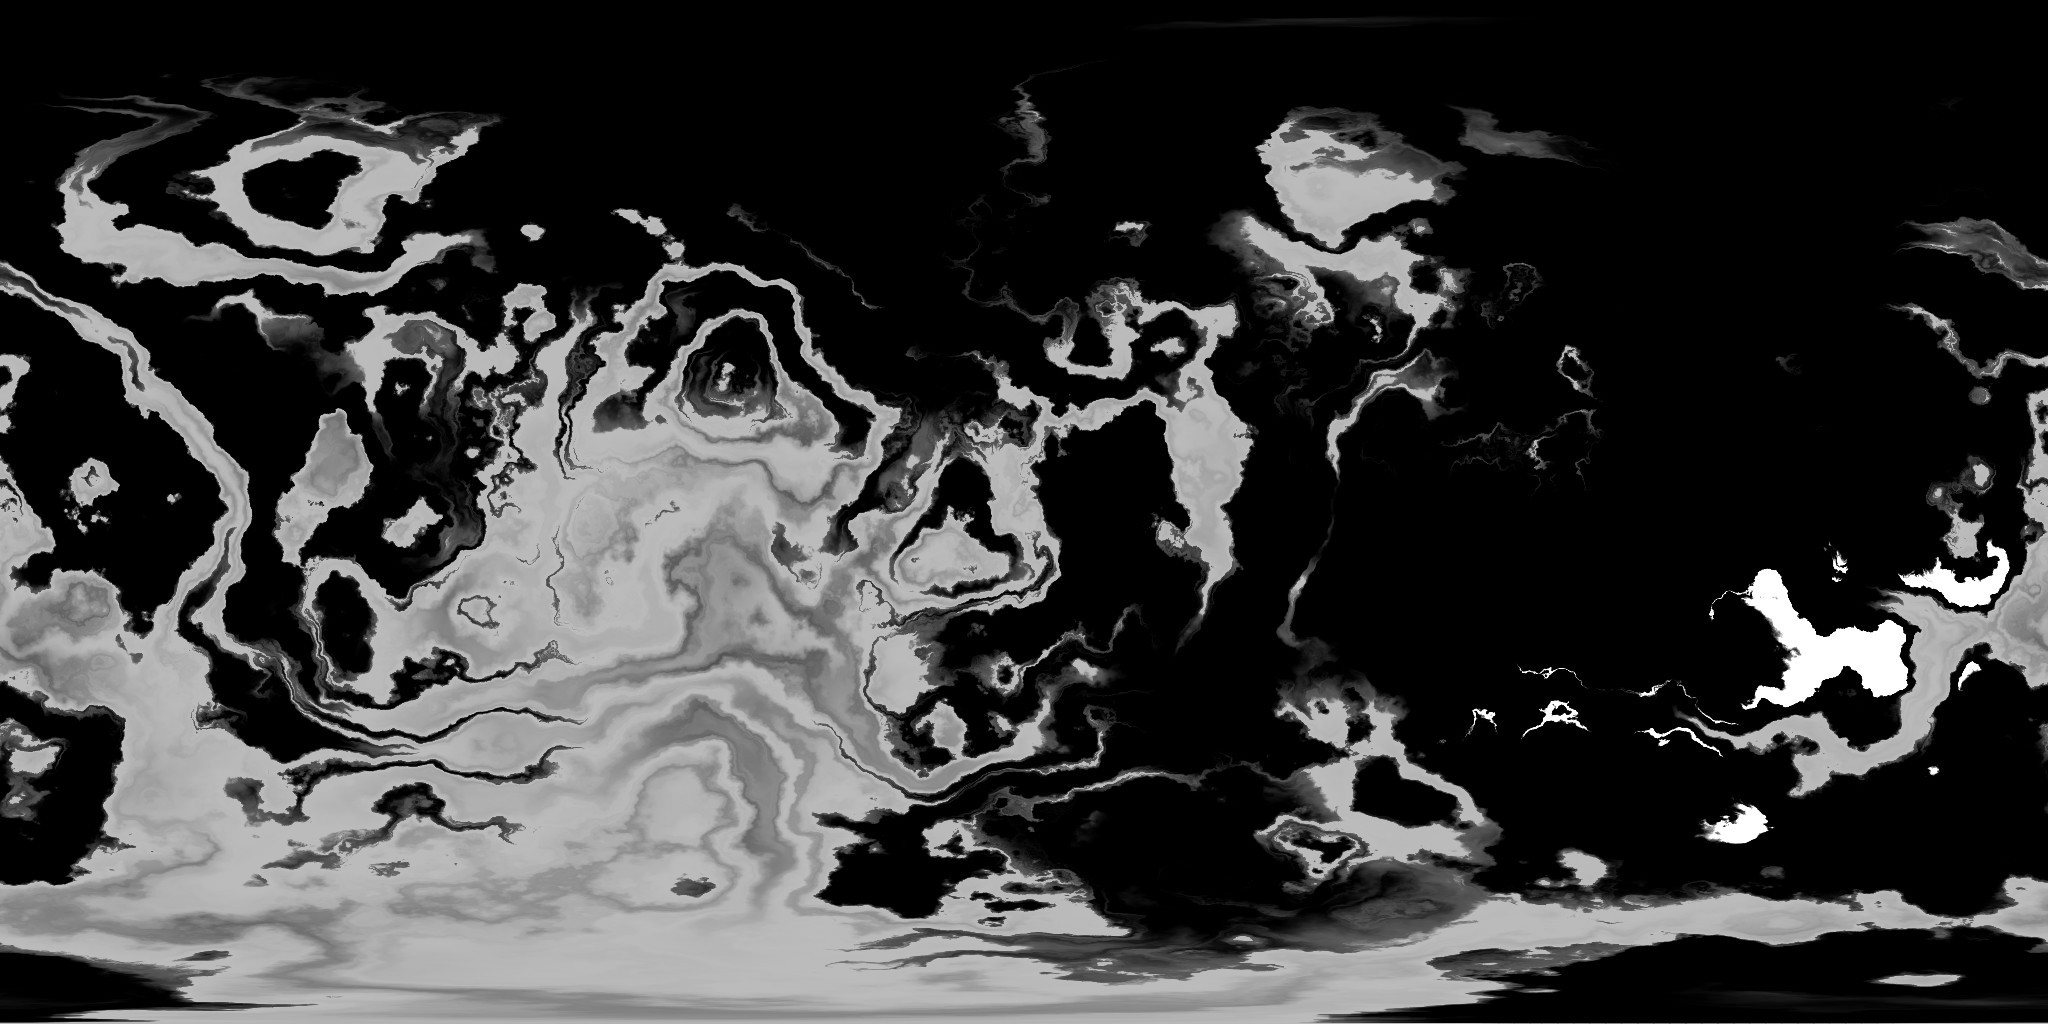
    enter image description here

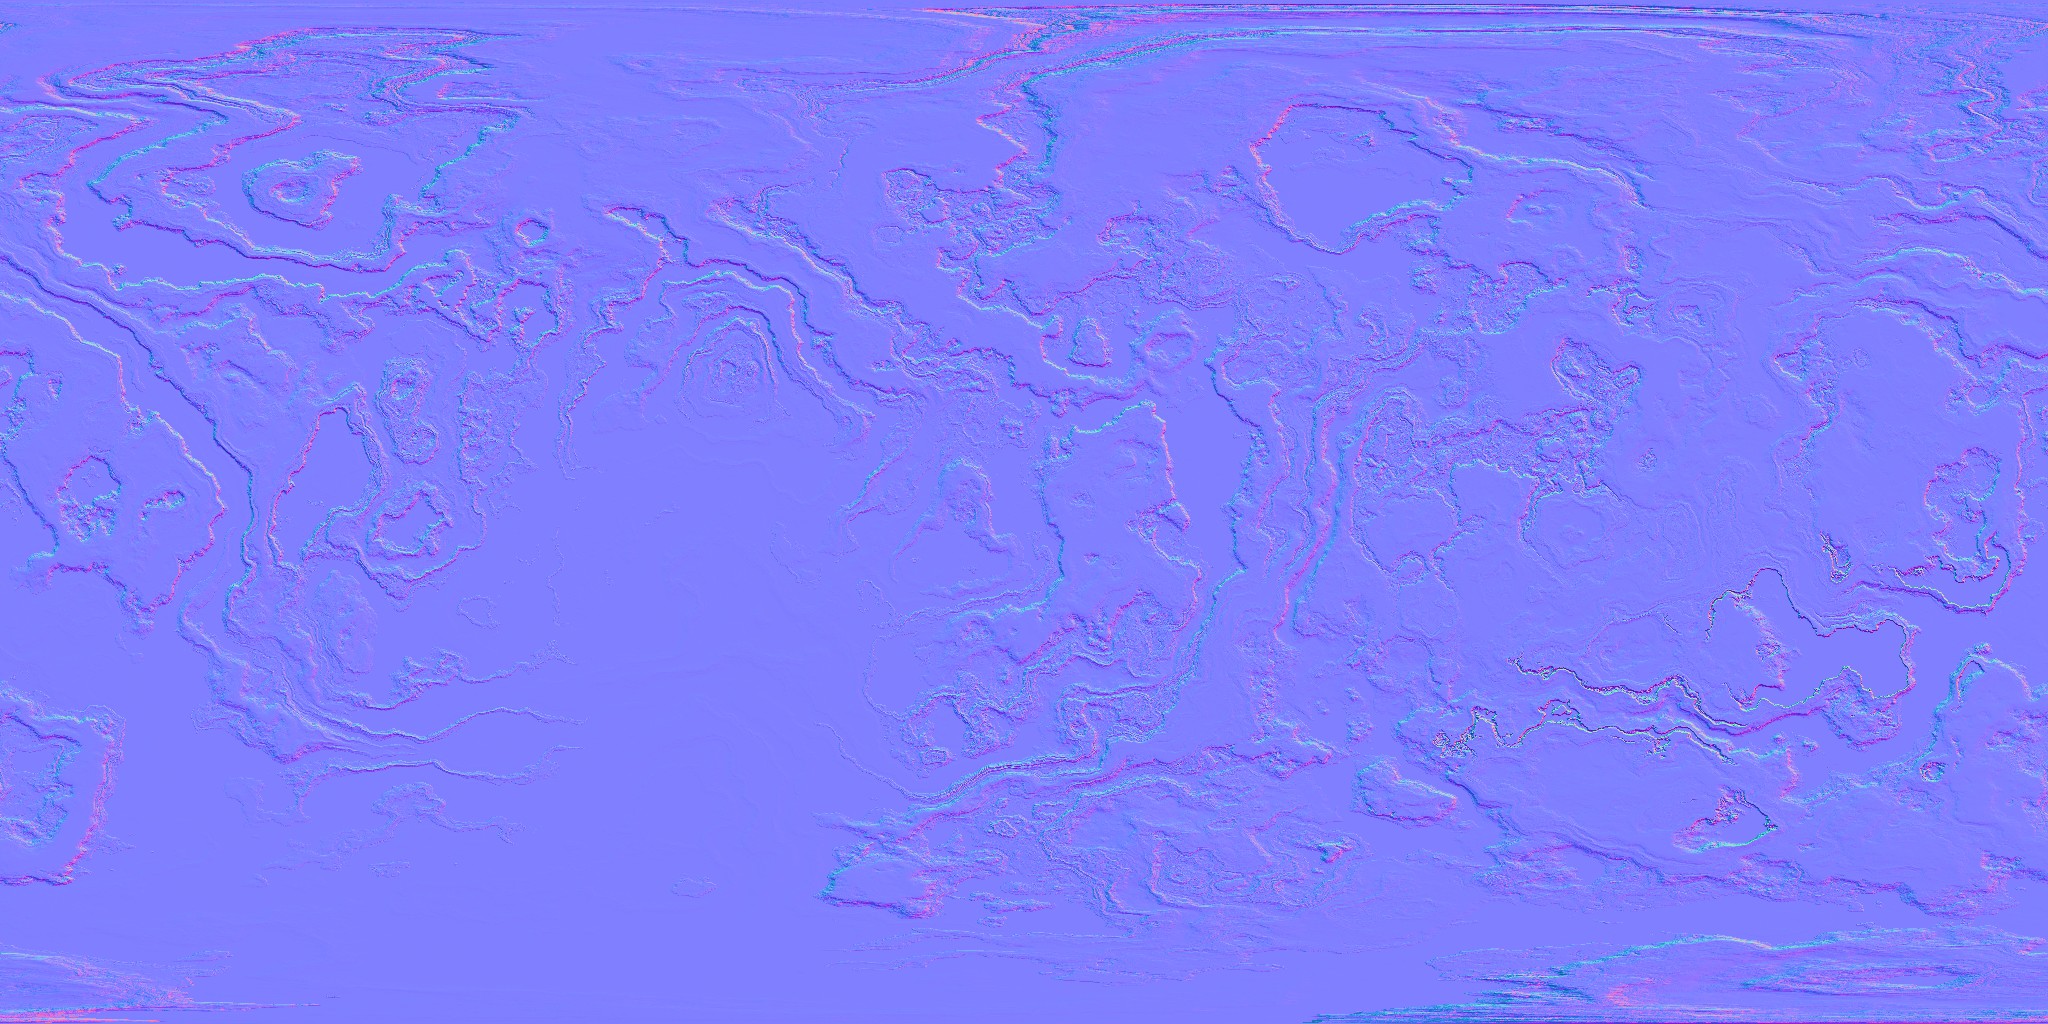
    For the normal map select Type: Normal and let the displacement be connected to the Material Output Node as is. But add a diffuse as shader, else it won't work (don't ask me why:) :

    enter image description here

    Normal:

    enter image description here

    Albedo texture is black, there is no diffuse component.

    Now when using these 3 textures this works much better and closer to how the Cycles material behaves:
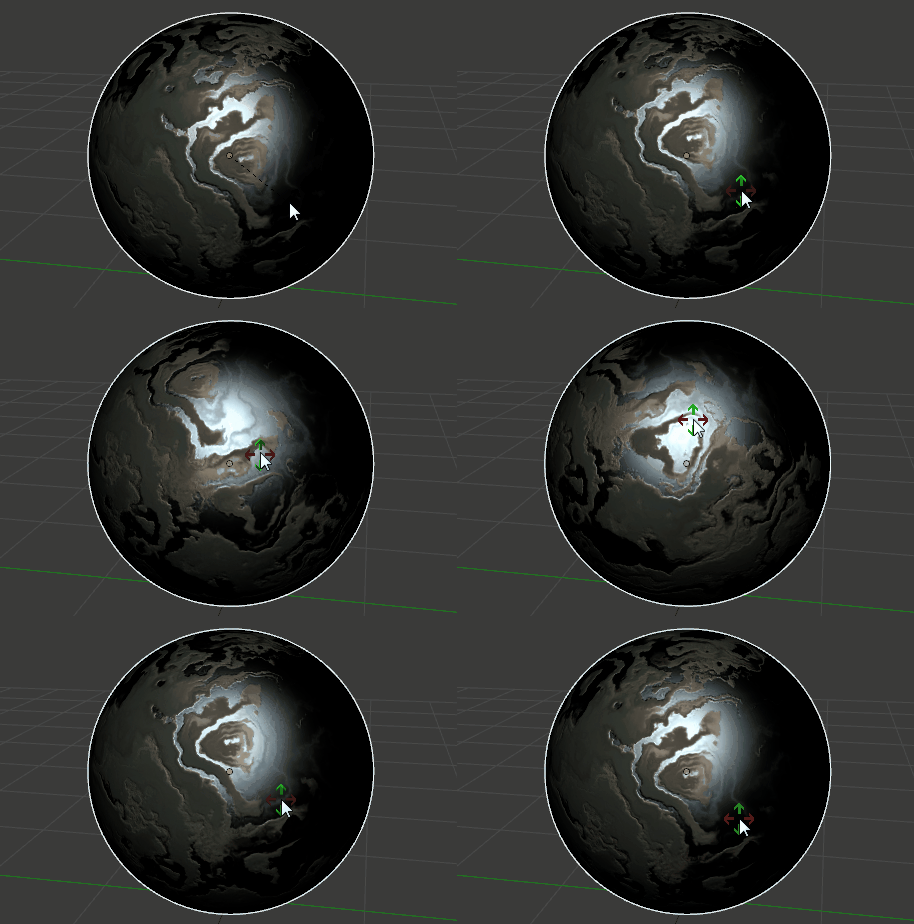
    enter image description here

$\endgroup$
6
  • $\begingroup$ Where did you find that Render passes flowchart? $\endgroup$ Commented Oct 6, 2017 at 21:59
  • $\begingroup$ @ScottMilner Yep good idea to add the link. Should have done it, it's fixed. $\endgroup$ Commented Oct 6, 2017 at 22:34
  • $\begingroup$ Can you please add a sample finish image , And tell me how to combine the finished texture images like normals,diffuse,roughness ? $\endgroup$ Commented Oct 7, 2017 at 14:04
  • 1
    $\begingroup$ @ShamsEl-Deen what other software will you use for the planet? You will be combining normals, diffuse, roughness in that software. Otherwise you loose lots of the surface properties. I will demonstrate on the file you provided and will make examples. $\endgroup$ Commented Oct 7, 2017 at 16:30
  • $\begingroup$ @Jerryno Yes i will combine the textures together,(Problem) I only don't know how to unwrap the sphere as a plane as you did , can you tell me how To Do it manually ? $\endgroup$ Commented Oct 7, 2017 at 20:12
5
$\begingroup$

You can bake your material to an image. "Render" tab, at the bottom.

Edit 07/10/17: just saw that you want a rectangularly shaped texture map. Then don't define the seam along the equator but rather from one pole to the other. You will get some distortion due to the projection of a sphere to the recangle, but this should be fixable by adjusting the UV map of the sphere on the output image. Here is the result of a test, the dark spot is a shadow from a lamp in the scene:

enter image description here

Important to get to proper rectangular UV map: when you create your sphere check the option "Generate UVs" (see my 2nd answer below). This is the output from your blend file when I do the baking from your file: Test bake result with newly added sphere

Edit 06/10/17: request for more Details on baking process.

This is a summary from this video tutorial: https://www.blenderguru.com/tutorials/introduction-baking-cycles

I assume you are using Cycles as render engine First you need to UV-unwrap your object

  1. Select your object (the sphere)
  2. Go to edit mode
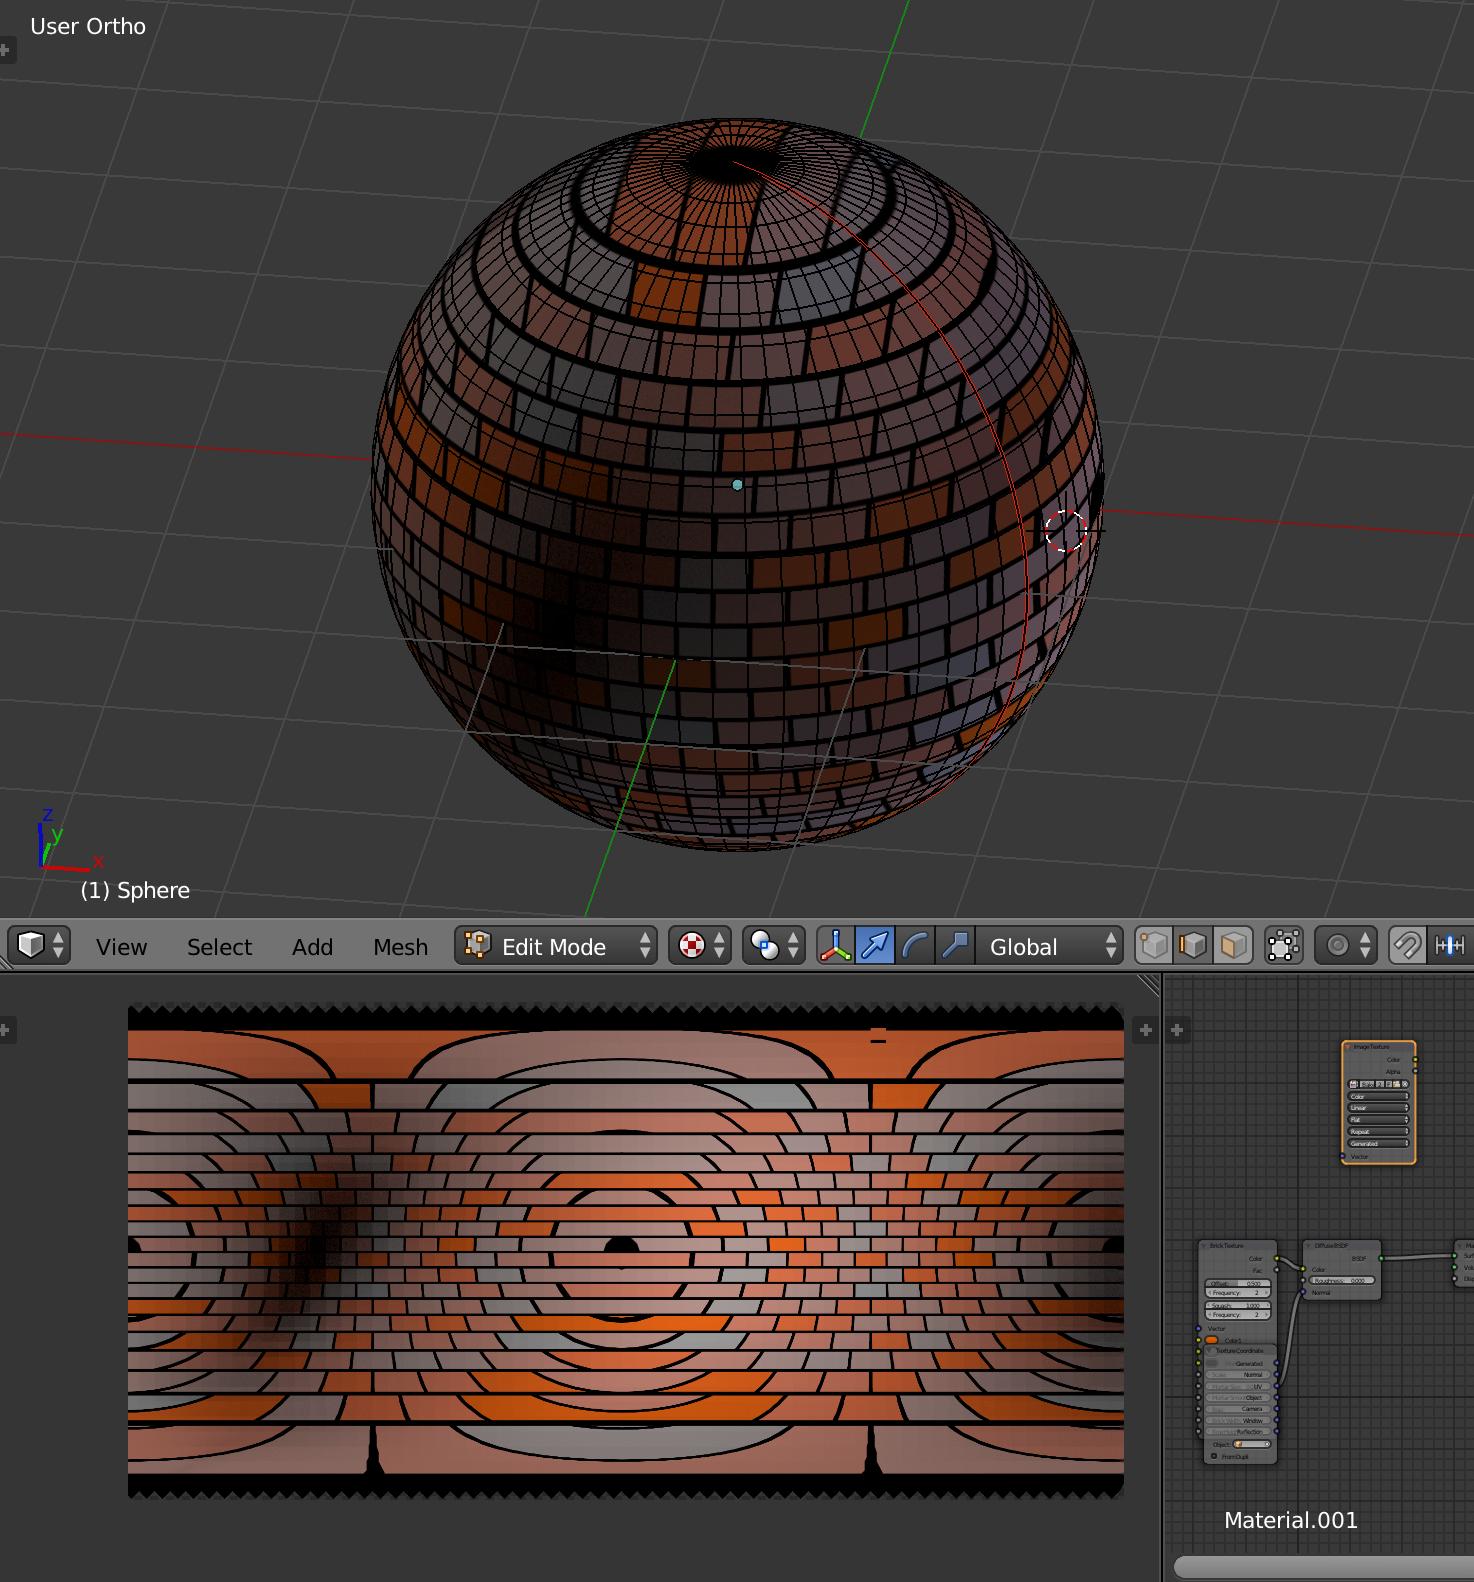
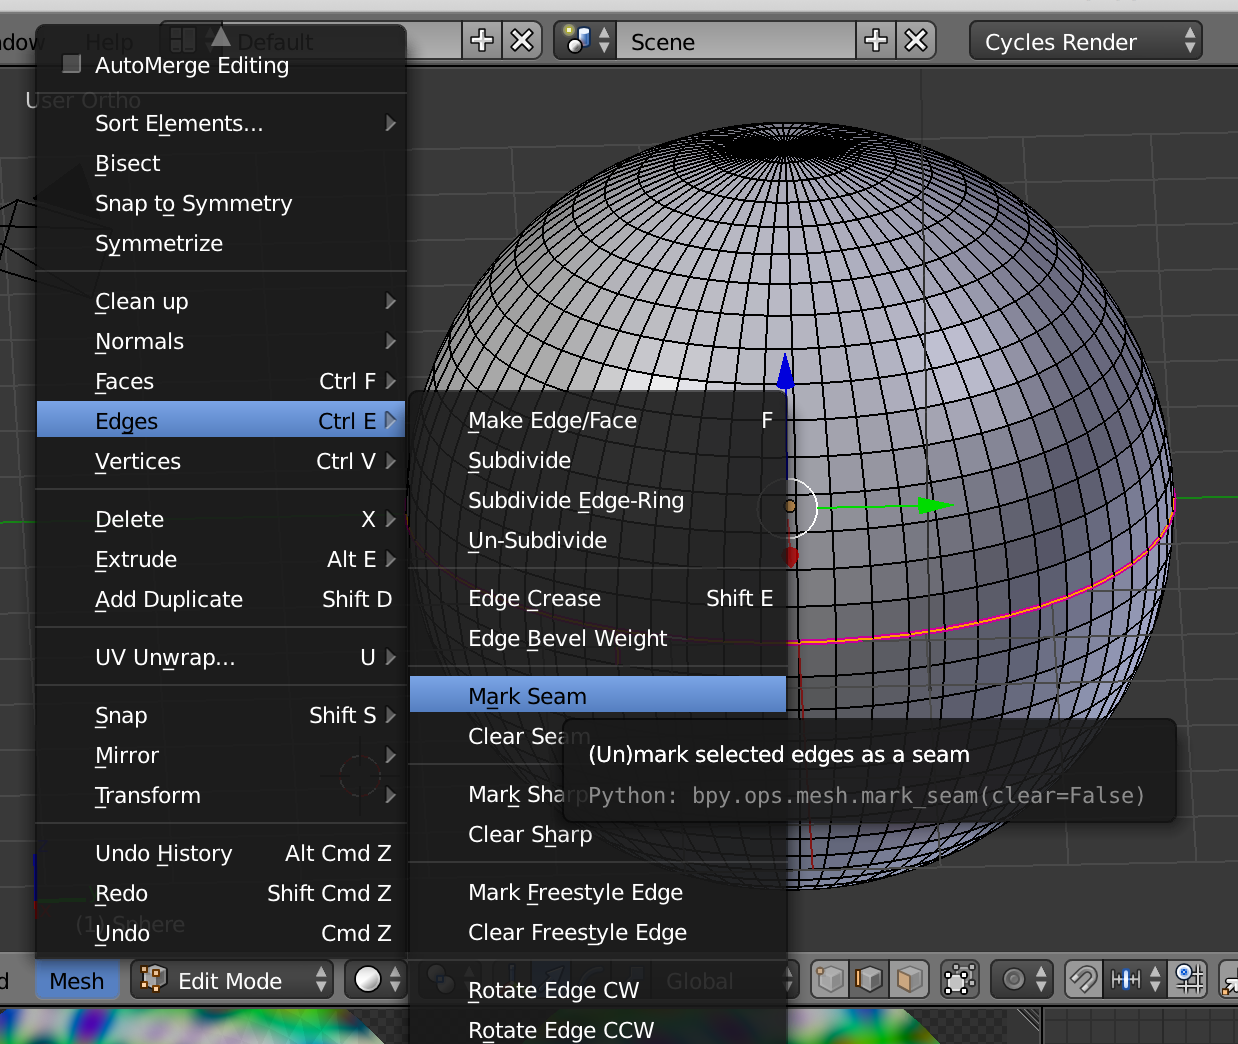
  3. Select the equator edges of the sphere and make them a seam for UV unwrapping: enter image description here
  4. Select all faces ("a") in edit mode
  5. Open UV/Image editor in addition to 3D editor window
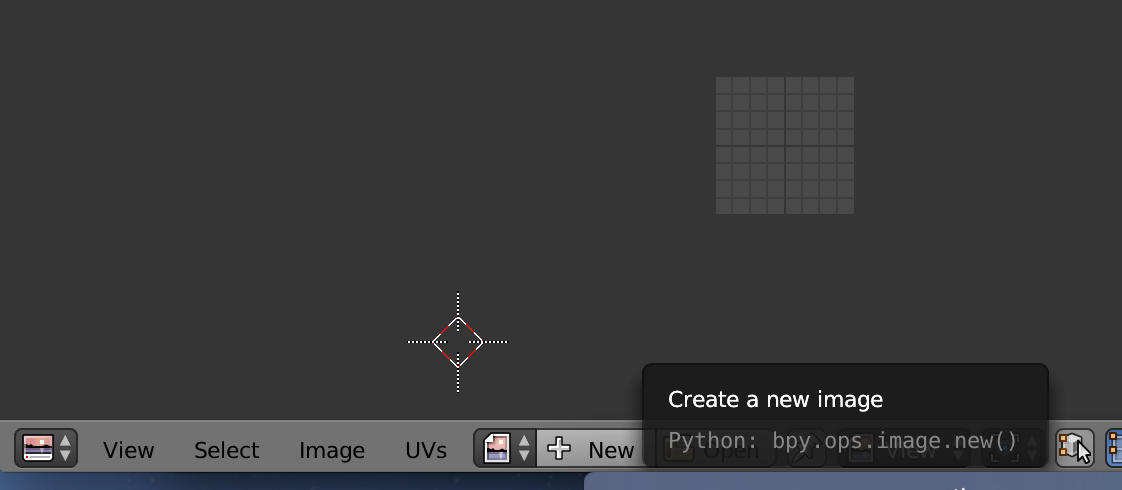
  6. Add a new image to UV/Image editor: enter image description here of desired size e.g. 1024x2024. The empty image should be double as wide as it is high, as you will have to place to circular meshes from UV unwrapping on the image: enter image description here
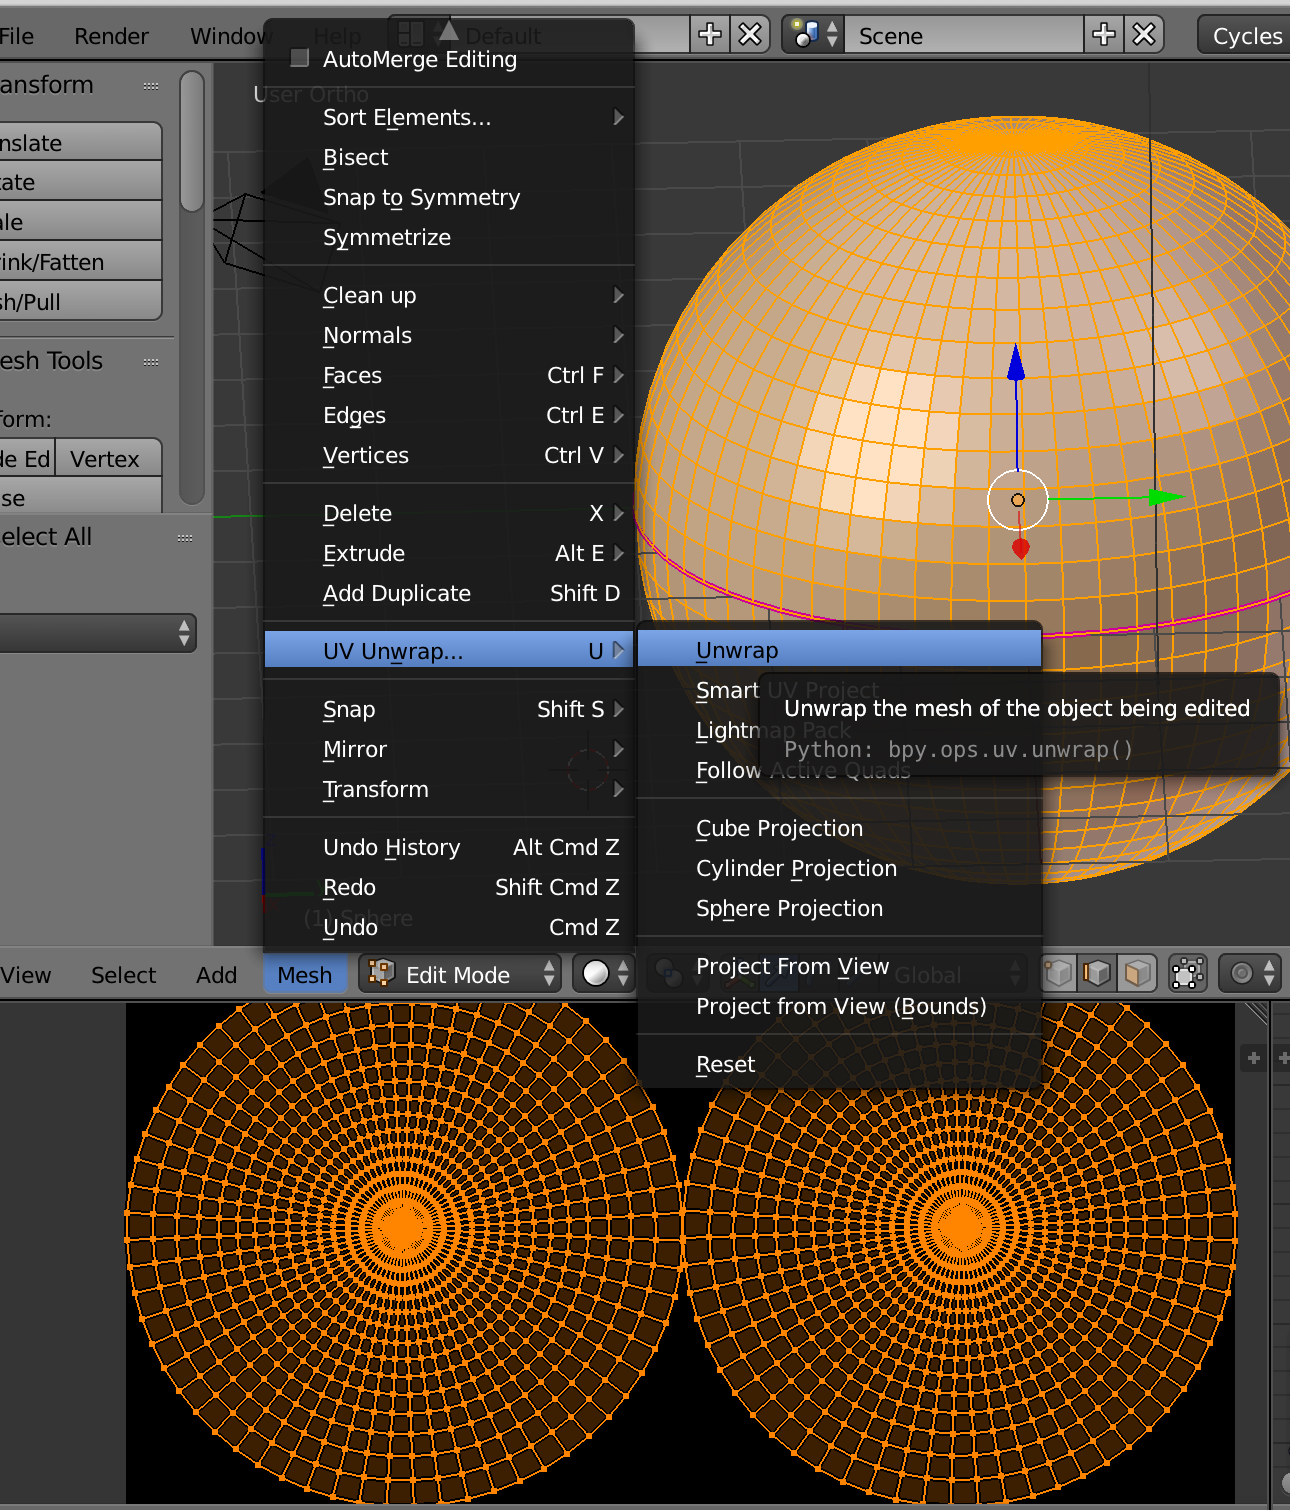
  7. With all faces selected, click on UV unwrap in the mesh menu of the 3D editor window --> as a result, two circular meshes should appear in the UV/Image editor: enter image description here
  8. Place the two meshes side by side on the area of the new image
  9. Select your material in the material tab
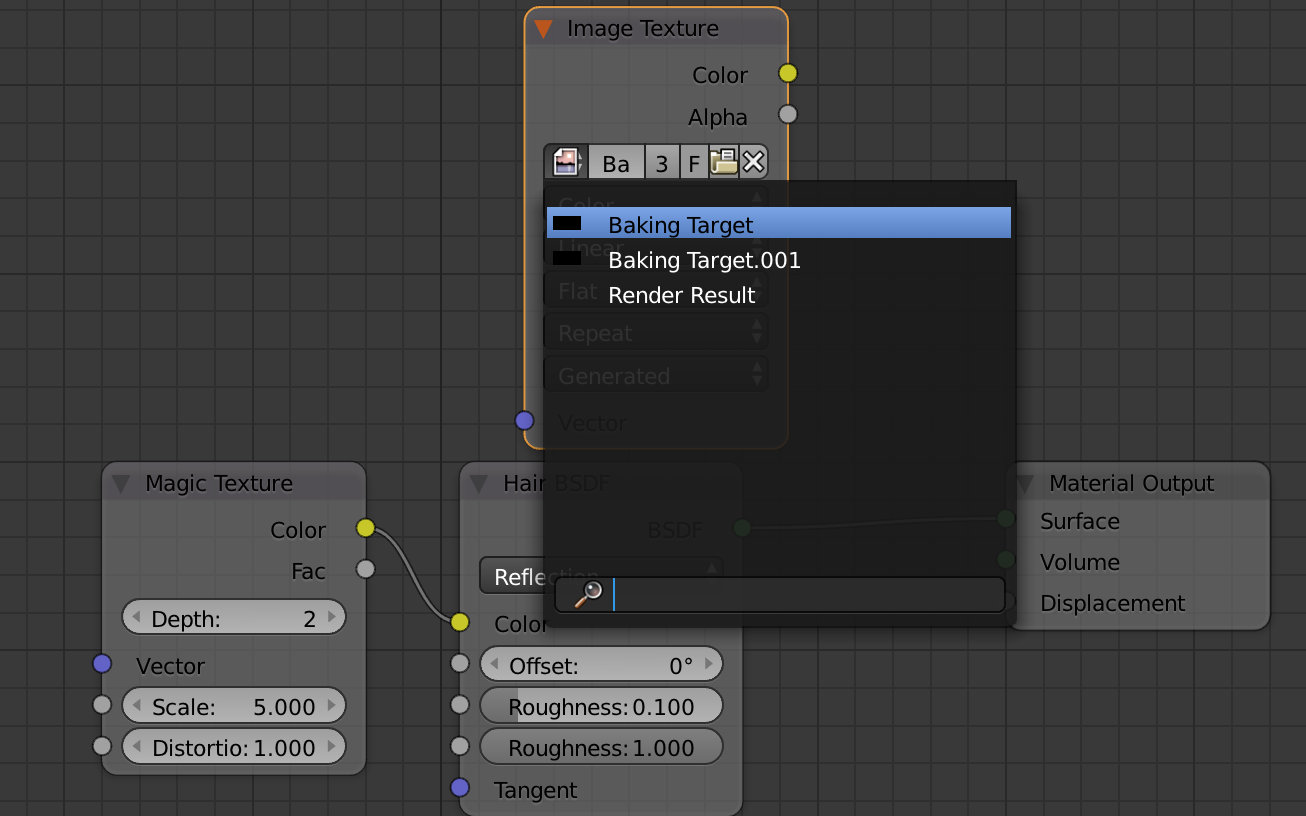
  10. Open a node editor window and add a new Image texture node. Do not link the new node to anything, but leave it highlighted.
  11. In the Image texture node select your newly created image as linked image: enter image description here
  12. now find on the "Render" tab the "Bake" submenu (bottom of the panel).
  13. select your baking method (combined should be ok) and check the options to your needs
  14. Click on the "Bake" button.

Now Blender should start to render the unwrapped sphere to the new image. The image can be saved and edited in an image editor.

$\endgroup$
2
  • $\begingroup$ I respect your answer but,when i bake it didn't bake the whole mesh , it only backed the part which is in front-of the light source (And i do not want this), i want the whole mesh to be backed. $\endgroup$ Commented Oct 7, 2017 at 8:41
  • $\begingroup$ Hi Shams, I guess you have a scene with the sphere and a light source illuminating the sphere with your material. To fix that, change the surface color in the World settings to all white, strength at 1. Remove the light. Now your sphere should be evenly lit by the environment (world) light. Check that by observing your scene in rendered display mode. $\endgroup$
    – WolfiG
    Commented Oct 7, 2017 at 20:53
1
$\begingroup$

Unfortunately I am not yet allowed to comment to Sharks and Jerryno's discussion. I am relplying to Sharms' question:

@Jerryno Yes i will combine the textures together,(Problem) I only don't know how to unwrap the sphere as a plane as you did , can you tell me how To Do it manually ? – Shams El-Deen 1 hour ago

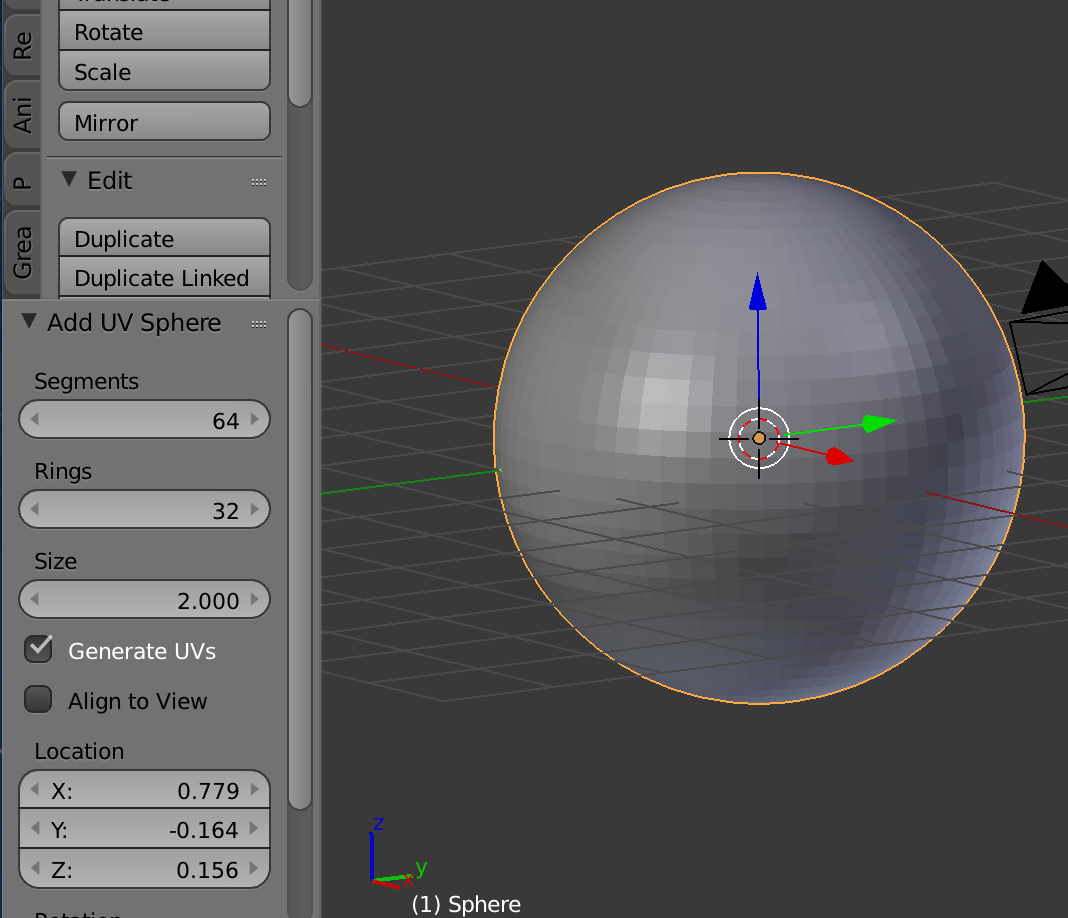
To get a proper rectangular unwrap create a new UV sphere and make sure "Generate UVs" is checked:

enter image description here

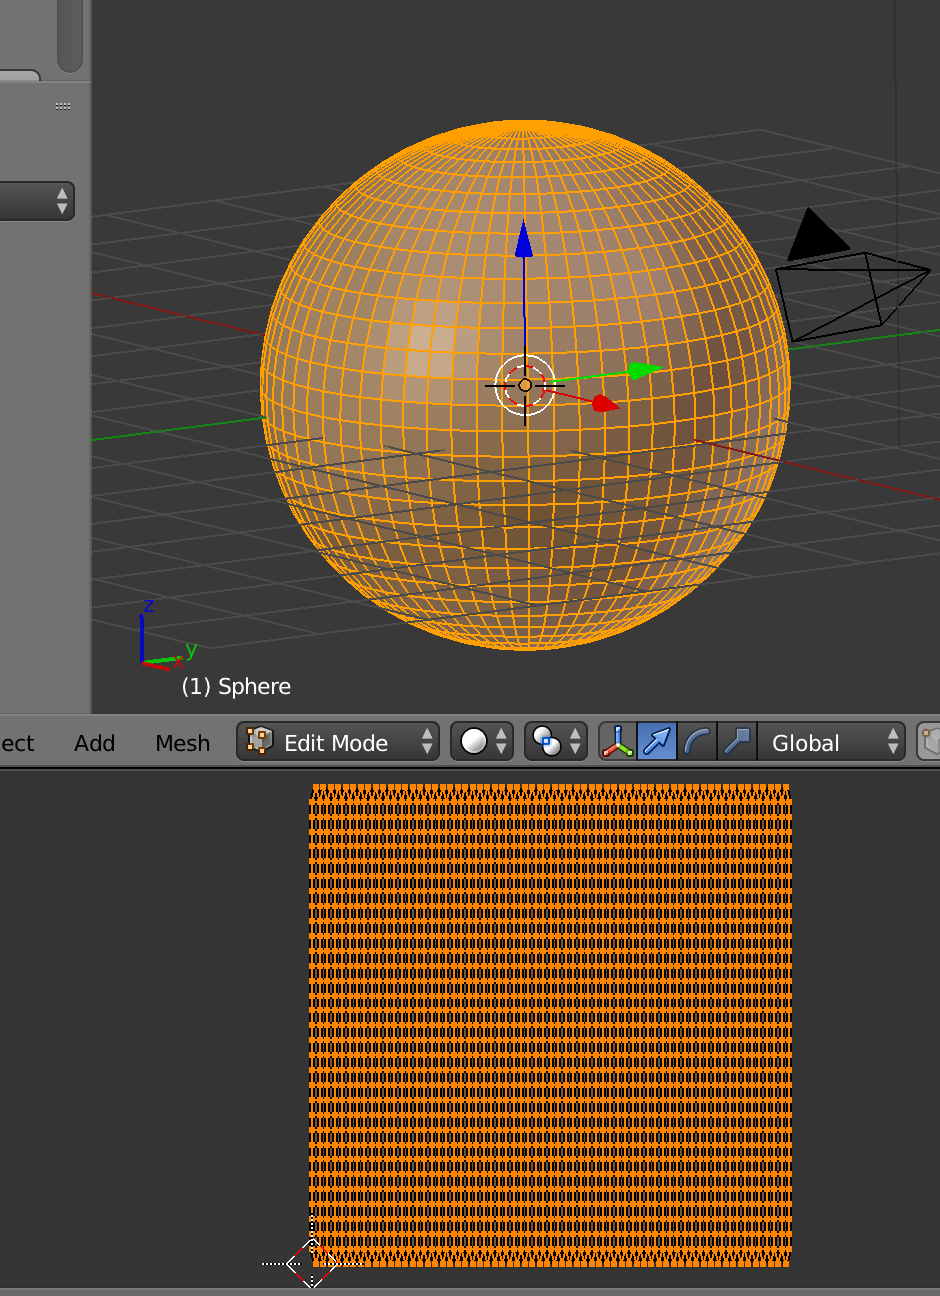
By doing so you do not even have to define a seam. When switching from object mode to edit mode the rectangular UV map will be there right away:

enter image description here

$\endgroup$
1
  • 1
    $\begingroup$ To get artifact free top and bottom of the baked image (where the poles are), the triangles should be ideally smaller than the image pixels. This results in a very high sphere polycounts. I find the advantage in the "sphere from a plane" method in the ability to add some loopcuts near the poles to get fine poly resolution to avoid baking artifacts, but to leave the rest of sphere unaffected. $\endgroup$ Commented Oct 8, 2017 at 0:38

You must log in to answer this question.

Not the answer you're looking for? Browse other questions tagged .