8
$\begingroup$

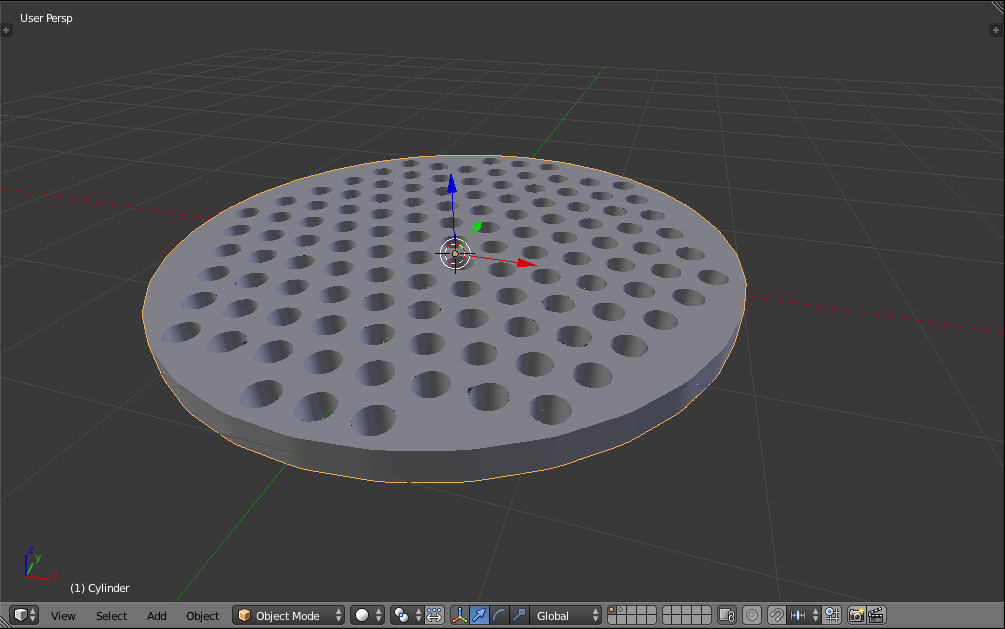
I’m trying to create a circular shaped grid, similar to the one in the pic. That’s my first attempt, created by arranging several cylinders with an Array modifier and then cutting the holes via the Boolean modifier.

Now you will probably notice that it looks not elegant in any way. I’d like to have the holes perfectly arranged and in a correct order, so that there are no half holes at the border of the mesh, for example.

How would you do this?

I tried working with Dupliverts but that didn’t work out well.

example

$\endgroup$
5

3 Answers 3

6
$\begingroup$

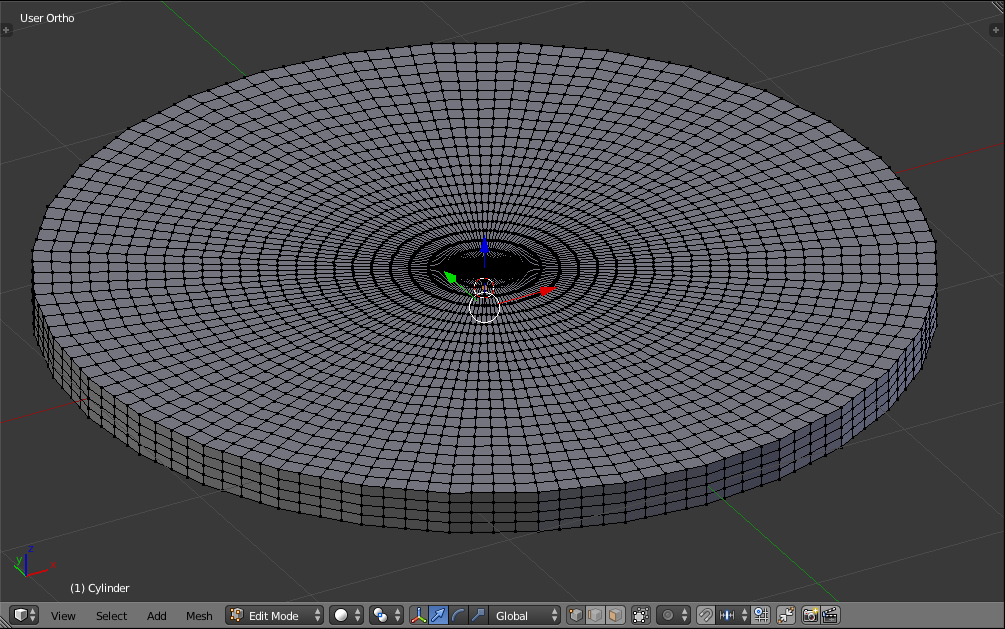
My solution was to start by adding a cylinder, scaling it up by 2, and scaling it down on the Z-Axis by a factor of 0.05. I then deleted the N-Gon faces, extruded the remaining vertices toward the center, but didn't merge them. This allowed for loop cuts to be added (Ctrl + R). After adding the loop cuts, I added a Subdivision Surface modifier set to Simple and with a View: and Render: value of 2. I applied it. My cylinder now looks like this:

enter image description here

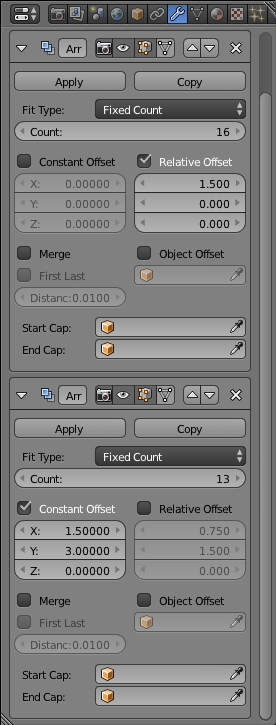
I then added another cylinder which I scaled down by a factor of 0.1 and up on the Z-Axis by a factor of 2. I moved the cylinder to (-3.3, -1.8, 0.0). I added these modifiers:

enter image description here

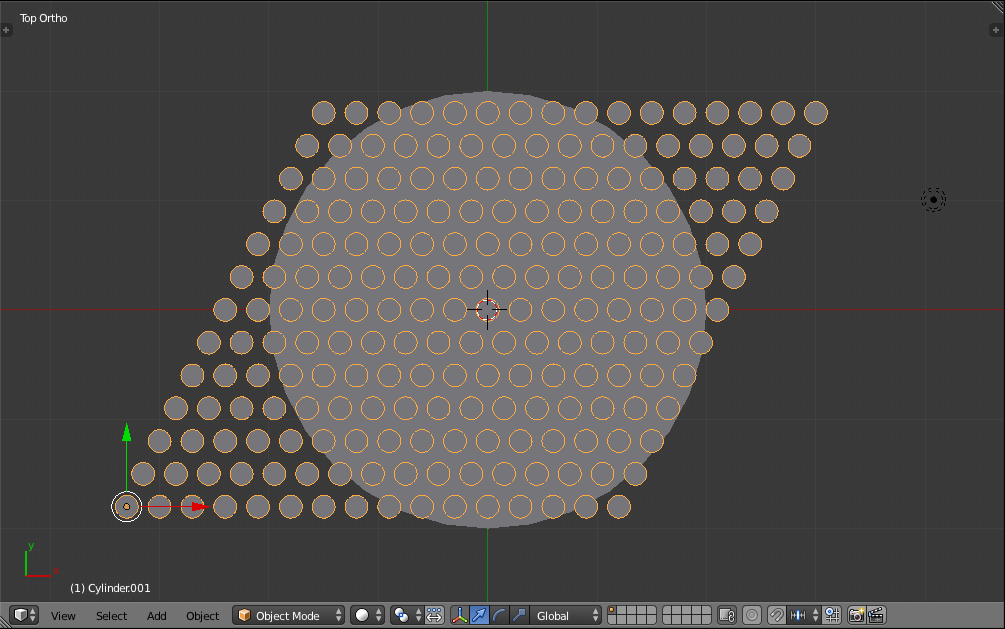
I now had something like this:

enter image description here

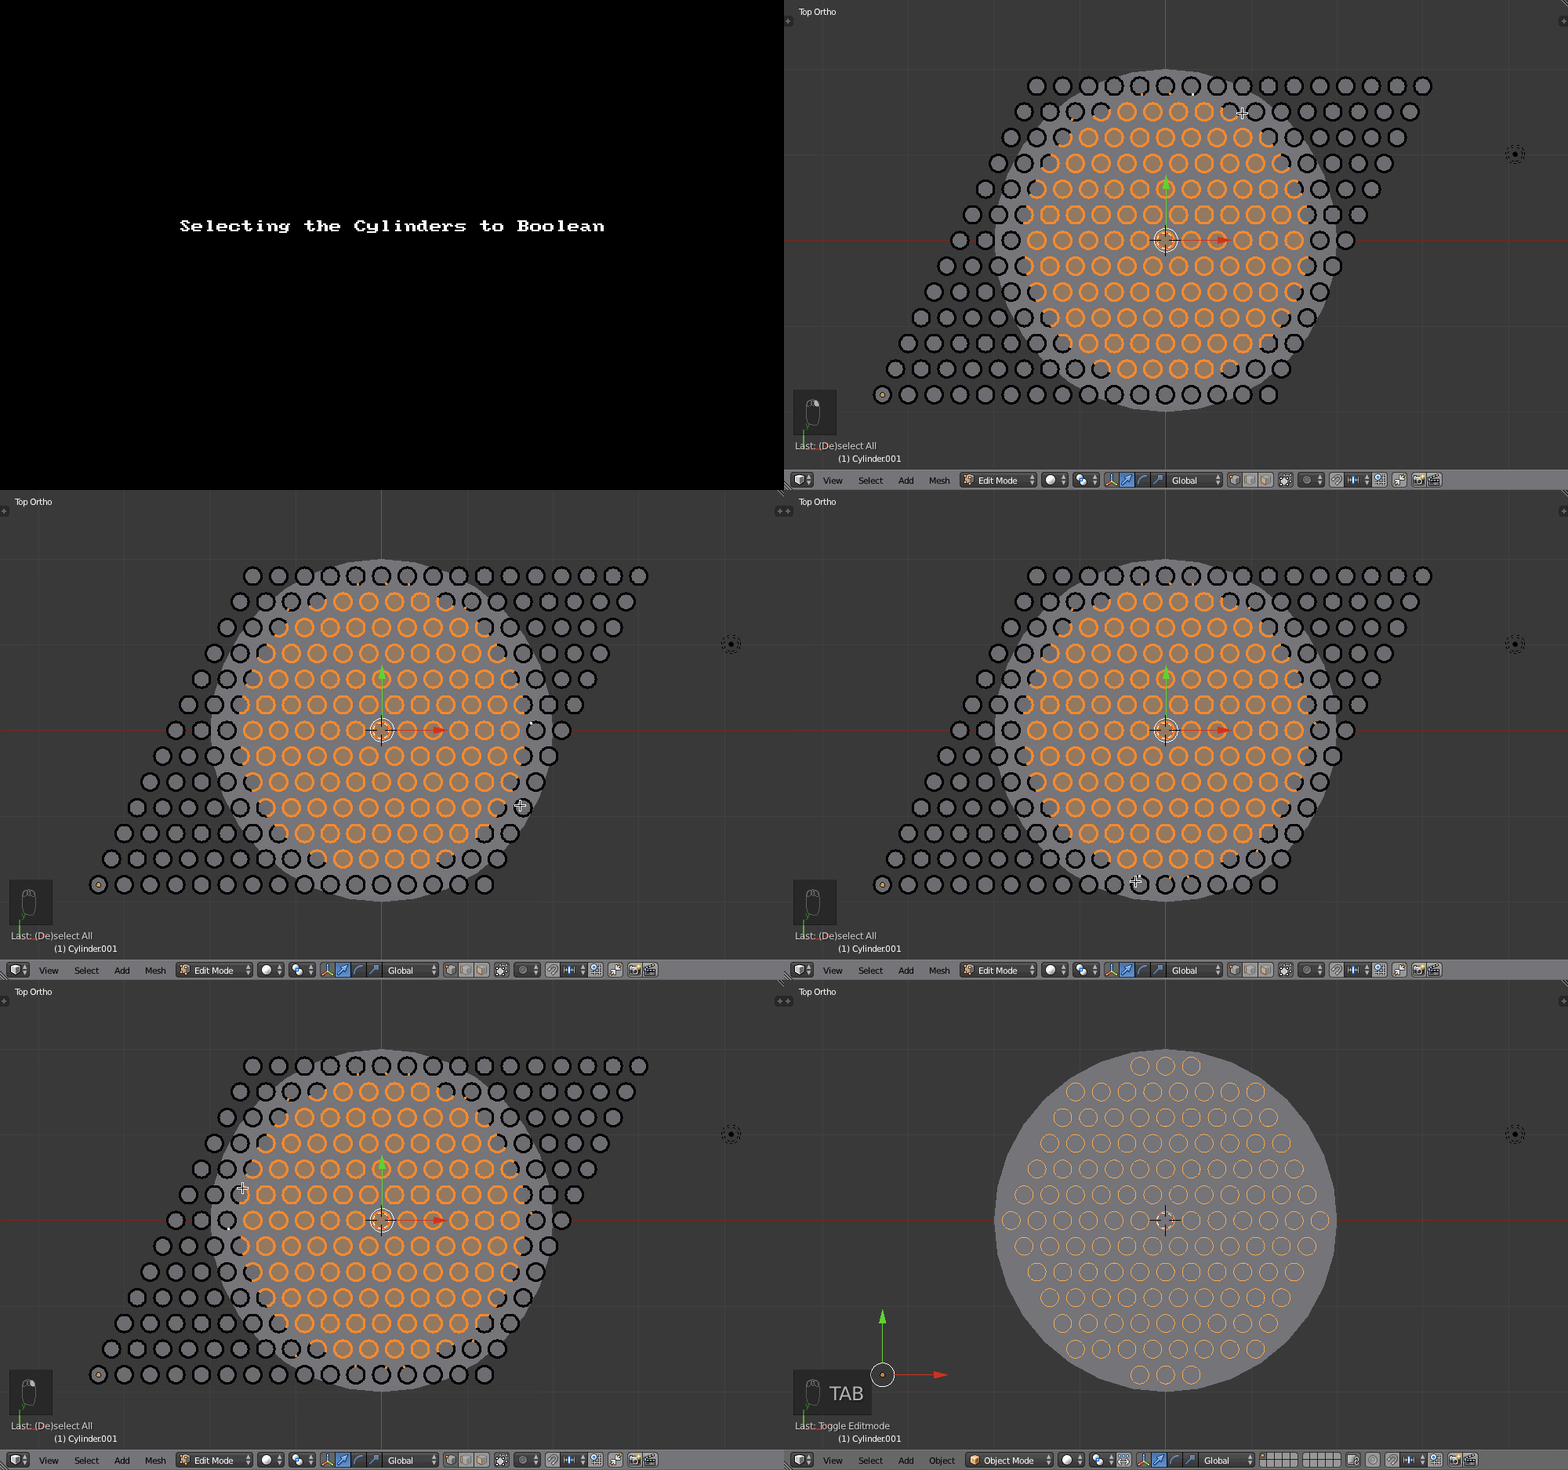
I applied both modifiers and keyed Tab to enter Edit Mode. I keyed A once to deselect everything. Now comes the big step. I keyed C for Circle Select, positioned my cursor at the center of the screen, scrolled up to the appropriate size, and keyed LMB LMB to finish the job. This selected most of the cylinders that I wanted. I Shift + RMB RMB selected one vertex on other cylinders that I wanted. I keyed Ctrl + L to select linked. Now that I had everything that I wanted selected, I keyed Ctrl + I to select inverse and finally keyed X to open the Delete menu and selected Vertices. I keyed Tab to exit Edit Mode.

enter image description here

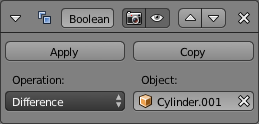
Now it was a simple matter of boolean-ing. The following is my settings. Make sure to have Difference selected, but you may not have the same object name as Cylinder.001. Apply the modifier.

enter image description here

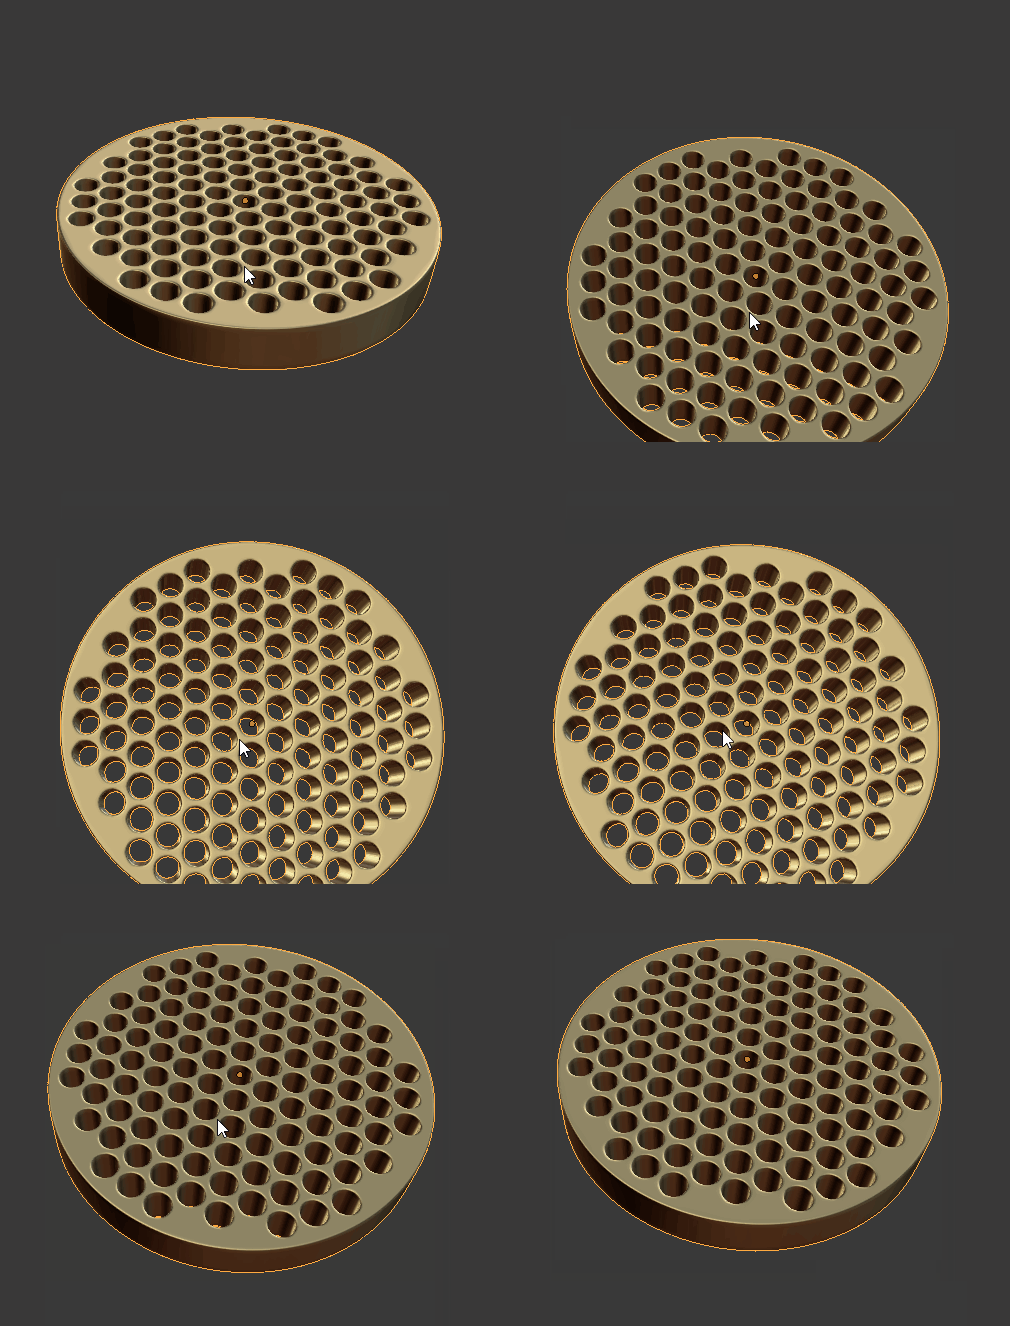
For some last touches, consider adding Smooth shading, and Edge Split modifier, and a Subdivision surface modifier. With these touches, the following is my final result. Obviously you could tweak various settings to get a result that you liked more.

enter image description here

Below is the .blend file. Note that I didn't delete the arrayed cylinders, but rather moved them to a separate 3D Layer.

$\endgroup$
13
$\begingroup$

A duplivert approach.

The aim here is to have a regular quad only geometry.

Here is the result with a bevel and a subsurface modifiers :

enter image description here

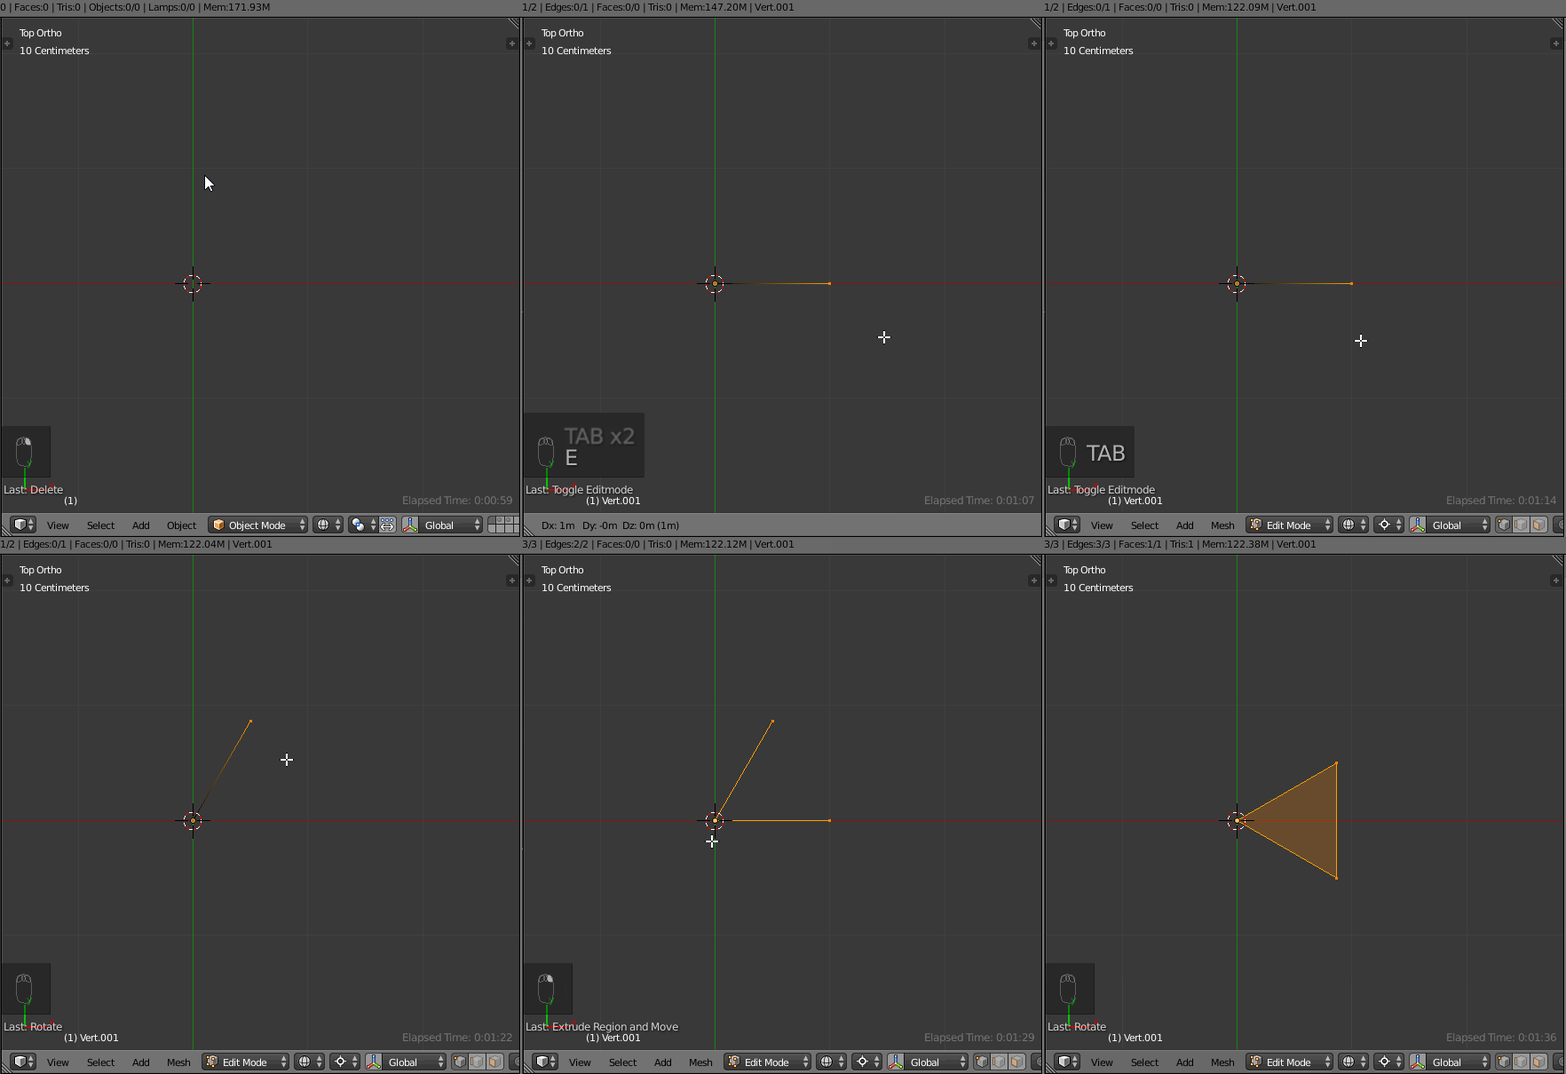
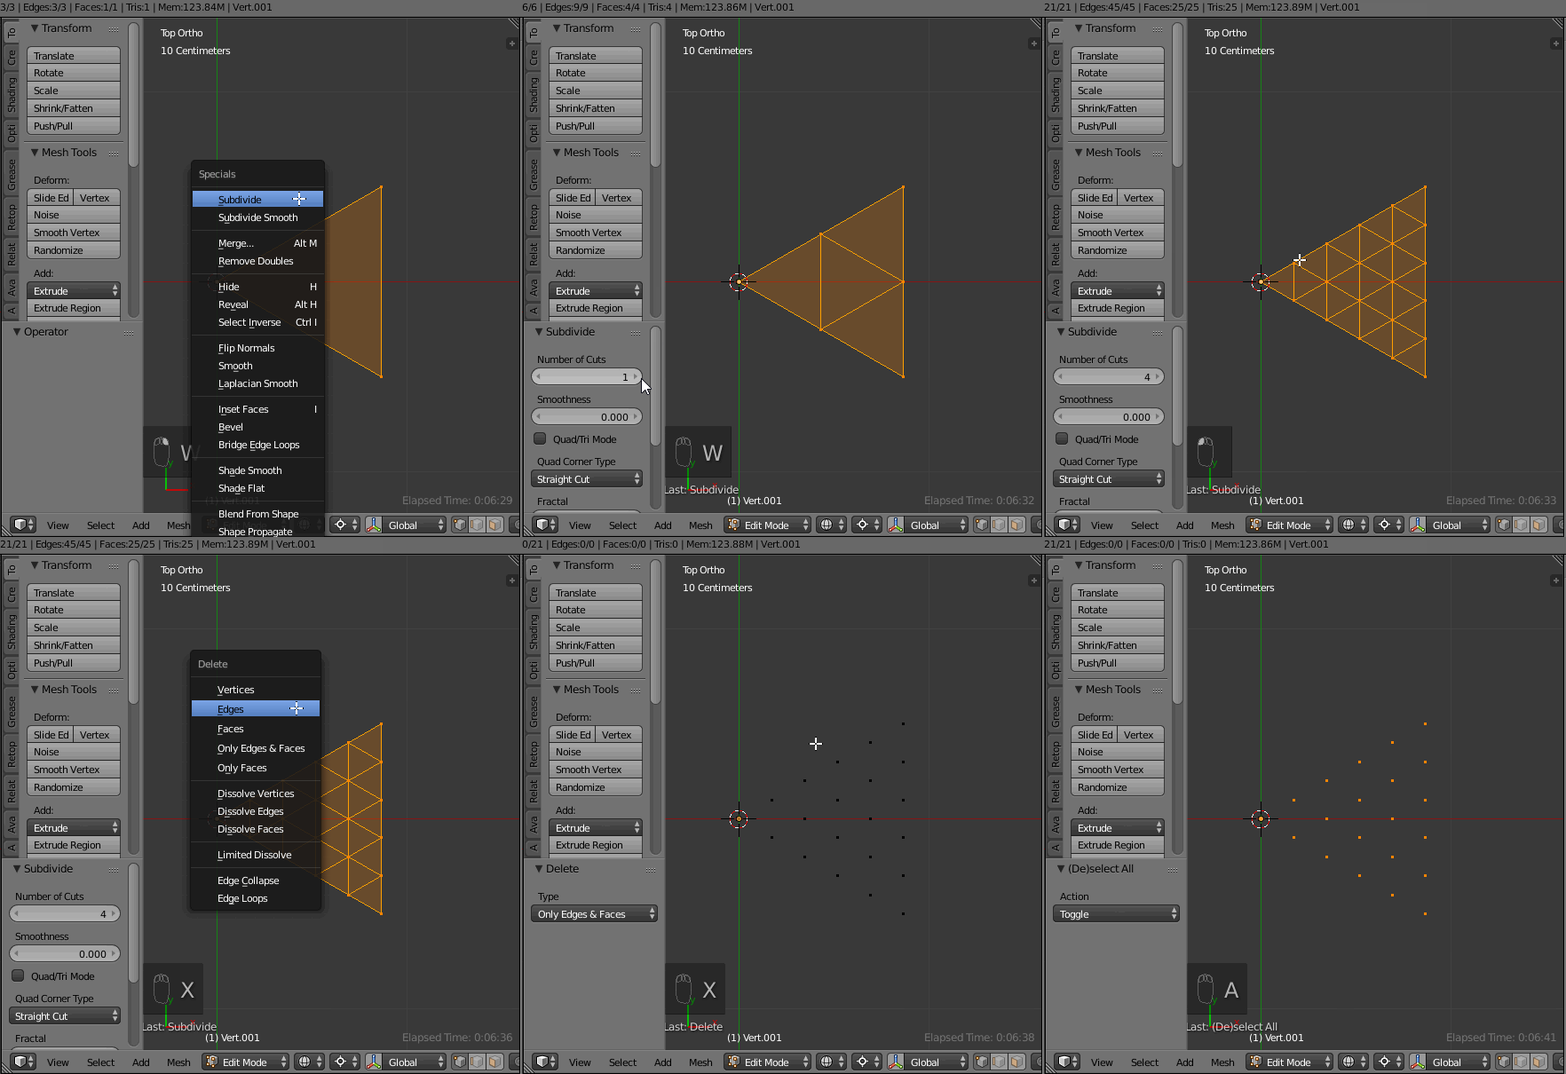
To begin :

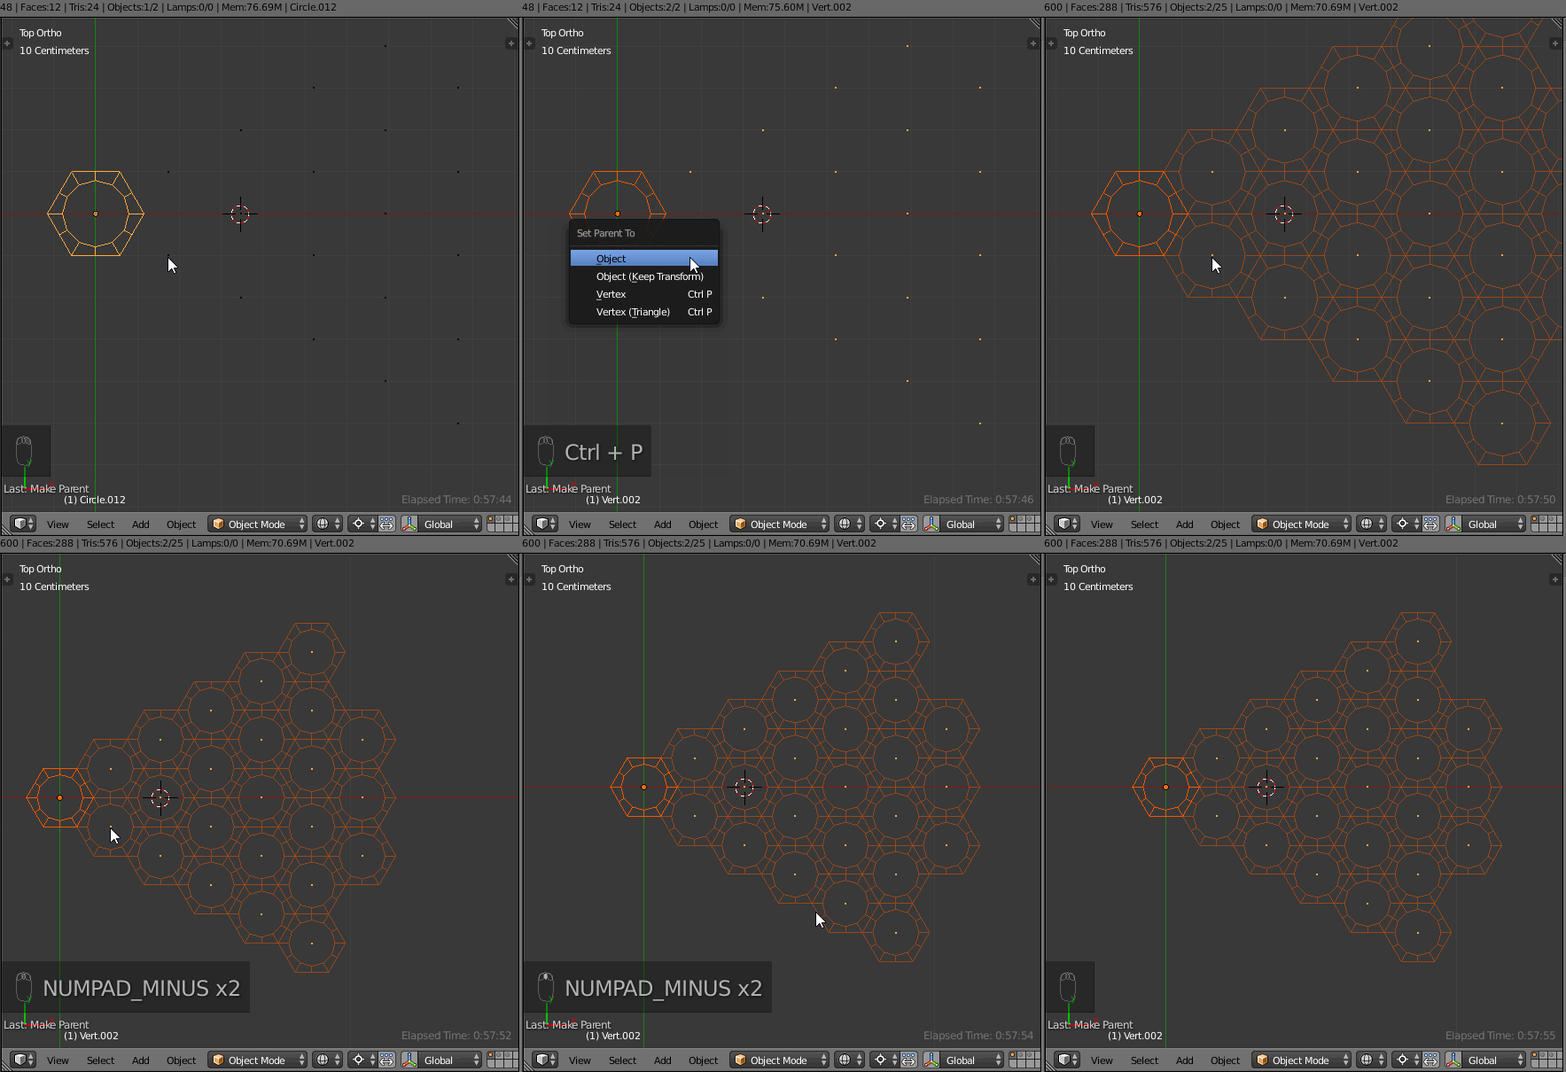
  • Make a sixth of hexagon
  • Make a segment of length 1
  • Rotate the extremity 60°
  • Make a face
  • Rotate all back 30°

enter image description here

  • Subdivide it the amount of time you want, in order to create the driving vertices (there will be one circle per vertex)
  • Keep only the vertices

enter image description here

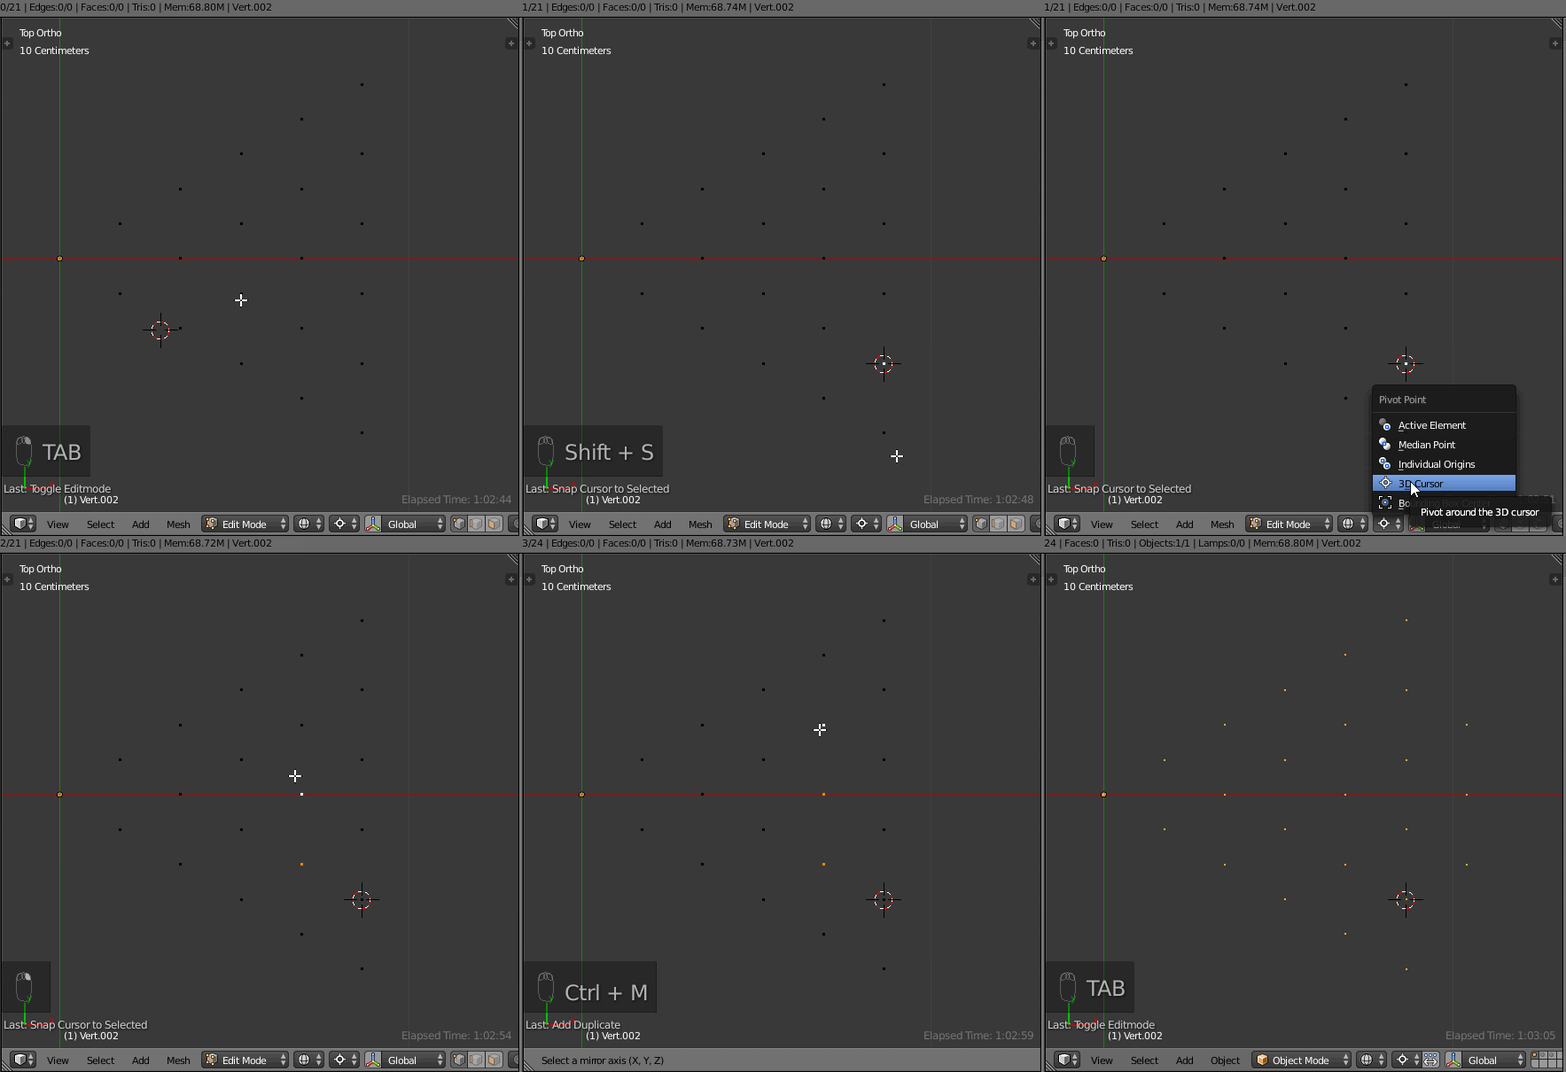
  • Complete this shape to be close to a circle, duplicating some vertices
  • Place the cursor at a pivot point and set it as pivot
  • Select and duplicate the wanted vertices
  • Mirror these copies along X : Ctrl+M then X

enter image description here

  • Add a circle with 12 vertices (that will be a good amount for the further tesselation, but you could choose more : see below)
  • Parent it to our sixth of hexagon
  • Set it duplivert
  • Adjust the size of the circles

enter image description here

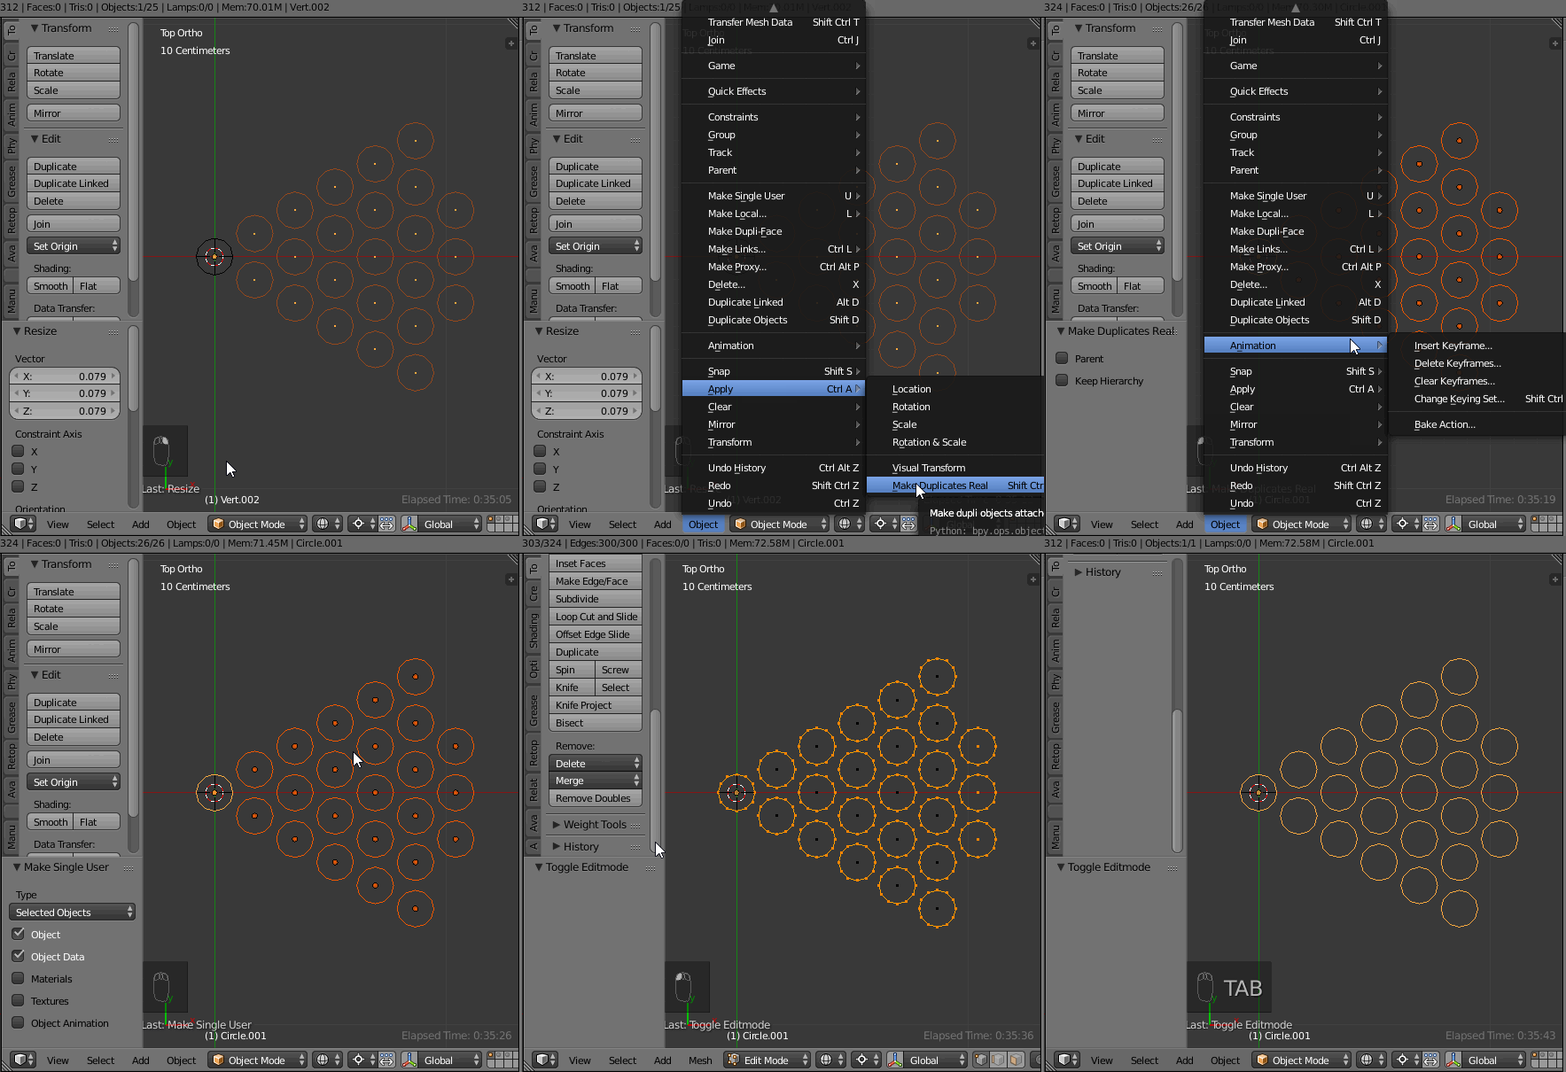
We will now make the tesselation

  • First step, make the duplicates real (this detaches the dupli from the sixth of the hexagon)
  • Make them single user (as they are still a dupli of their original circle)
  • Join all (note that joining without making dupli single user will work too)
  • Remove the double (as the selection included the original circle)

enter image description here

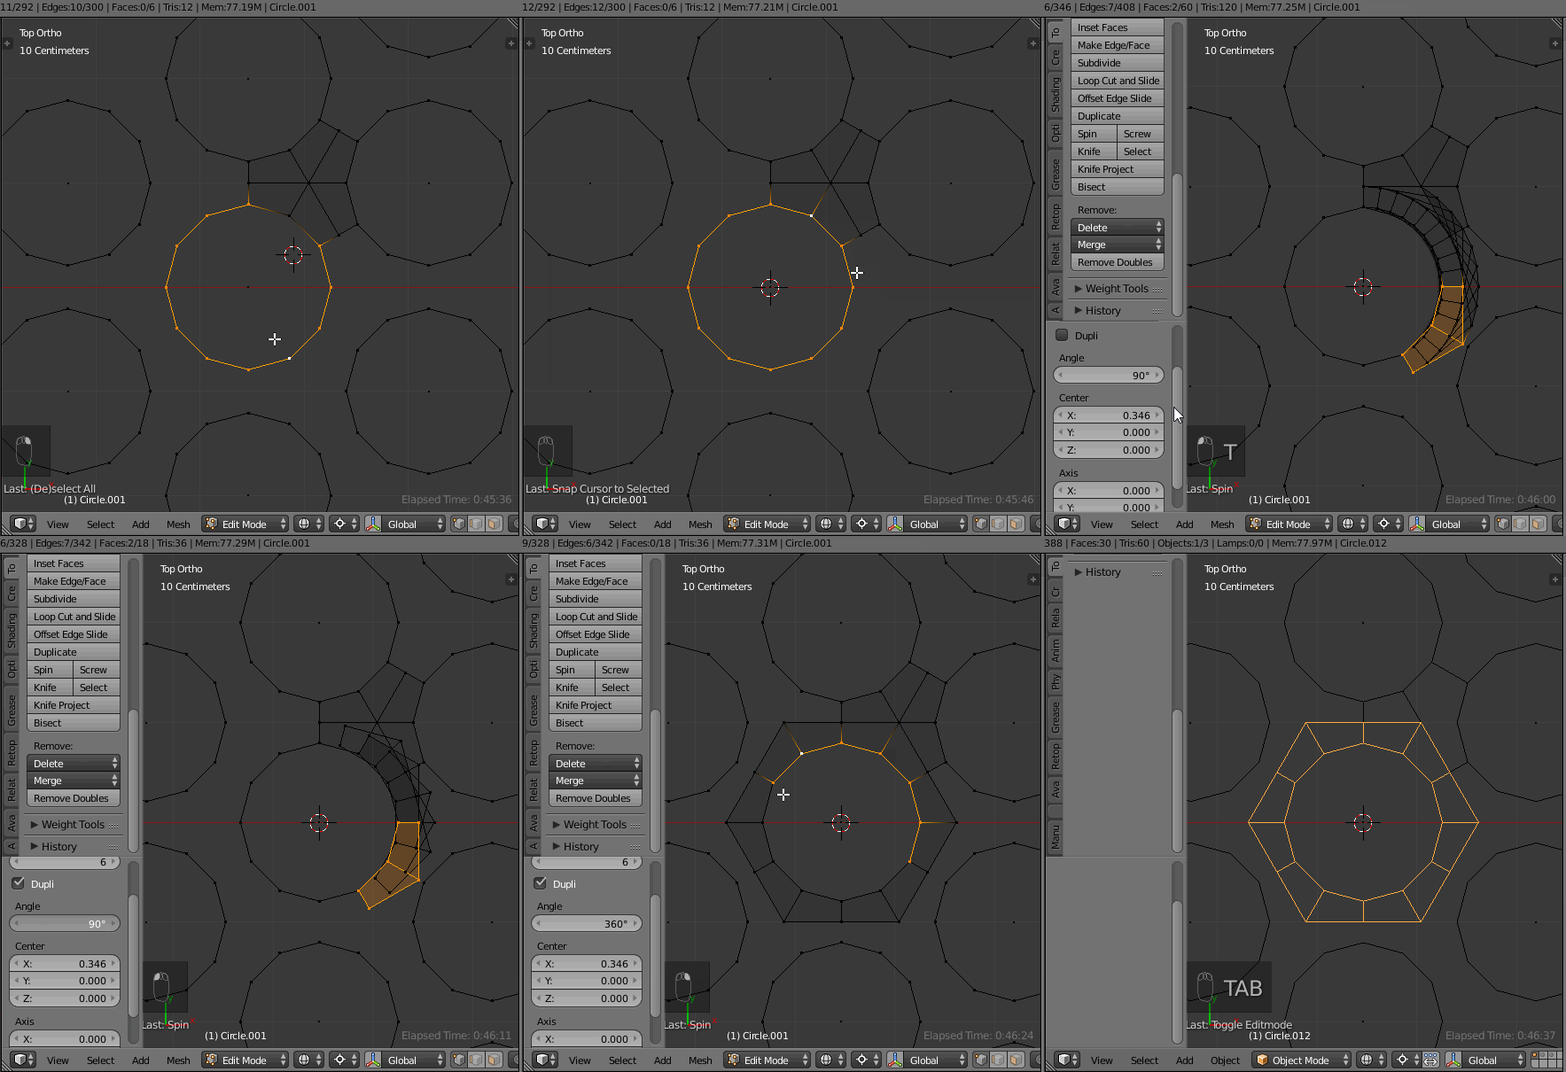
  • Tesselation, second step, enter edit mode
  • Work on the sixth of one of the circle to link it to its neighbors, so that we obtain the 1/6 of the perimeter
  • Our goal is to make 'quad only' tesselation, using a 'minimum' of vertices

To do that :

  • Connect the neighbors, make a face, cut it
  • Once done for the three in this corner, scale the in between vertices to 0 and remove doubles

enter image description here

  • Now we have a 6th of what we want, spin it 6 time for 360°
  • Select the result and separate it

enter image description here

  • Back to the duplivert, parent this newly created hexagon to the initial 6th of hexagon composed of vertices
  • We obtain a regular tesselation

enter image description here

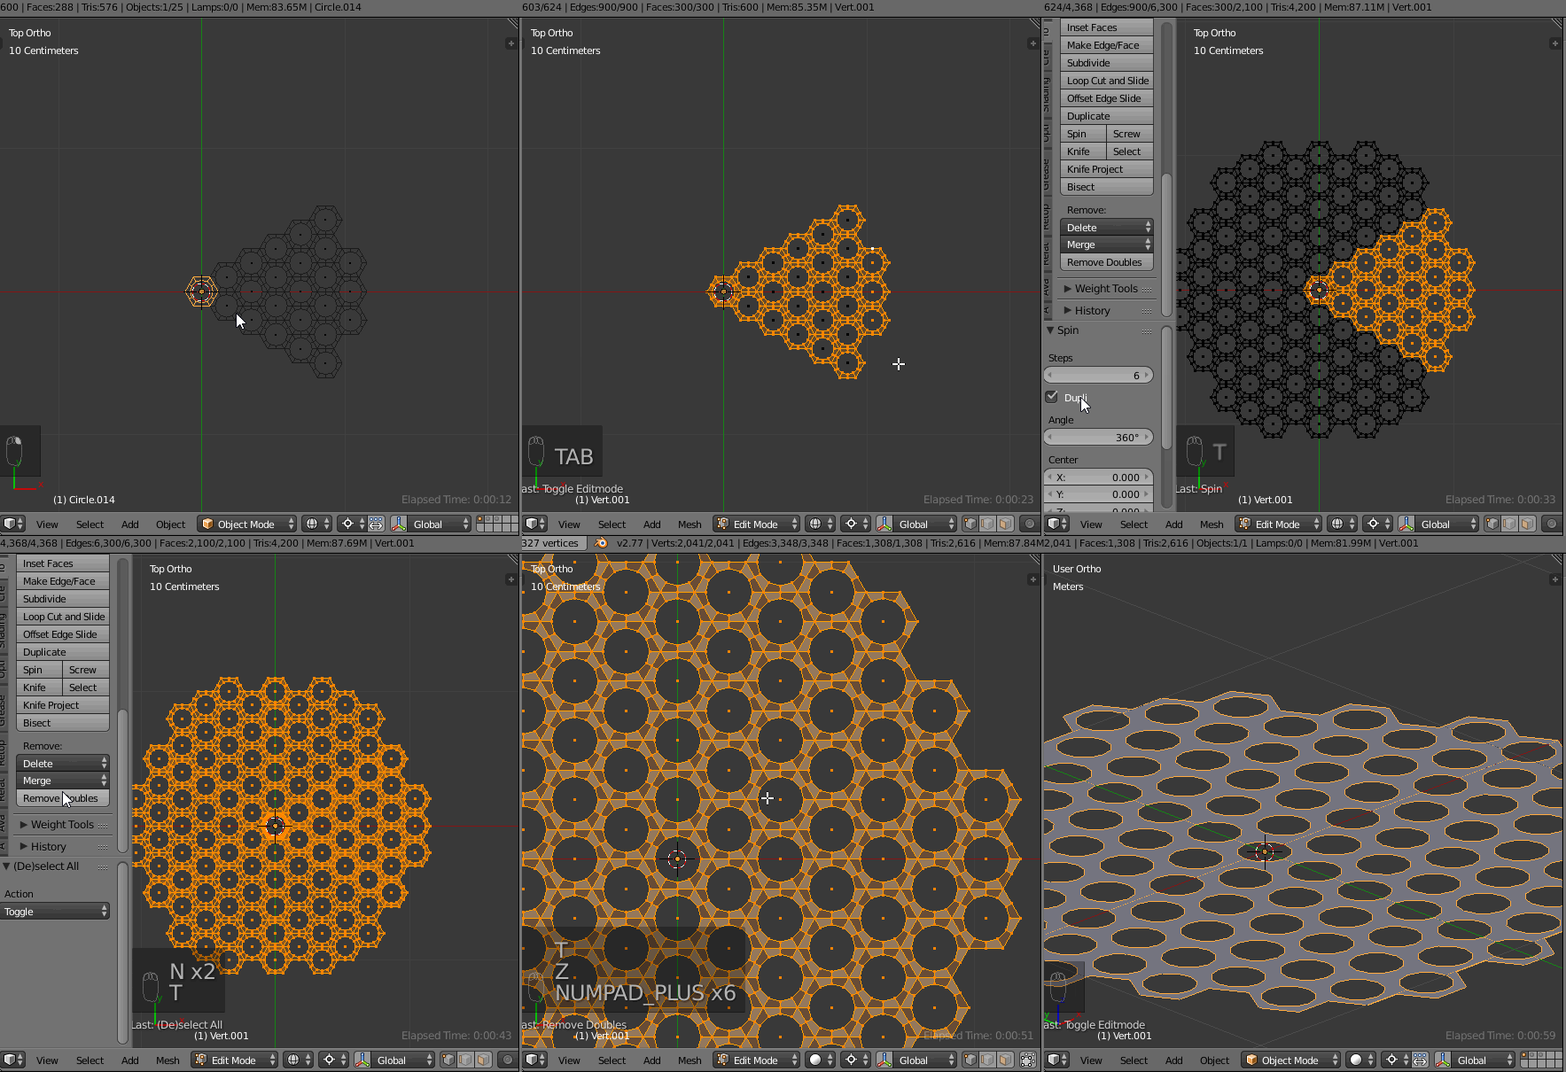
  • Again make duplicate real, join the objects, enter edit mode
  • Spin all 360 in six steps
  • Remove doubles
  • Adjust the normals

enter image description here

  • The last step : creating the outer circle
  • We have here 156 vertices in the peripheral
  • So we add 156 vertices circle around
  • Then bridge edge loops between
  • In order to smooth a bit the border, you can also add another outer circle

enter image description here

We are done (long to explain... but shorter to do !).

For information, my first though was to use particles as there is a hexagonal grid option for it. But it seems that there is no way to adjust it so that all the particles stay regularly into the circle. And as you can see, there is an angle between the particles alignment and the hexagon.

enter image description here

$\endgroup$
3
  • $\begingroup$ Nice answer (yes, a bit too long). On the step of making 'quad only' tesselation you could just merge those selected verts with Alt+M > At Center. Also you can use . (dot) key for 3D Cursor Pivot and Ctrl+, (coma) for Median Point. That could shorten gifs a bit. $\endgroup$
    – Mr Zak
    Commented Jul 29, 2016 at 9:20
  • $\begingroup$ @MrZak, thanks, yes a bit too long... hard to know sometimes if we say too much or too few... thanks also for the shorcuts you indicate (but I won't redo all the gif !!) $\endgroup$
    – lemon
    Commented Jul 29, 2016 at 9:40
  • 1
    $\begingroup$ elegant solution $\endgroup$
    – aliasguru
    Commented Jul 29, 2016 at 11:03
3
$\begingroup$

I'd use two Array Modifiers, a Subsurf and a Boolean to achieve the result. Check out the Blend file here for the result:

Start off with a plane and create this pattern here:
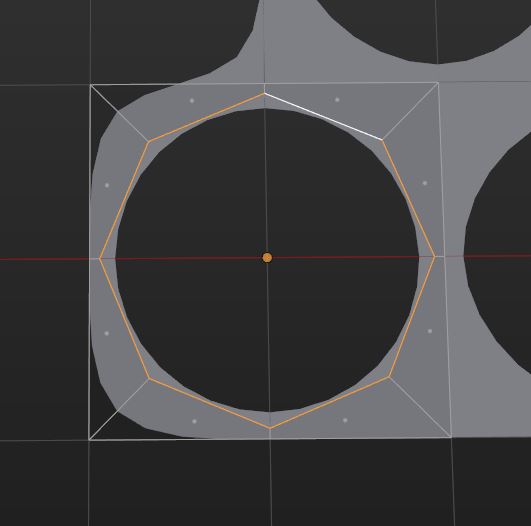
pattern

Step by step manual to do that:

I created it using a plane, went into edit mode, and subdivided it once. Then i selected the center vertex and hit Ctrl + Shift + B to bevel the vertex interactively. While still beveling, also press Ctrl + to add a segment to the result. That should give you this:
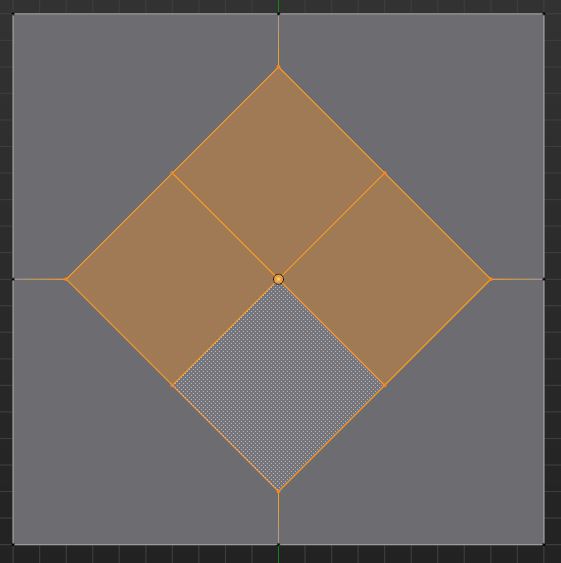
base mesh

Now you can switch to face selection mode, and use LoopTools to create a circle inside:
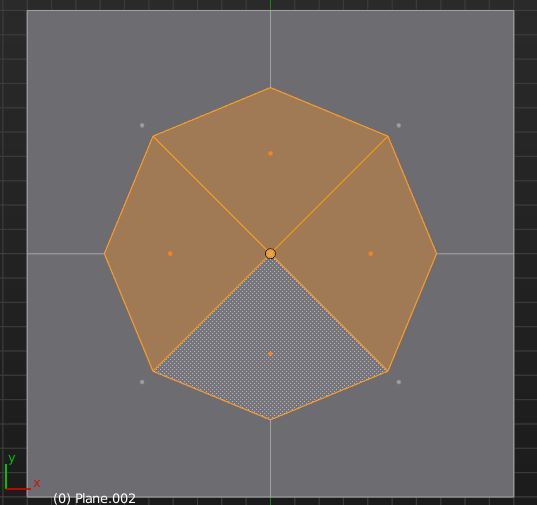
circle

delete the inner faces and scale the circle to your liking. Notice that I spent a lot of attention making sure that the vertices are evenly spaced, also on the outside!

Now to the modifiers: Add an Array modifier, set the number to 30 or so, and use relative offset of 1 to generate the first row. Check the Merge Option, it will be needed for the Boolean to work!

The second array is more tricky. You need to use constant offset as well as relative offset. The relative one duplicates the row of holes in the second direction, the constant one shifts them to the side by half the width of your base mesh. Notice that depending on your scene this value can differ from mine quite a bit! Again, check the Merge option.
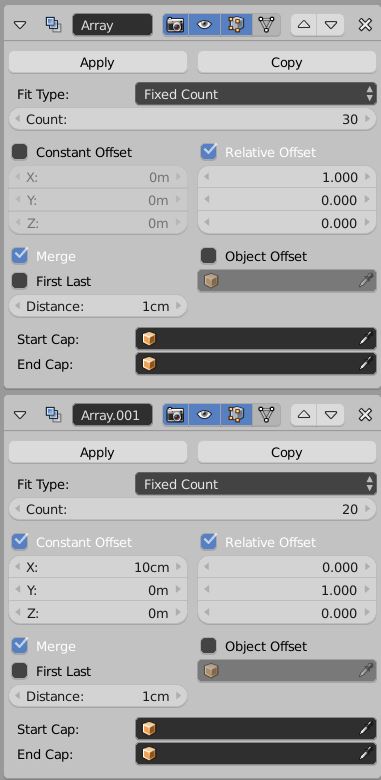
arrays

Now create a cylinder that encompasses what you have so far:
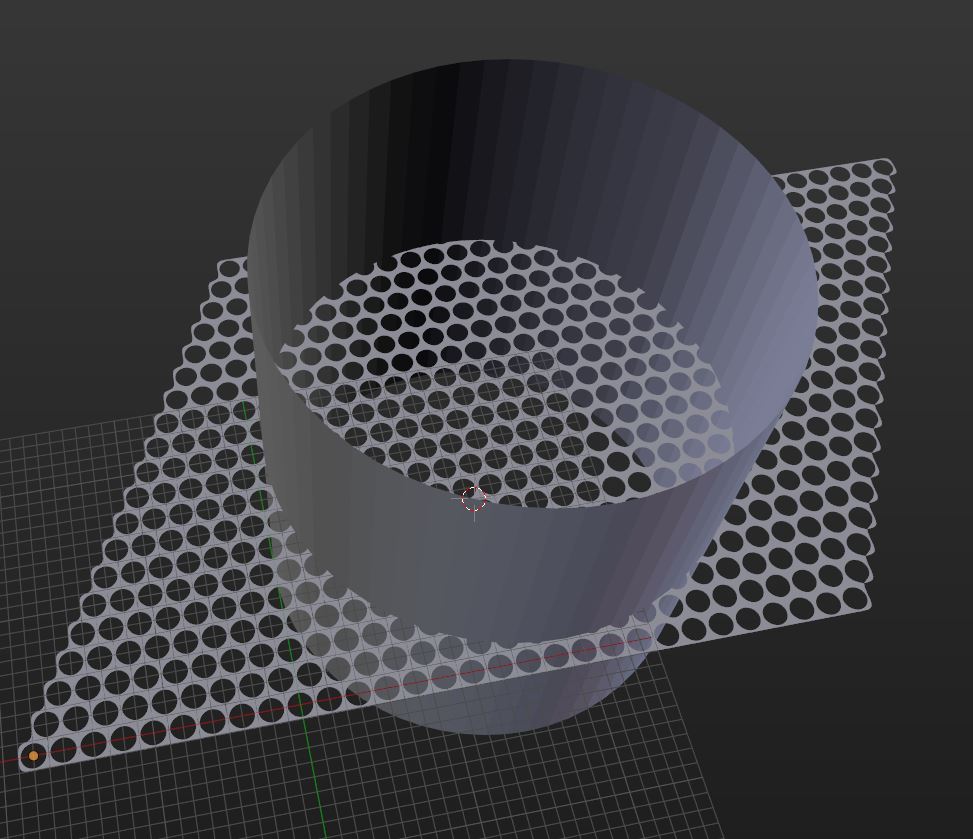
objects

Lastly, add a subsurf (to smooth the holes) and the boolean, to cut the result. Choose the cylinder as the cutting object:
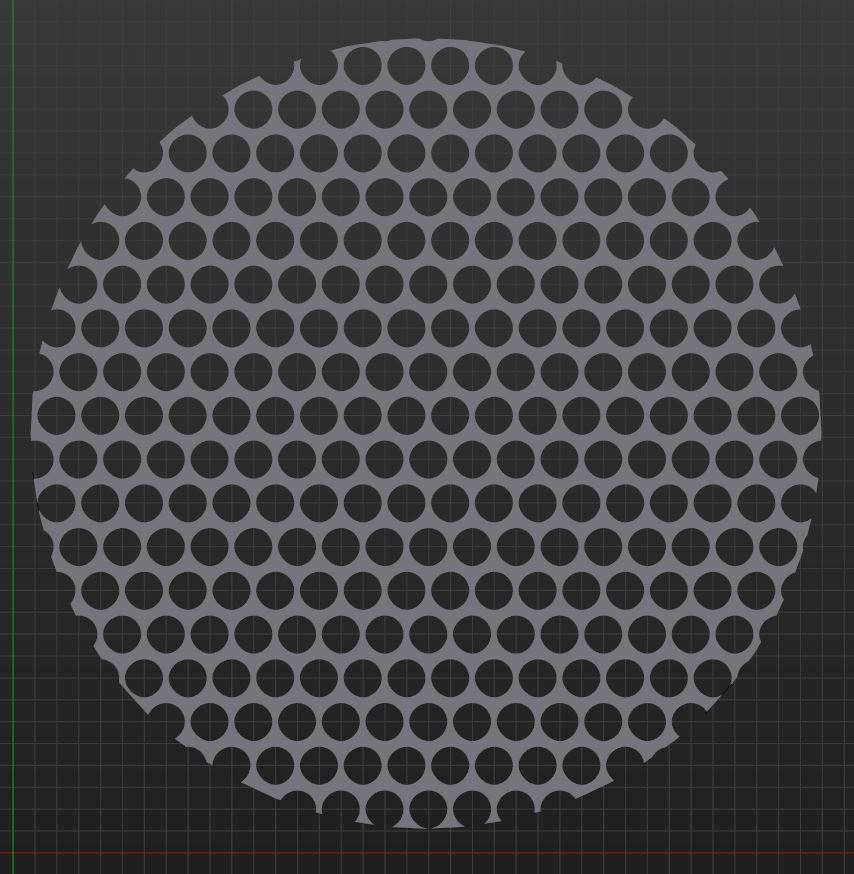
final result

One thing to note: I was using the latest Development Build of Blender for this, that's why I have the 'BMesh' option visible. If you don't have it, the Boolean might not work reliably enough, and you need to tweak the final mesh a bit by applying all modifiers and deleting some faces. For me it looked like this in 'old' Blender:

delete manually

$\endgroup$
3
  • $\begingroup$ This does not get rid of the holes around the edges. That was what the op asked about. $\endgroup$
    – Shady Puck
    Commented Jul 28, 2016 at 16:54
  • $\begingroup$ @ Shady Puck - yes, you are right, but this issue can be fixed easily. I prefer this method for one important reason - you get much better topology for further work with mesh and correct modifiers behavior and prevent shading issues. $\endgroup$
    – Shubol3D
    Commented Jul 28, 2016 at 18:04
  • $\begingroup$ shady puck is right, i missed that point of your question. a possible solution is to set the array modifiers to NOT merge, and forget the boolean and the subsurf in the first step. when you now apply the arrays, you can, as shady pointed out, circle select the vertices you need. however, with this mesh, you would rather make sure the selection slightly exceeds the surrounding cylinder. now manually fill the holes you don't need, remove doubles, and then go for booleans $\endgroup$
    – aliasguru
    Commented Jul 28, 2016 at 18:46

You must log in to answer this question.

Not the answer you're looking for? Browse other questions tagged .