25
$\begingroup$

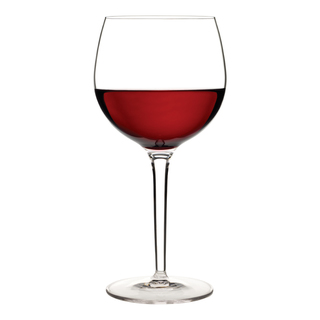
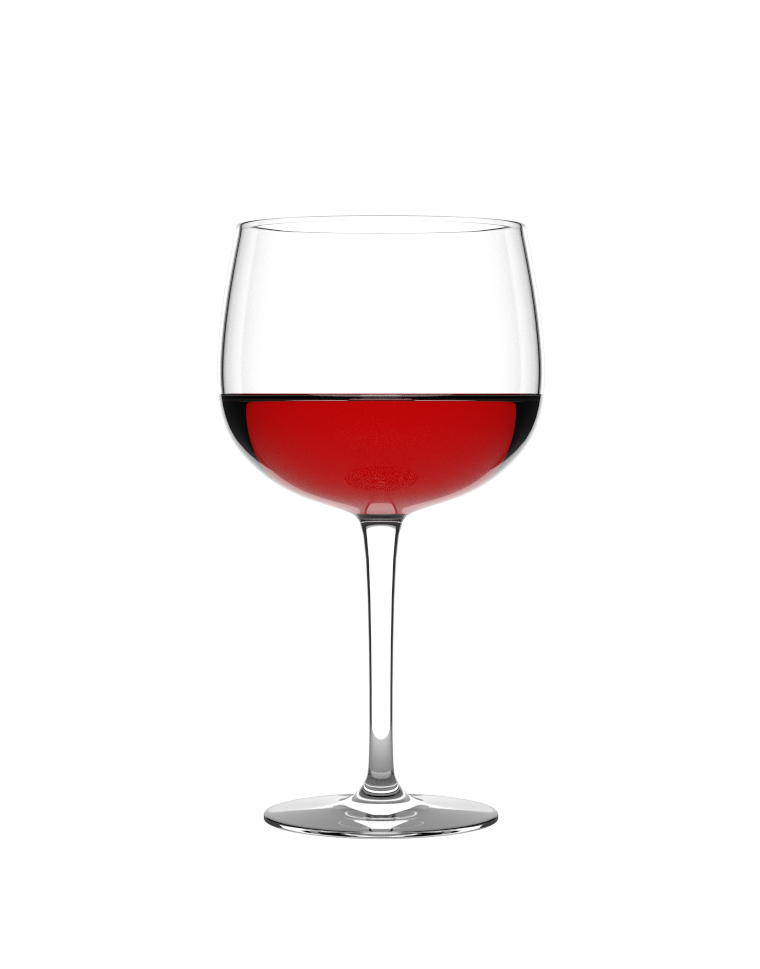
I am at beginner level. One of the projects I am doing is to create a glass with fluid. Like a glass of water or a glass of wine. Now I can find quite some tutorials on how to create the glass, but very few if any on how to create the fluid (with a realistic result). I am not looking for fluid simulations (like the water /wine flowing into the glass) but to get something like this:

enter image description here

The question is not (only) about modelling the fluid, but especially how make the fluid look realistic colours, transparency, specularity, dark/light colours etc.

Maybe I should have mentioned that I am watching this tutorial. Somehow I feel that all those manipulations shown there (using Blender Render) are not fully covered within Cycles Render.

$\endgroup$
1
  • 4
    $\begingroup$ First of all I would suggest to have a look on this article adaptivesamples.com/2013/10/19/fluid-in-a-glass in order to learn how to correctly manage interfaces. They are as important as the shadeer itself. $\endgroup$
    – Carlo
    Commented Aug 14, 2015 at 17:29

3 Answers 3

12
$\begingroup$

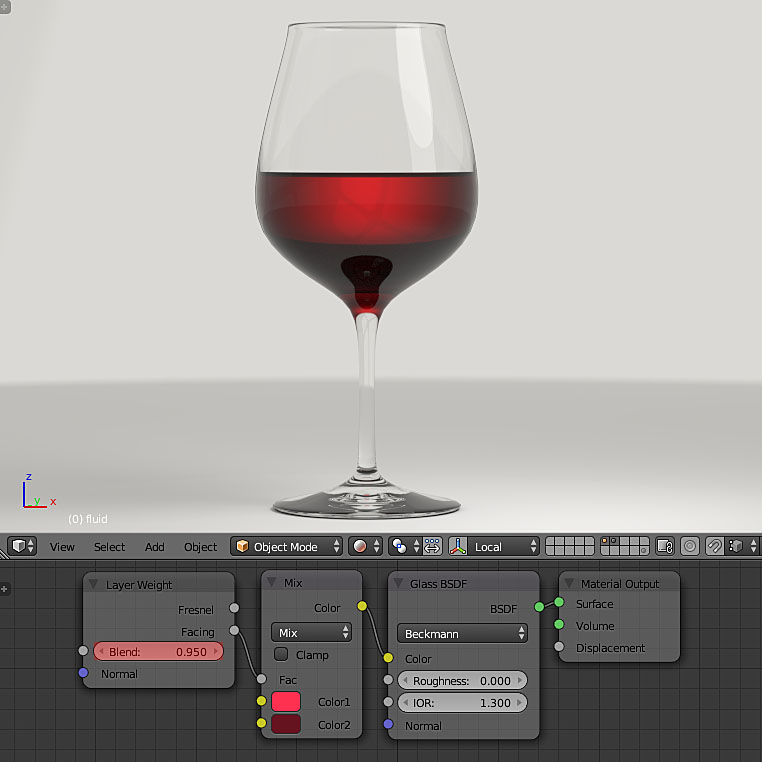
You may do it using the Glass and Layer Weight nodes. enter image description here

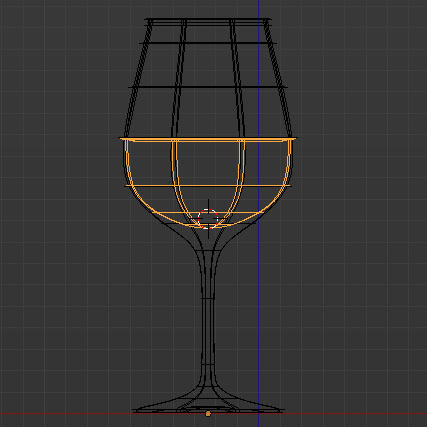
Model a fluid (see Carlo's link in his comment) and assign a new material to it. enter image description here

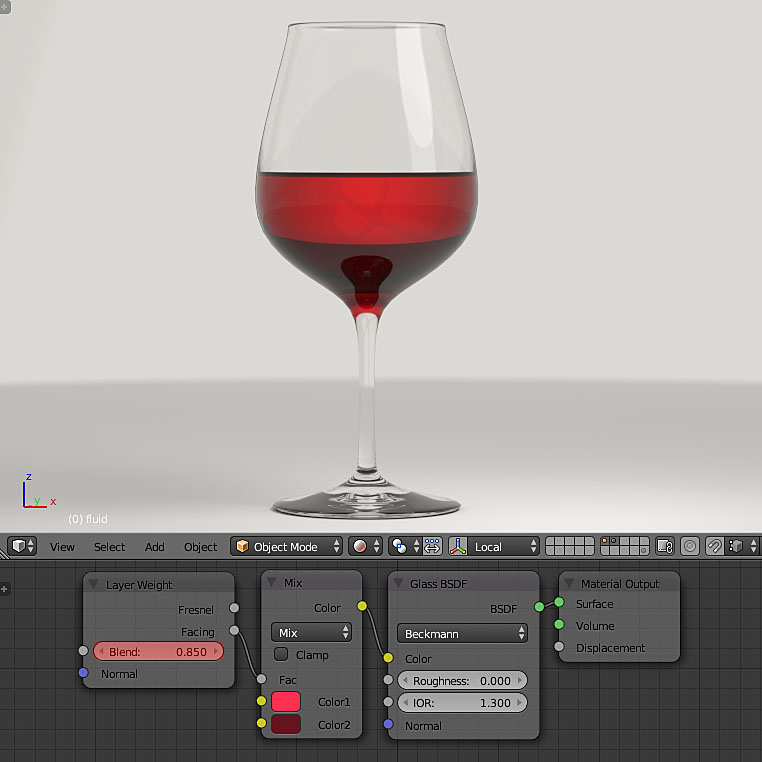
Set up its material nodes as pictured below. After adding a Glass node set its Roughness to 0 and change the IOR value to something about 1.300-1.333. Adjust a Blend factor of a Layer Weight node for a different result (different blending between colors). enter image description here

NOTE: I set a simple color for a background here. To make it look more realistic use a HDRI image for a background.

$\endgroup$
1
  • 9
    $\begingroup$ Note that mixing colors based on surface angle isn't an accurate simulation of absorption. It does make for a nice stylized look though :) $\endgroup$
    – gandalf3
    Commented Aug 14, 2015 at 19:33
20
$\begingroup$

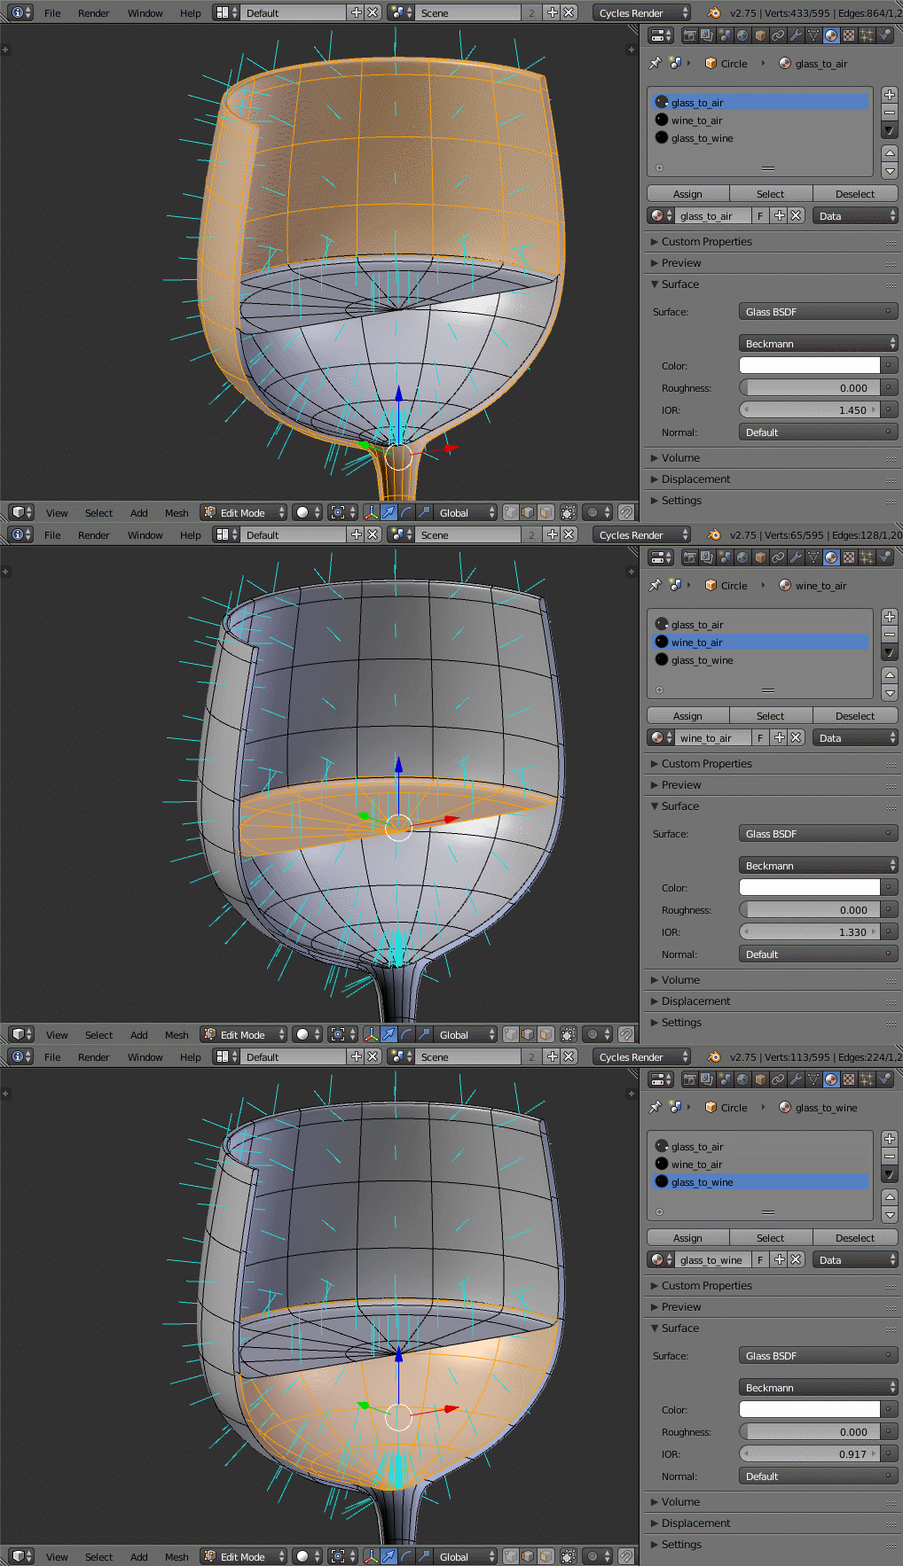
For any situation with multiple refracting materials that come into contact, it's important to set up the geometry to correctly simulate the interfaces between the glass and liquid. See Liquid / glass interface IOR and normals in Cycles.

Geometry

To summarize the post linked above:

Instead of thinking in terms of materials, think in terms of interfaces. In your setup, there are three interfaces:

  • Glass to air

  • Wine to air

  • Glass to wine

The ordering depends on the direction the normals of the faces making up an interface are pointing. For example, the way I setup the scene the normals of the glass > wine interface pointed from glass to wine. So for that interface, the IOR should be glass IOR / wine IOR.

Create materials for each interface and set their IORs appropriately. The IOR of air is 1, so division is unnecessary for the air interfaces.

  • For the glass > air material, you'll want to set the Index of Refraction to something like 1.45 or 1.5 (the IORs of different kinds of glass vary quite a bit).

  • For the wine > air material, you'll want to set the Index of Refraction to something around the IOR of water (~1.33 at 20° C).

  • Provided your normals are pointing from glass to wine, the IOR for this material should be 1.09 (I originally had the wrong number, please ignore the .917 in the gif).

enter image description here

Material

The darkening around the edges of the wine is caused by absorption. Due to the way light refracts through the glass and the wine, light must pass through more wine near the apparent edges of the glass. This means more light will be absorbed, and less light will reach the camera, making the wine appear darker.

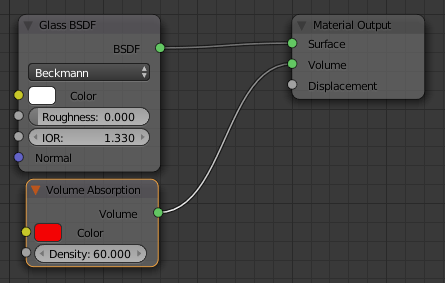
To simulate this, add a Volume Absorption node and plug it into the Volume output:

enter image description here

Note that the amount of absorption will depend on the size of your object as well as the density, so it may take some fiddling to find values you like.

enter image description here

$\endgroup$
3
  • $\begingroup$ This is a follow up comment to gandalf3's explanation above, there is a conflict in how ior for the surface is calculated "Provided your normals are pointing from glass to wine, the IOR for this material should be .917." but above you say "the IOR should be glass IOR / wine IOR", which is 1.0905. $\endgroup$
    – John
    Commented Jul 7, 2016 at 2:01
  • 1
    $\begingroup$ Formula is [Medium with normals pointing outwards] divided by [Medium with normals pointing into it]. Air to Glass (reverse the IOR order like this Glass/Air): 1.45/1 = 1.45. Going from Glass to Liquid (normals of liquid pointing into the glass volume): 1.33/1.45 = 0.917. If you are going from Liquid into Glass (normals pointing into the liquid) then it's 1.45/1.33 = 1.09 $\endgroup$
    – JoelArt
    Commented Apr 19, 2021 at 0:08
  • $\begingroup$ John & @JoelArt Thanks $\endgroup$
    – gandalf3
    Commented Apr 20, 2021 at 17:38
7
$\begingroup$

A couple of things to pay attention to with fluid regarding materials is the IOR (Index of Refraction). You can use a Glass Shader for most liquids. For something like milk you'll want an SSS Shader (Sub-Surface Scattering). For something like wine though, go with a Glass Shader.

Water has an IOR of 1.33 and that number is worth committing to memory (it varies slightly depending on the temperature.) Here is a list of IOR values of common liquids. Wine is not on that list but other alcohols like Vodka (1.363) and Whisky (1.356) are, so my first thought was to use a value in the 1.35~1.36 range and call it close enough... but then I decided to search "red wine IOR" and I found a super-detailed article on the optical properties of red wine.

Here's a chart:
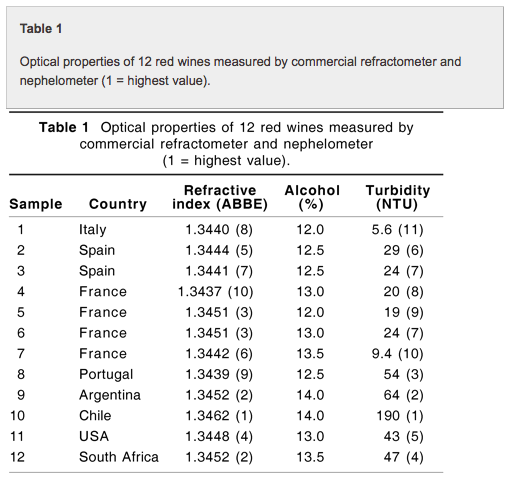
enter image description here

Original URL of the chart is here. Full article URL is here.

In short, the average Index of Refraction of red wine is about 1.345, so you can use that, or any of the IOR values from the samples on that chart.

IOR is not something to obsess over, but since you can usually find the IOR values for many common materials with some quick searching I find it's best to just look it up, plug in the number, and then move on to tweak the color and other properties of your liquid.

Another thing you might try is using a Volume Absorption Shader in conjunction with your Glass Shader to make your wine look thicker where it is denser. Red wine has sediment, so it will be a much deeper red the further in you go. A Volume Absorption Shader can help you get this look. Play with the "Density" value until you get something that looks right to you.
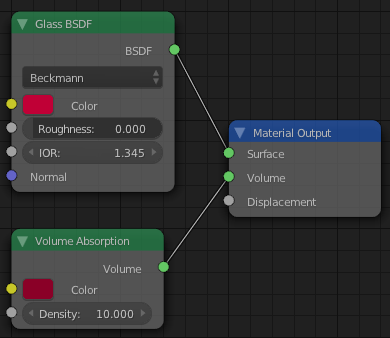
Red wine material with volume

Finally, I realize you're not planning to do any fluid simulation, but I'll leave these two fluid sim tutorial links up for anyone who is interested: 1, 2.

$\endgroup$
2
  • $\begingroup$ Nice tips @Mentalist, but I think the OP just wants to model a fluid and give it a realistic material instead of making a fluid simulation. $\endgroup$
    – Paul Gonet
    Commented Aug 14, 2015 at 18:24
  • $\begingroup$ Agreed. When I first read his question I wasn't sure, but I can see that now. I'll leave the links there in case someone else finds them helpful, but move them to the end of the answer as a side note. $\endgroup$
    – Mentalist
    Commented Aug 14, 2015 at 18:55

You must log in to answer this question.