7
$\begingroup$

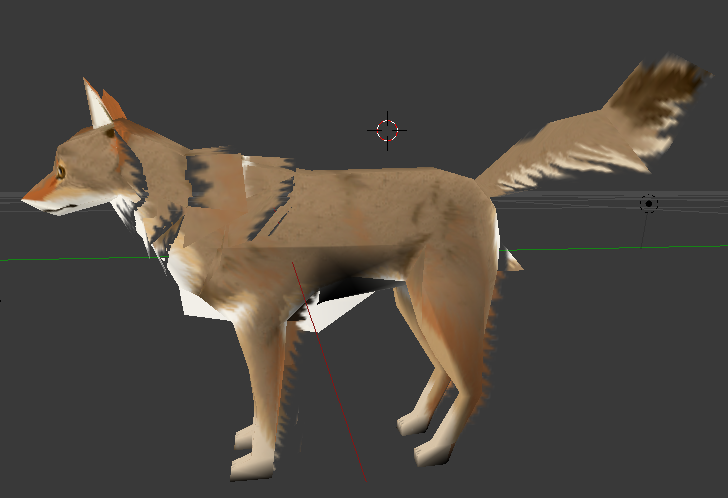
I've been trying to add some "fringe" to a coyote I've been modeling. I have the planes all where I want them, and made the original coyote one object, while the extra panels I'll be using for fringe are a separate object. Both objects have their own UV map and their own texture, the Fringe Object's texture having some transparency.

When I apply the Fringe Texture to the Fringe Object, however, the transparent sections don't work the way I expected them to. I wanted the transparent sections to reveal the texture beneath the fringe, but instead, they make the entire coyote transparent in those sections. Or they turn white.
enter image description here

I haven't finished tweaking the texture in Photoshop yet, but I thought I should get this problem figured out before doing anything else.

Note: The tail has the fringe effect that I was going for on the rest of the body, but it is not part of the Fringe Object. The left side of the tail seems to work perfectly, but the right side of the tail has the same problem: the transparent parts of the texture make anything beneath it transparent as well, instead of just allowing the next layer of texture to show through. Ideally, I would have included all of these "fringe" panels while I was modeling in the first place, but decided to add them later after I'd already made a texture for the coyote.

If it will help, here is the file I'm working from: http://www.pasteall.org/blend/29395

$\endgroup$
2
  • $\begingroup$ Your file is missing the textures. Please pack them into your .blend file. To do that, go to "File->External Data->Pack All Into .blend". $\endgroup$
    – maddin45
    Commented May 23, 2014 at 7:53
  • $\begingroup$ Sorry. Here it is! pasteall.org/blend/29404 $\endgroup$
    – shhh
    Commented May 23, 2014 at 14:03

1 Answer 1

7
$\begingroup$

I found two problems with your model:

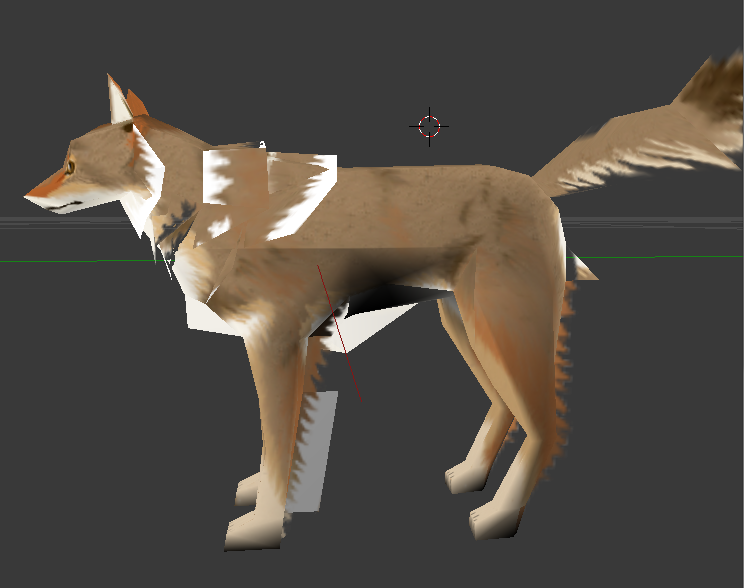
  1. Your fringe faces also exist on the coyote model, but there they do not have a transparent texture. This causes the white parts on the fringe. Remove the fringe faces from the coyote. The result should already look better:
    enter image description here
    There are still some faces with flipped UV coordinates, like the ones on the hind leg of the coyote, and the UV coordinates of the fringes unter its chest lie on a part of the texture without transparency, but these should be pretty easy to fix.
  2. This problem is actually not your fault, but just how graphics cards work. The sections of the coyote that became transparent are caused by the order in which the faces of your model are drawn. When a face is shaded (meaning when the color and lighting calculations are performed) the first thing the graphics card checks is the distance of the triangle to the camera at the current pixel. If there was already another triangle drawn at this pixel which was closer to the camera, the lighting calculations are skipped (see Z-culling), because usually the old triangle would occlude the new one anyways.
    But if the old triangle actually was transparent at that pixel you will get the visual artifacts you can see in you model: The old triangle did not produce a color at the pixel since it was transparent and the new one is skipped. This is how you get the holes in your coyote.

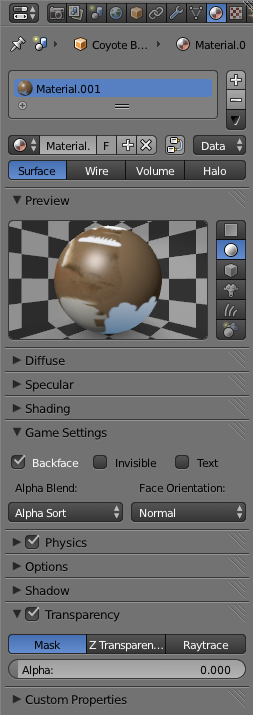
The only real solution to the second problem is rendering the triangle that is furthest away from the camera first, then the ones closer to the camera. If you want to use this model in the blender game engine you can make Blender do this sorting for you. Create a material for the coyote and give it your image as texture. Make sure the texture coordinates are set to UV and the texture affects the alpha channel of the material. Go to the material settings, enable transparency and set the alpha value to 0. Then activate alpha sorting. Do that for both the coyote body and the fringe.
enter image description here
You can also join both meshes (select both and press [Ctrl+J]) and just use different materials and UV coordinate sets for body and fringe.
Since all these settings are a bit hard to explain without writing a full tutorial, here is the .blend. Just have a look at the materials.

$\endgroup$
4
  • $\begingroup$ Thank you so much! I'll go about fixing the coyote as soon as I get home from work. $\endgroup$
    – shhh
    Commented May 23, 2014 at 20:58
  • $\begingroup$ For future reference, do you recommend going about creating a texture like this in a different way from the start? (I decided to add fringe as an afterthought.) For instance, is there a better way to do the fringe on the chest and legs? Right now, I have two panels with opposing normals placed a hair's breadth away from each other, but is there a way to create a face that will display texture on both sides? And should "second level" textures generally be applied to a separate object, or...? Thank you for your help! $\endgroup$
    – shhh
    Commented May 23, 2014 at 21:02
  • 2
    $\begingroup$ If you are using your model for a game I would try to only use one texture, because switching between textures takes some time. For the purpose of rigging and animating it might also be easier to pack everything into one object, but that is personal preference. If you want to be able to turn of the fringe (i.e. for a lower detailed coyotes when they are far away) keeping it a separate object which can be hidden is probably better. To avoid faces being transparent from the backside you can disable 'Backface Culling' in the 'Game Settings' of the material. Then you only need one face. $\endgroup$
    – maddin45
    Commented May 23, 2014 at 21:49
  • 1
    $\begingroup$ But in general it is best to start with the way that makes modeling for you easier. You can still optimize if the basic setup looks good. $\endgroup$
    – maddin45
    Commented May 23, 2014 at 21:51

You must log in to answer this question.

Not the answer you're looking for? Browse other questions tagged .