0
$\begingroup$

I don't fully understand UV Mapping.

I imagine that the shapes that evolve from the flattened/cut open 3D object, are laid out on a 2D canvas which is the UV Map. You can draw on that canvas, add images and all the things that are within the shapes (unwrapped 3D object) are gonna be shown on the 3D model, where the shapes belong.
But as I understand now, The Map is basically one Image and you lay those shapes on top of that one image.

  1. Can I put a second image on there on a specific island?
  2. Can I create a separate UV map for unwrapping only a specific part of the mesh?
  3. Is a new map created every time I unwrap the object? If yes, how can I mangage all those maps?
  4. Does a texture without alpha always cover the whole 3D model?
  5. When is a texture from a UV Map activated/rendered? Does that only work via the shader editor?

As an example, how would I put this white logo/lettering on this screwdriver, which I modelled in Blender? Assuming that I have the logo as an image file.

I use Cycles for that project.

screwdriver with white logo
Click to enlarge

$\endgroup$
3
  • $\begingroup$ Hi Josh, welcome to Blender.se. I believe your question may be borderline, but still valid for this site. (Thanks for taking the tour.) I have edited your question a bit and condensed it to only the most crucial information. Have I removed anything vital? If yes, please edit it back in again. Although this style of writing may seem impersonal, it will help others answer your question and find information more quickly. $\endgroup$
    – Leander
    Commented Mar 11, 2020 at 22:47
  • $\begingroup$ As your question is also about shading (using textures in a material), it would help if you added the render-engine as a tag (EEVEE, Workbench, Internal, Cycles ...) $\endgroup$
    – Leander
    Commented Mar 11, 2020 at 22:48
  • $\begingroup$ Thank you @Leander for helping me making my question more efficient! I added just a few words. Let's see what the community can do with it :) Thank you! $\endgroup$
    – JoshBadert
    Commented Mar 11, 2020 at 23:19

2 Answers 2

0
$\begingroup$

Easiest way of solving that problem is to

Firstly, Bake the Textures from the modeled object that you've created.

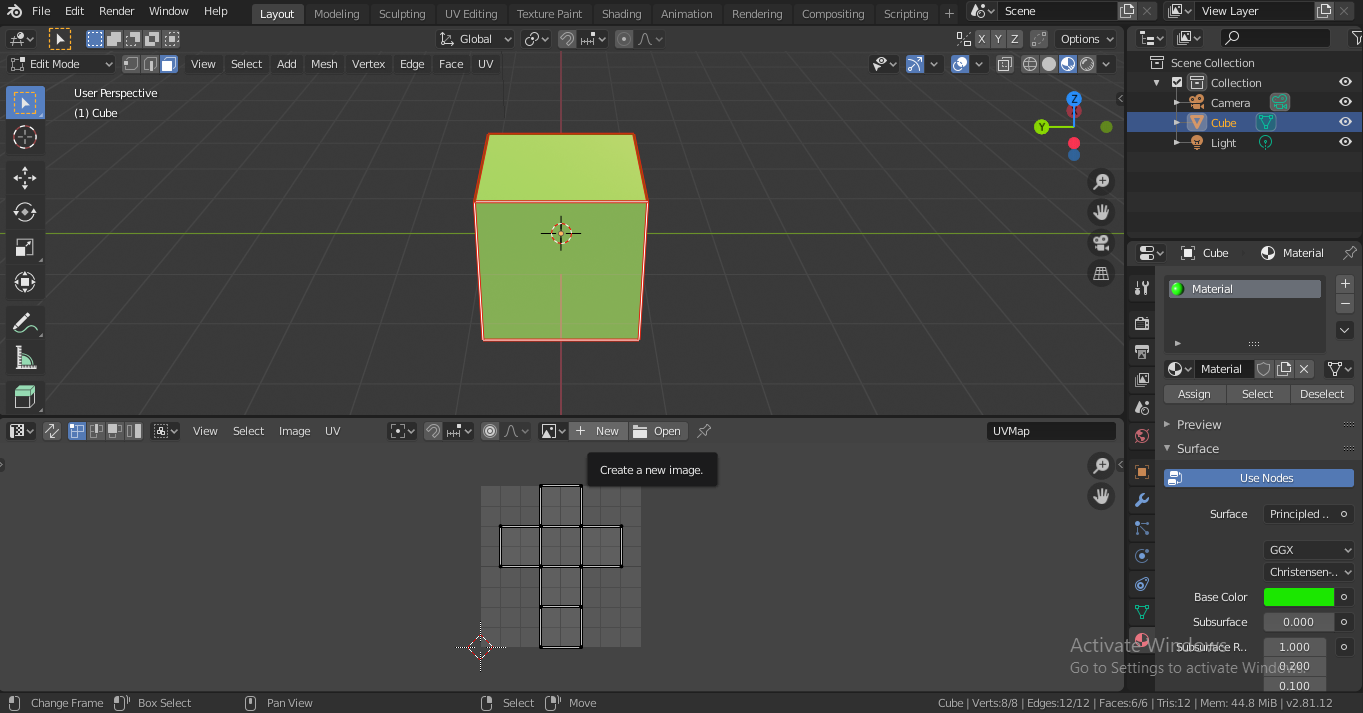
Select the 3d object. And goto "Editmode" and mark seam Ctrl+E-->"Markseam" then U-->Unwrap. Then open your "UV Editor" to check your unwraped mesh.

If you have no knowleadge about unwrapping mesh without overlaping check out this links

Painting a dog with texture paint, TOTAL NOOB

https://www.youtube.com/watch?v=scPSP_U858k

enter image description here

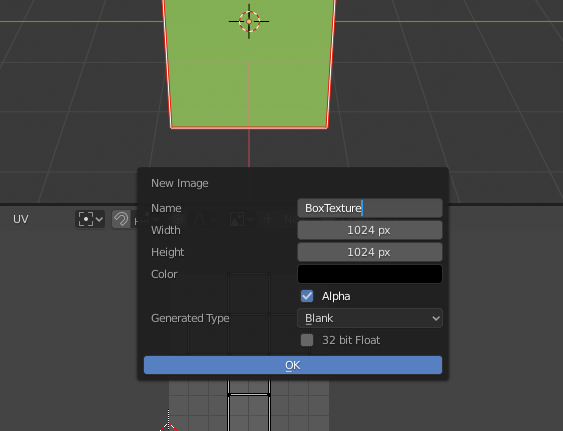
Now, create new Image for your unwrapped mesh to bake the textures in. enter image description here

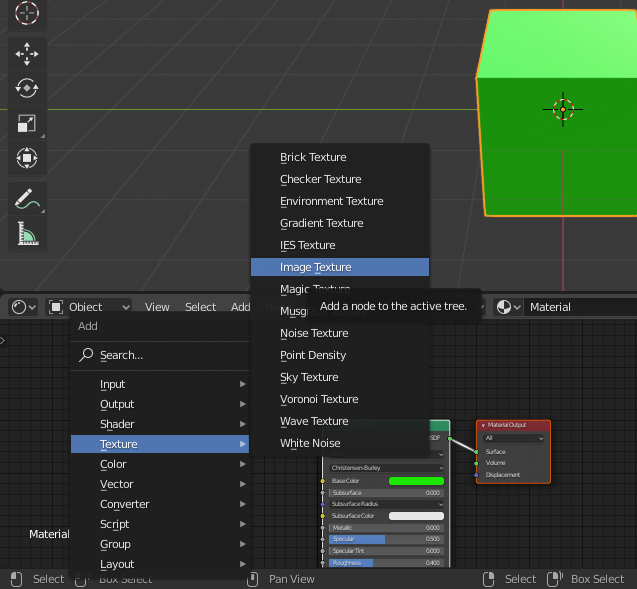
Now, goto "Shader Editor" and create new "Image Texture" Node by Ctrl+A--> Texture --> Image Texture. enter image description here

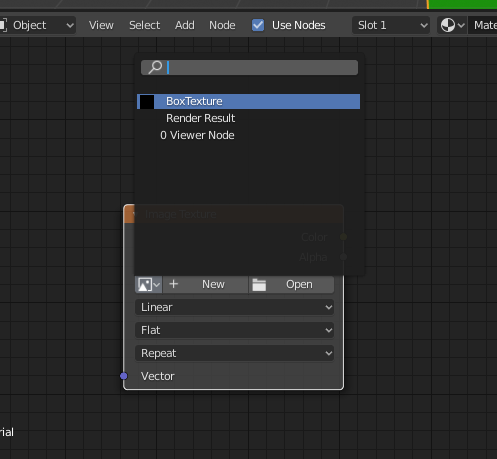
Now, select the Texture Image that you've created for your mesh, in your newly created Image Texture Node. and Select the just the Image texture "node". enter image description here

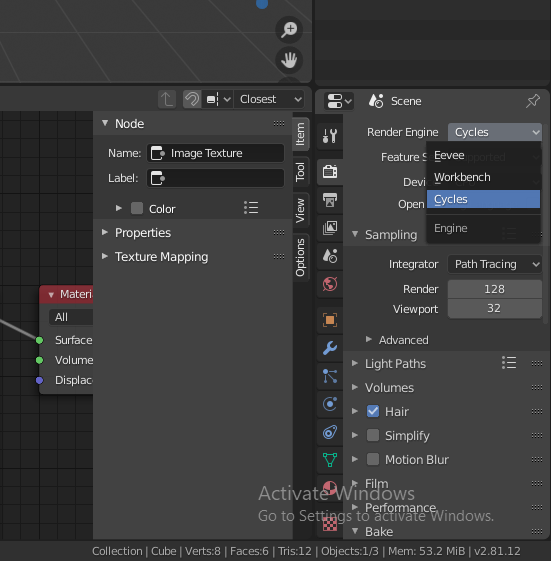
Goto the Scene and select Cycles Engine. enter image description here

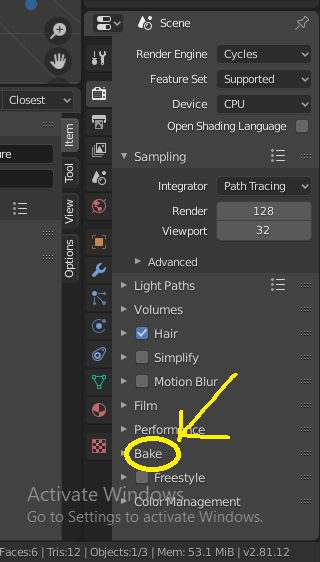
Now, goto the bake menu

enter image description here

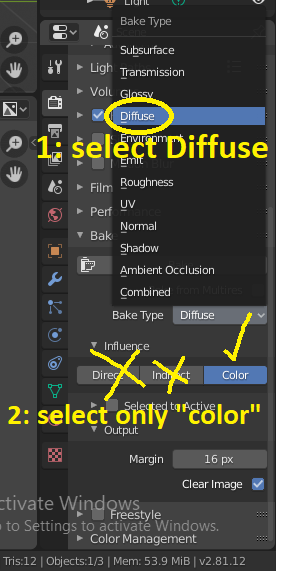
Select the bake type --> Diffuse and just check the "color" option.

enter image description here

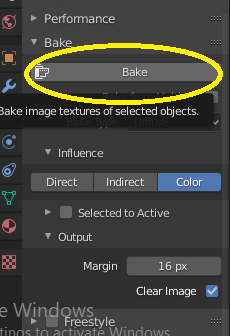
Now, goto "Object mode" and Hit "Bake" button under bake menu.

enter image description here

------------Wait for it to bake the texture.---------------

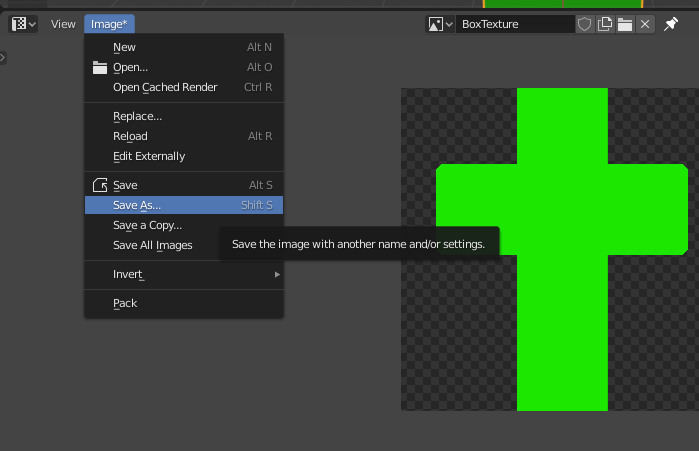
Now save your texture and open it in "Photoshop". enter image description here

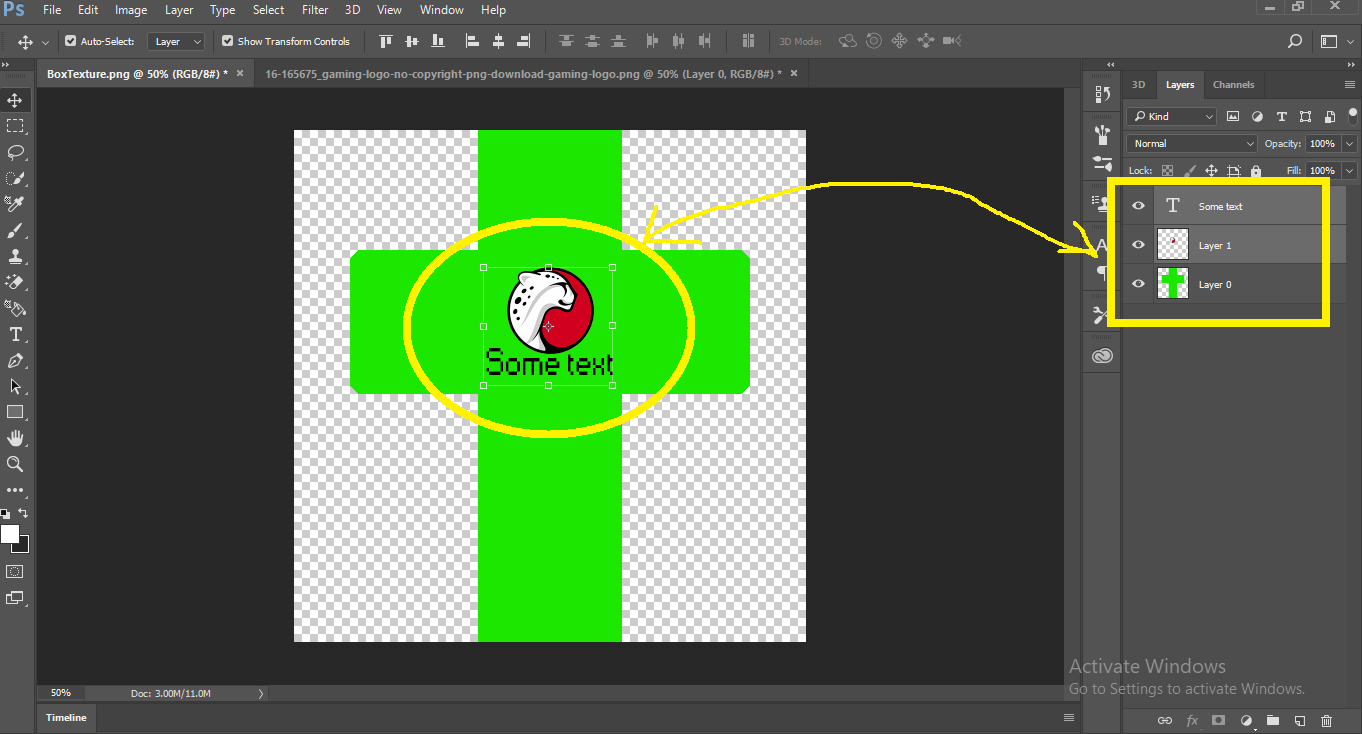
Now open both the saved texture file and the logo png file in Photoshop or other photo editing tools. In my case I've used Photoshop to add the logo to the texture.

Now, save the edited texture(or) image file.

enter image description here

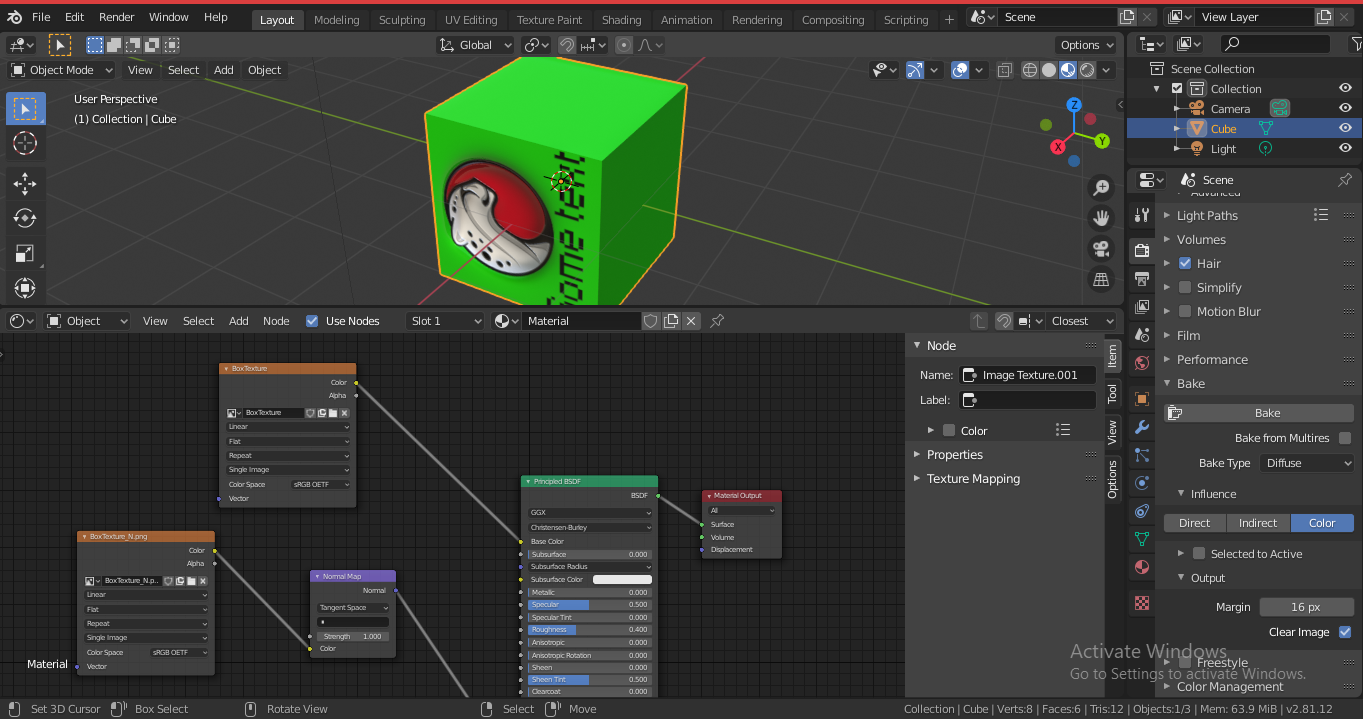
Now, if you'd open the edited image/texture file into the blender and plug it to your mesh you'll see something like this.

enter image description here

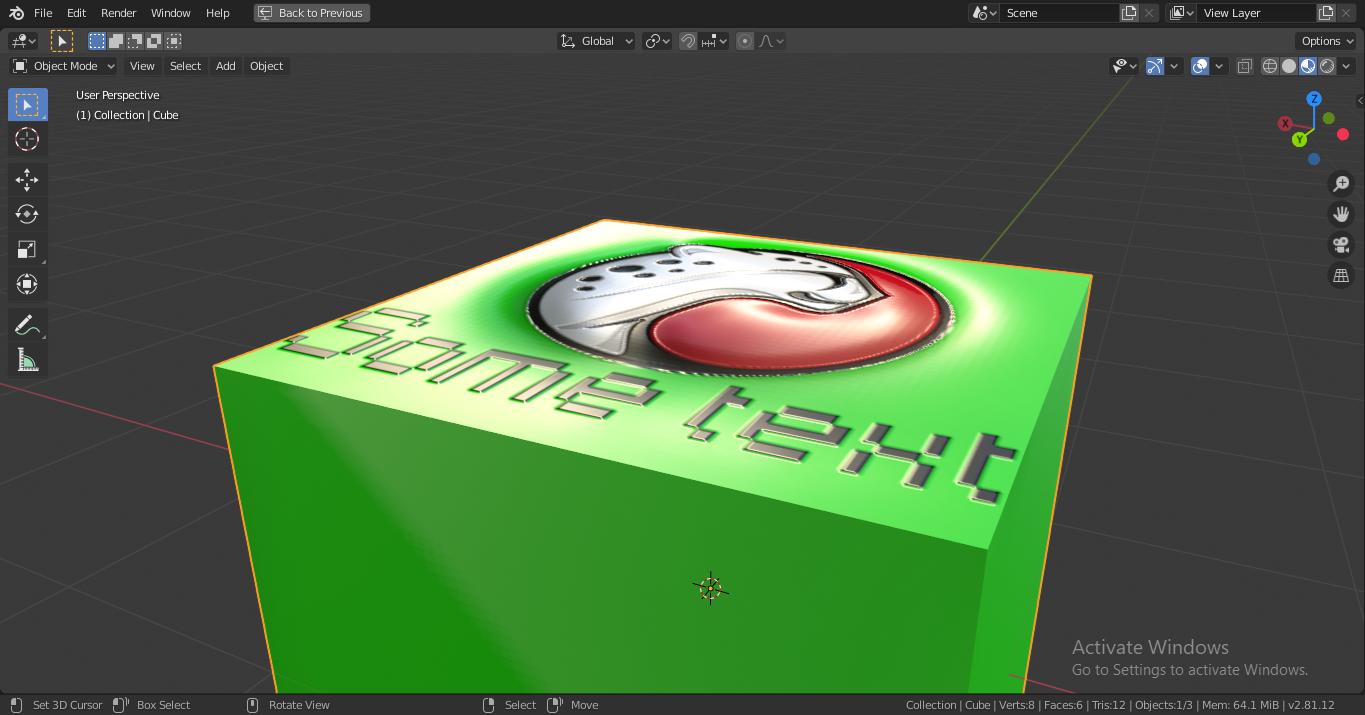
But I've even created and added a Normal map of the diffuse map to get a bump effect of the logo. enter image description here

$\endgroup$
8
  • $\begingroup$ Thank you Akai for the detailed answer! The situation that I'm in is more like: I have the model, I built a material and haven't applied any texture to the object yet. Except a noise texture node, that I sent through a bump node to get that rough grainy texture that I want all over that material. So I want the logo to not affect the whole surface of the material. Would you approach this the same way? Just then in photoshop make the background Alpha instead of green like you did? Or is there a more direct way? $\endgroup$
    – JoshBadert
    Commented Mar 12, 2020 at 10:20
  • $\begingroup$ how about using substance painter for texture creation and also adding the logo? I always use it to create detailed and realistic textures. $\endgroup$ Commented Mar 12, 2020 at 12:51
  • $\begingroup$ I was actually just researching how other software would solve this. I found this video about substance painter. That's basically exactly how I imagine the solution. I select my image file and just paste it on the 3D object. Just like in this video at 2:30 youtube.com/… Is that not possible in Blender? $\endgroup$
    – JoshBadert
    Commented Mar 12, 2020 at 13:53
  • $\begingroup$ youtube.com/watch?v=VnfTSXWF21A ...Hope this helps you! $\endgroup$ Commented Mar 12, 2020 at 15:19
  • $\begingroup$ There you go! That's exactly the solution I imagined! Is there a reason why you would choose "your" method over that method? Is there a downside to the stencil method? $\endgroup$
    – JoshBadert
    Commented Mar 13, 2020 at 7:58
1
$\begingroup$

So for everybody looking for a solution for that situation as well. There are two ways (probably even more) to solve it:

  1. The one that Akai explains in his post very detailed
  2. The one that is explained in this video https://www.youtube.com/watch?v=VnfTSXWF21A

Thanks for the help!

$\endgroup$

You must log in to answer this question.

Not the answer you're looking for? Browse other questions tagged .