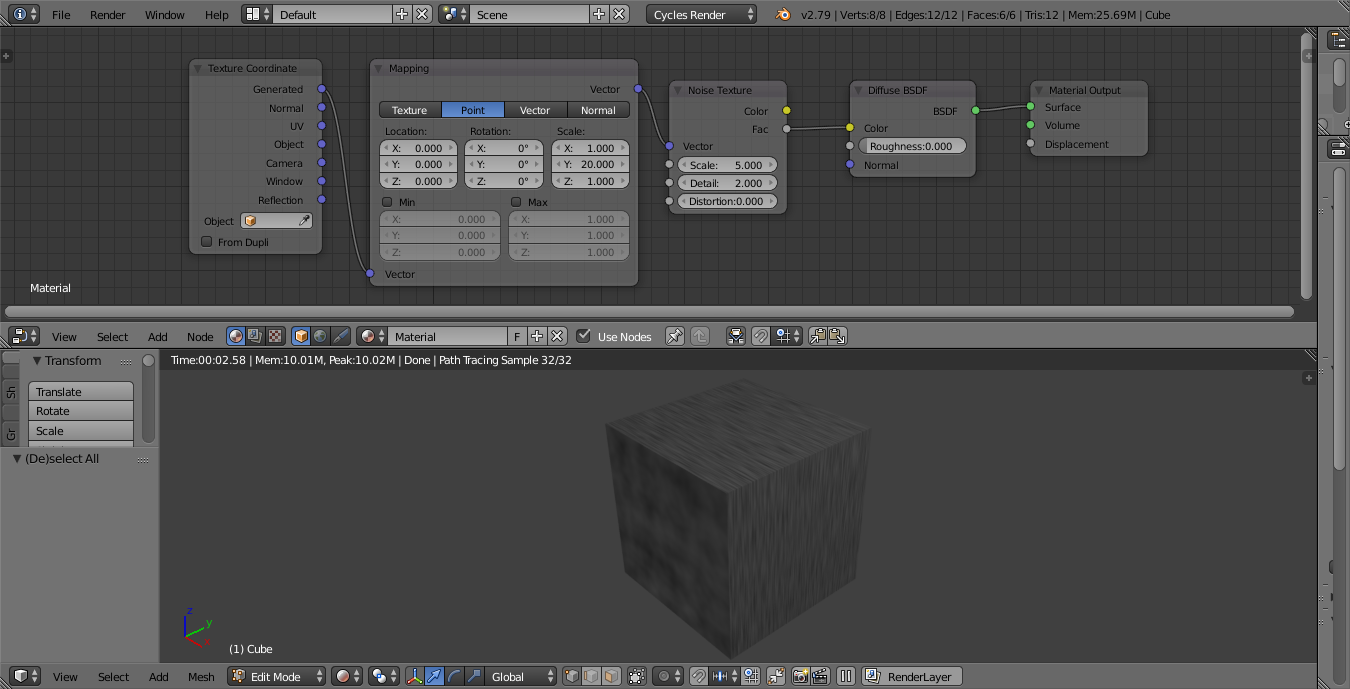
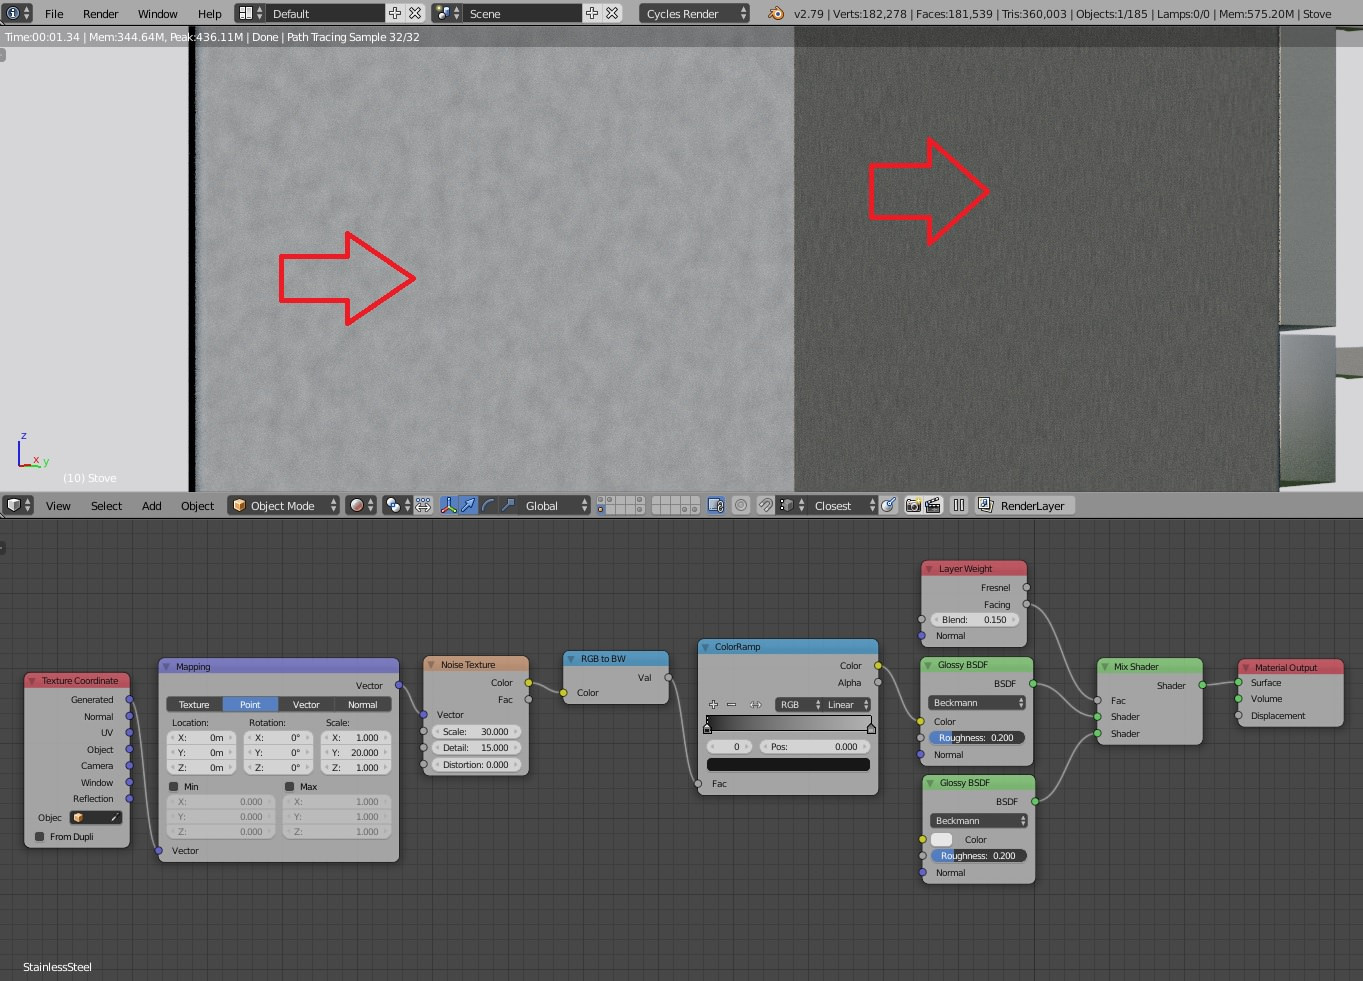
You are using a Mapping node to stretch out or compress the noise to produce a 'brushed steel' effect. Here's a simplified material for demonstration (removing unnecessary nodes while retaining the stretched mapping) :

The Mapping is compressing the noise in the Y-axis so as to produce a 'brushed' effect. This works on some of the faces but not others (note the top and side looking 'brushed' but the 'front' just showing undistorted noise).
This is due to the mapping only affecting the Y axis. Since the 'front' face is aligned with the Y plane it is not affected by the mapping. This is due to Generated coordinates being a '3d' mapping - there is no distinction between faces and the orientation of those faces cannot be controlled individually.
The way to resolve this is to unwrap your model (which you have already done) and you should be using UV coordinates (instead of Generated) as follows :

Using UV coordinates you can adjust the 'direction' of the brushing on each face by changing the UV map to reorientate each face as desired.


