2
$\begingroup$

Recently I was rigging a character which I extract the mesh from another game as a .obj file. When I imported it into Blender, every things was fine.

But after I rigged it with bones and assigned it with Auto weight, then problem happens when I was trying to adjust the pose and check out the weights.

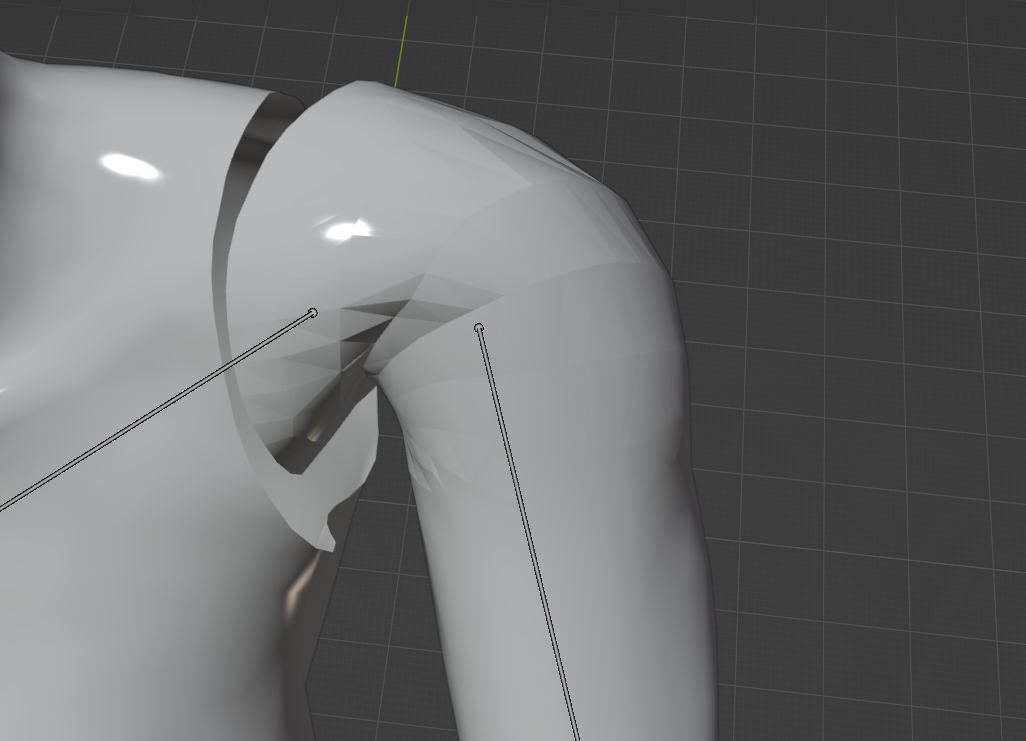
The problem is, when I changed the pose, the mesh becomes unsmooth, little flat surfaces appears, like the shoulder in the image below (I rotated the shoulder bone).

What should I do to keep my mesh smooth? Is this has something to do with normals?

It seems that this problem has nothing to do with bone weights. Because whenever I deform my mesh, those flat surfaces appear (for example, when I drag some vertex in the edit mode that causes deformation).

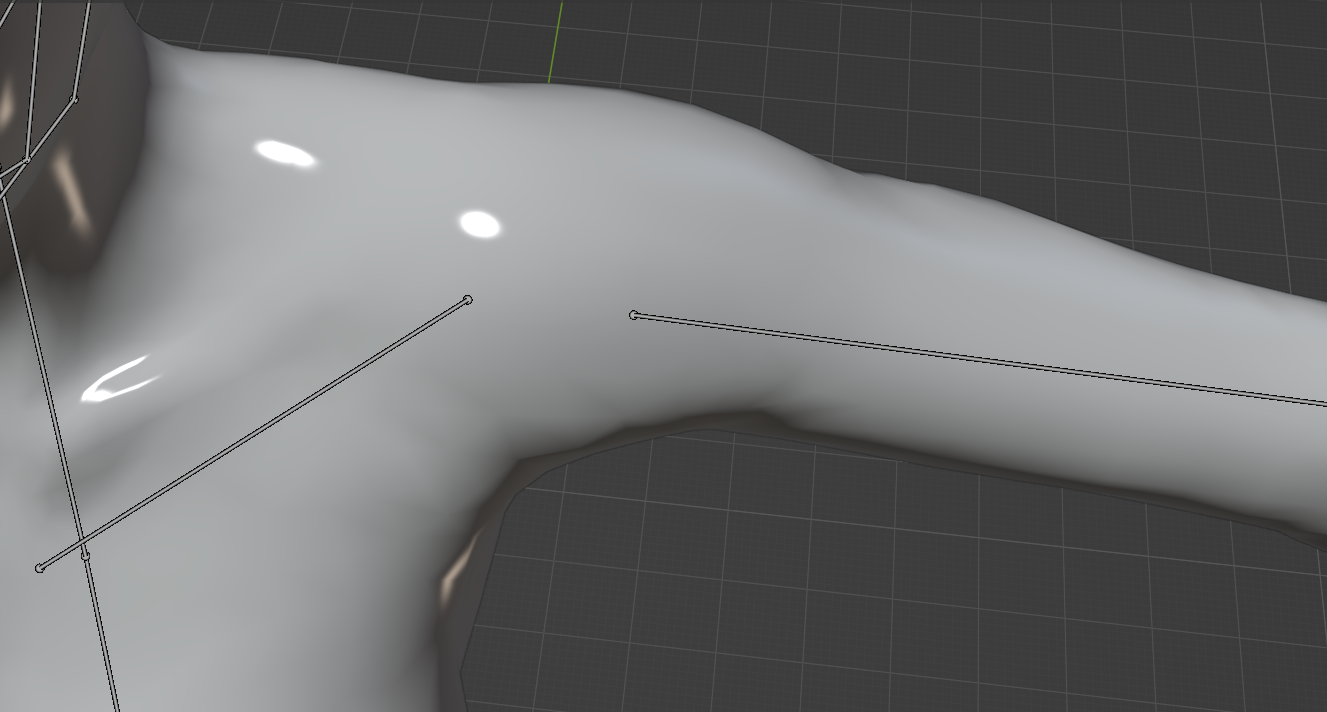
Before

After

$\endgroup$
2
  • $\begingroup$ Consider using Rigify's animation rig (rig) and not the meta rig (metarig). The meta rig is used to adjust the bone structure to the mesh. It won't help you much with animation and facial expressions. The animation rig is created with the Generate Rig button. It will not work for your meta rig because you separated the teeth and mouth bones for some reason. There are also a few bones misaligned which will cause errors. I recommend watching a Rigify tutorial. $\endgroup$
    – Blunder
    Commented Dec 15, 2022 at 19:35
  • $\begingroup$ Thanks for the advise, and yes, I have been watching some tutorials about Rigify plugin. But seems Rigify is not what I need, because I am targeting UE5, so it seems that I only need deform bones for later creating control rig in UE5. I created a bone controlling eye movement in this file, but when I imported .fbx into UE5, it's not working the same way in blender. @Blunder $\endgroup$
    – scjjwan
    Commented Dec 16, 2022 at 1:53

1 Answer 1

4
$\begingroup$

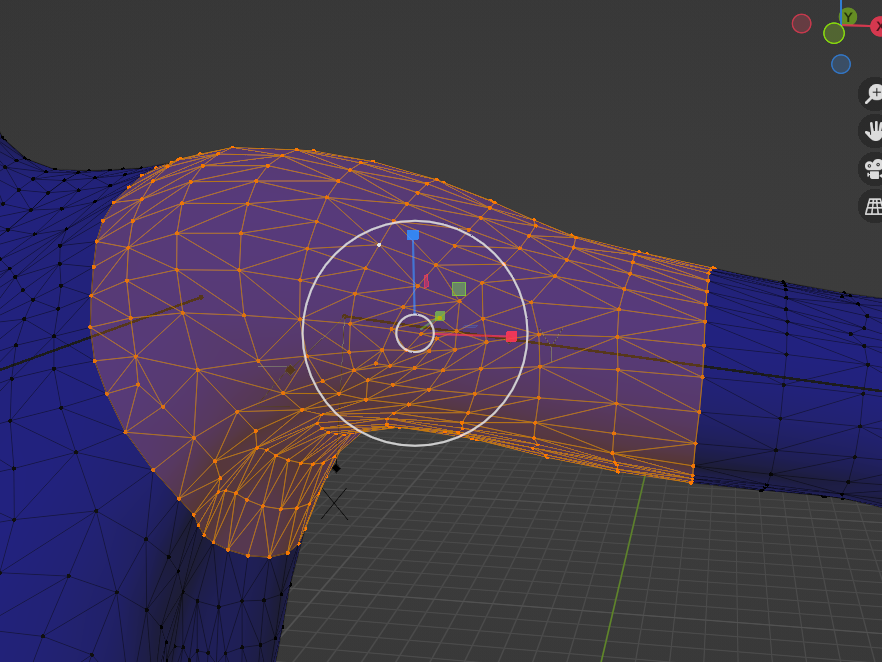
It looks like your Blender mesh is separated into different parts for some reason. You can check if a mesh is divided into separate objects by entering Edit Mode and pressing Ctrl + Numpad +.

By doing this, you will see that your mesh ends and continues on another mesh. You can solve this by entering edit mode, selecting all with A, and pressing M to merge by distance.

enter image description here

I would clear the parent first so you get the automatic weight paints. Select the mesh, press Alt + P > Keep Transform.

After that, redo the parenting by selecting the mesh first, then the bones, and pressing Ctrl + P for automatic weight painting.

Now the whole mesh should be affected.

Just a tip on the side:

It looks like you enabled auto-smooth shading. This is a good feature, but not the best for soft-body shadings. I'd recommend you press W and just select the Shade Smooth option. (Not Shade Auto Smooth)

This feature is better for hardsurface models, etc.

$\endgroup$
2
  • $\begingroup$ Thanks a lot for your answer! $\endgroup$
    – scjjwan
    Commented Dec 15, 2022 at 13:20
  • 1
    $\begingroup$ Changing to Shade Smooth mode solved my problem! And also thanks for your elaborate answer about the seperated parts. As for this mesh, I intentionally keeped the mesh parts seperated that way for later painting bone weights manually. $\endgroup$
    – scjjwan
    Commented Dec 15, 2022 at 13:47

You must log in to answer this question.

Not the answer you're looking for? Browse other questions tagged .