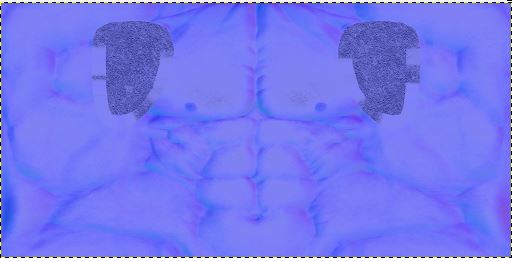
I'm new to Blender and I'm trying to combine the head and body from two models I downloaded, the model I want to use the body for has separate textures, normal maps, roughness maps and specule maps for each body part and as long as only the textures are used there are some seams but they are not very visible.
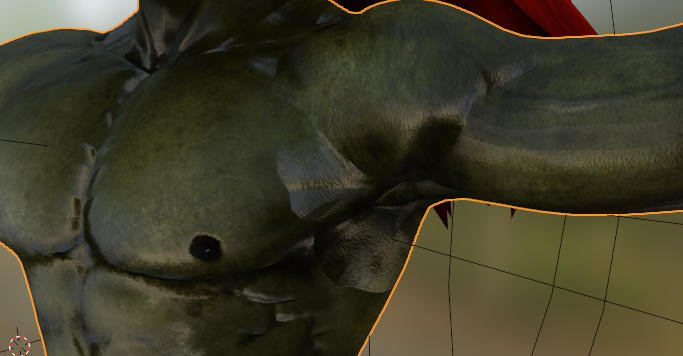
But once I activate the normal, specule and roughness maps the borders between textures become much more prominent.
I'm pretty sure it has to do with the bump map because this is what the bump map looks like directly plugged into output.
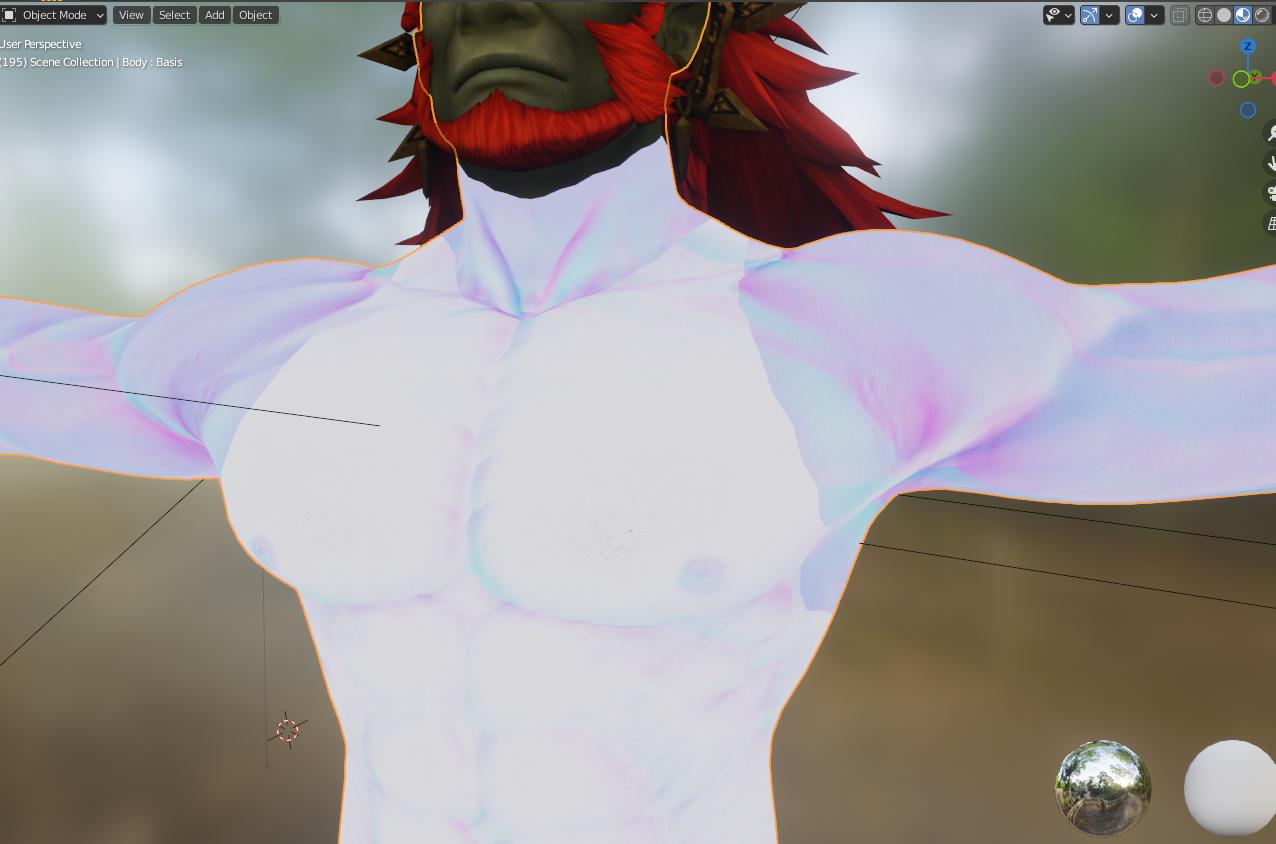 This is the node setup I used for the shaders, they are the same for each body part texture. Not sure if it's fit for purpose, I just imitated it from the original model because that one had a bunch of functions I don't need.
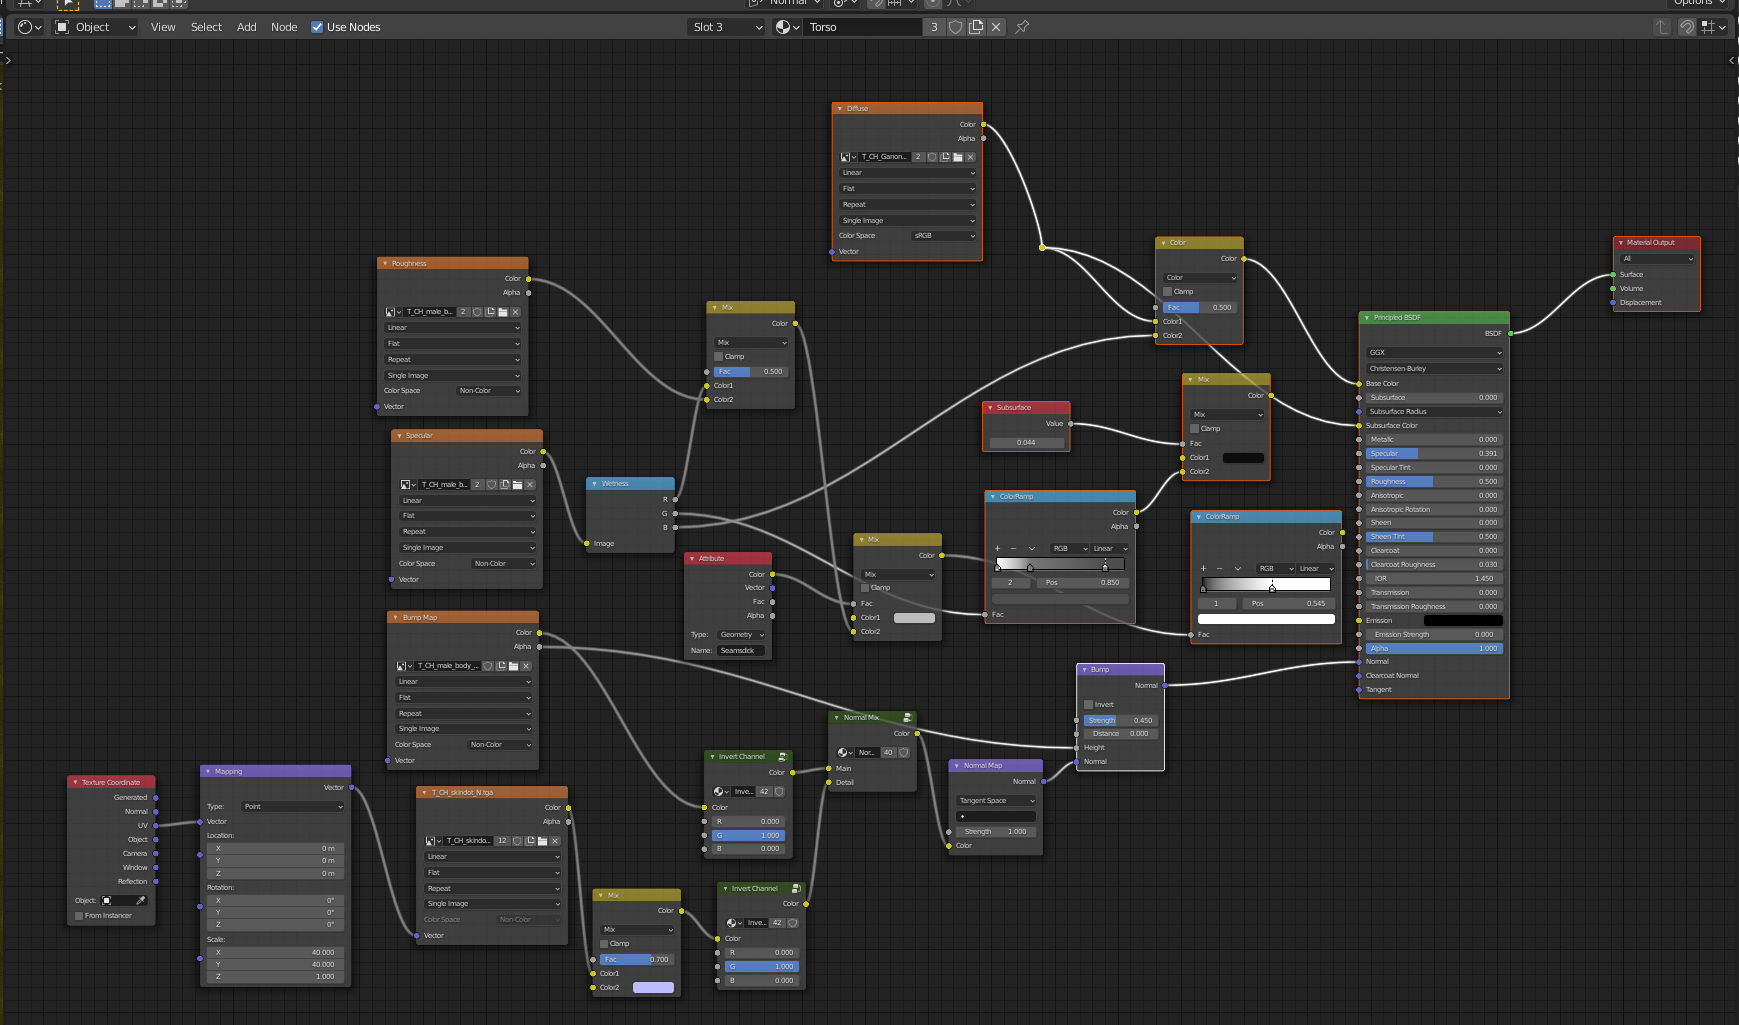 This is the content of the Normal mix group node.
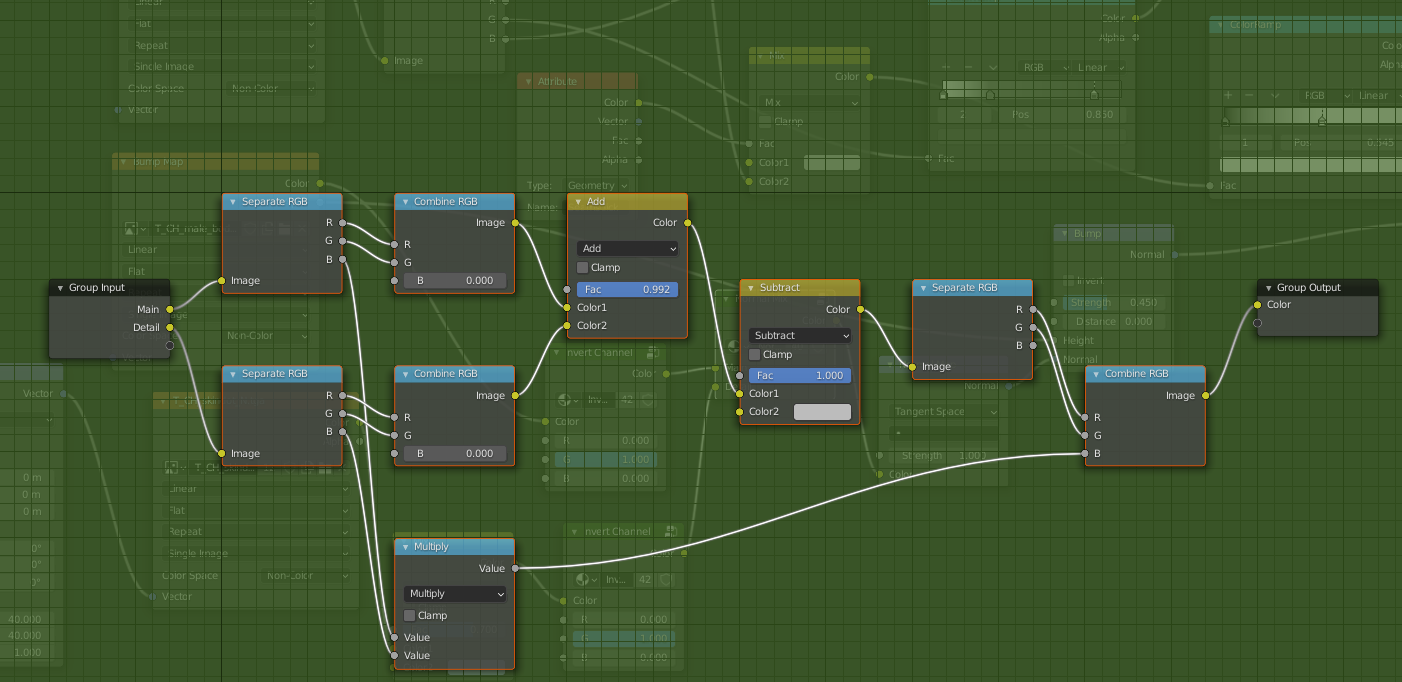 And this the content of the invert group nodes, both are identical.
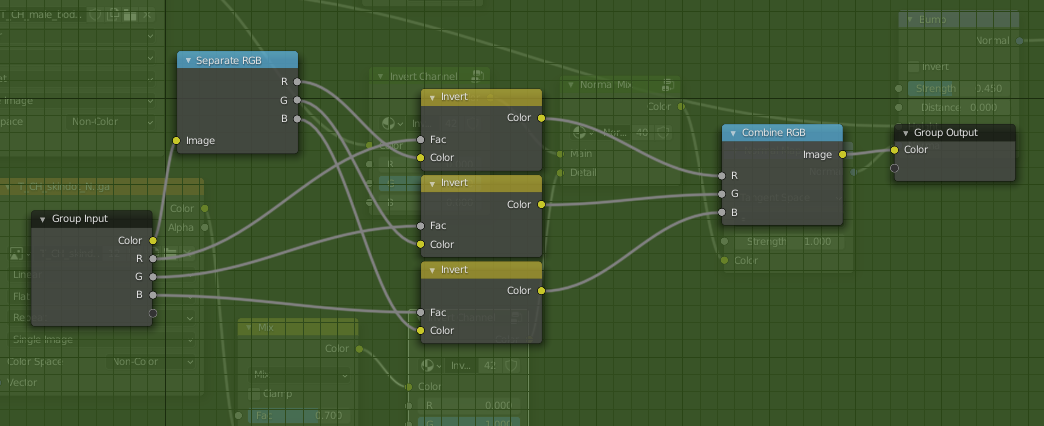 Once I mute the invert group nodes it looks like this.
 This was the original node setup I copied my setup from, not sure if I removed anything essential.
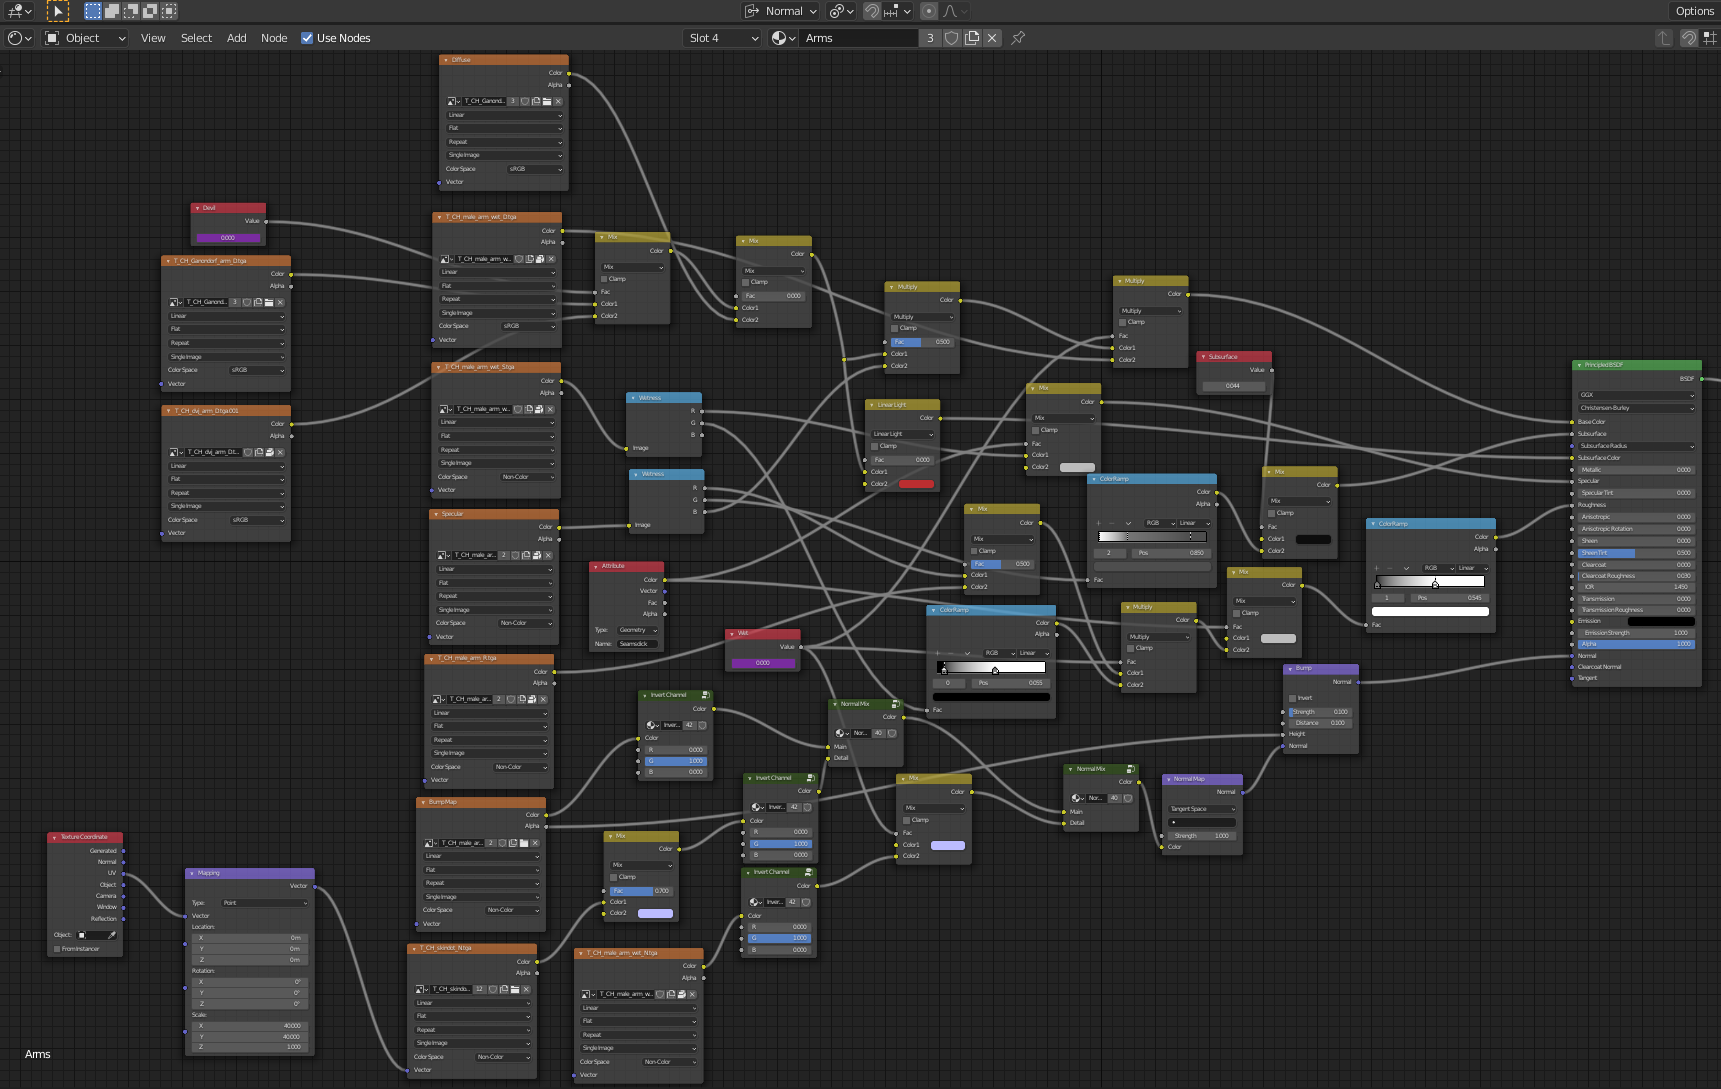 the original setup enabled adding a wet look to the skin but I don't need that so I removed those nodes.
The body part textures look like this.
 And the normal textures like this.
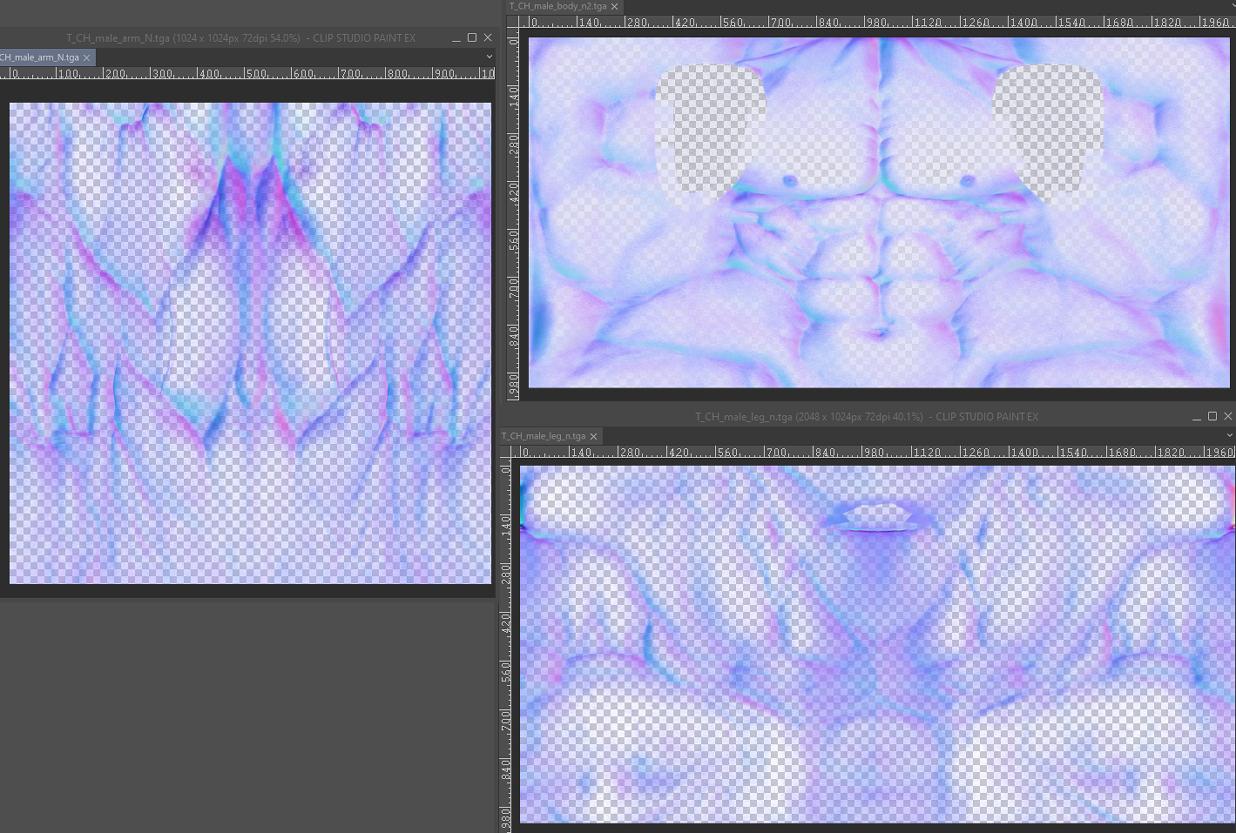 I do not have SubstancePaint so I tried fixing the seams with an image editing software butI can't align them well because the border between arms and torso is in the middle of the torso texture image and not the edge like in the arm texture image.
What I am looking for ideally is a way to unwrap the mesh again but have it pull the texture along so it creates a new image with all the textures that I can then edit, or a way to separate the faces that have the seams on them and export the texture on them as a separate image for editing. Or any other way to fix this that I simply don't know about.
You can download the blender file here.
Any help would be greatly appreciated.
-
1$\begingroup$ Does this answer your question? Visible seams on tangent normal maps. Try both answers as there are a couple of ways this can happen and it could be either. $\endgroup$– SazeracCommented Aug 16, 2021 at 2:53
-
$\begingroup$ @Sazerac Sadly that didn't fix it. : P It seems to be cuz the normal map images are not continuous with each other but I can't fix that in an image editing program because the border between arms and torso is in the middle of the torso texture image and not the edge like in the arm texture image. Is there maybe a way to unwrap the mesh again but have it pull the texture along so it creates a new image I can then edit? Or can I separate the faces with the seams and export the texture on them as a separate image for editing? At any rate, thanks for your help! ^^ $\endgroup$– ClayPitaCommented Aug 18, 2021 at 14:53
-
$\begingroup$ Can you show just the normal map texture and what model looks like with just it plugged into the shader with the normal map node? $\endgroup$– SazeracCommented Aug 19, 2021 at 0:05
-
$\begingroup$ @Sazerac Sure thing I added the images, you can see there's a big difference between the torso and the arms and neck but I don't know how to fix it, I tried texture paint mode but it still creates the weird seam. : P $\endgroup$– ClayPitaCommented Aug 19, 2021 at 0:55
-
$\begingroup$ There are 2 formats of normal maps, one for DirectX and one for OpenGL (that Blender uses). With the 2 Invert Channel nodes your node setup converts a DirectX format into OpenGL. I'm not sure what you exactly did, you wrote: "I just imitated it [the shaders] from the original model *". Shader of model A with textures of model B? So, are you sure your normal map is in the correct (DirectX) format? How does the model look like when you mute/unplug the 2 *Invert Channel node groups? $\endgroup$– BlunderCommented Aug 19, 2021 at 2:34
1 Answer
The image T_CH_male_body_n2.tga seems to be broken. You need a backup or download the model again, hopefully with a valid unchanged image.
The image contains a normal map (RGB values) and a bump map in the (A)lpha channel = RBGA.
If I open T_CH_male_arm_n.tga (the normal maps for the arms) in Gimp then it looks like a valid normal map. The Alpha channel is turned off to get a better impression:
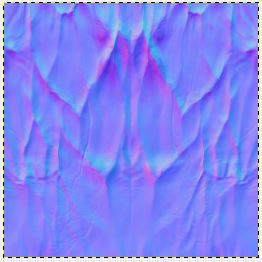
T_CH_male_arm_n.tga - Normal map for the arms
The main color variations here are around the saturated blue, that's #8080FF the value for a "flat" normal.
Now have a look at the map for the torso that is T_CH_male_body_n2.tga:
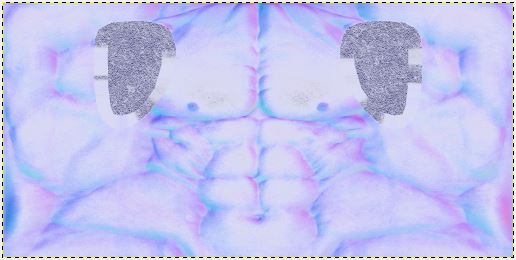
T_CH_male_body_n2.tga - Normal map for the torso. It's very pale!
This image is way too pale for a normal map (transparency is disabled). All these light blue pale areas should be darker. The image should look something like this:
I've adjusted here the values to give you an impression. The map is just for illustration. It's still not right because it lacks cyan and deep purple values.
Unfortunately, normal maps need to be calculated and can't be painted. So I hope you have a backup. If not, you can try to adjust the color (RGB curves) and smear the still visible seams in Blender. But the result will be poor.
Note: For some reason there is a T_CH_male_body_n.tga and a T_CH_male_body_n2.tga. The only difference is that the 'n' version has no bump data, the alpha values are all set to 1.
-
$\begingroup$ The T_CH_male_body_n.tga is the original image that was included in the blender file when I downloaded it, T_CH_male_body_n2.tga was my attempt at editing it so it would work as a normal map, but I guess it didn't work. :'D But thanks so much for your help, now at least I know where the error is coming from and can try to find a solution. ^^ And cudos for your detailed explanation, really cool people can get answers to their problems from the community here! ^^ $\endgroup$– ClayPitaCommented Aug 22, 2021 at 20:36
-
$\begingroup$ It looks like someone baked out that torso normal map with the wrong colour space settings. Without the original source it would be pretty much impossible to fix. $\endgroup$– SazeracCommented Aug 22, 2021 at 23:36

