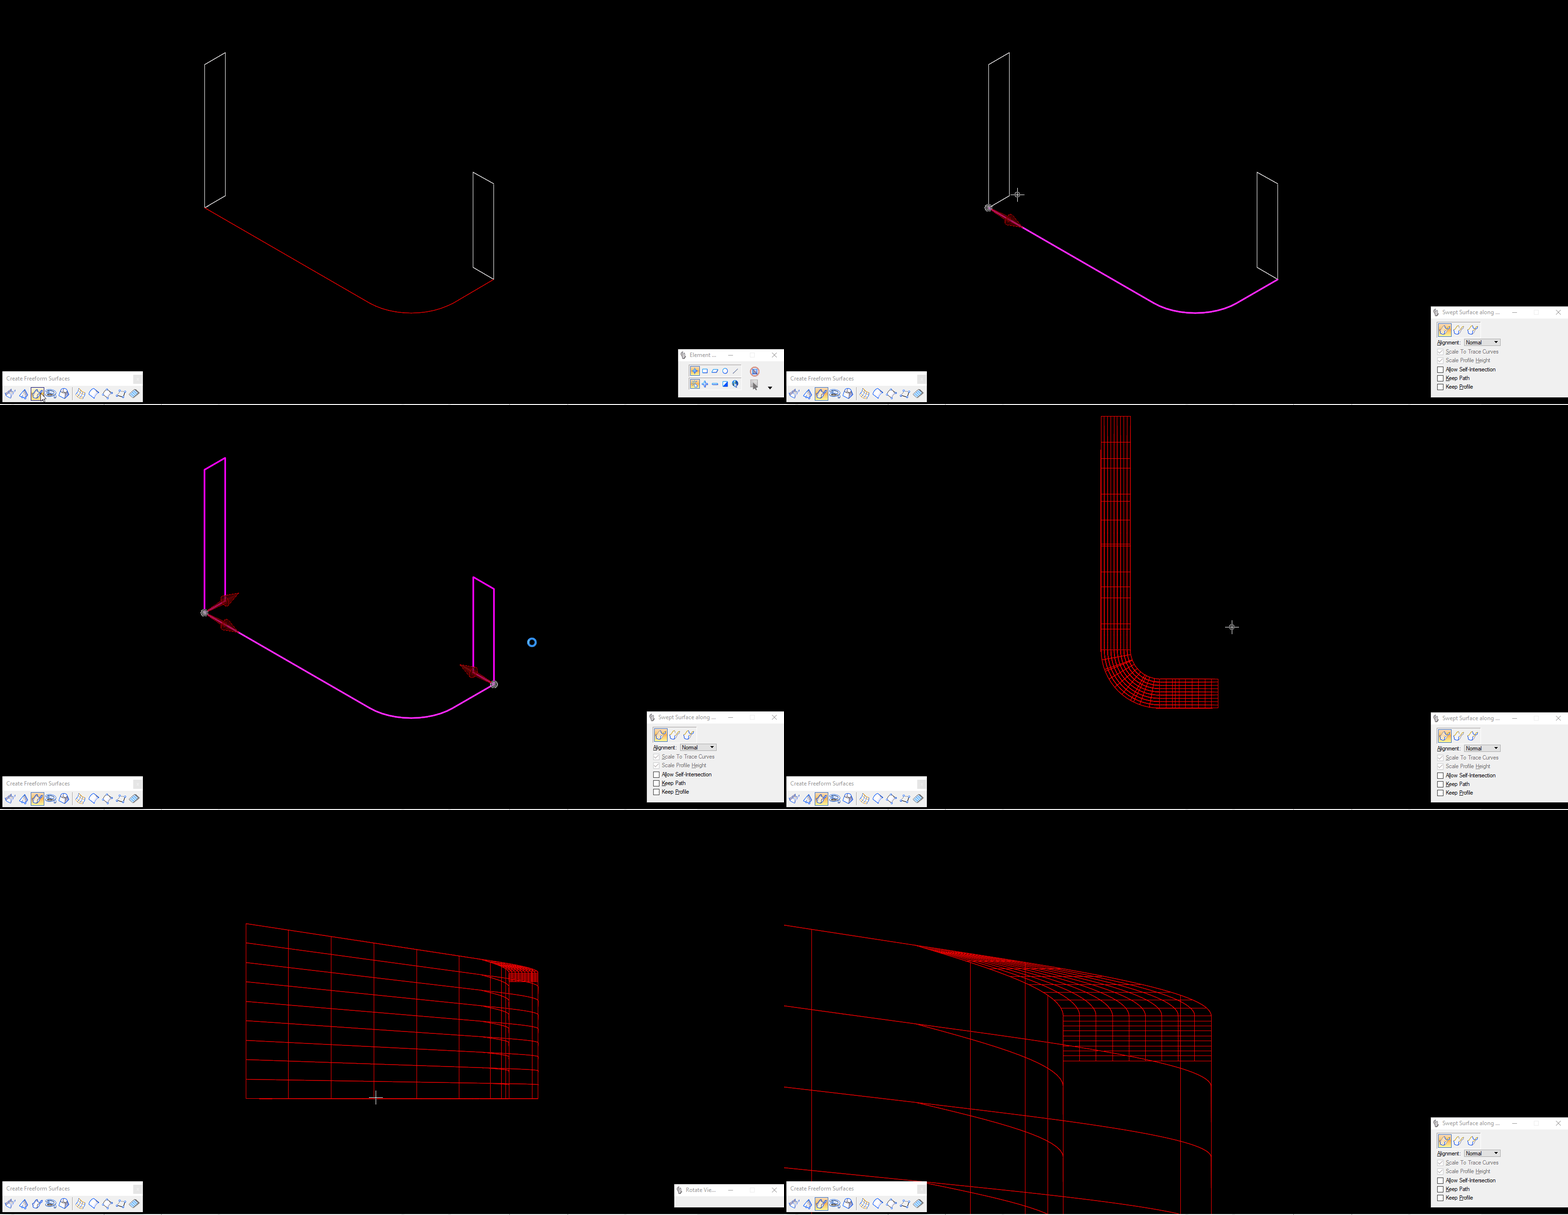
I've asked this elsewhere but have not got a solution yet. The image below show's what I am trying to achieve in Blender but I'm not sure if any of its built-in tools or addons can replicate this workflow. The suggestion's I've been given result in inaccurate geometry and I'm seeking a solution as per the below image.
2 Answers
Using Follow path constraint offset
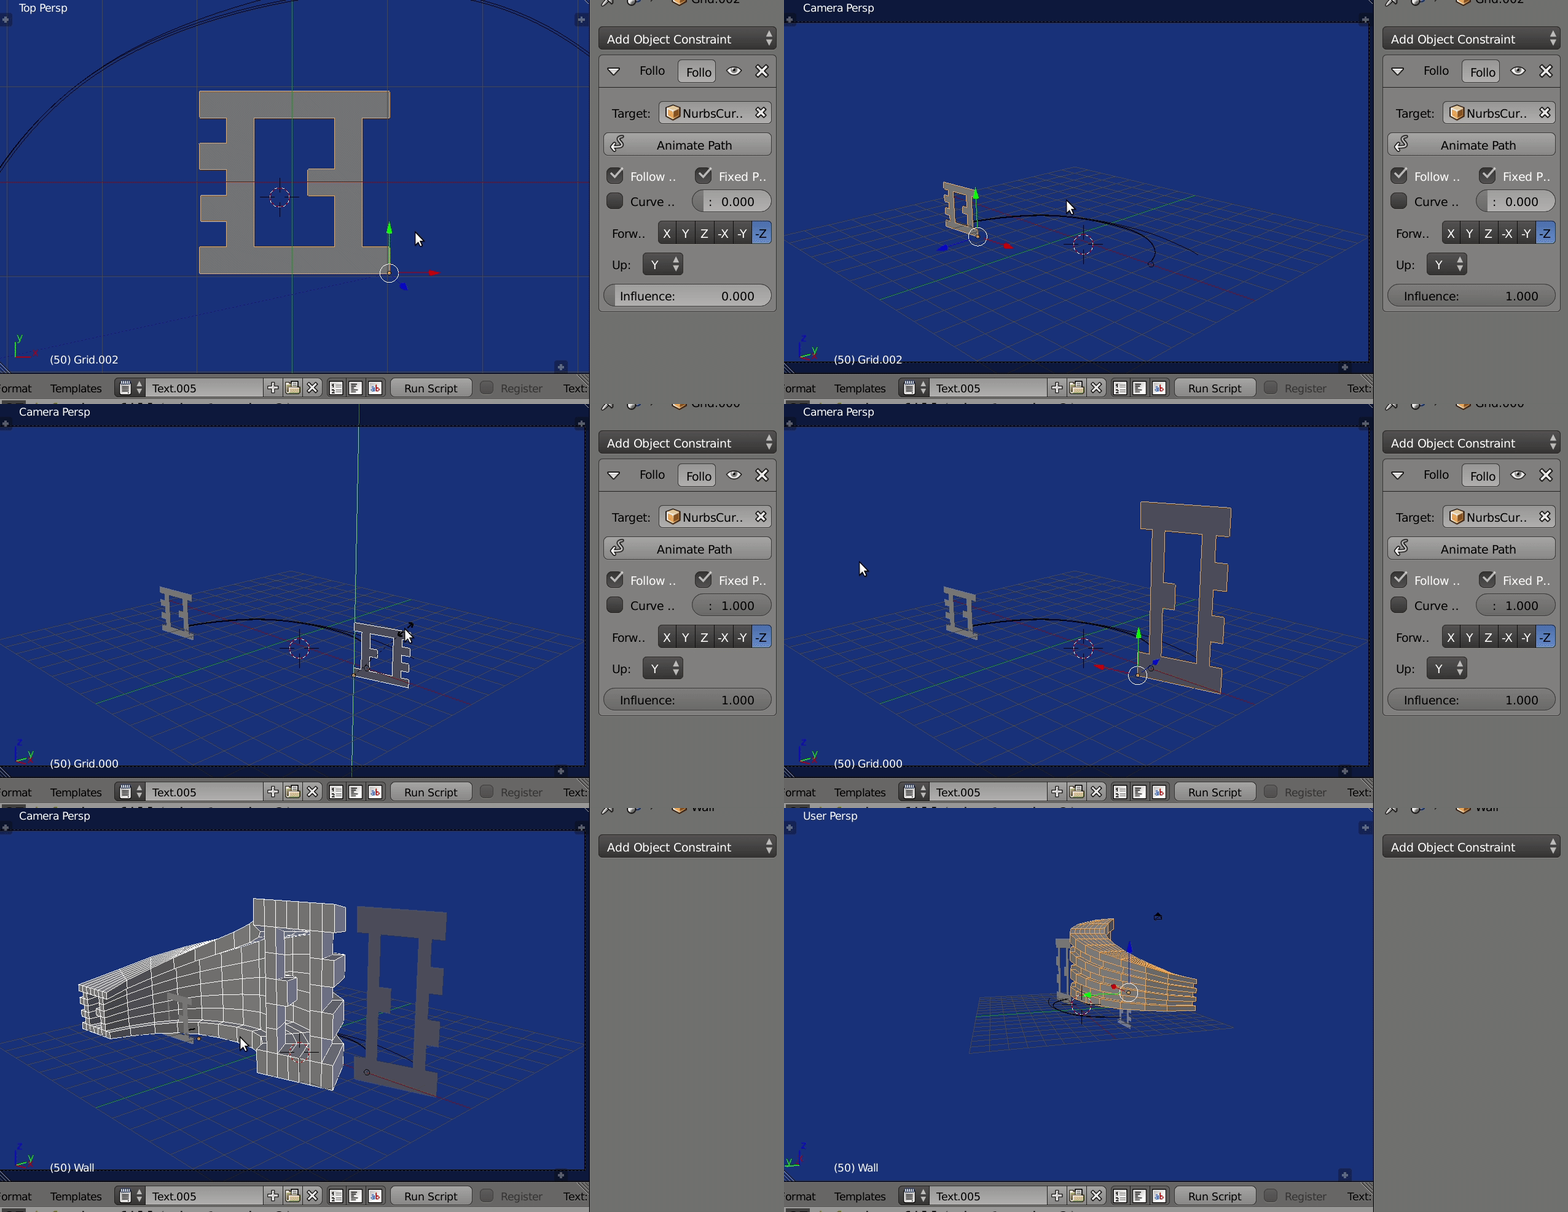
- Add a flat profile mesh on the xy plane, give it a follow path constraint of -Z forward (face normal pointing out) and y up.
- Set to fixed position. One end of curve will be 0 and the other 1. Duplicate the profile mesh and move to another offset on curve.
- Scale either end or both. With both end profiles selected run the script below.
- "Extrudes"
segmentstime around the curve linearly interpolationg from start scale to end scale. Makes a mesh object using the global coordinates of the arranged profile.
EDIT: Update for 2.8x
The script:
import bpy
import bmesh
from mathutils import Vector, Matrix

context = bpy.context
scene = context.scene
dg = context.evaluated_depsgraph_get()
coll = context.collection or scene.collection


def offset(ob):
    return ob.constraints["Follow Path"].offset_factor


ob1, ob2 = sorted(context.selected_objects, key=lambda o: offset(o))
T = ob2.matrix_basis @ ob1.matrix_basis.inverted_safe()
ml2 = ob2.matrix_basis.copy()
start = offset(ob1)
end = offset(ob2)
segments = 10
d_offset = (end - start) / segments
me1 = ob1.data
me = me1.copy()
bm = bmesh.new()
bm.from_mesh(me)
# remove non boundary edges
#bmesh.ops.delete(bm, geom=[e for e in bm.edges if not e.is_boundary and e.link_faces], context='EDGES')
bm.to_mesh(me)
bm.clear()
# build the mesh by sliding ob2


def ring_fill(ring1, ring2):
    for e1, e2 in zip(ring1, ring2):
        bm.faces.new(e1.verts[:] + e2.verts[:][::-1])


bm.from_object(ob1, dg)
bmesh.ops.transform(bm, verts=bm.verts, matrix=ob1.matrix_world)
offset = start  # + d_offset
copy = ob2
copy.data = me
scale2 = ob2.scale.copy()
nring = len(me.vertices)
ring = [e for e in bm.edges if e.is_boundary]

for i in range(segments):
    offset += d_offset
    copy.constraints["Follow Path"].offset_factor = offset
    copy.scale = ob1.scale.lerp(scale2, (offset - start) / (end - start))
    dg.update()
    bm.from_object(copy, dg)
    bmesh.ops.transform(bm, verts=bm.verts[-nring:], matrix=copy.matrix_world)
    next = bm.edges[-len(ring):]
    ring_fill(ring, next)
    ring = next

# reinstate the end (much of the same)
ob2.data = me1
ob2.matrix_basis = ml2
dg.update()
bm.from_object(ob2, dg)
bmesh.ops.transform(bm,
                    verts=bm.verts[-len(me1.vertices):],
                    matrix=copy.matrix_world)
next = [e for e in bm.edges[-len(me1.edges):] if e.is_boundary]
# fill
ring_fill(next, ring)
# recalc normals
bmesh.ops.remove_doubles(bm, verts=bm.verts, dist=1e-7)
bmesh.ops.recalc_face_normals(bm, faces=bm.faces)
ob1.select_set(False)
ob2.select_set(False)
# make new object and link to scene.
ext = bpy.data.meshes.new("Extrusion")
bm.to_mesh(ext)
extrude = bpy.data.objects.new("Wall", ext)
extrude.show_wire = True
extrude.show_all_edges = True
coll.objects.link(extrude)
-
$\begingroup$ a better fill, because it's lower-level? $\endgroup$– Robin Betts ♦Commented Nov 9, 2018 at 19:14
-
1$\begingroup$ The
ring_fillmethod as opposed to the bridge loops bmesh operator. It's quicker and doesn't require the inputs to be loops. $\endgroup$ Commented Nov 10, 2018 at 1:07 -
If you are looking for an identical workflow, I guess you'd need to have it coded as an addon.
If you just look for a clean result:
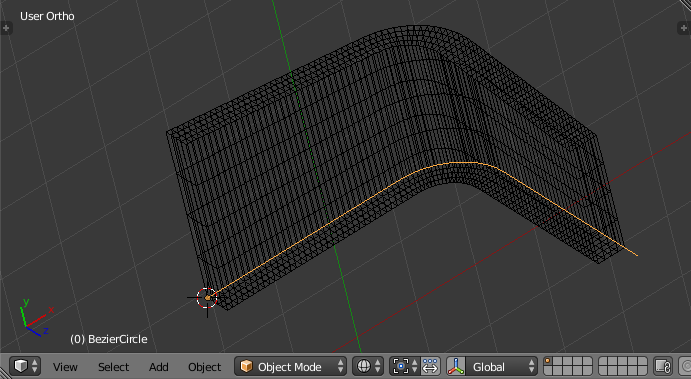
I would use an ordinary mesh and a curve modifier.
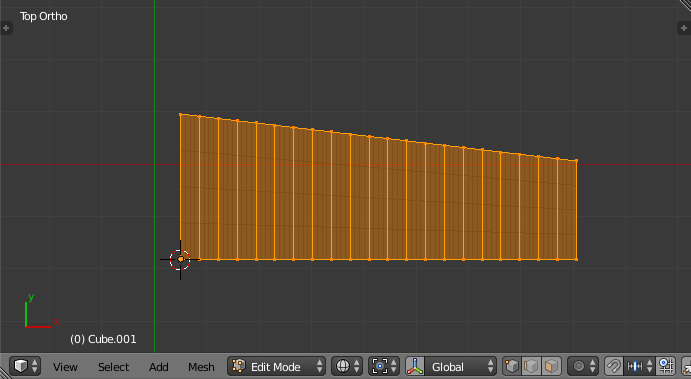
Model the wall without the curve, you could use the bridge tool for that. I positioned the object origin where the curve will be.
Then build the curve so that it's origin sits at the start of the curve.
Place both object origins on top of eachother and make sure their local axes point in the same direction.
After that, give the mesh a Curve Modifier using the curve in question.You might need to switch direction in order to get a good result. With curve modifiers it's all about axes, where the object origins are and the direction of the curve. If that's in alignment, all's well.
And you can change the mesh. You don't have to stick to simple forms.
The result looks pretty similar.
I have put a simple subsurf modifier before the curve modifier to increase resolution. Creates a bit of excess verts though.
-
$\begingroup$ Hey, thanks for the reply. It would be nice it there was a solution as simple as I had shown but I'm happy to work with Blender workflow if it creates the correct geometry. In your example, is the wall a flat plane or does it have depth as well? $\endgroup$ Commented Oct 30, 2018 at 15:55
-
$\begingroup$ you can add depth with a Solidify modifier $\endgroup$ Commented Oct 30, 2018 at 16:17
-
$\begingroup$ Yeah I'm aware of that but it didn't mention it in the workflow if one was used or not and if it was, at which point in the process is it applied e.g. prior to the curve modifier, at the very end? etc... $\endgroup$ Commented Oct 30, 2018 at 16:25
-
$\begingroup$ at the bottom of the modifier stack $\endgroup$ Commented Oct 30, 2018 at 16:32
-
$\begingroup$ I actually used a cube and scaled it in editmode. Or I use a plane and duplicate it. $\endgroup$ Commented Oct 30, 2018 at 16:43


