0
$\begingroup$

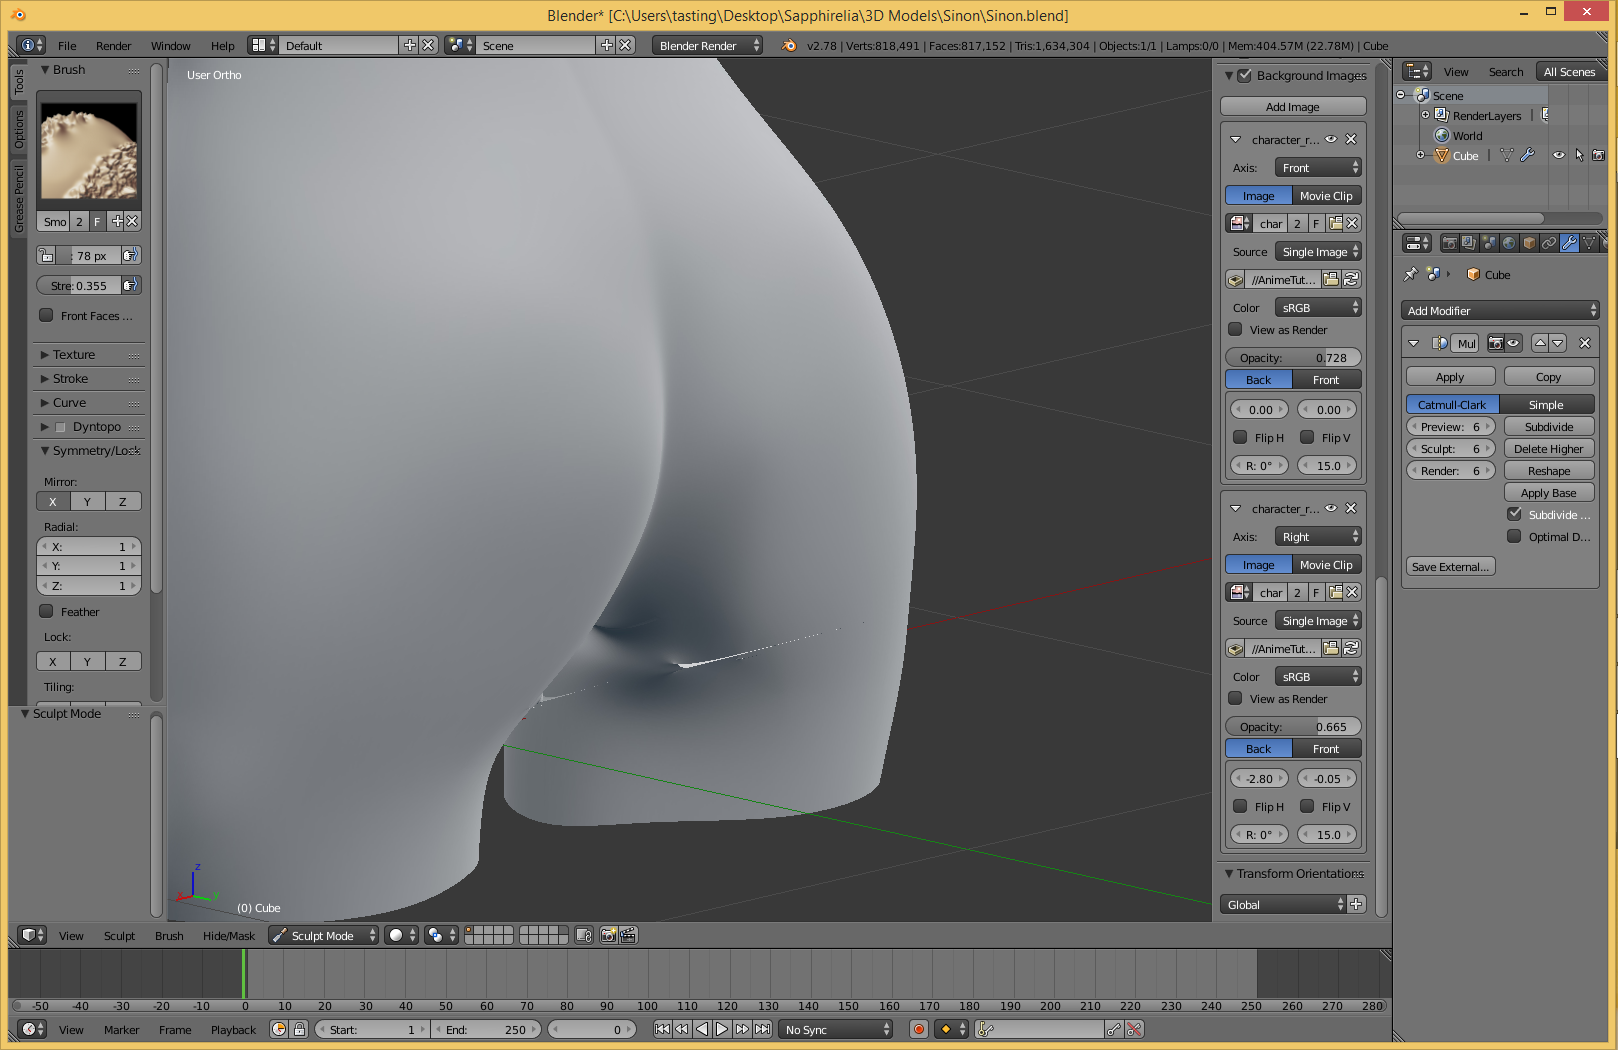
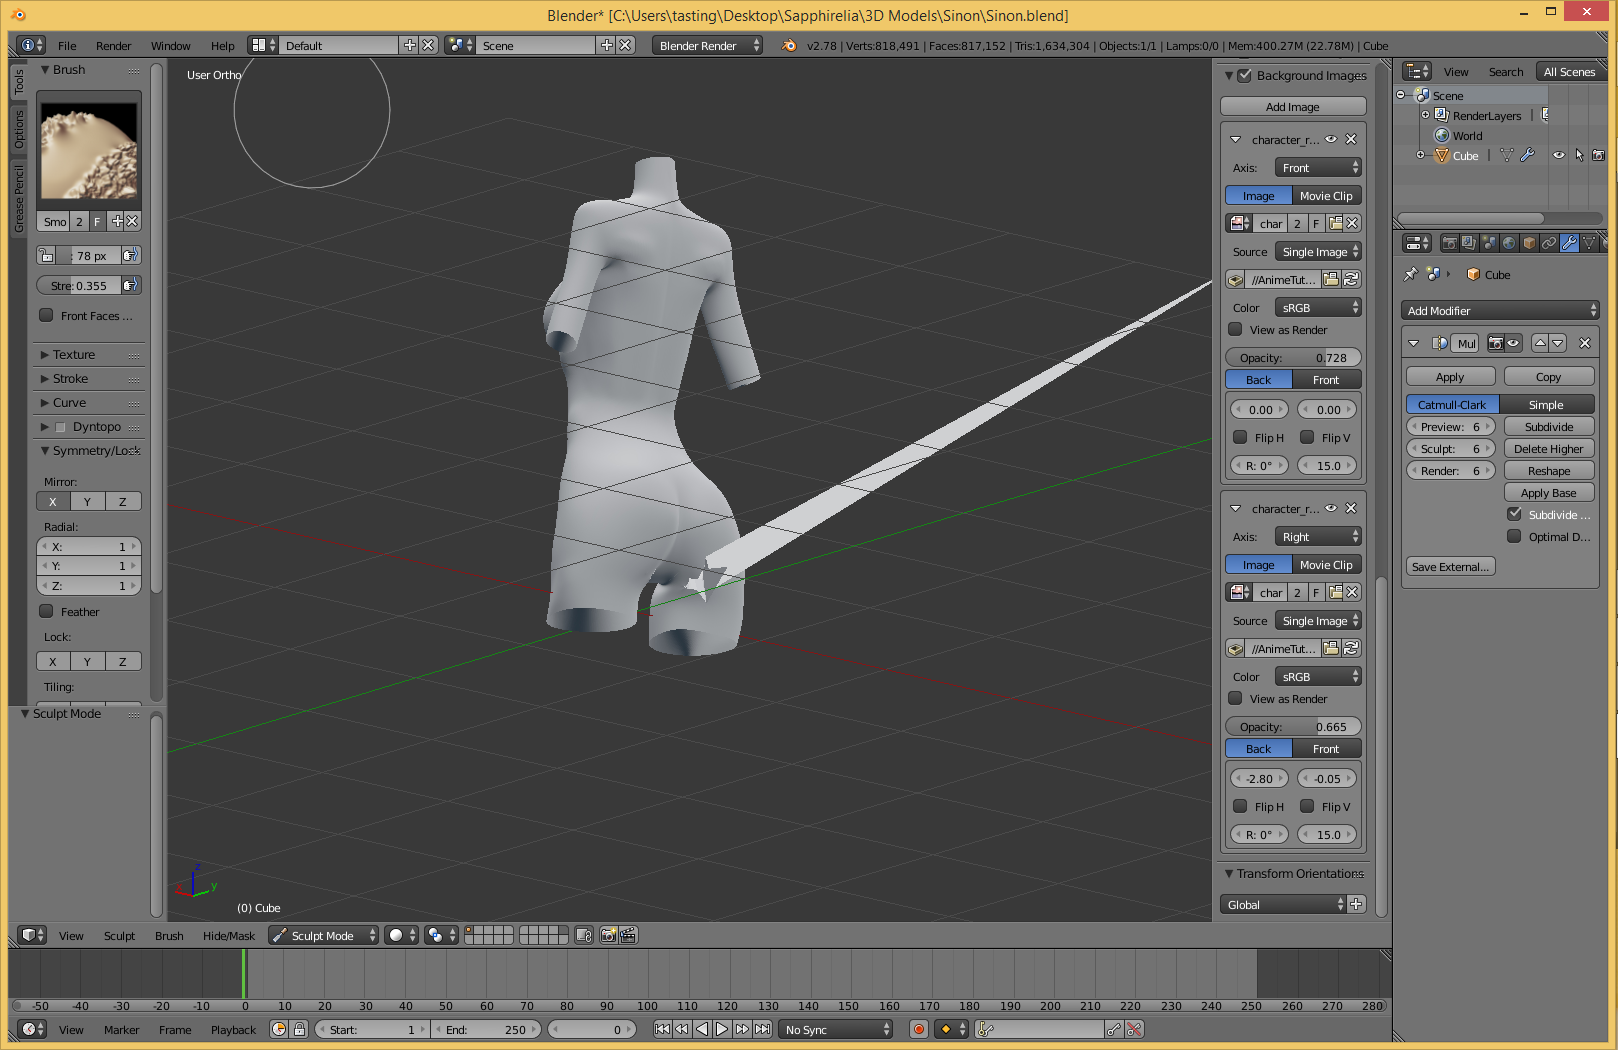
So this is my first 3D model and it's basically an Anime character. I was just done sculpting the front and noticed that the back of the thighs has a weird vertex sticking out of it creating a hole, and any attempt to fix the mesh in Edit Mode just "explodes" the protruding vertices into a jumbled mess of faces behind the model.

the problem

zoom

Is there any way to fix this in sculpt mode or edit mode? Cause as of now moving any vertex around that area in edit mode creates a glitchy mess.

Edit: There's also a similar problem but not as severe at the front where the "flesh" of the thigh creates a crease with the belly, I tried smoothing it at first but it just shaves off the crease and creates a big hole.

$\endgroup$
2
  • $\begingroup$ Avoid fixing errors in sculpt in Edit mode. Use Smooth and Grab brushes to move the bulging spike in place, then smooth that area a bit more. That will remove some details of sculpt but won't produce new errors. $\endgroup$
    – Mr Zak
    Commented Aug 7, 2017 at 12:09
  • $\begingroup$ I've fixed the hole at the front by using the fill tool and re-creasing it alongside the clay strips and draw tools, but the back "spike" is way too narrow to be modified with the grab tool, and as far as I know the end of that spike has been unmovable for me thus far. $\endgroup$ Commented Aug 7, 2017 at 12:13

2 Answers 2

1
$\begingroup$

It's very difficult to tell what might be going on, without more information. If you can attach the .blend file, someone might be able to take a look at it.

Aside from that, there are a whole variety of things that might be going on. Sculpt mode might be "confused" about trying to smooth an inverted crease, or it might be "confused" by a single vertex that's not attached to anything. It doesn't look like you have any other modifiers on the object, but things like like "mirror x" on a mesh that has a mirror modifier can have weird results.

I'd recommend taking a deliberate, methodical approach, to sort out any oddities manually. Firstly, use edit mode to manually move your vertices back into the general vicinity of where they're supposed to be. If you pay attention during this process, it might reveal some clues about what's going on in sculpt mode. You might be able to use Proportional Edit mode to make things a little faster.

I suspect that you will discover some faces that are doing odd things you didn't intend, or edges that are connected in the wrong order, or something like that. Unfortunately, the only way to discover them is to pick individual vertices, and the only alternative is to blow that section away and rebuild it from scratch.

I hope that helps!

$\endgroup$
1
  • $\begingroup$ The thing is, if I touch a single vertex in edit mode, it will just mess up the sculpt from the subdivision surface modifier, and the mess is different in every subdivide number. The only way to fix it would possibly be to start all over with the sculpting, unfortunately. Well, that's 4 hours down the drain. $\endgroup$ Commented Aug 7, 2017 at 22:58
0
$\begingroup$

This is how I go about this kind of problem where Vertices shoot randomly in sculpt mode (assuming there is no problem in edit mode to the mesh). This problem can be solved in sculpt mode without extra steps but sometimes it doesn't.

Steps:

  1. Remove - any physics simulation, rigging, etc. Try to keep only the multires modifier.
  2. Apply multires modifier at the highest level.
  3. Fix the shooting vertices in sculpt
  4. When shooting vertices are gone then apply new multires modifier and "Unsubdivide"(this option is inside the "Subdivision" in multires modifier). This will create subdivisions levels like the last mesh (levels of subdivision depends on the previous version).
  5. If you have shape keys, keep a copy of the original mesh and transfer it later to the corrected mesh.
  6. Always keep a copy of the file or mesh.
$\endgroup$

You must log in to answer this question.

Not the answer you're looking for? Browse other questions tagged .