1
$\begingroup$

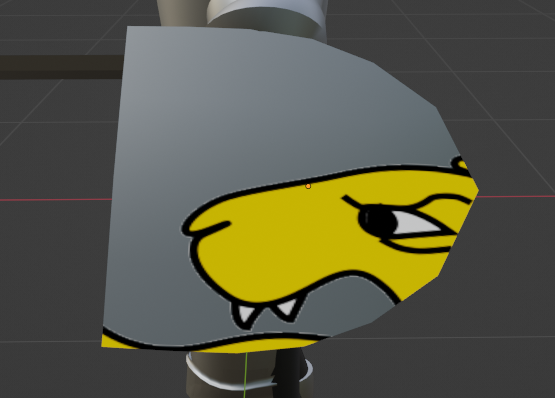
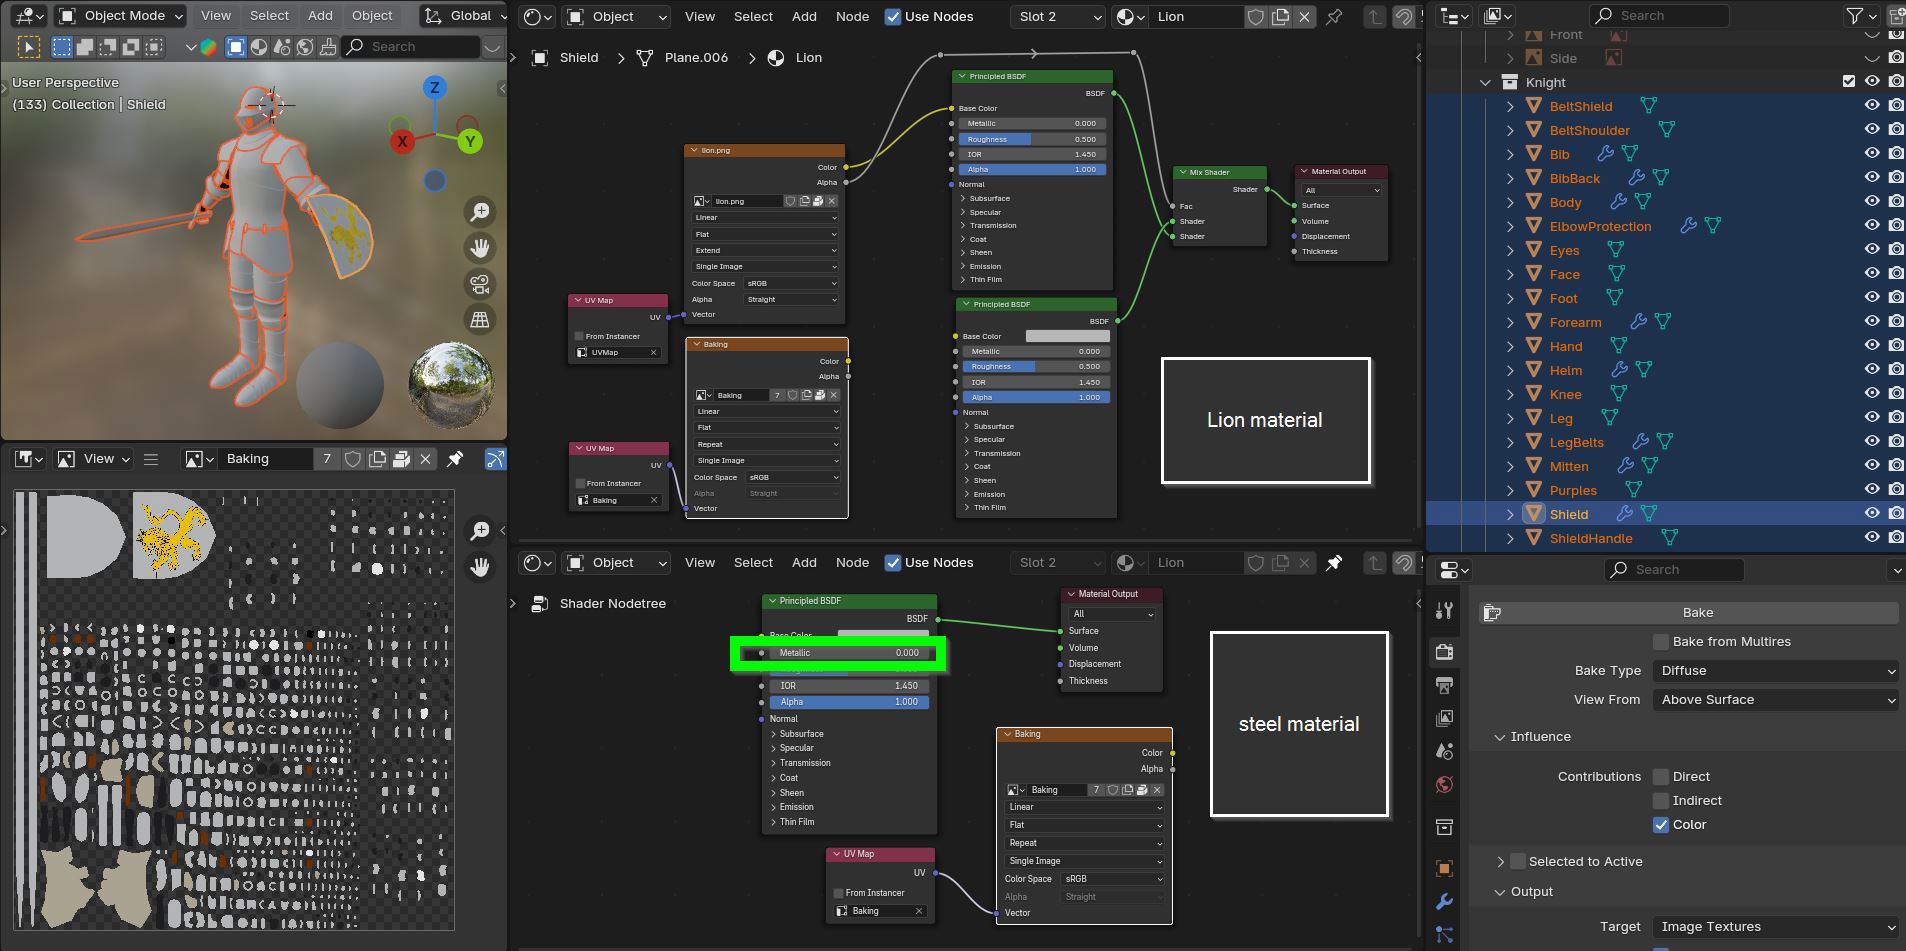
I made a knight model. I placed a png image of a lion on the shield. Other materials are just colors. I need to bake all the materials into one texture for the game engine. But when I did that, the baked texture only contained part of the lion. I think the problem is that the lion image is not scaled for UV map baking. But I don't understand how to fix it.

So the baking result and problems looks like this:

enter image description here

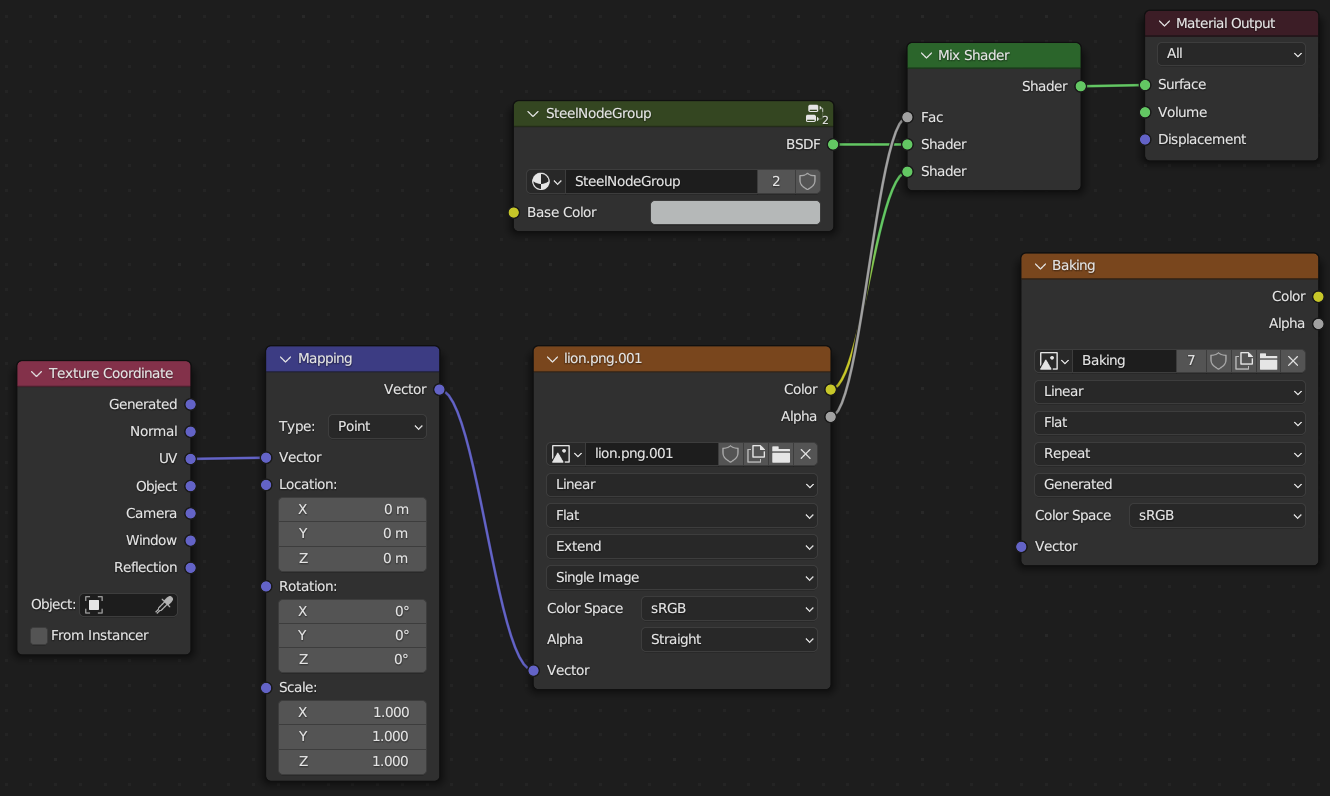
The lion material consists of a png image and a steel material background (SteelNodeGroup). Mapping was used to position the lion on one side only. enter image description here
The default uv map and shield as I want:

enter image description here

The uv map for baking all knight to one texture:

enter image description here

The same uv map but on lion image:

enter image description here

I try to put uv map nodes to material, but result is shield without lion: enter image description here

$\endgroup$
2
  • $\begingroup$ Try this: Select one vertex of the shield in the UV editor, hover over it and hit 'L'. Now you can rotate it using R-90, scale it with 'S' and move it to the correct position with 'G' just like normal modelling. $\endgroup$
    – John Eason
    Commented Aug 22 at 21:00
  • $\begingroup$ This won't fix the current issue, but the Mapping node in that shader is all zeroed, so it is doing nothing. $\endgroup$
    – TheLabCat
    Commented Aug 23 at 3:24

1 Answer 1

2
$\begingroup$

You have correctly created two different UV maps: one for placing the lion on the shield, and one for baking the whole character: in my example they are called respectively "UVMap_Shield_Lion" and "UVMap_Character_and_Shield".

During the baking process you have to tell explicity which UV Map every image should use: if you don't, the default UV map will be always used (the one which has the camera icon enabled in the UV maps list).

Remember to copy and paste the image node in which you want to bake, with its UV map selector node, in every material involved in the baking process, leaving the image node unconnected and selected.

UV map selector nodes

EDIT:

In your file there was some mess in the materials: there was more than one material output nodes (one was contained in the "Steel" node group) and the lion image was directly connected as shader, resulting in an emission component, that didn't get baked in the diffuse pass.

In the steel material, as metallic is 1.0, no diffuse component is present, so if you want a diffuse color to be baked you have to temporarily turn off the metalness slider.

This is the result after cleaning up the materials:

enter image description here

$\endgroup$
11
  • $\begingroup$ Hi. I try this but there is no lion on the shield in the baked texture. Add a screenshot to the end of my question. $\endgroup$
    – Tolfel
    Commented Aug 23 at 18:29
  • $\begingroup$ It should work. Did you bake with Type: "Diffuse" and Influence: "Color" (no Direct, nor Indirect)? All "Baking" image texure nodes have to be selected during baking. If the problem persist use the menu File > External Data > Pack Resources, then upload the file here. $\endgroup$ Commented Aug 24 at 7:36
  • $\begingroup$ Didn't work. Thanks for your help. Link to blend file: drive.google.com/file/d/1-uHMjRO4_MJF6HWwVRLuf42IIVjpUwjm/… $\endgroup$
    – Tolfel
    Commented Aug 24 at 17:45
  • $\begingroup$ An access permission is asked for downloading the file. $\endgroup$ Commented Aug 24 at 18:55
  • $\begingroup$ Update permissions. Sorry. $\endgroup$
    – Tolfel
    Commented Aug 24 at 19:06

You must log in to answer this question.

Not the answer you're looking for? Browse other questions tagged .