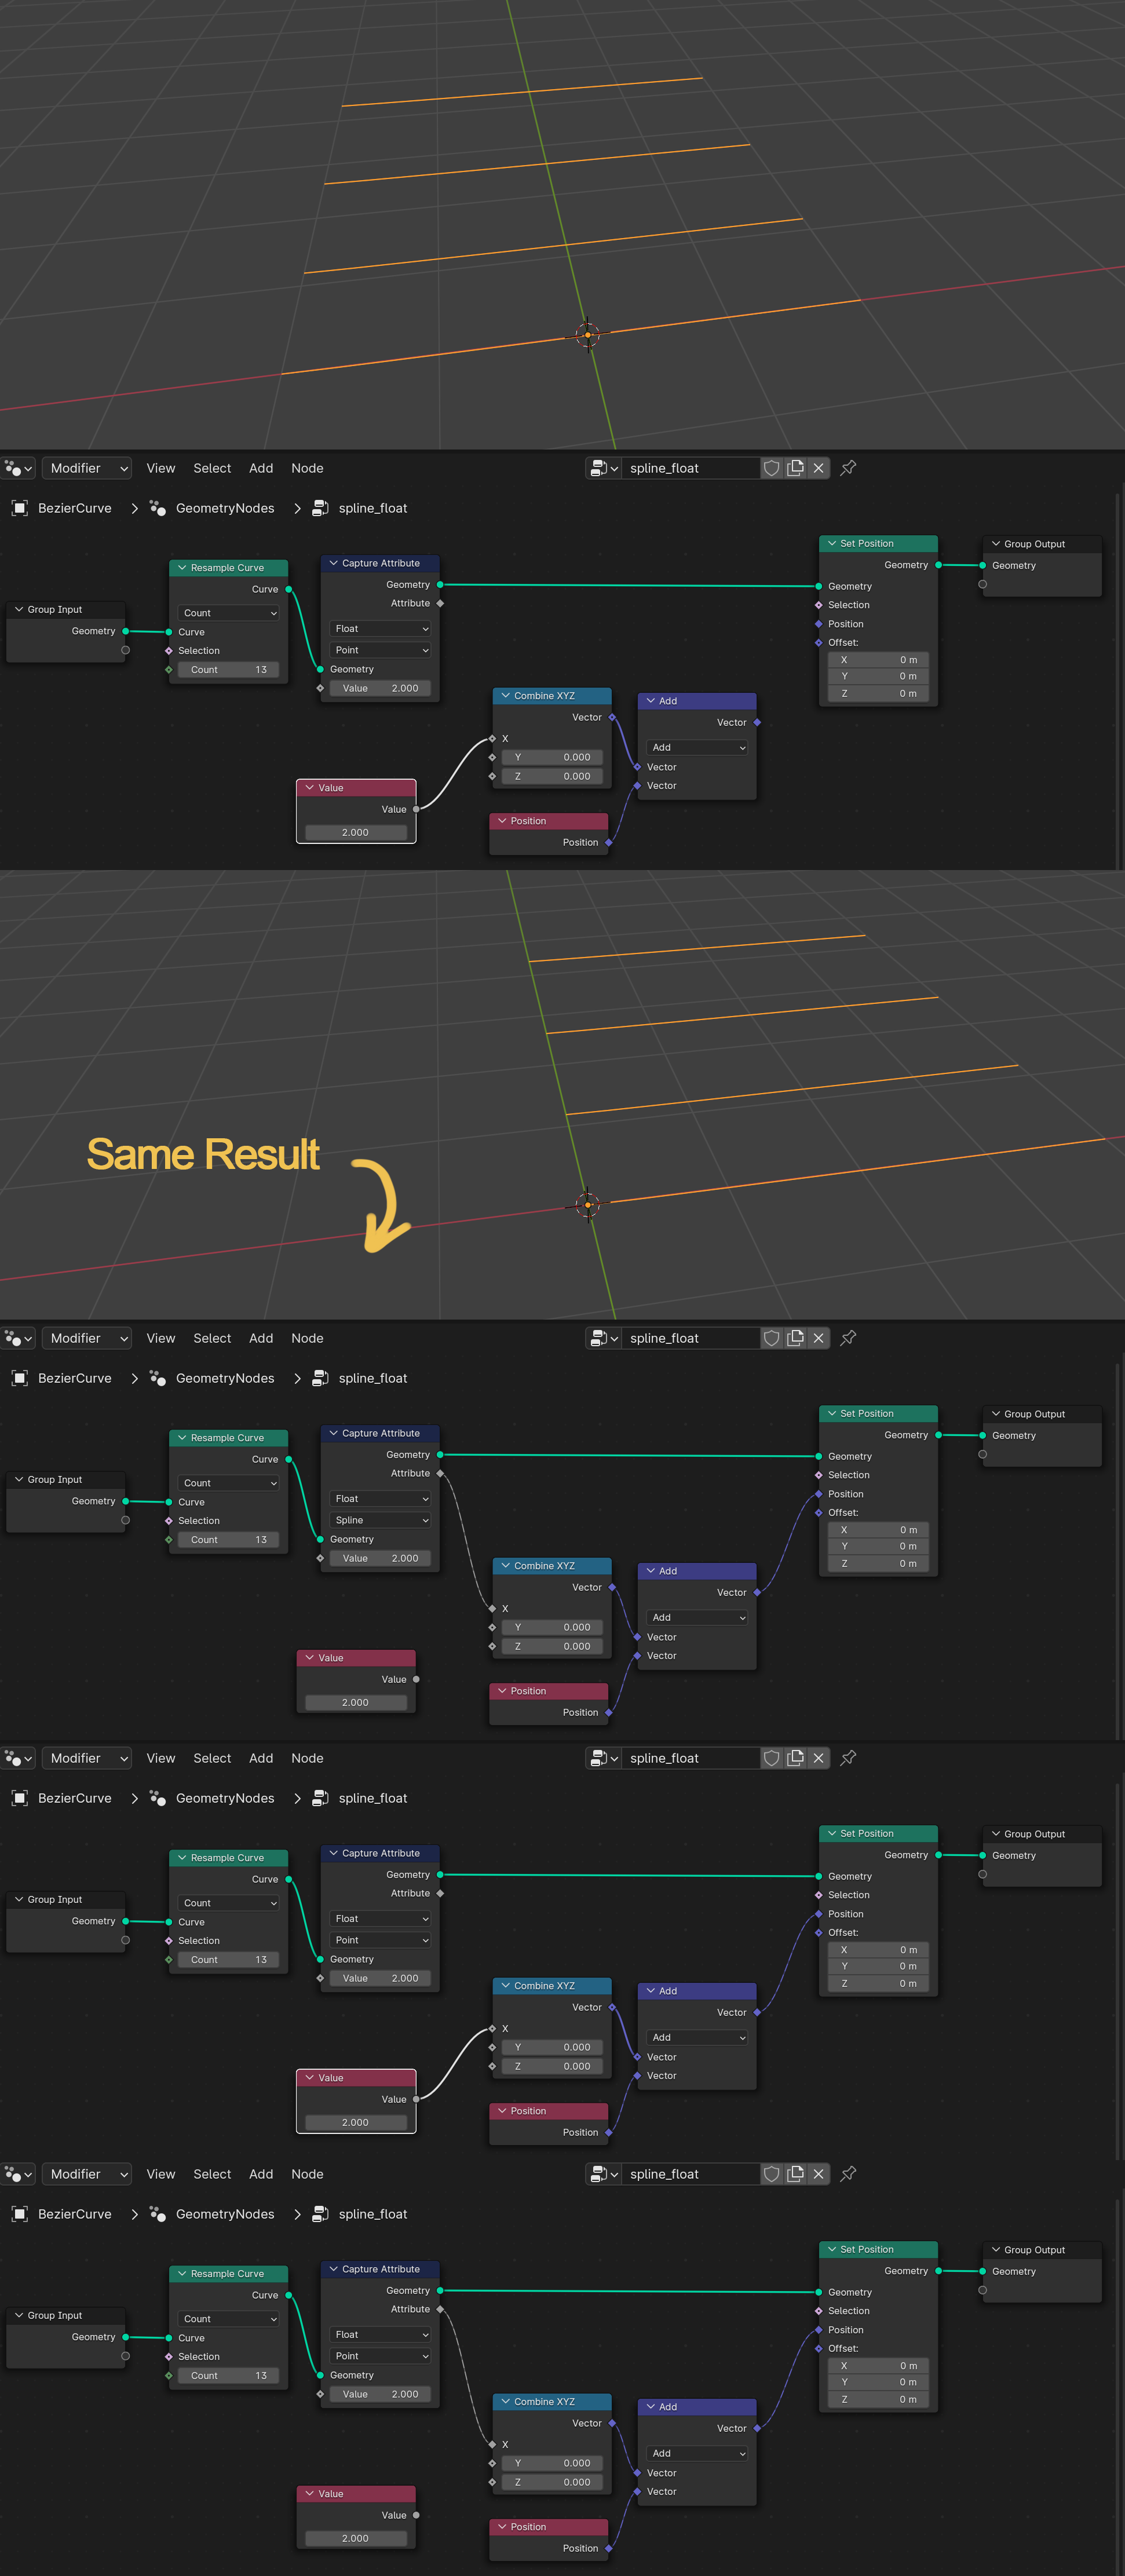
If something is useful for you, you can only decide for yourself - when you understand how this is working you might find use cases for it. As said in the comments, just using single values for all does not make much of a difference.
So I will show you what difference it makes when you use varying values, how the choice between Spline and Point changes the resulting values and why both can be useful, depending on what you want to achieve.
A simple example (with integer values instead of float, but that does not really matter): a curve object consisting of 4 separate splines just like in your example. Each has only two control points. All elements in Geometry Nodes have an index starting at 0 for each type of element. So the 4 splines have the indices 0 to 3, the 8 control points have the indices 0 to 7.
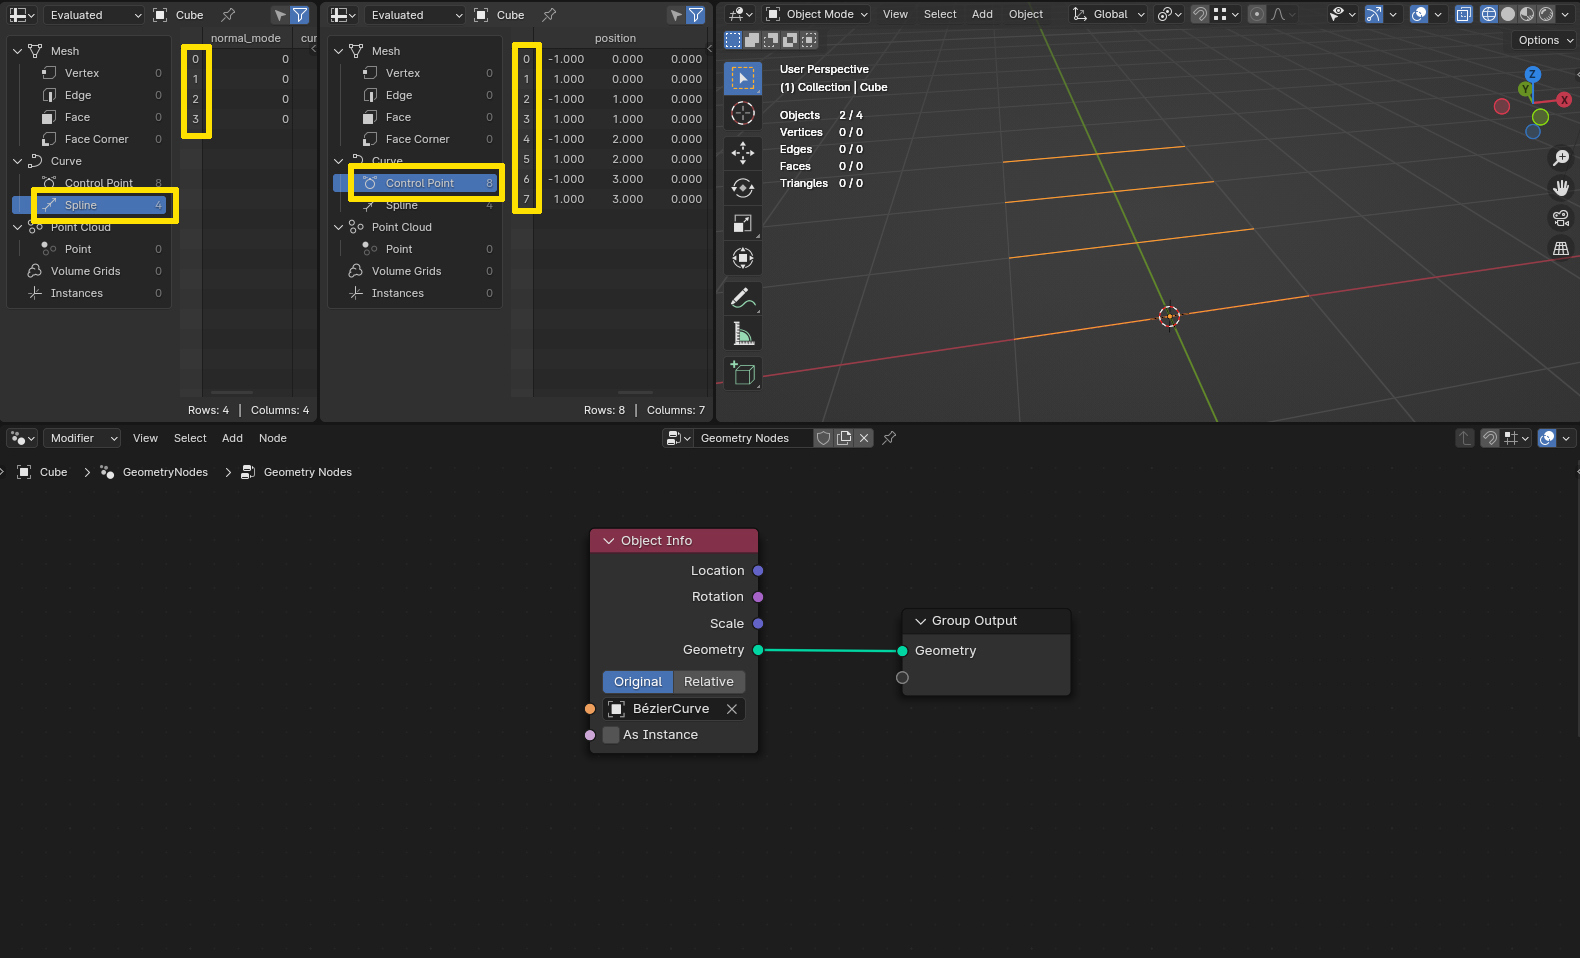
The thing is - the domain you choose in the Capture Attribute node also determines where it gets the values from if you plug in some node which reads geometry data like index, position etc. and not just unrelated values.
So if you now go and plug an Index node into the Capture Attribute node set to Spline, it reads the index of each spline and stores it on the geometry - the geometry are the control points of the curve. So on the first spline you have the attribute value 0, on the second 1 etc. Plugging this for example into the Z of a Combine XYZ node and use this as Offset in a Set Position node (which sets the position for each control point), the first two points are offset 0 on Z because they are part of spline 0, the second ones are offset 1 m on Z because they belong to spline 1 and so on, as you can also see in the position data in the Spreadsheet.
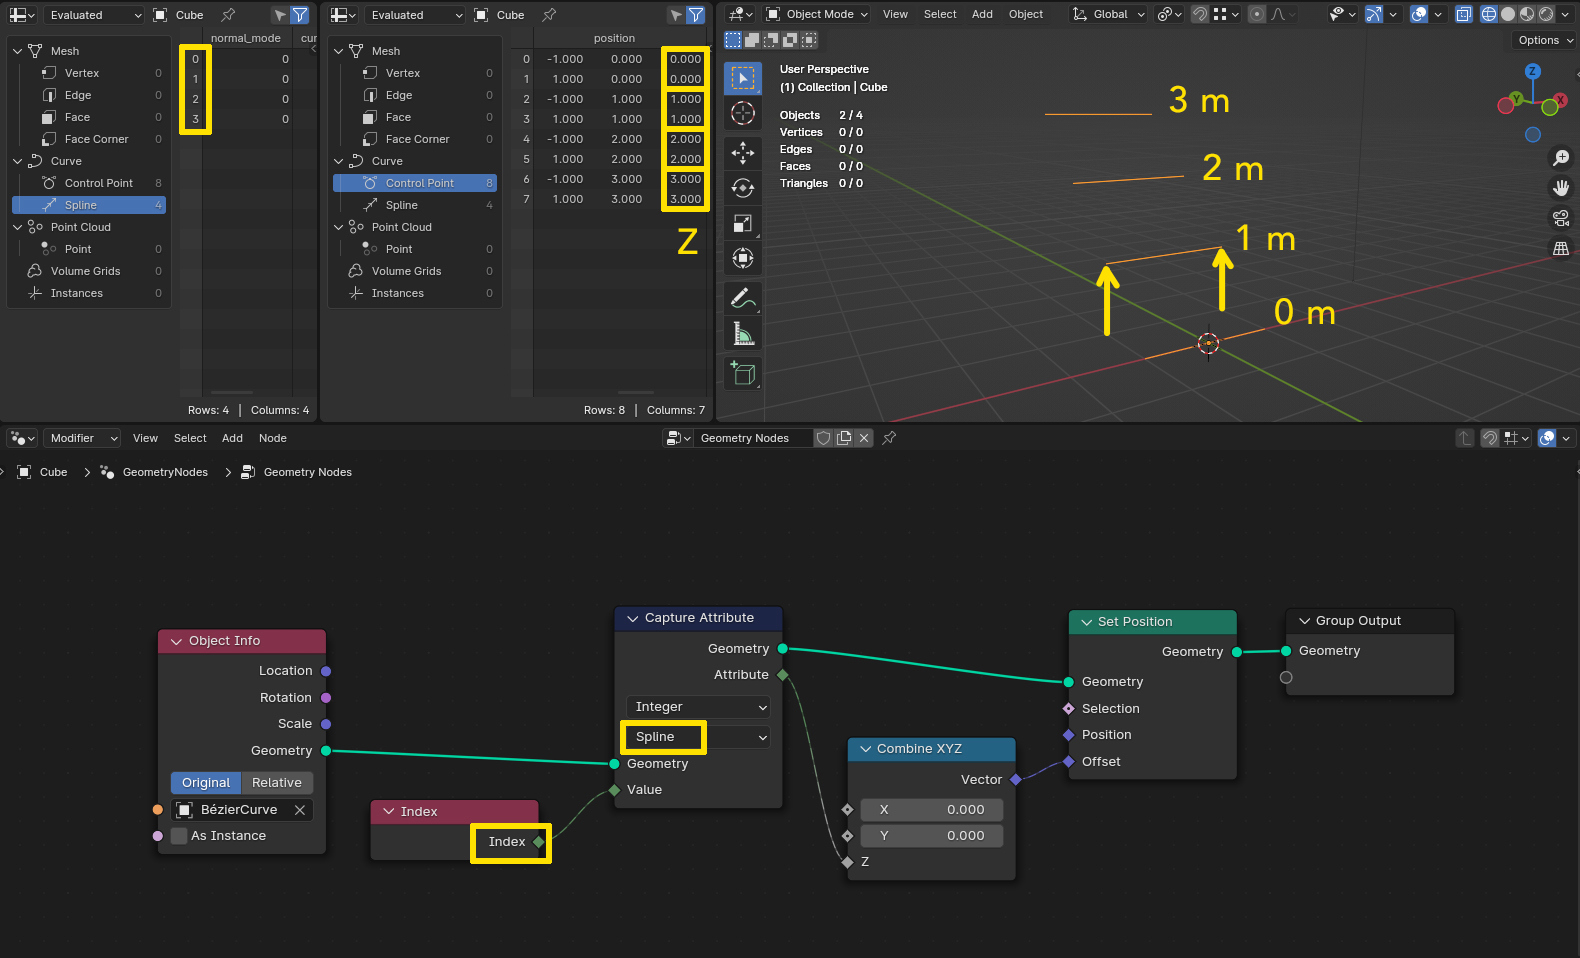
But if you set the Capture Attribute node to Point, it captures the indices of the control points from 0 to 7. In this case, each point gets its own index assigned (of course you would not need to capture the index of a point on itself, this is just for demonstration). Doing the same as before you can now see that not a spline is evenly moved upwards, but point by point and therefore setting the endpoint of a curve higher than the start point.
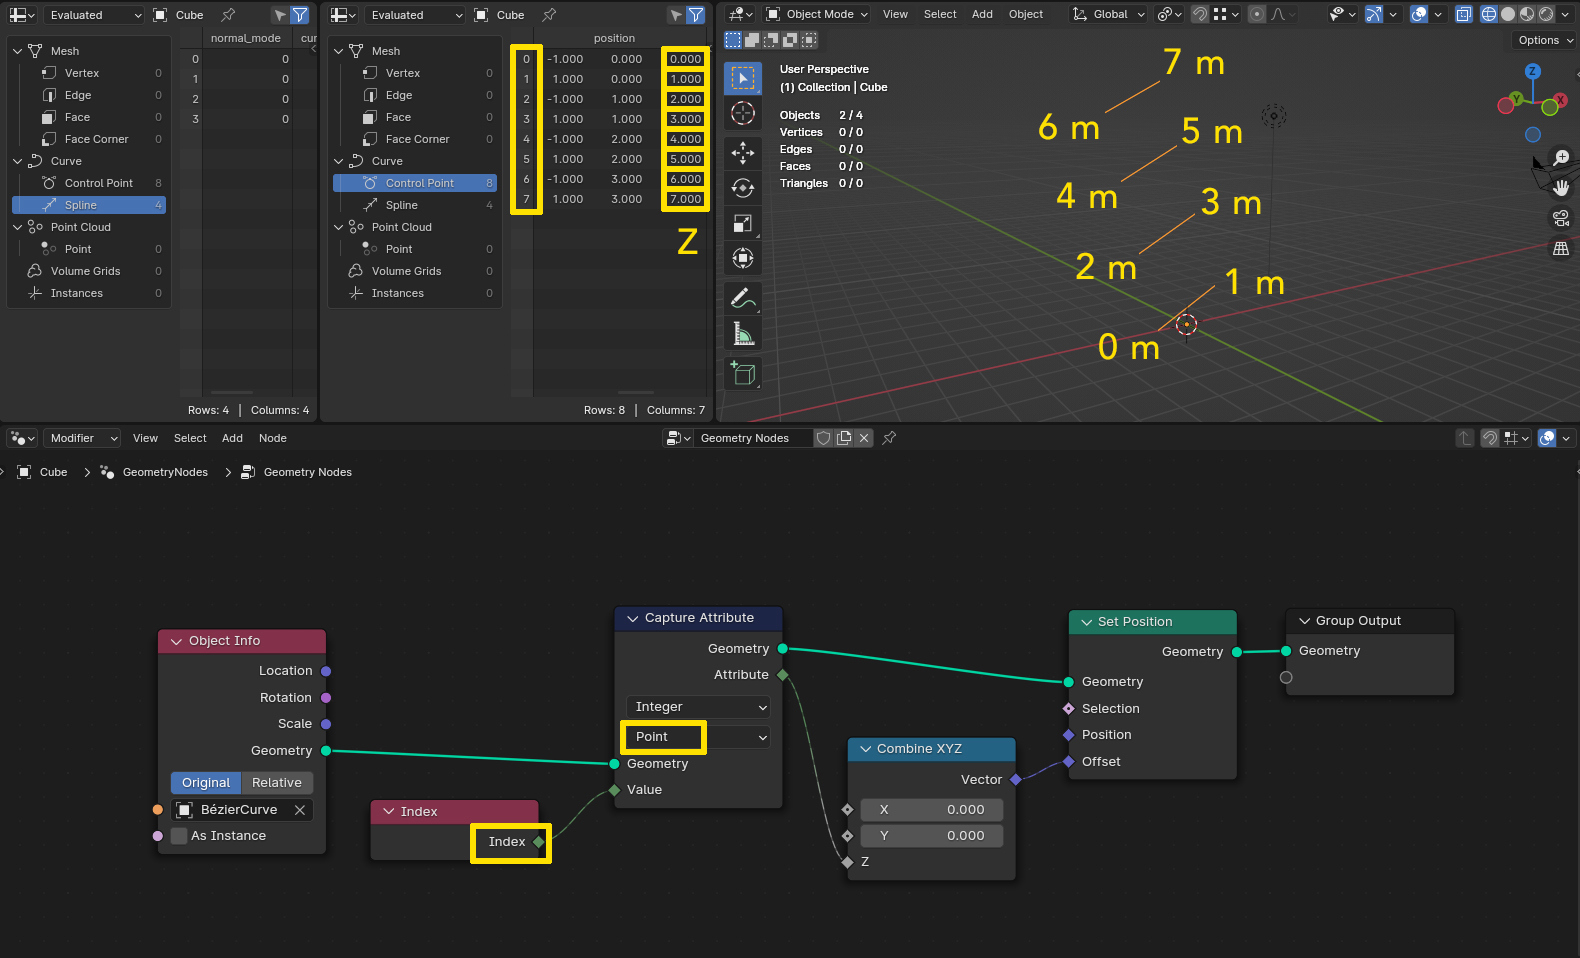
As I said, just for demonstration. The last result you would also achieve by using just the index in the Combine XYZ node without capturing. What I wanted to show is: deciding on which domain you choose, you can use common values for all or groups of elements, or have each its own individual value.
In the example above you could use the spline indices in a Set ID node, which gives the points ID values different from their (inherent and not manually changeable) index value. This can later be used to group them together when you want make a selection based on ID for some operation.
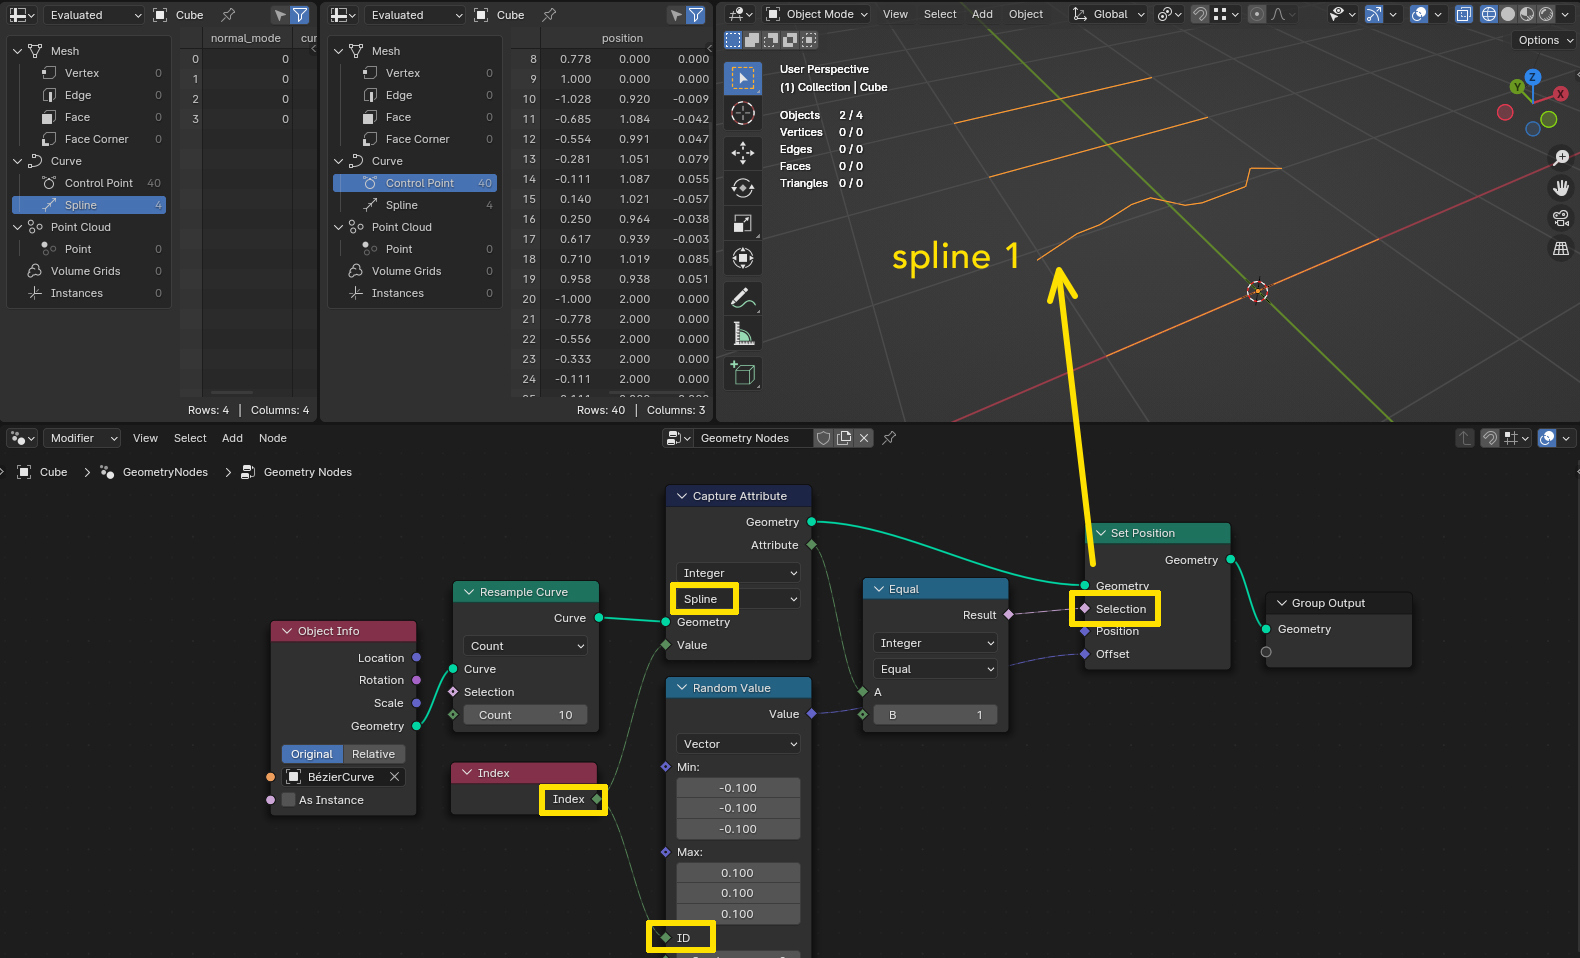
Here another example where using the spline domain can be useful when operating on points: let's say I want to use the Set Position node only on the second spline (index 1) to make it a bit chaotic. I can resample the curve to have more points, because a spline with only two points will not look very random.
If I set a Count of 10 for resampling, the splines have now 40 points altogether, the indices of the points being 0 to 9 on the first spline, 10 to 19 on the second etc. But if I want to be able to switch the resample count arbitrarily and not care for how this changes the index of points, I can simply use the spline index for selection.
At the same time the Index node provides the individual point index to be used in the Random Value node, so that each point gets an individual random value. For something like this you need a Capture Attribute node, because without it you could not choose which index the Set Position node should use for selection. Since it works on points it would use the point index, so without the Capture Attribute node you would always have to know the range of point indices you want to operate on. With Compare you are of course not limited to Equal to select one spline, it could be Greater Than or Less Than to select all from or up to a certain spline.
