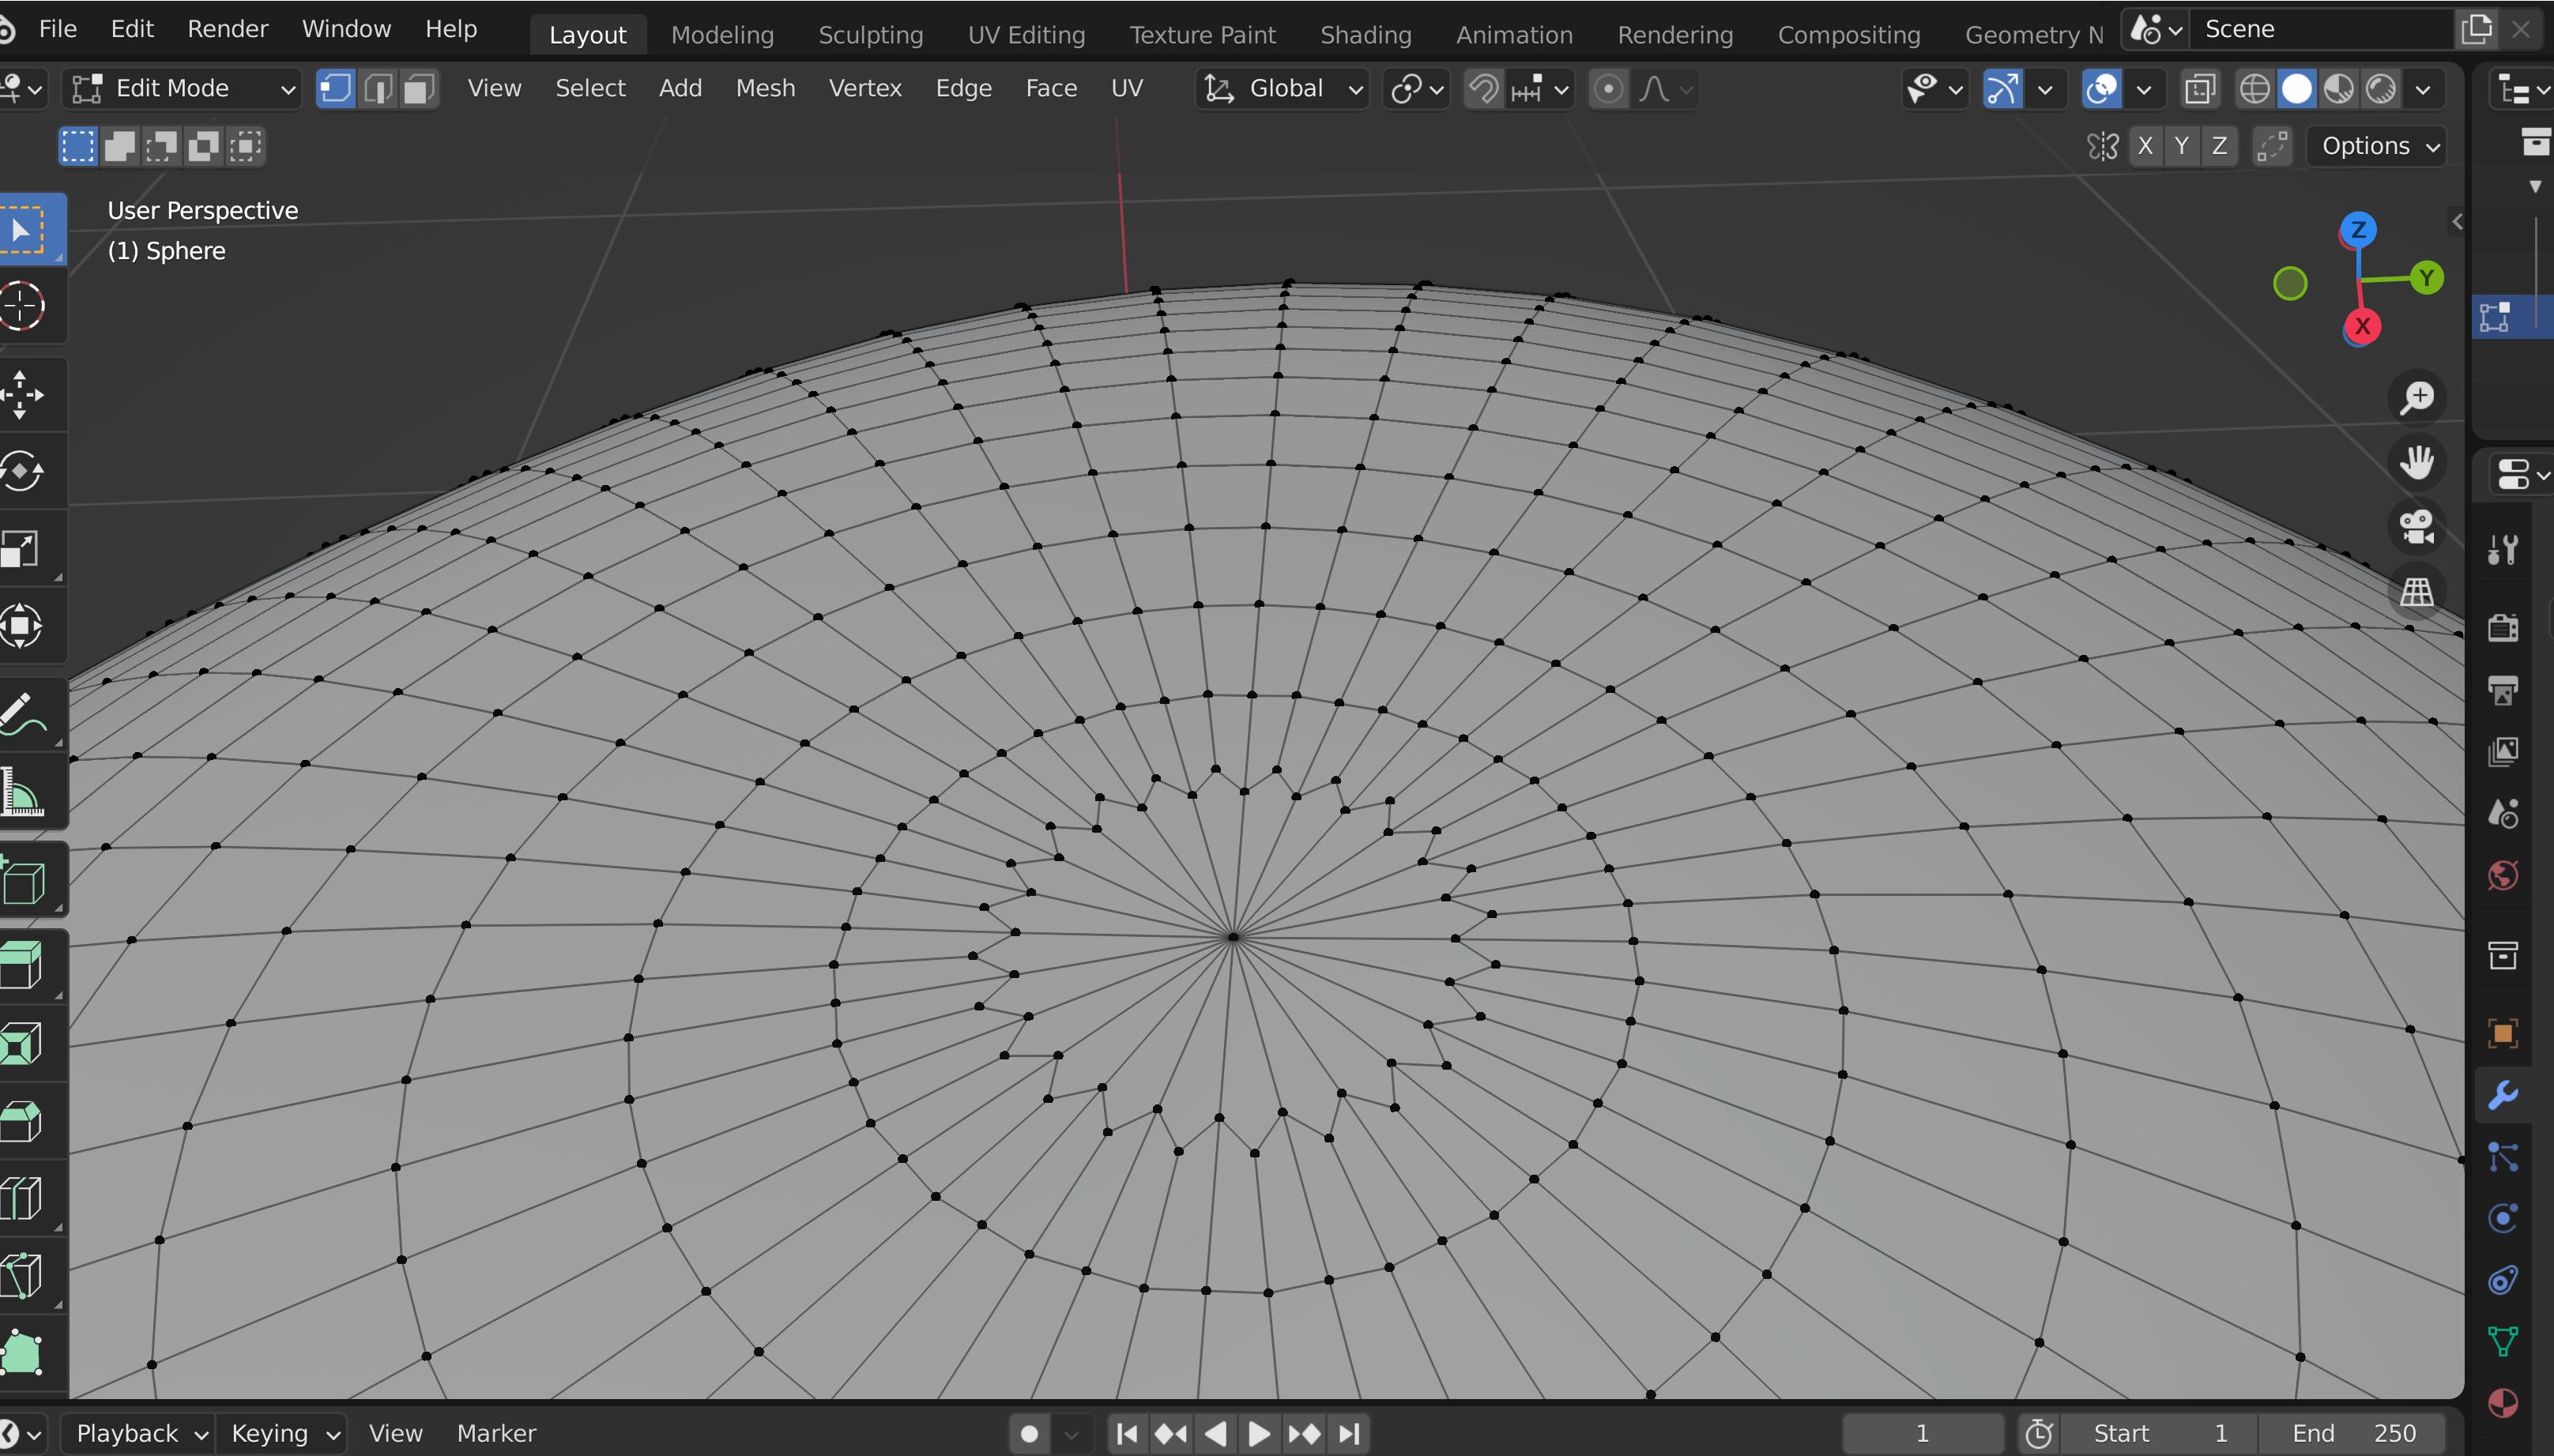
After I applied my subdivision modifier, the top circle now has this weird zigzag pattern. Is this normal? If it isn't, why did this happen and how do I fix this?
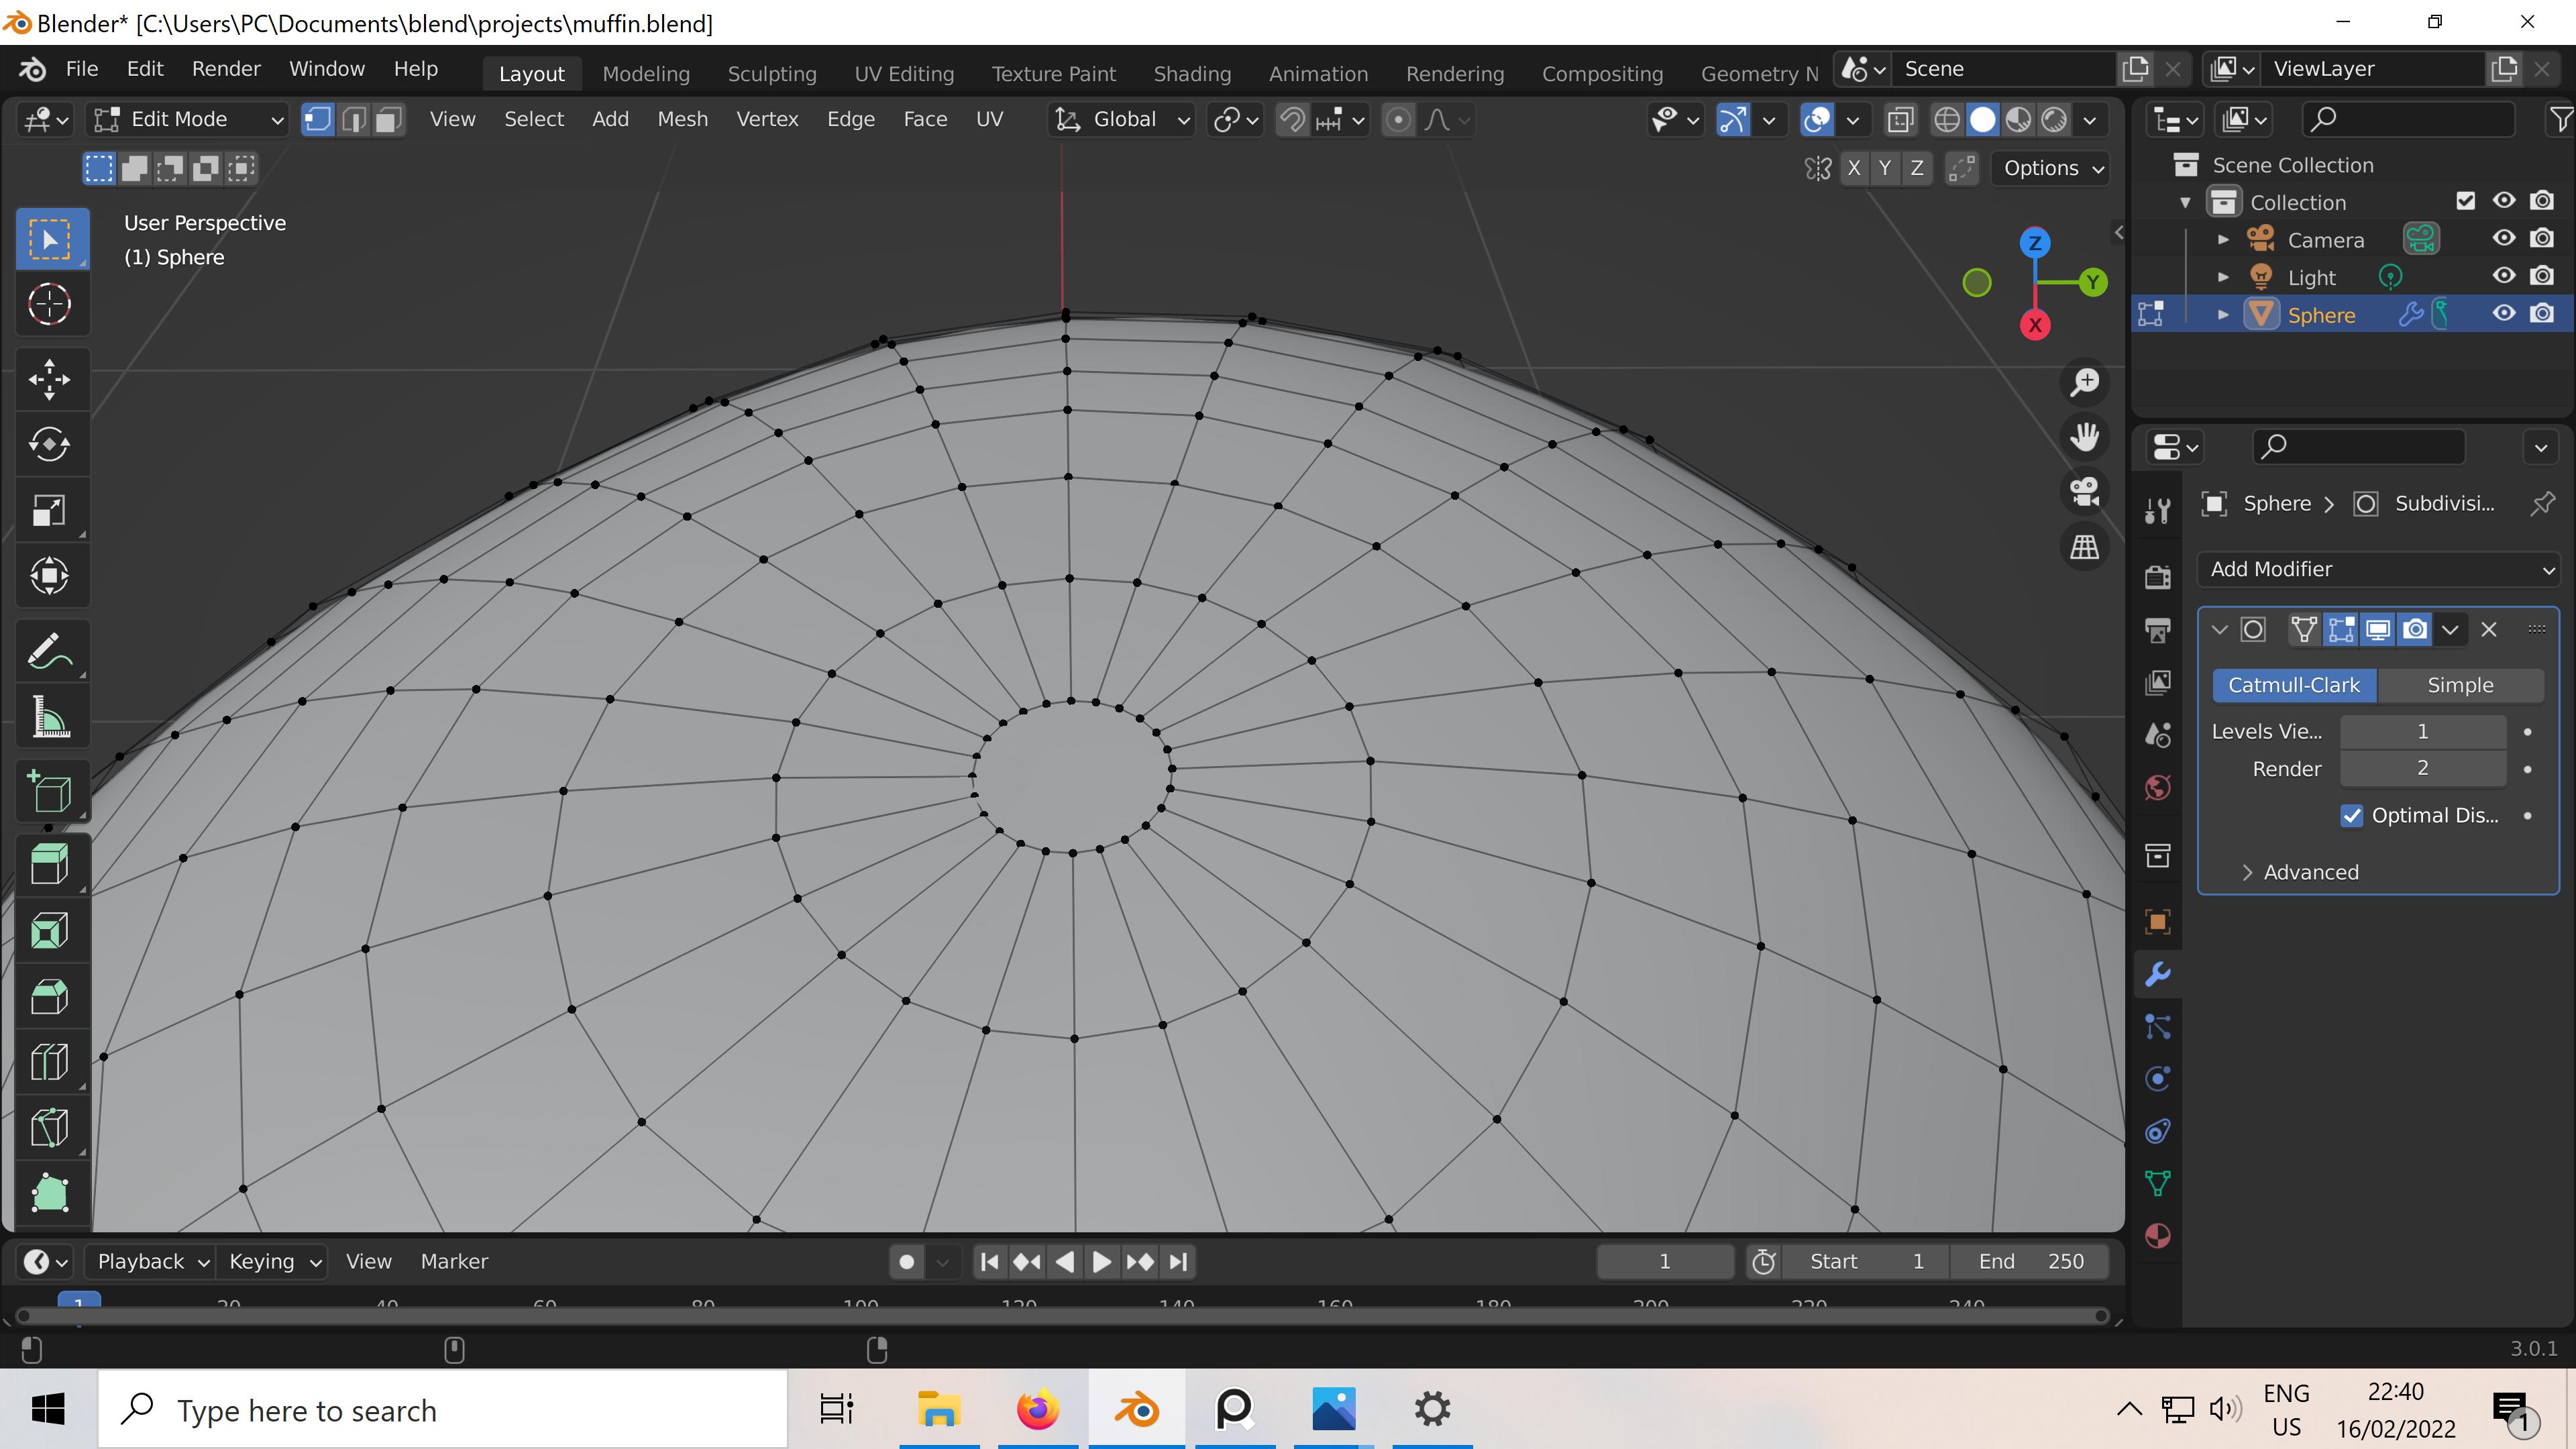
This is how it looked like before applying my subdivision surface modifier.

After I applied my subdivision modifier, the top circle now has this weird zigzag pattern. Is this normal? If it isn't, why did this happen and how do I fix this?
This is how it looked like before applying my subdivision surface modifier.

It is normal, that's because the tip of your geometry is made of a ngon. The subdivision algorythm created a vertex in its center, created the new geometry from it.
If you activate the wireframe overlay and disable the Subdivision Modifier's Optimal Display option, you can actually see the final mesh beforehand:
Because of how this subdivision algorithm works, you can't really avoid that.
L0Lock is right the problem lies in the algorithm of the Subdivision Surface Modifier. However, there is a way to trick the modifier a bit.
Recently I ran into a similar problem as you, with the Subdivision Surface Modifier creating some not-so-pretty geometry. Especially when Shade smooth is enabled (Figures 1 and 2).
The following solution led to a good result in my case:
Now I can also activate Smooth Shading and obtain the result shown in Figure 7.
What this technique does is practically spread the problem across multiple faces. Whereas my previous geometry had a 32-gon before applying the Subdivision Surface Modifier, it instead contains 28 5-gons and a quad after the changes described above. The Subdivision Surface Modifier seems to handle this much better.