6
$\begingroup$

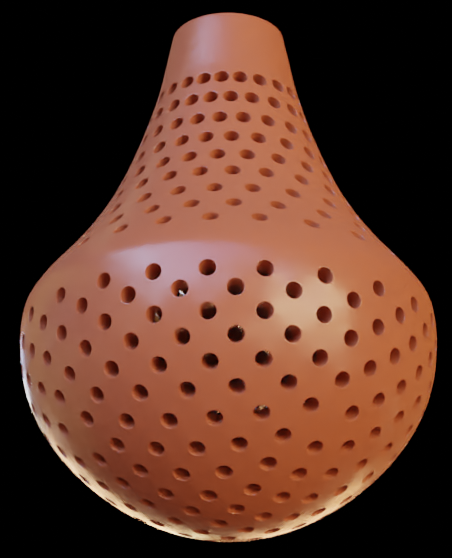
I need to make an object for a 3d printing project. The object needs to let water pass but block out bigger things like leaves and small pine cones. I already have the basic shape down, but i am struggling with getting evenly spaced, holes that are the same size.

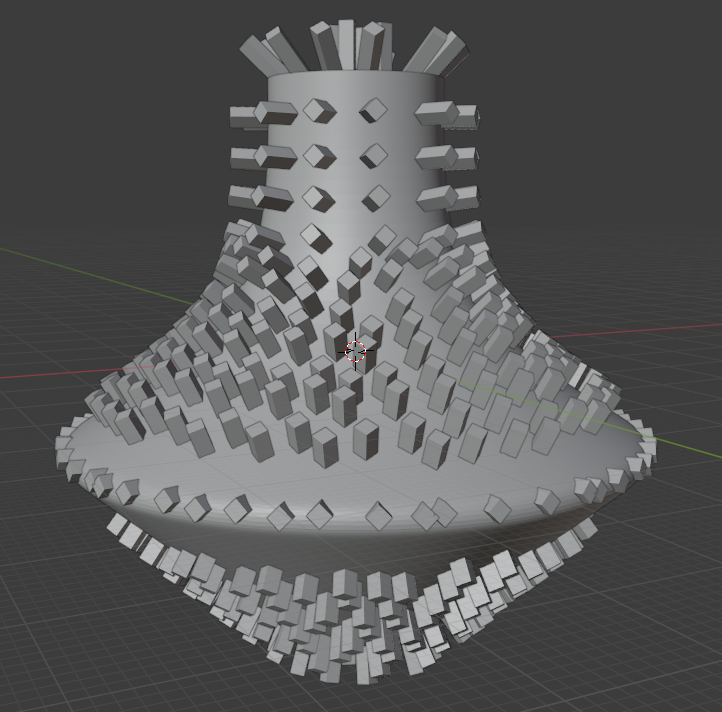
I have tried using a particle system but it looks like you can't boolean a particle system. Here is a picture of the shape i need holes cut into. The rectangles were my attempt at cutting with the particle system.

enter image description here

Does anyone know how i can achieve evenly spaced holes that are all the same size?

$\endgroup$
1
  • 1
    $\begingroup$ You can boolean cut the particle system. Convert it to real mesh object (convert in the Modifiers stack, remove system, then join resulting objects). As there aren't too many particles it likely won't freeze for an hour or something. Then pick that object as Boolean cutter $\endgroup$
    – Mr Zak
    Commented Oct 15, 2020 at 20:02

2 Answers 2

8
$\begingroup$

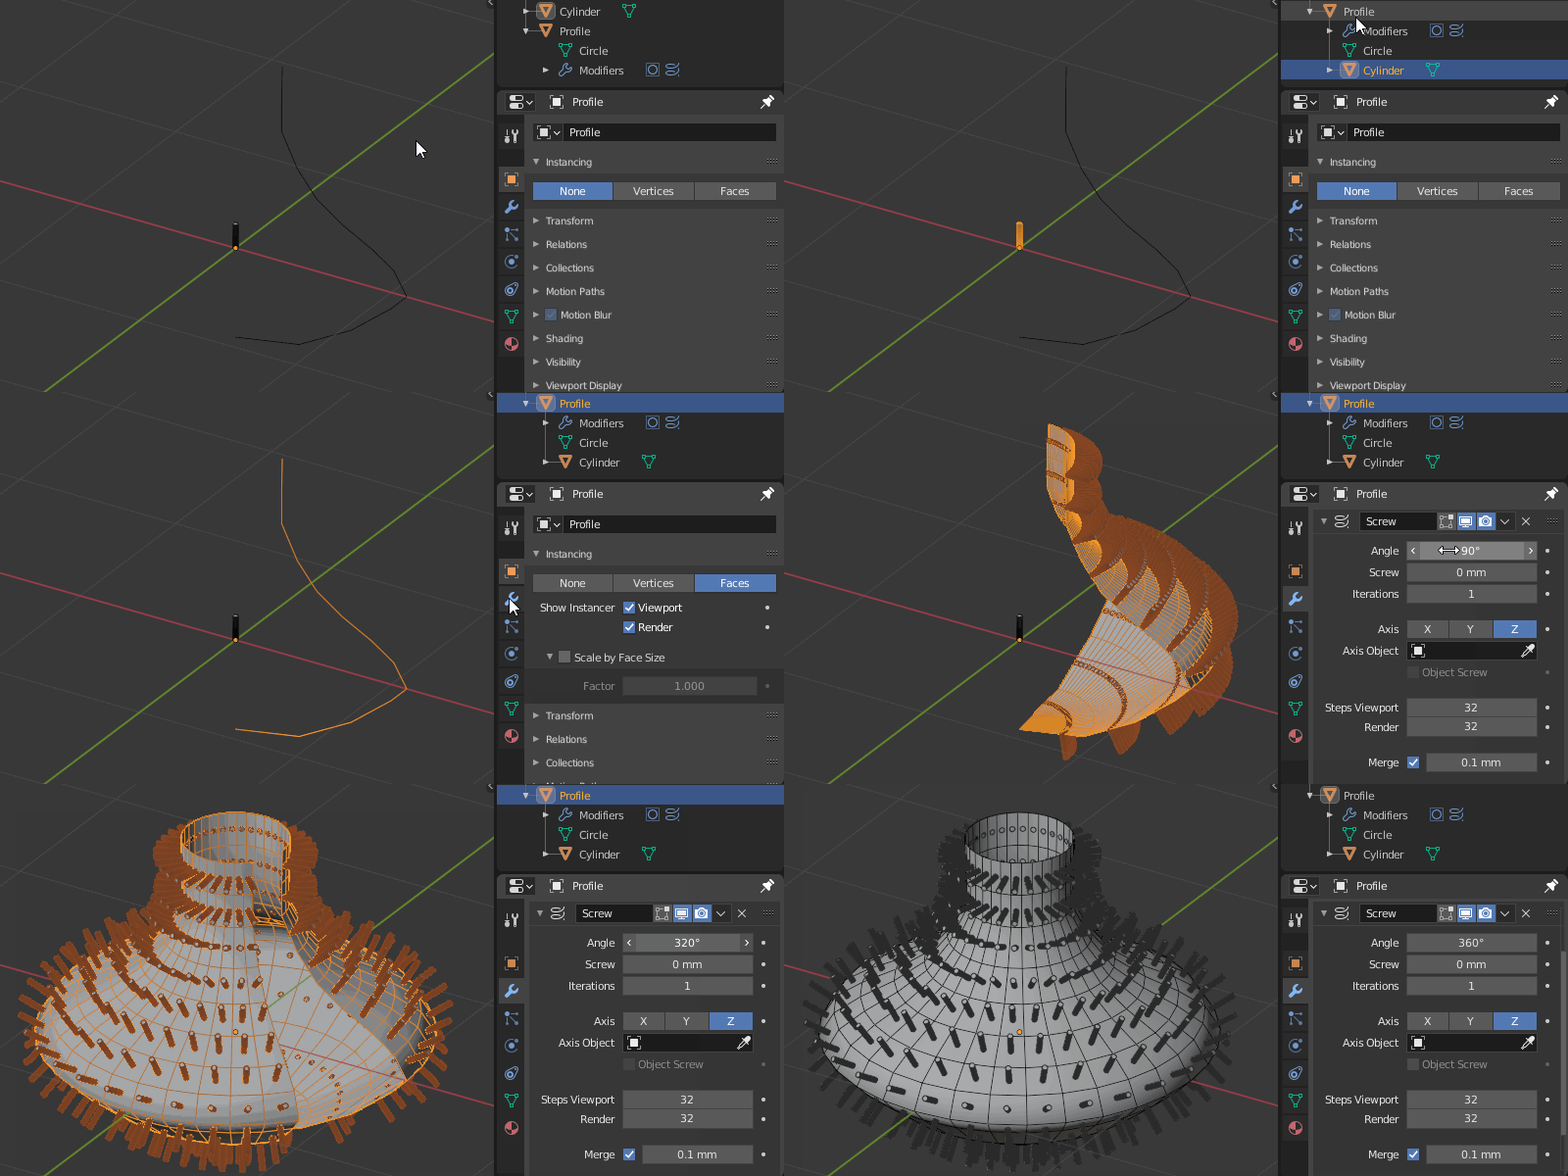
You could try instancing for this.

  1. Reduce the object to a profile
  2. Parent the cutting shape, set instancing to Faces
  3. Add the Screw modifier and adjust it to your needs.

Then just go Object > Apply > Make instances real and use Boolean...

enter image description here

$\endgroup$
1
  • 1
    $\begingroup$ Wow thanks, I had no idea you could bind an object to faces like that. $\endgroup$
    – Michael
    Commented Oct 15, 2020 at 22:18
9
$\begingroup$

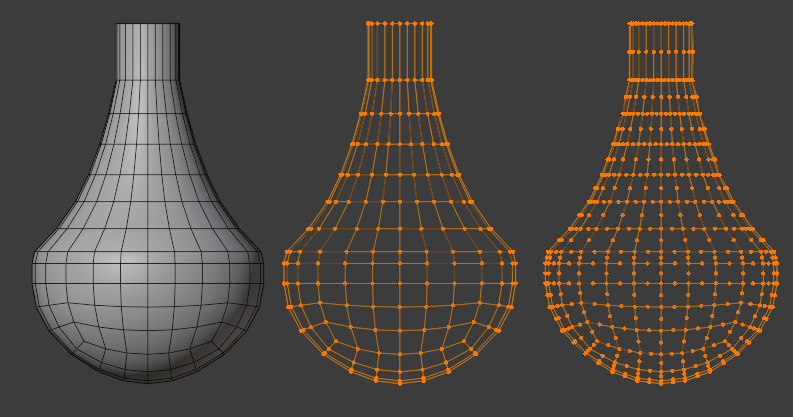
You could model this:

enter image description here

  1. Establish Basic geometry, (mine is an extruded half round-cube) and reserve a highly-subdivided copy, you're going to shrinkwrap to it later
  2. X Delete > Only Faces
  3. Edge Menu > Subdivide

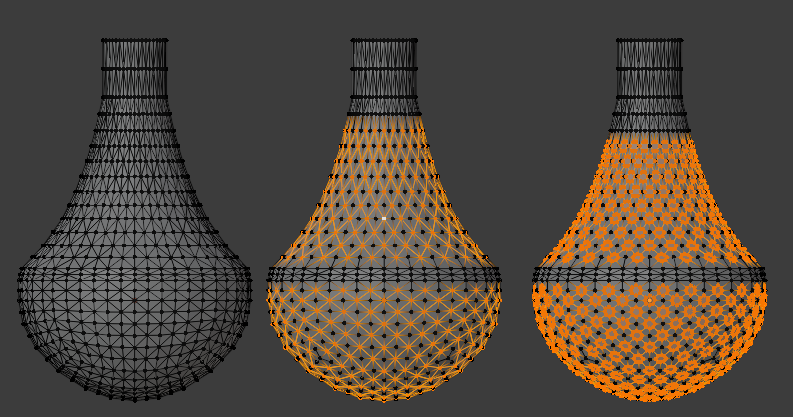
enter image description here

  1. F refill the faces, and Face Menu > Poke them
  2. Select one of the new vertices, and Shift G Select Similar > Number of Connecting Edges. Deselect the ones you don't want to be holes.
  3. CtrlShiftB Bevel the remaining selected vertices, with an offset. Note the offset setting.

You can use the shipped add-on Loop Tools > Circle if necessary, to round the holes to a dimension slightly smaller than the bevel offset you noted. Delete the hole faces. Now you use the Srinkwrap modifier targeted on your reserved intact copy to ensure the surface has not been distorted by the edge subdivision, poking, etc, and apply it.

The rest is modifiers: Solidify, Bevel (by angle), Subdivision Surface...

enter image description here

$\endgroup$
5
  • 1
    $\begingroup$ That produces a remarkably clean mesh, I will have to study these selection tools further. However this also falls prey to the same issue i was experiencing in that the spacing of the holes get further apart when the width of the object increases. $\endgroup$
    – Michael
    Commented Oct 15, 2020 at 22:20
  • 1
    $\begingroup$ I don't mean to spam all your posts, but this is a really smart way to do it :). Way more elegant than some ugly boolean... $\endgroup$ Commented Oct 15, 2020 at 22:29
  • 1
    $\begingroup$ @JachymMichal Would you be willing to explain to me why everyone hates booleans so much? They seem pretty useful to me. $\endgroup$
    – Michael
    Commented Oct 15, 2020 at 22:35
  • 2
    $\begingroup$ @Michael Well, they can create ugly topology if you're not careful :). But it's often more of a virtue signaling "Hey, I hate booleans, that means I'm a pro". If you can use them, more power to you :). $\endgroup$ Commented Oct 15, 2020 at 22:43
  • 1
    $\begingroup$ Nothing wrong with Booleans, IMO, so long as they're not a lazy, bad-topo, alternative to cleaner (and sometimes quicker), modelling. Especially if the meshes don't need to deform, have exquisite normals, or to be kept as low-poly as possible. 3D printing doesn't need to fuss about those things. $\endgroup$
    – Robin Betts
    Commented Oct 15, 2020 at 22:47

You must log in to answer this question.

Not the answer you're looking for? Browse other questions tagged .