12
$\begingroup$

Hello Blender community!

First time posting. I’m a fairly recent 3D NOOB playing around with Element 3D and C4D renderer in After Effects, and I have a project that’s allowing me to dig deeper into Blender. I’m at excited at how 2.8 feels…

So-

I’m trying to model the following tree and I want to make it ‘grow’.

Desired Tree

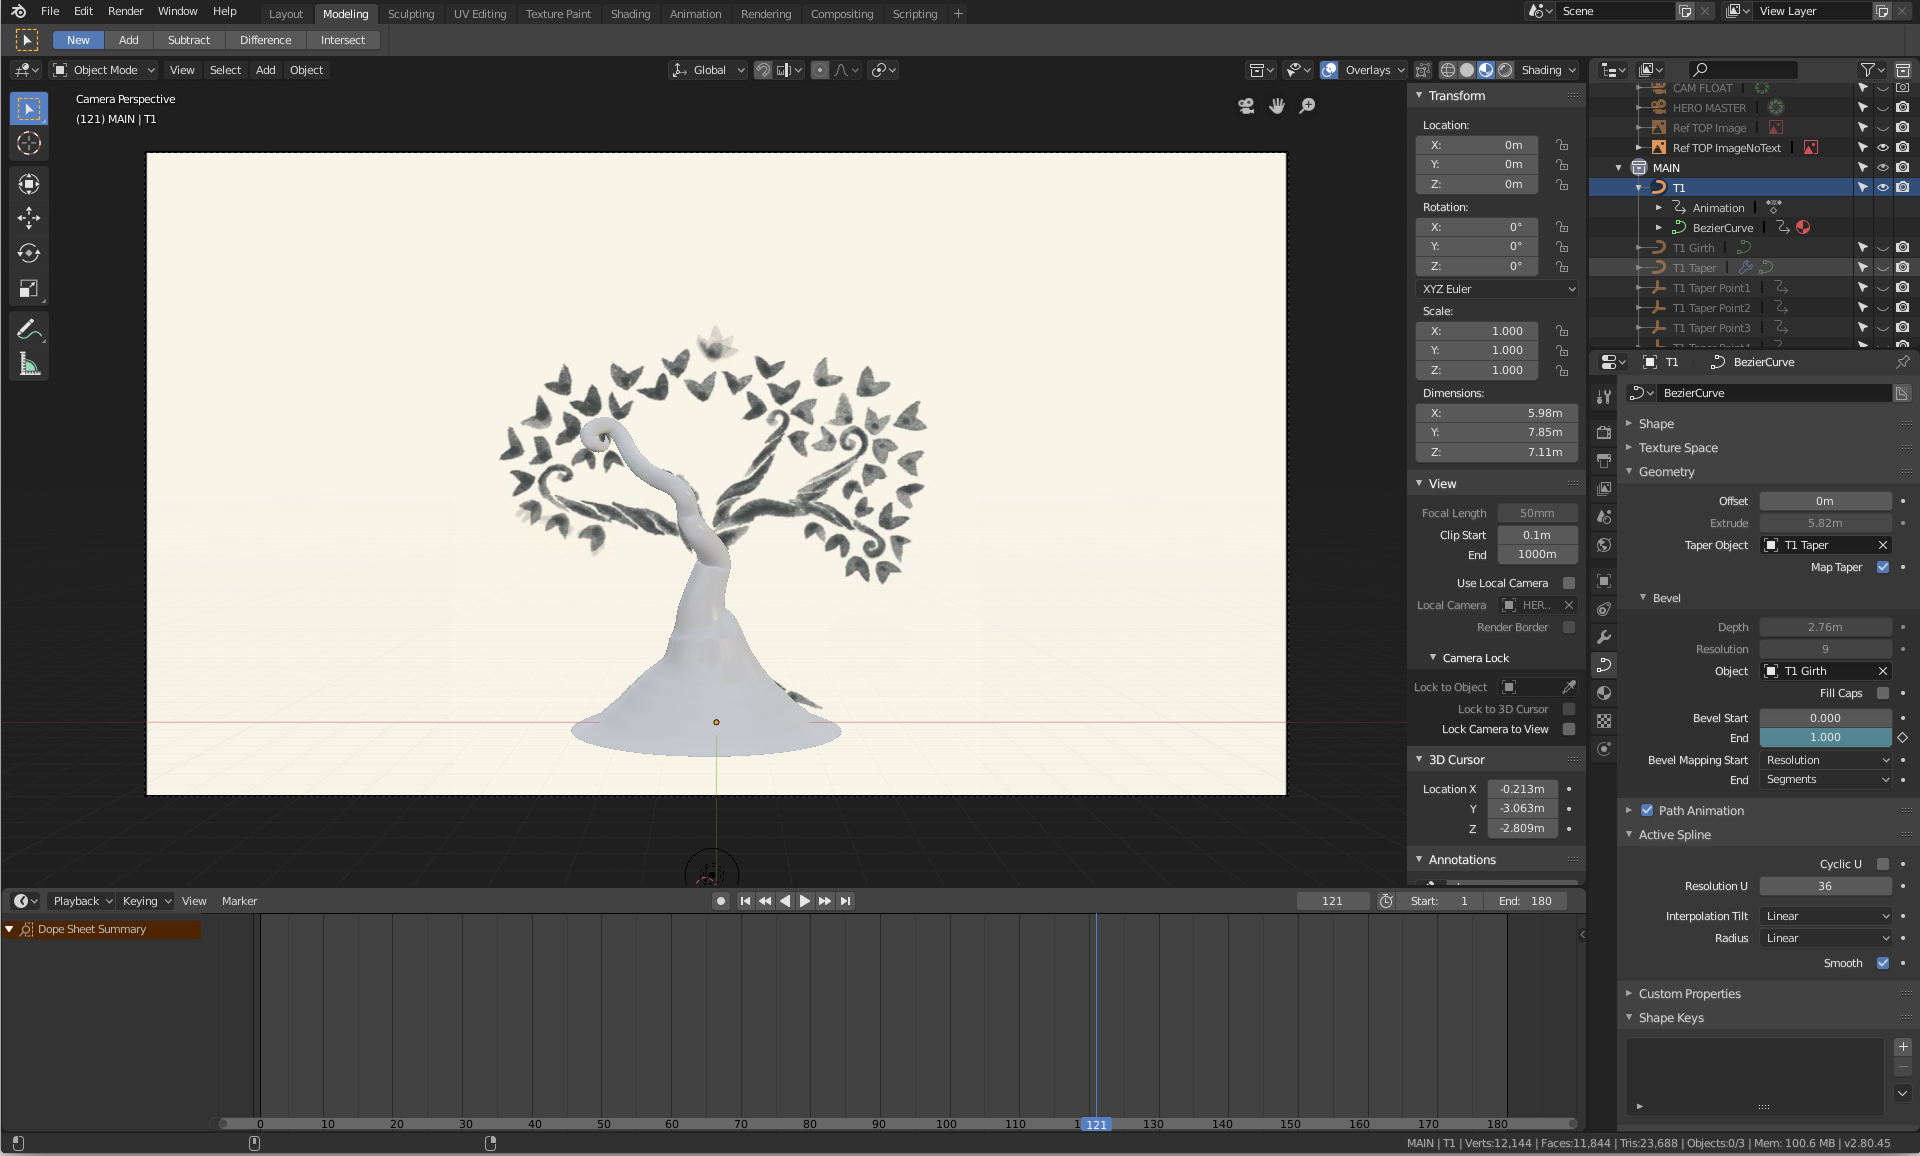
I’ve created a curve with a few points, beveled with a circle, and using a NURBS path to affect the taper.

enter image description here

I hooked up the vertices of the NURBS path to empties and animated the location of the NURBS vertices to affect the girth of the girth of the tree as it’s ‘animating’ the Bevel end value. The ‘growth’ of the tree is looking how I want it to:

enter image description here

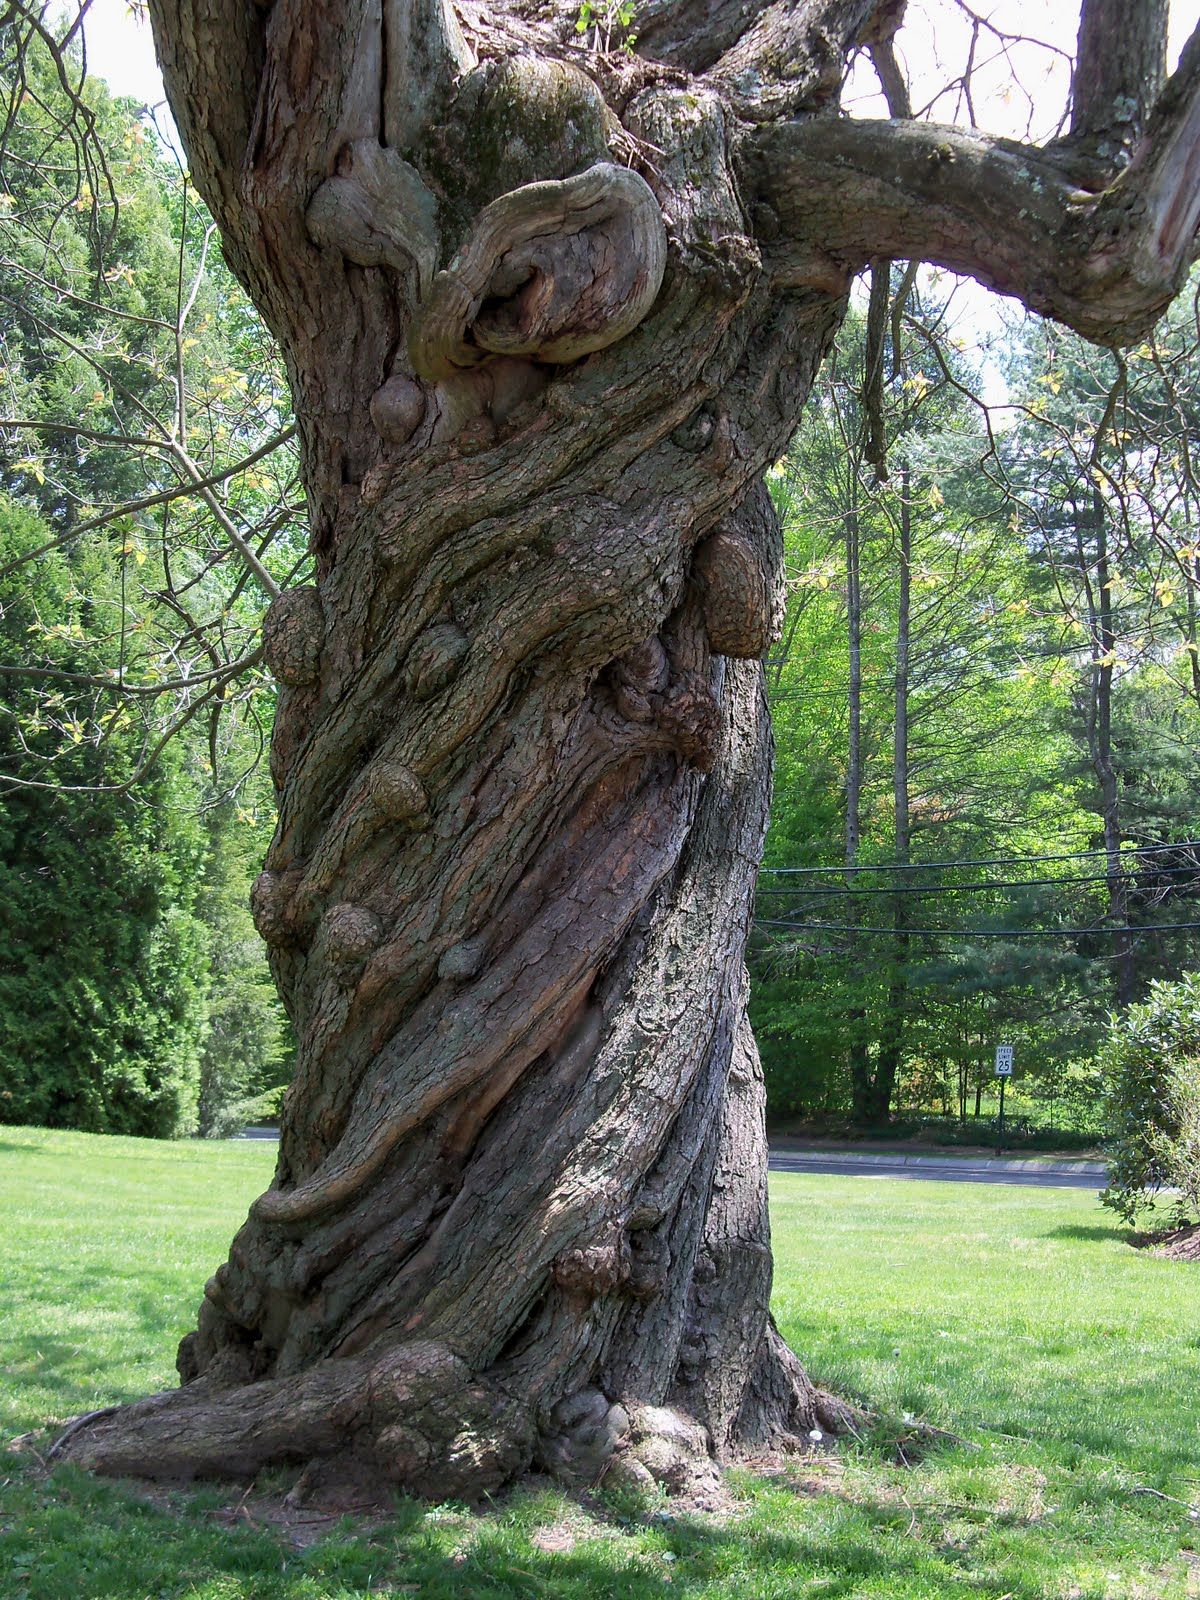
Now I want my tree to look like the drawing, and this real tree, for example, with the whole tree twisting as it grows.

enter image description here

How do I do this?

I’ve seen people taking an object, add loop cuts, add a simple deformer and twist. But I would need to convert this beveled curve into a mesh - which then I lose the animation from the keyframed Bevel End point for the growth.

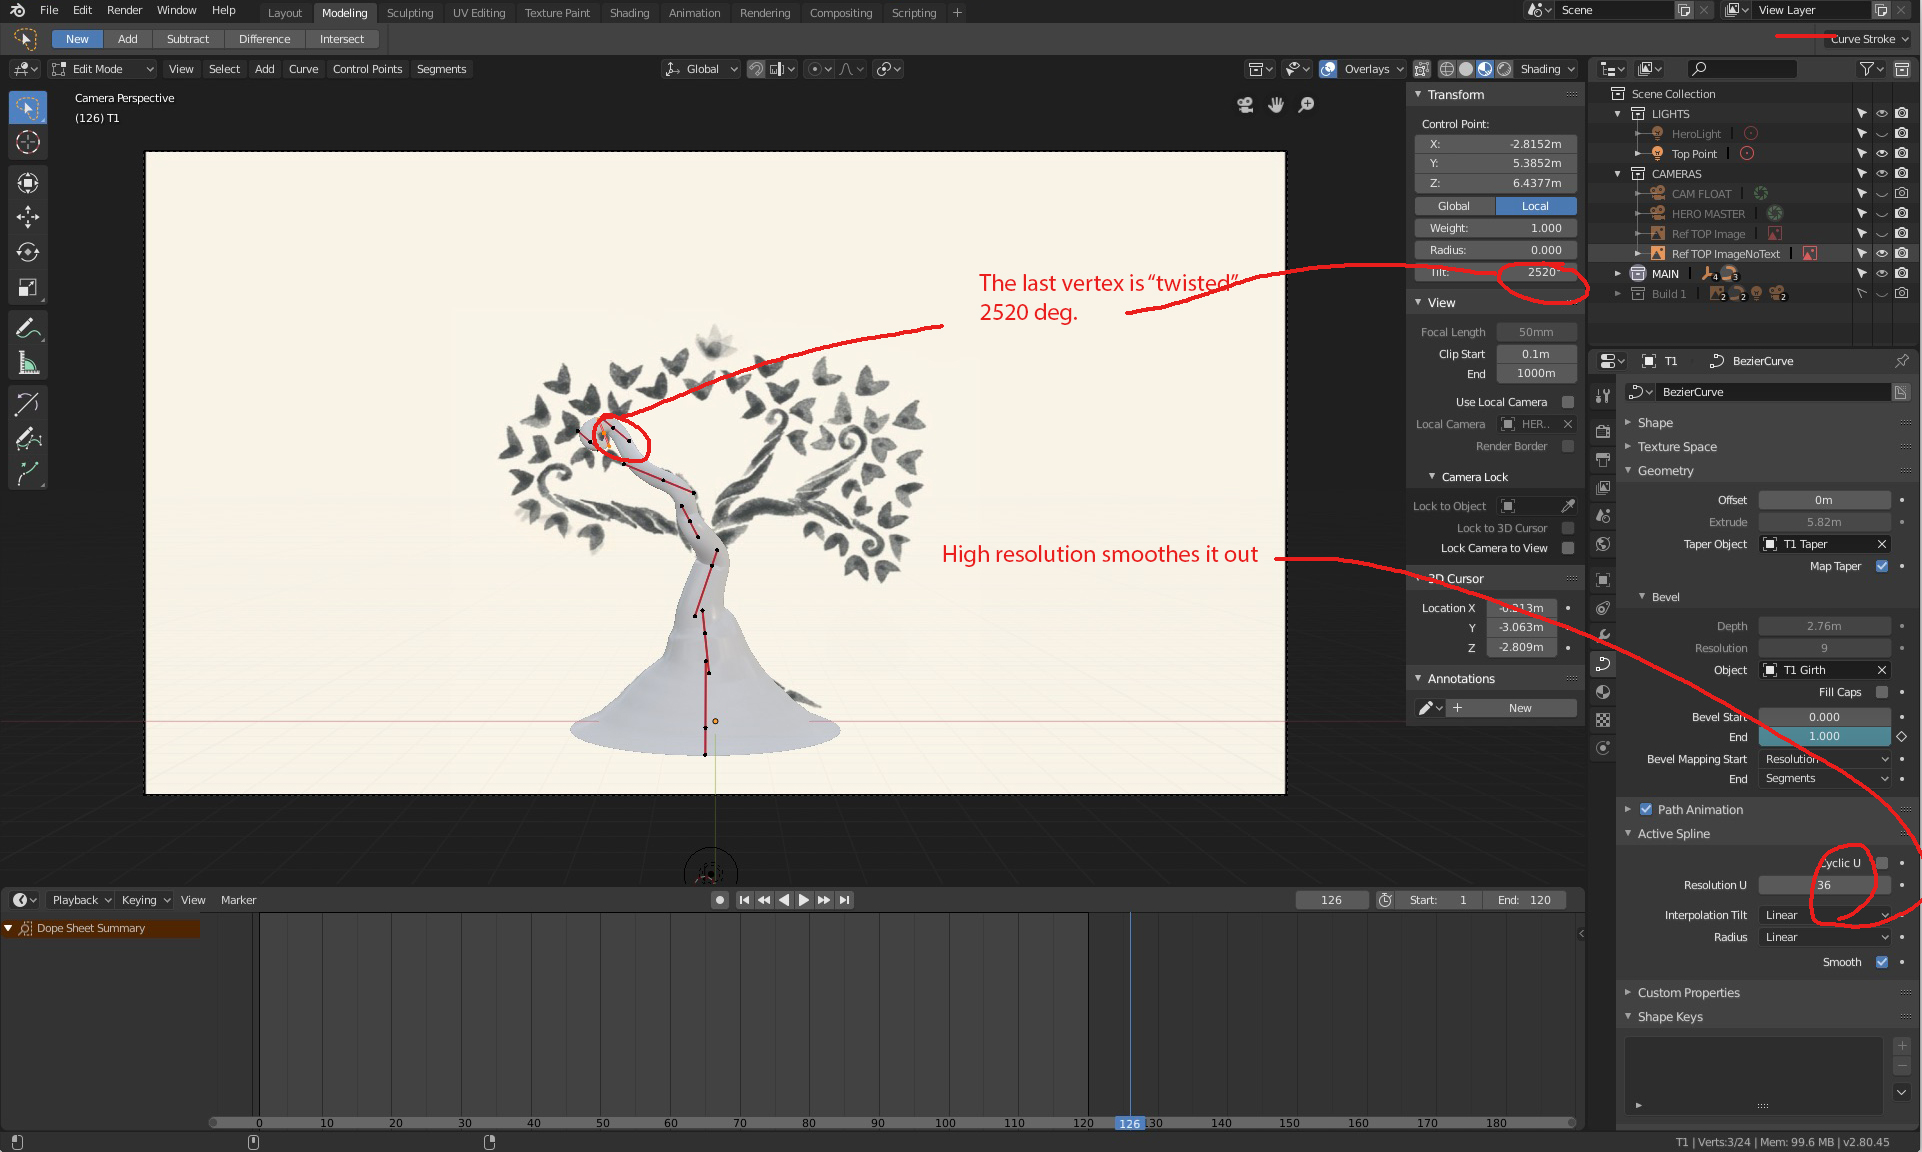
I’ve tried playing with the tilt value of the vertices within the path of the curve. The curve has a total of 8 vertices, so just for example, I added a 360 degree rotation between each vertex, so the last vertex has a ‘twisted’ value of 2520 degrees for the tilt.

enter image description here

So in theory, the physics of this makes sense, but at a high spline resolution, it doesn’t look like it’s twisting much. If I lower the resolution to 2, i can see the physics of what’s happening, but it’s not quite the look I want.

enter image description here

What approach do I need to take here?

Thanks in advance!

[EDIT] THANK YOU ALL for your suggestions. I'm still having a little trouble getting the hang of proportional selecting, but the combination of that and changing the shape of the sweep got the look I was going for. Thank you again!!

enter image description here

$\endgroup$
4

2 Answers 2

13
+75
$\begingroup$

You're actually super close to getting what you want. The default circle shape of bevels just makes it really hard to see. The reason for this is because you're trying to twist a smooth, cylindrical object. Twisting a smooth cylinder results in another smooth cylinder, up until the point where you twist more than the geometry allows, which is what you see in the last gif.

I tried a similar setup but with an irregular shape and it works really well.

Here's my setup:

enter image description here

As you can see I used less handles, but that doesn't really matter.

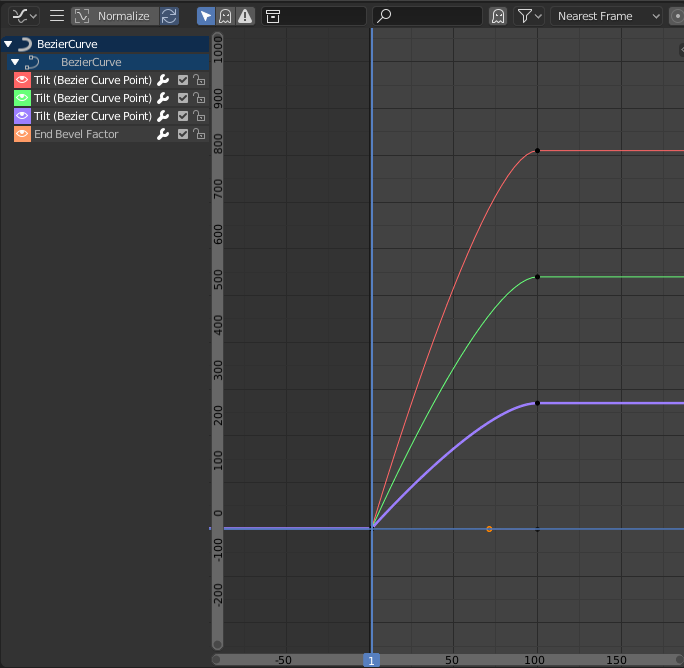
I also animated the twist of each handle as I found it gave a nicer result. To find how much you need to twist each handle, think about how many twists you want overall, then divide that by the number of handles. 360 degrees per handle for 8 handles will give you a really twisted tree. The one in your image has more like 3 twists in the full length. In my case I did just over 2 full twists, so each handle was twisted 540 degrees more than the previous one. For your tree, try 90-120 degrees per handle and go from there.

When/if you animate these values, just be aware that because of the magnitude of the values, they will be off screen at first.

Mine looked like this:

enter image description here

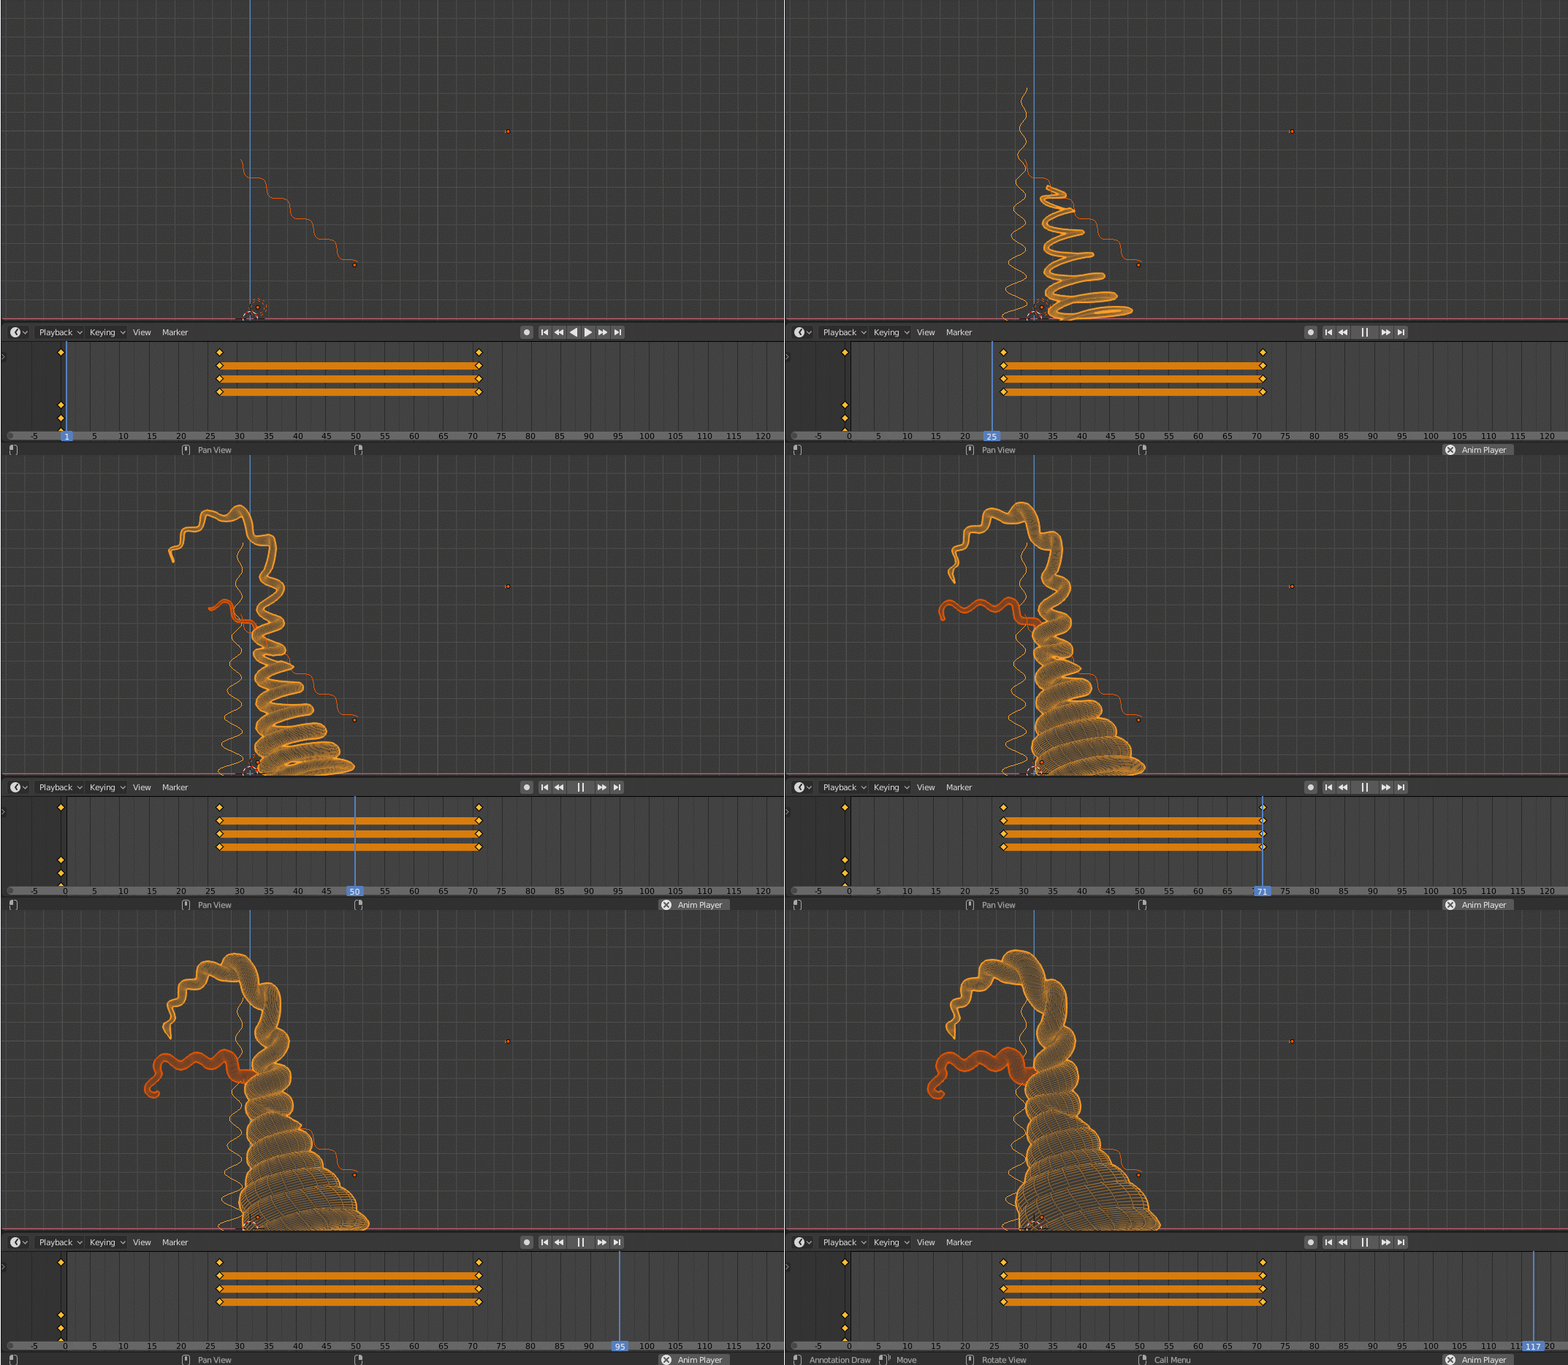
The final animation looks like this. The animations could be better, but the idea is there.

enter image description here

$\endgroup$
6
$\begingroup$

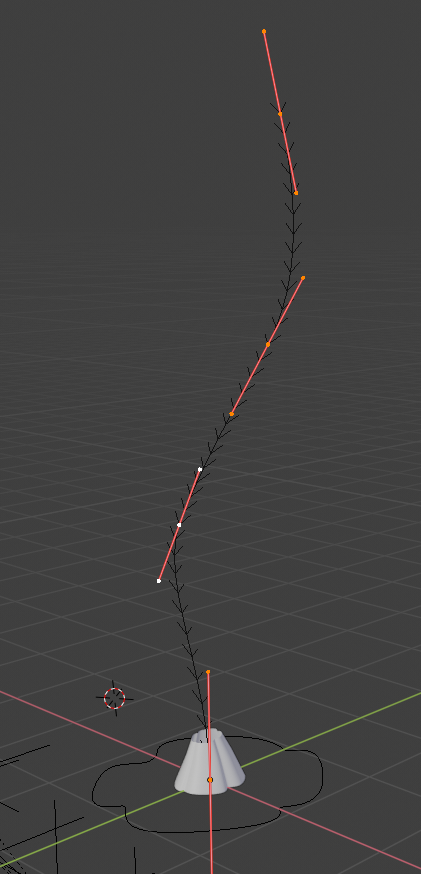
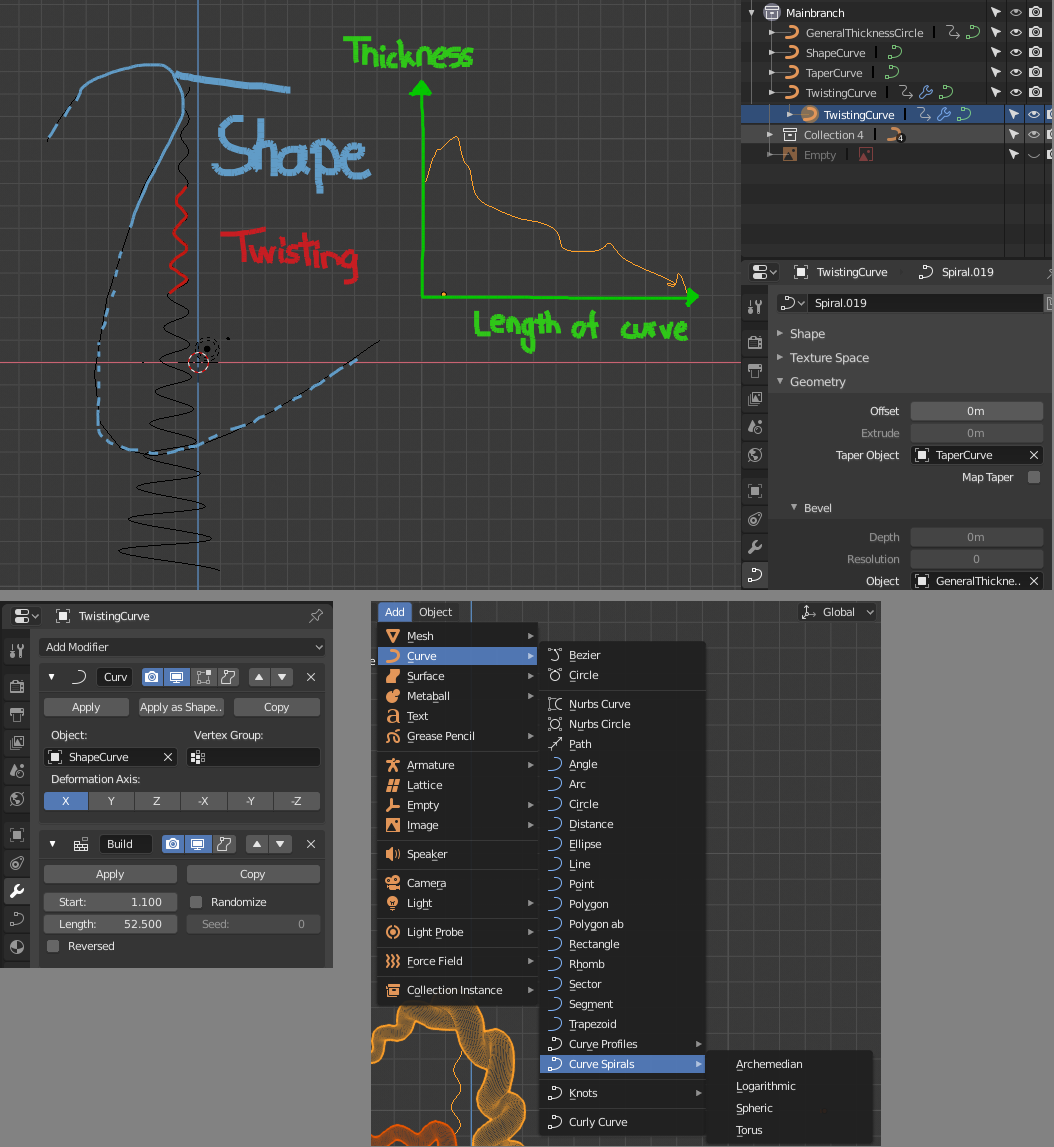
A Tree-Curve is made of:

  • A general twist, for this I used a logarithmic loop (red). You can generate your own from the Add Curve: Extra Objects addon, that ships with blender (I think). This is the only object that can't be changed easily later (at least I haven't found a fast solution to it)
  • A curve that determines the direction of the branch (blue)
  • A circle that determines the general thickness
  • A taper curve, that determines how thick the branch where along its length it is in comparision to the general thickness (green)

To wrap the general twisting curve around the shape curve, we use a curve modifier on the general twisting curve. To animate the growing in length we have to add a build modifier to this curve.

Now we animate the general thickness by setting two keyframes, one where the circle is small and one, later, where it has a larger diameter. The same goes for the build modifier.

To make adjustments use proportional editing. To add other branches, use the same process but and match the start and size of the growing to the growing of the main branch

enter image description here

enter image description here

$\endgroup$
3
  • 2
    $\begingroup$ I hope you find them helpful. In the future, post general comments under the question so everyone can see them. And if you find an answer that solves the question you can accept it so the question is resolved. $\endgroup$
    – Brenticus
    Commented Feb 25, 2019 at 13:35
  • $\begingroup$ Slow on the response, but THANK YOU for your help!! Kinda confrused on this forum system: "And if you find an answer that solves the question you can accept it so the question is resolved. –"......how do I do this? $\endgroup$
    – bnww
    Commented May 17, 2019 at 22:41
  • $\begingroup$ @bnww You can just click on the check-mark, it'll then appear green $\endgroup$
    – WhatAMesh
    Commented Jun 4, 2019 at 22:51

You must log in to answer this question.

Not the answer you're looking for? Browse other questions tagged .