I'm trying to make one object orbit another. But I want it to repeat, rather than stop at 100 frames. It seems there is no option for this. Is there a way to make this happen?
7 Answers
There are several ways to do what you want here's one:
Create an object, then and a Curve->Circle to act as the path for your orbit.
NOTE Make sure that the origin of the curve is in the same place as the object's origin.
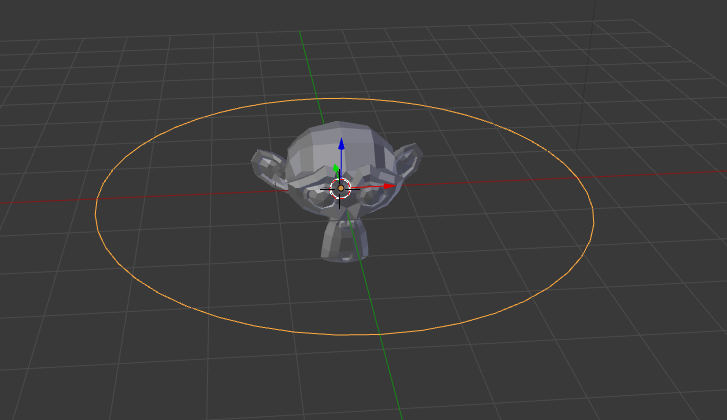
Select the object and add a Follow Path constraint and select the curve as the path to follow. Make sure you click on Animate path.
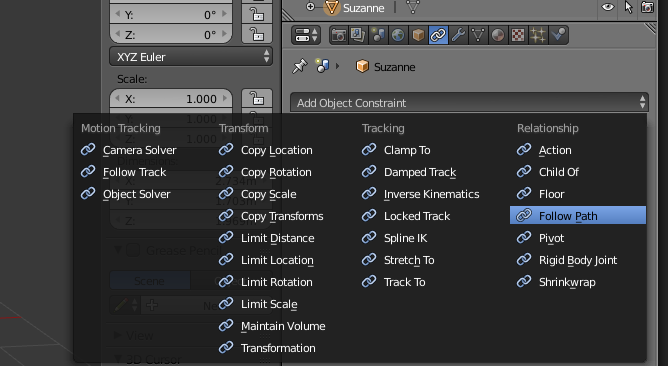
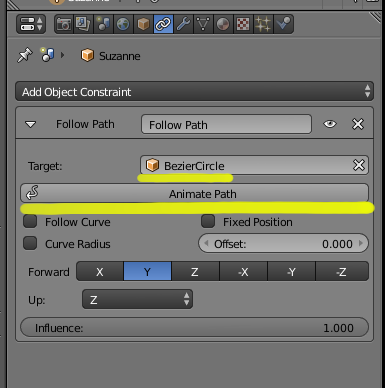
Now your object will follow that path forever and ever and ever...

To control the speed of the orbit select the curve and change the Path Animation value to a smaller number of frames to go faster or a bigger number to go slower.
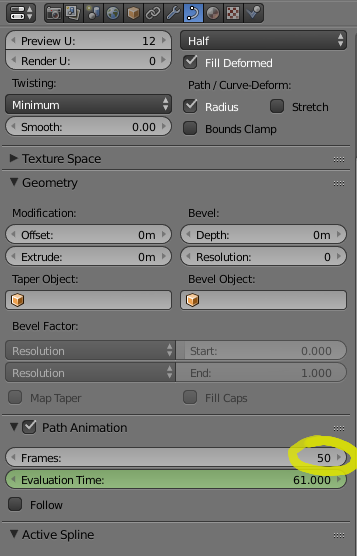
The oldest way to have an object follow a path is by Parenting the object to the curve with the Follow Path option. This method has the problem mentioned on the question: the object moves along the path once and stops at frame 100.
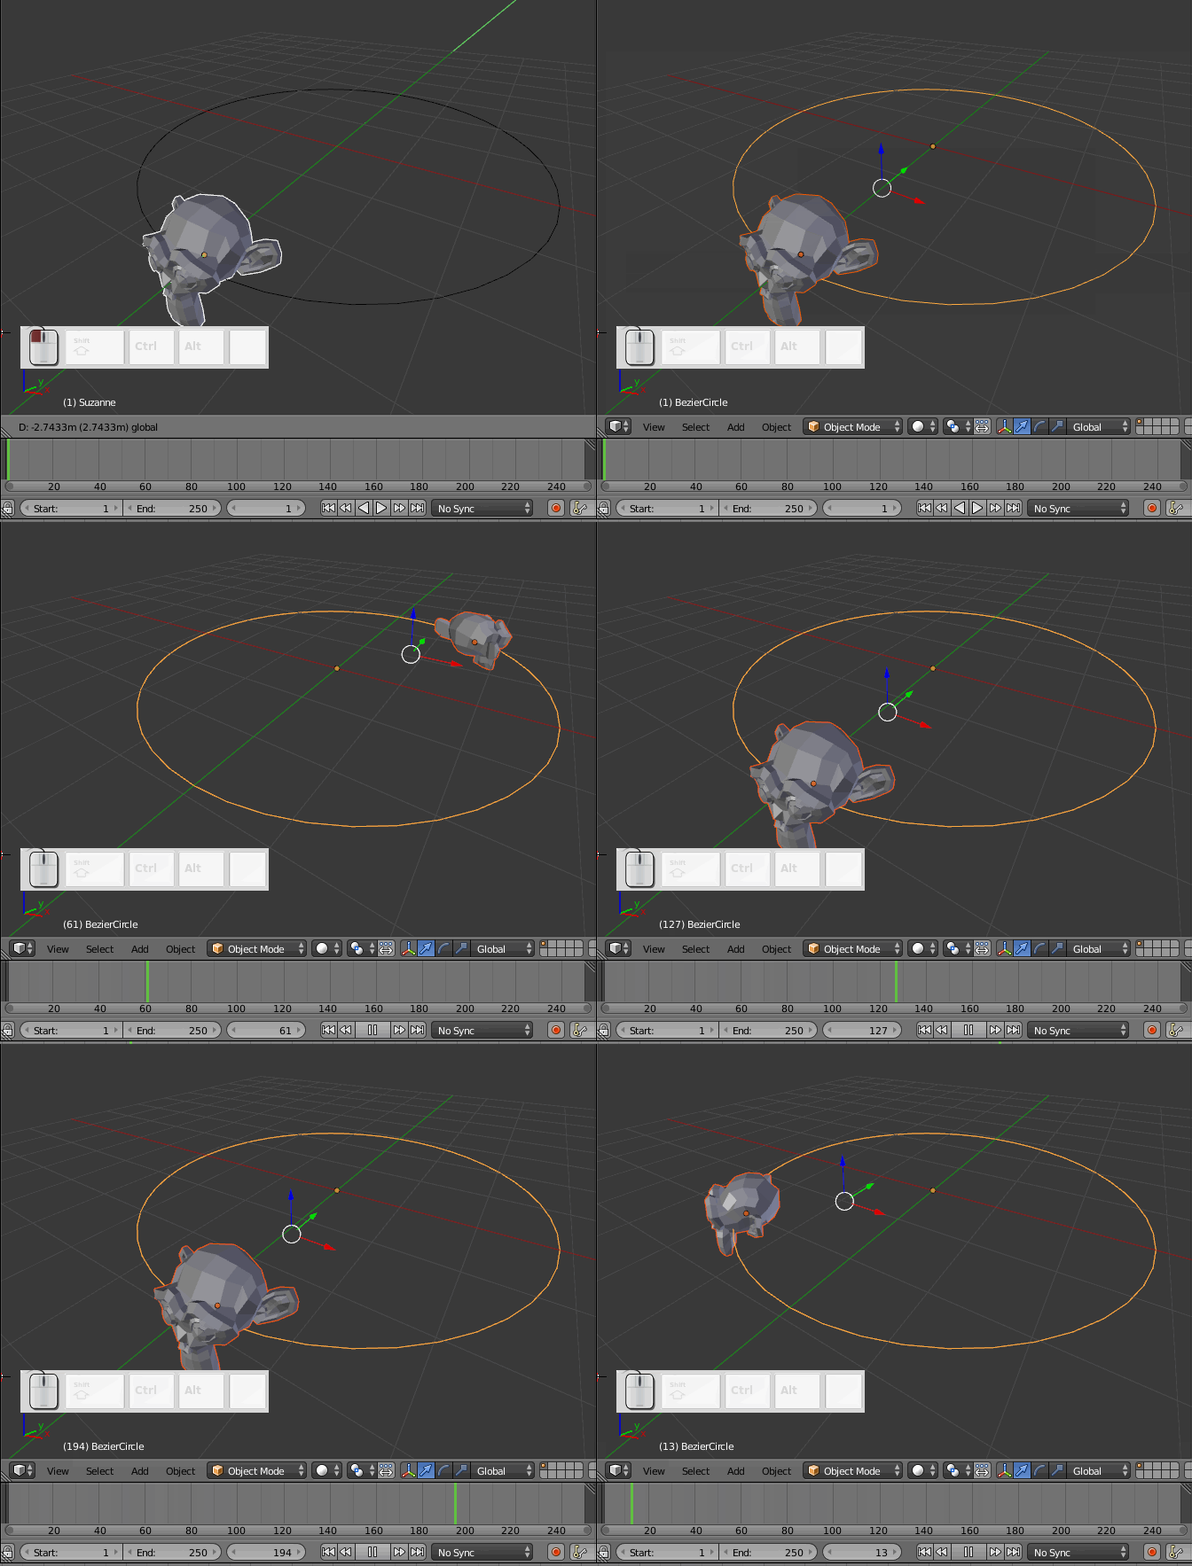
How to make the movement cyclic since there are no Keyframes or other obvious choices?
Let's look at how the movement works.
The Object travels along the path following the settings on this control panel:
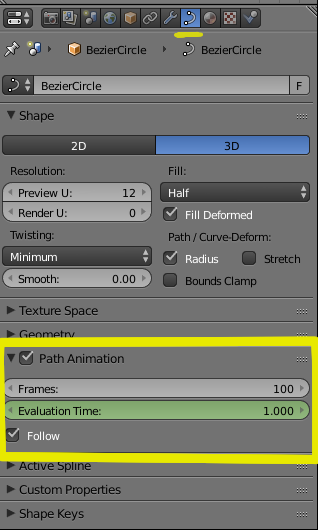
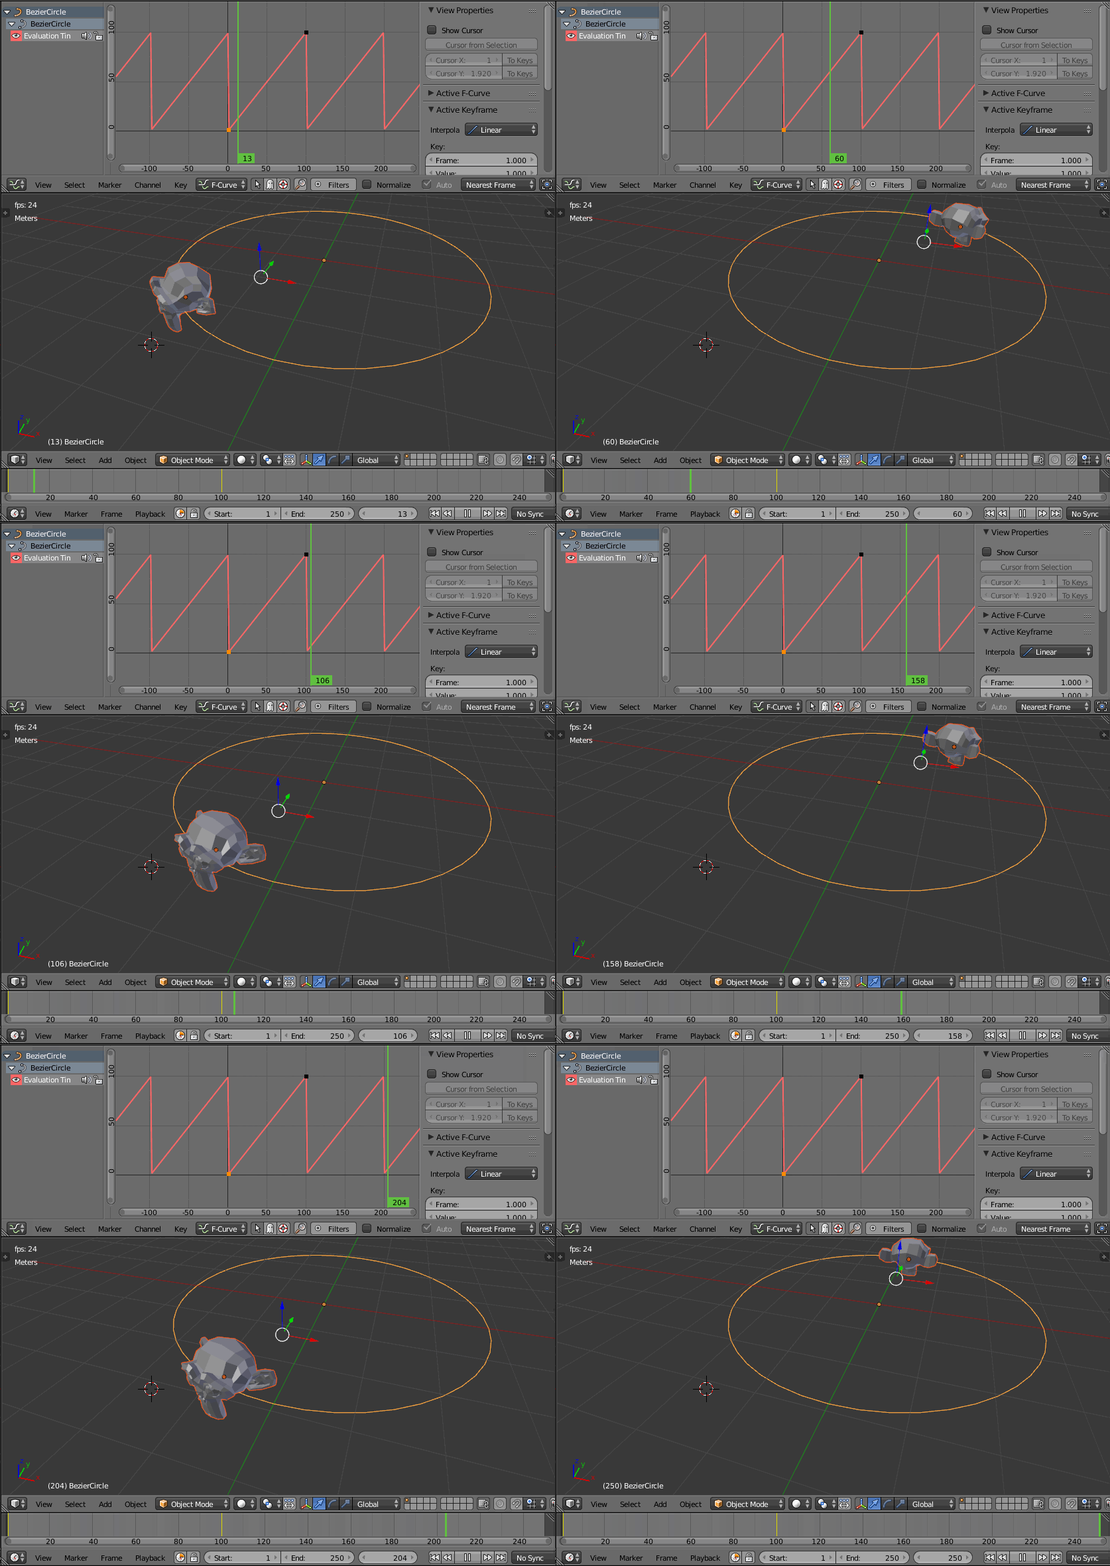
The Frames Value determines how many frames the object is going to take to travel through the path. The default value is 100, meaning that the object will take 100 frames to complete the circular motion (or the complete lenght of the path).
The Evaluation Time determines how far along the path is the current frame. At frame 1 the object will be at the starting point of the path. At frame 100 the object will have finished travelling through the full length of the path.
The problem is that past frame 100 the evaluation time keeps advancing, but the object has already completed a full loop through the path and has nowhere else to go!
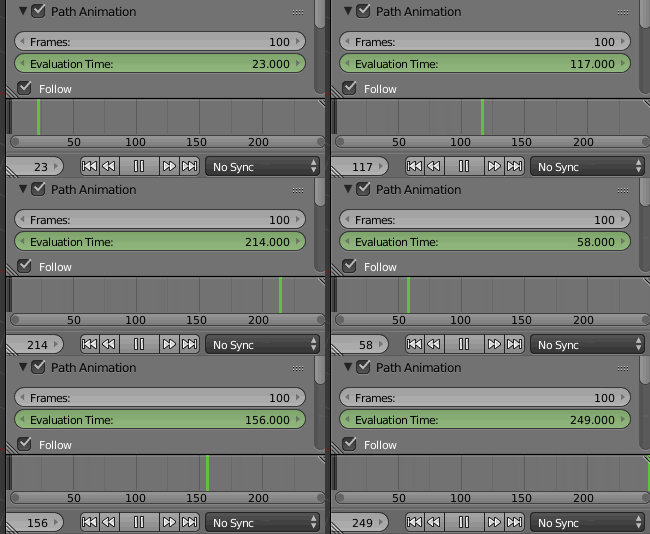
Yes! But how to change it!!??
Well, there is another piece of this puzzle. Selecting the curve and opening the Graph Editor reveals this graph:
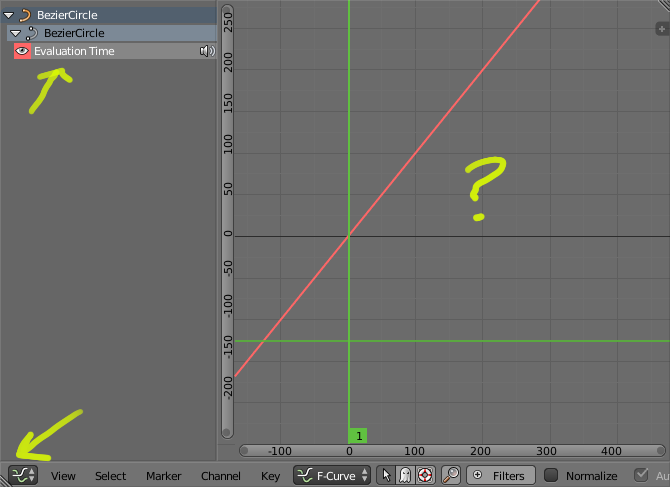
That shows the problem clearly. The horizontal scale is Time and vertical is Value. At frame 0 the evaluation time is 0. At frame 100 the evaluation time is 100 and from there it keeps growing. To make a cycle we want the evaluation time to start over from 0 at frame 101!
By Pressing N on the Graph editor (or the + sign on the top right of the window) you can access the panel and the Modifier function that is creating all this mess.
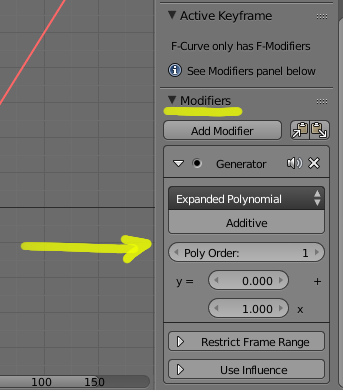
Enough already!! How do I fix this???!!!
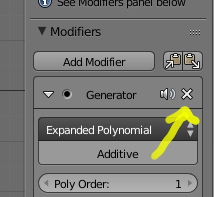
Delete the Generator Modifier by clicking on the X
Create two keyframes by clicking while pressing Ctrl. One keyframe should be at frame 1 with the value of 1 and one at frame 100 with a value of 100. Set the interpolation to linear and add a Modifier, selecrting the option Cycles to create and endless cycle!
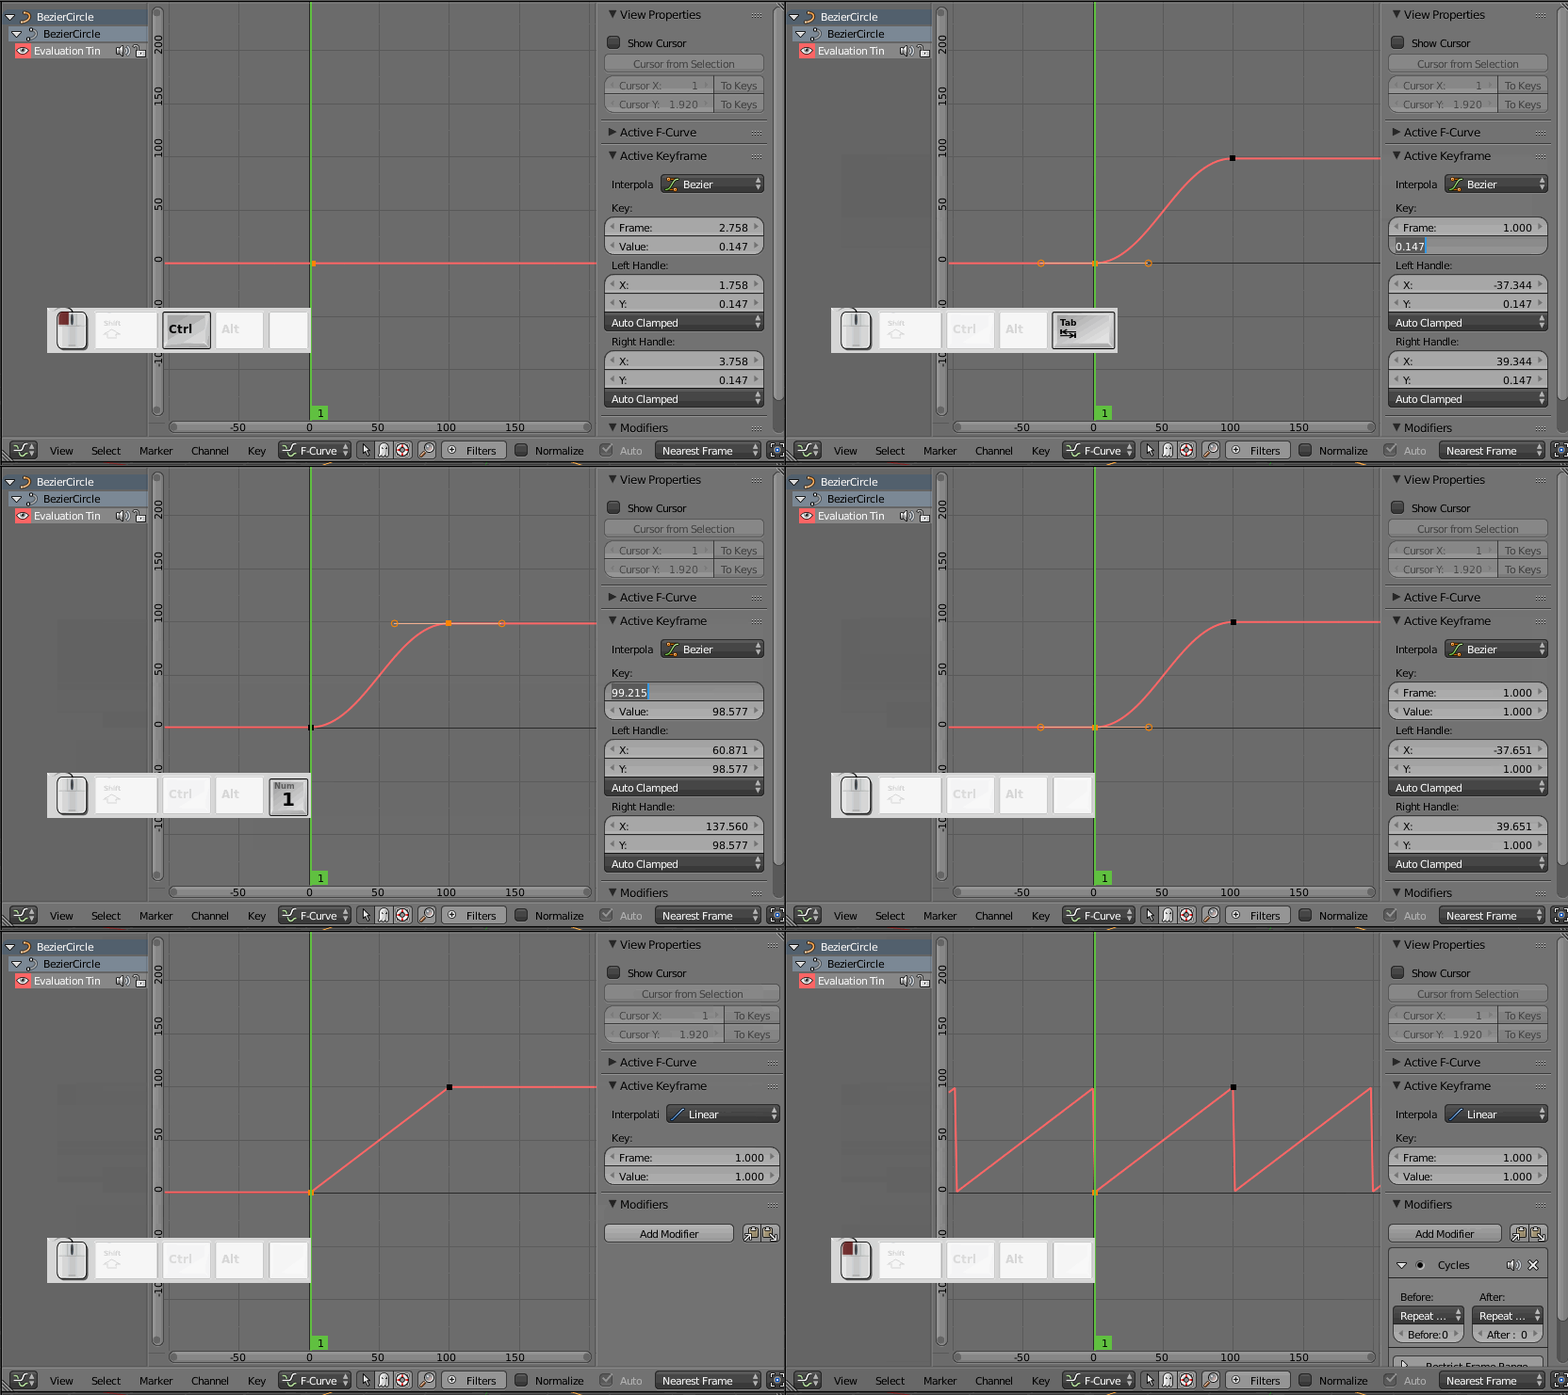
Every 100 frames the Evaluation time will reset to 0 and start over. To alter the speed of the orbit just set the keyframes closer together to go faster or further away to go slower.
So what to do if you have painstakingly made the orbit with keyframes and want to make them cyclic?
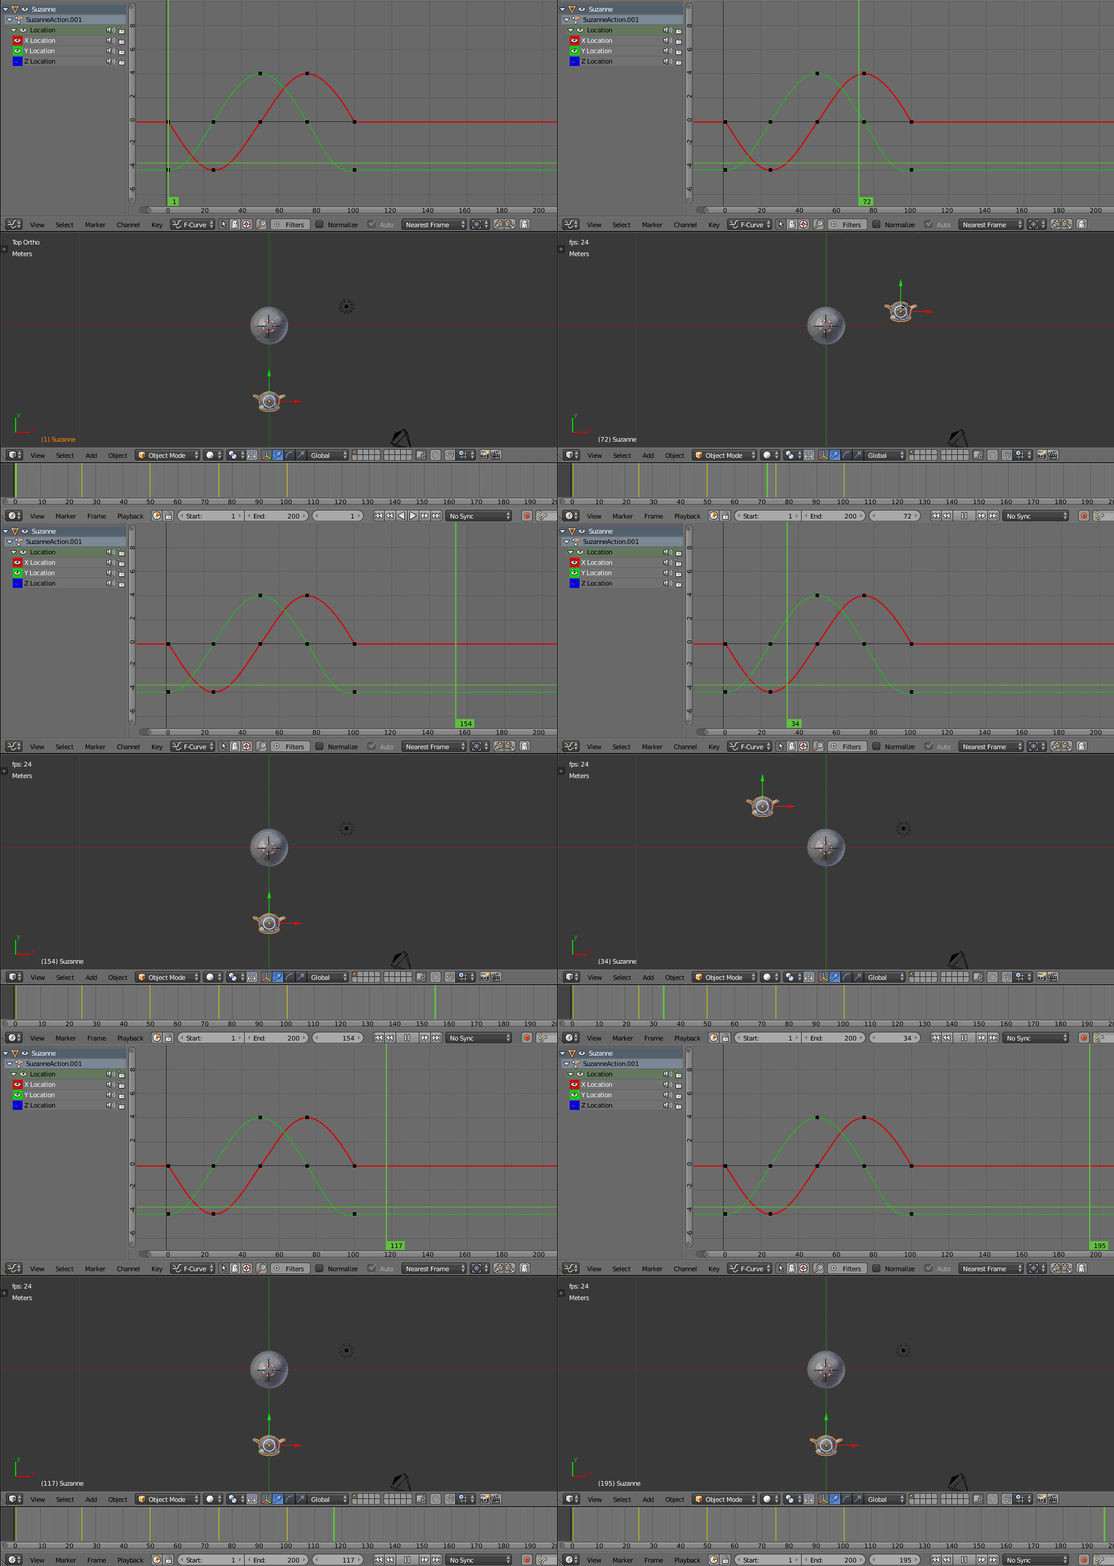
You could copy and paste the keyframes of the curve... Too much work again...
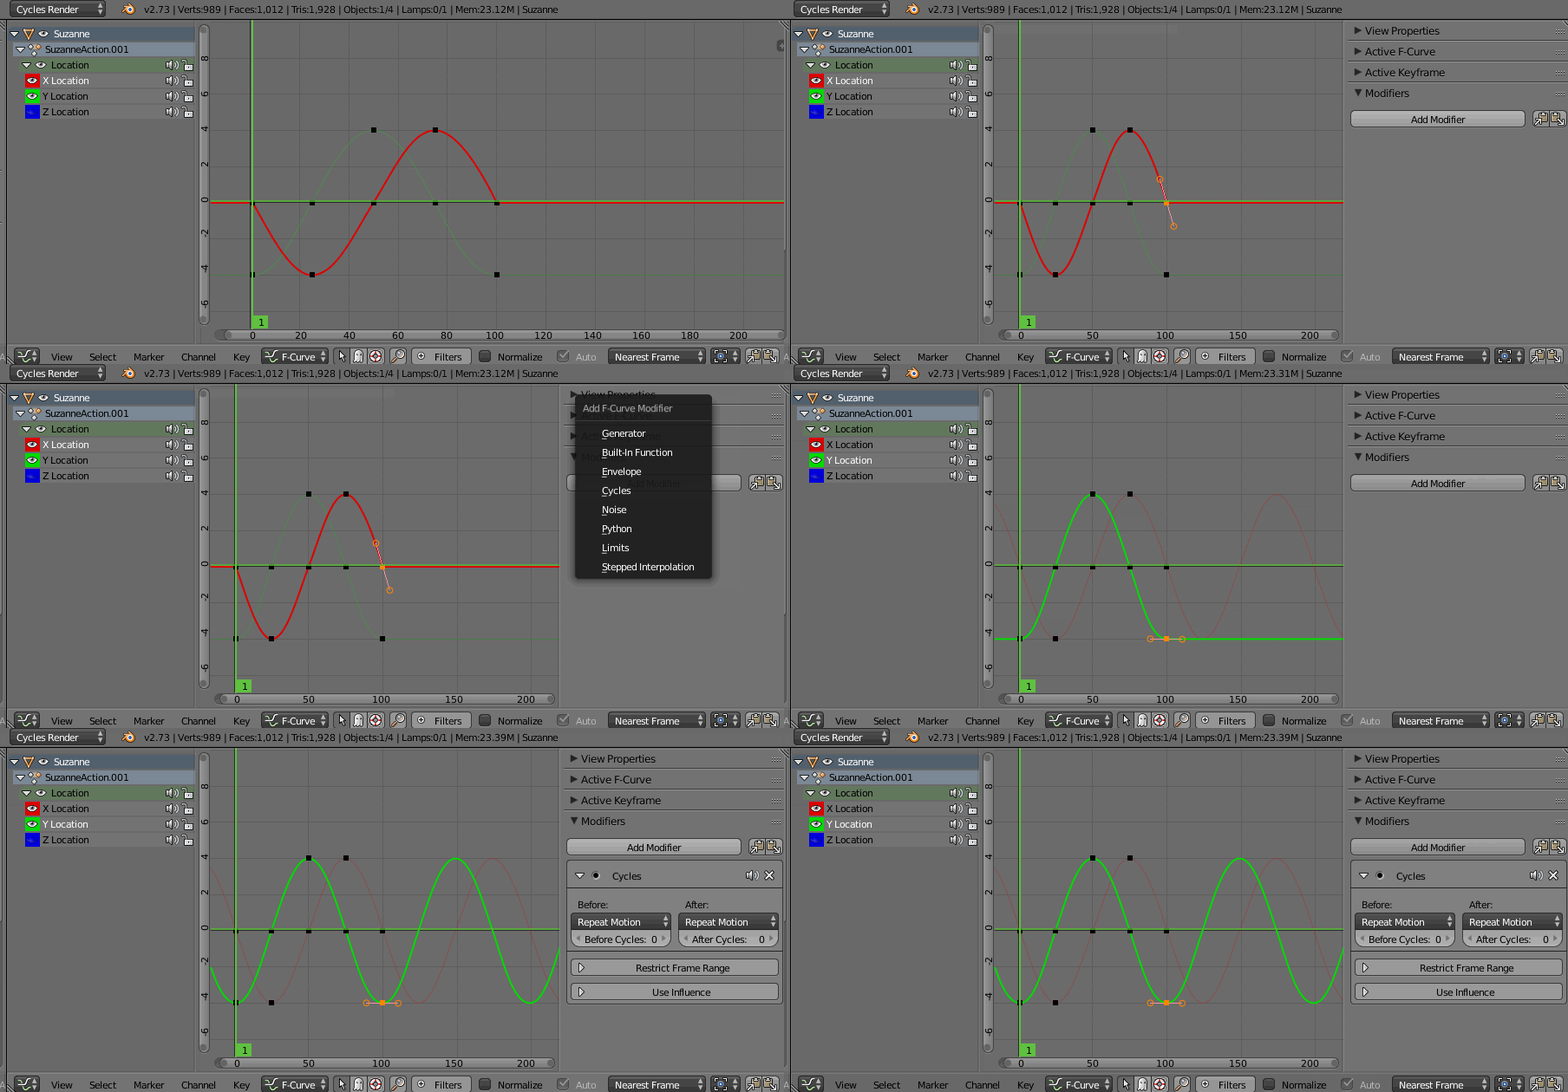
If you press N you can access the numeric panel for the curves and ther you can add a cycles modifier to create cyclic motion.
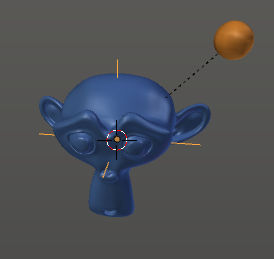
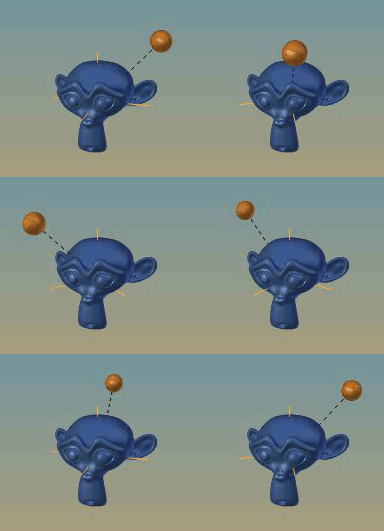
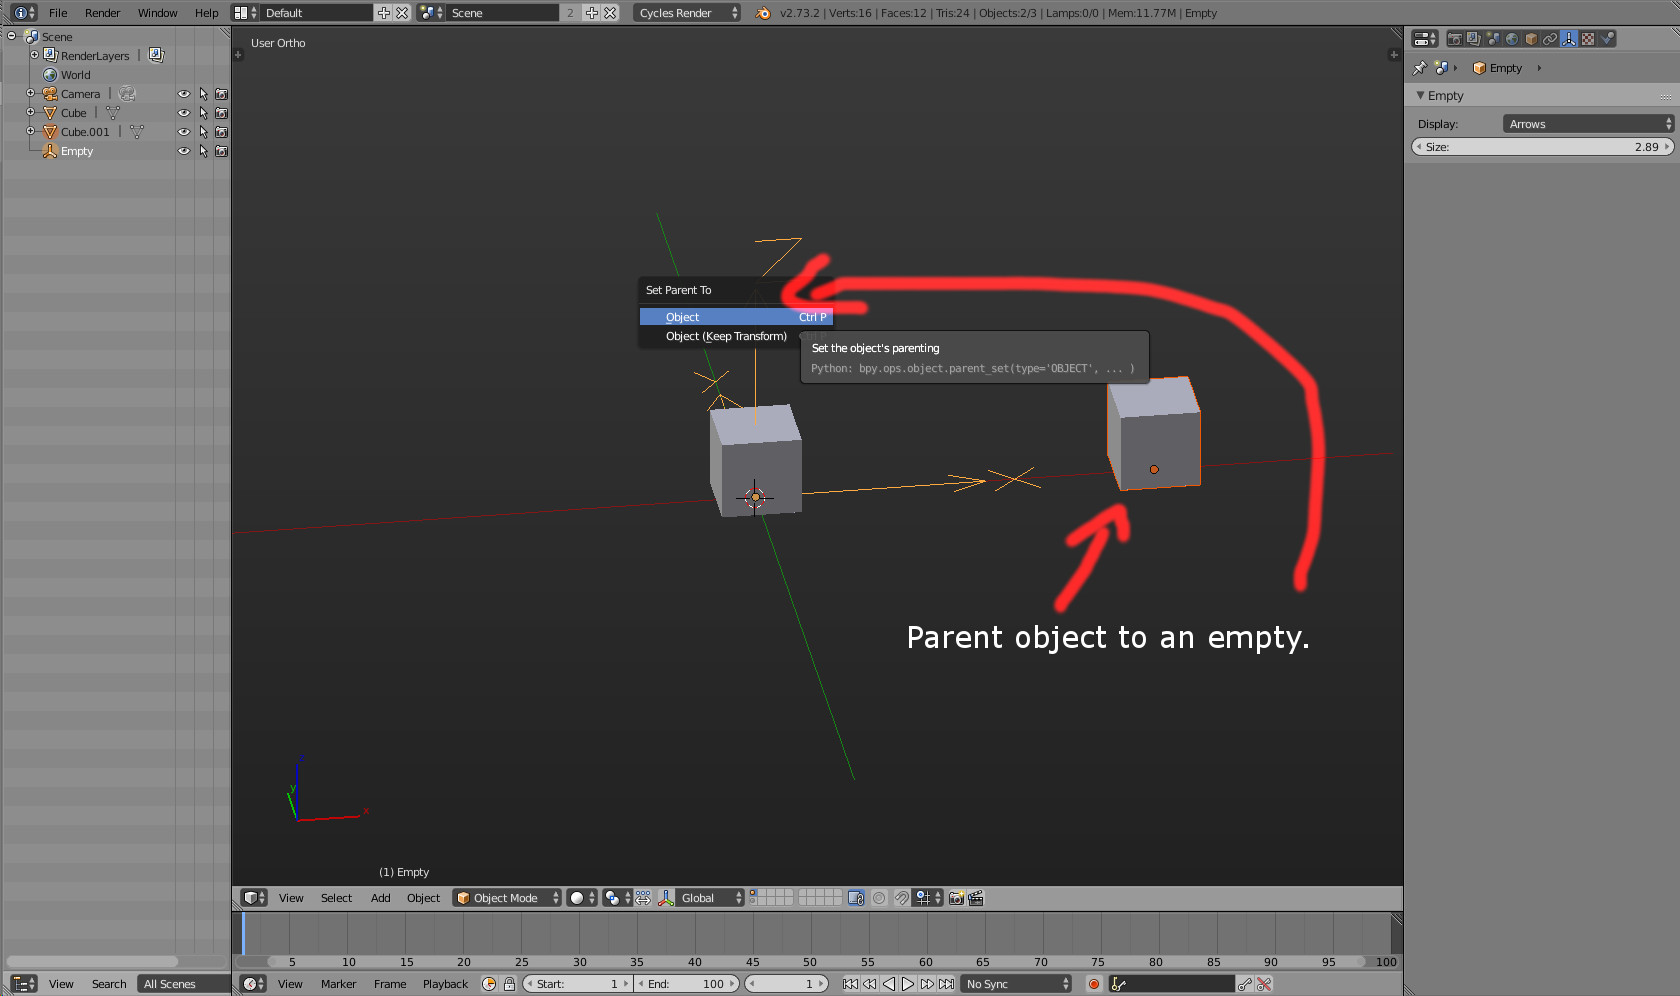
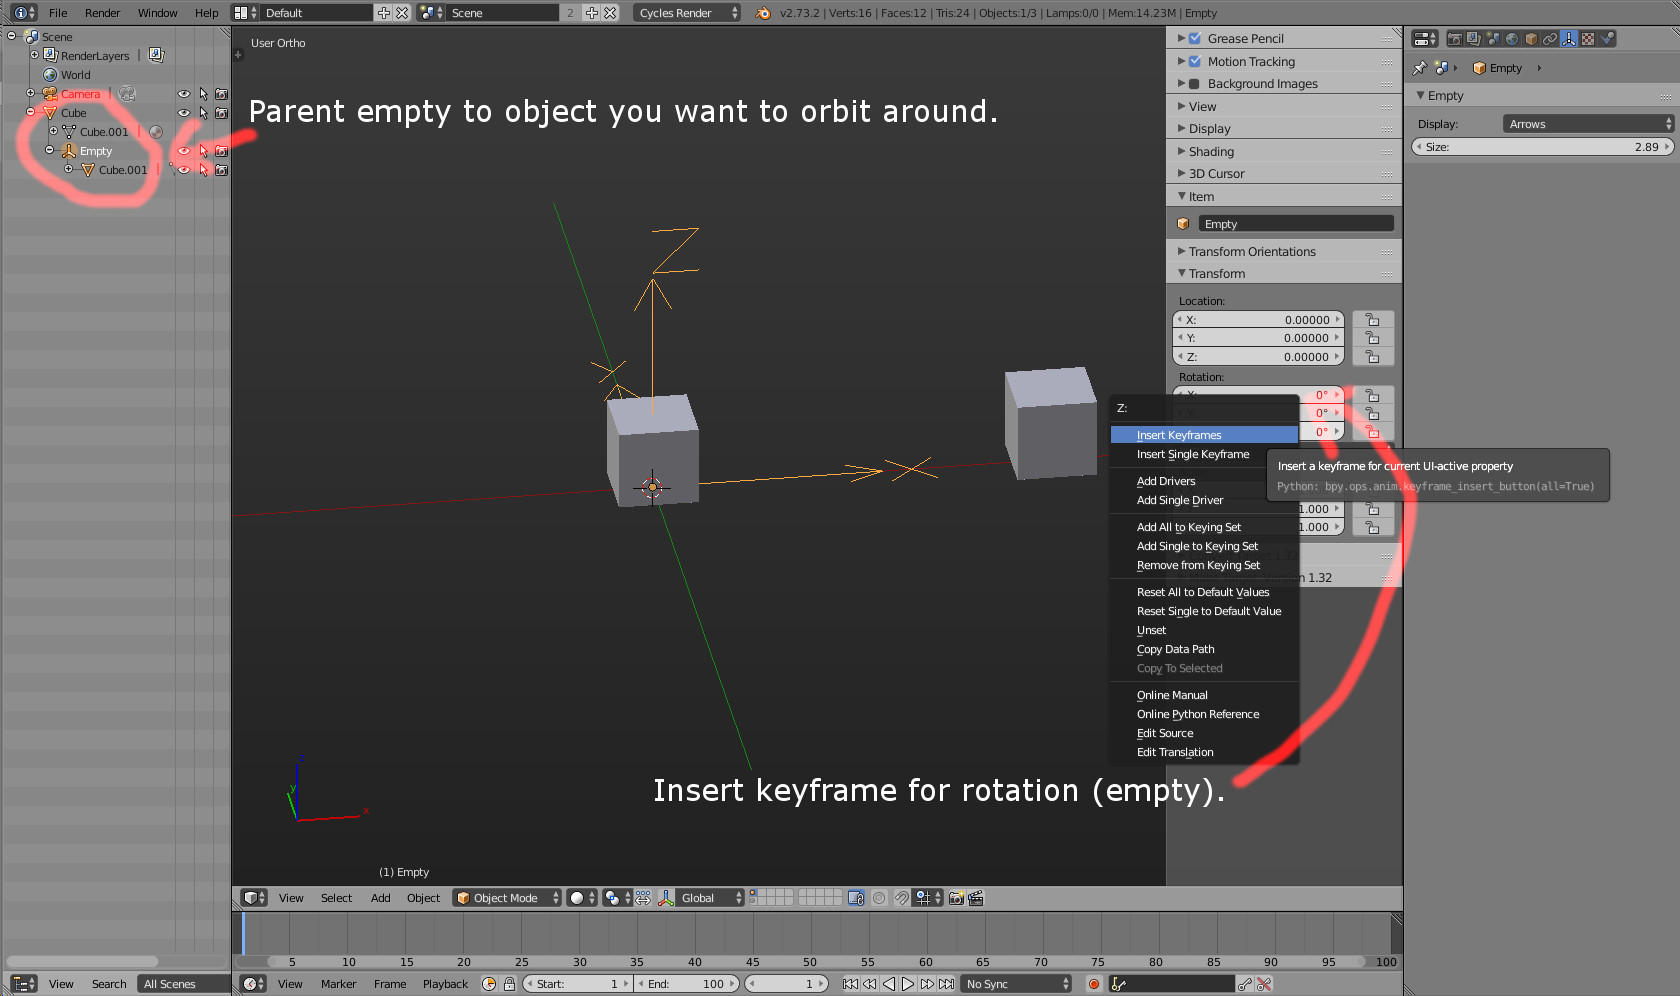
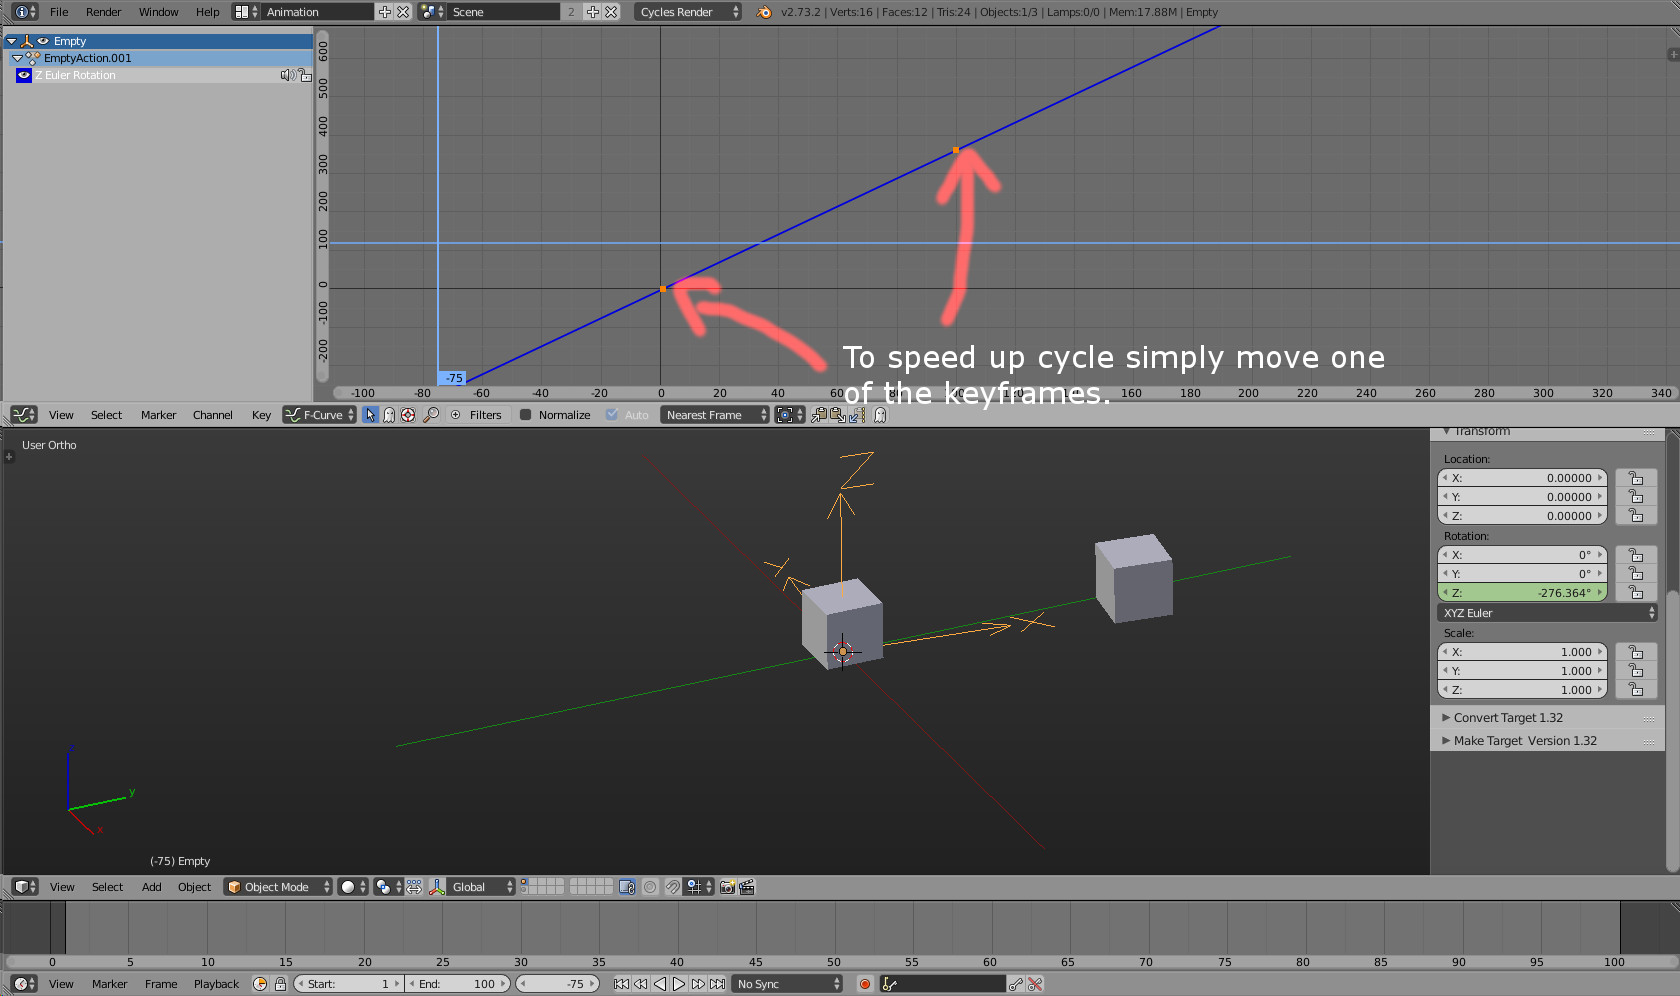
Place an empty at the location of the object you wish to orbit around, make this empty the parent of the object you want to do the orbiting, animate the rotation of the empty.
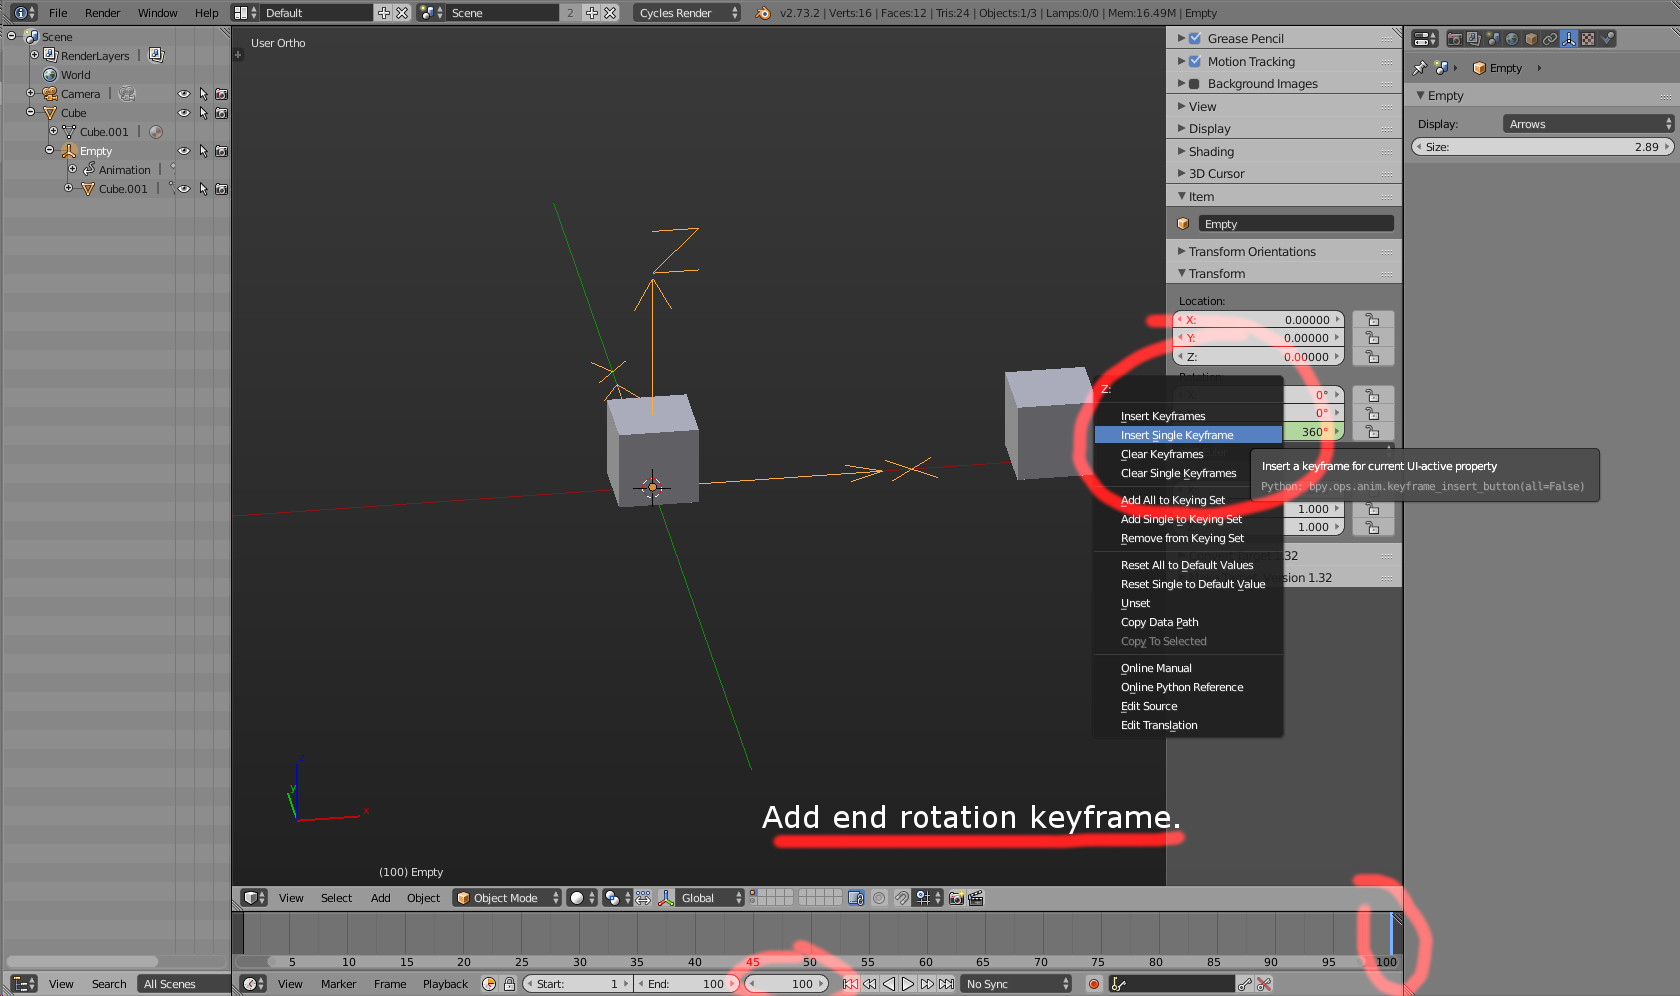
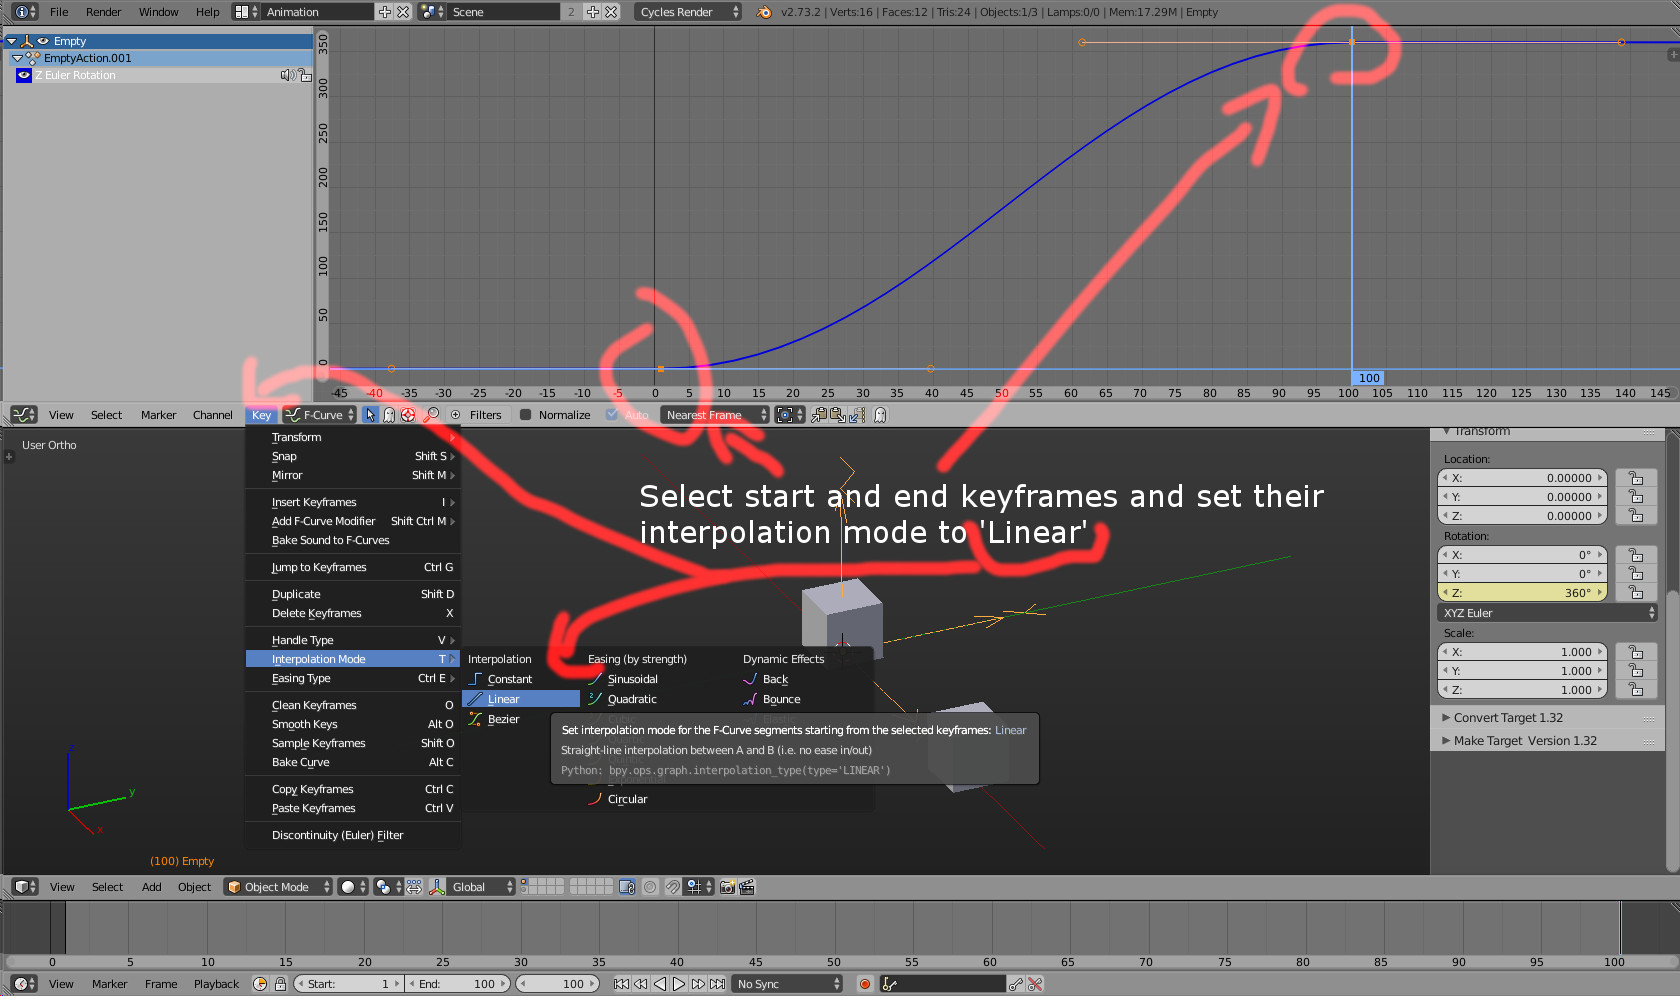
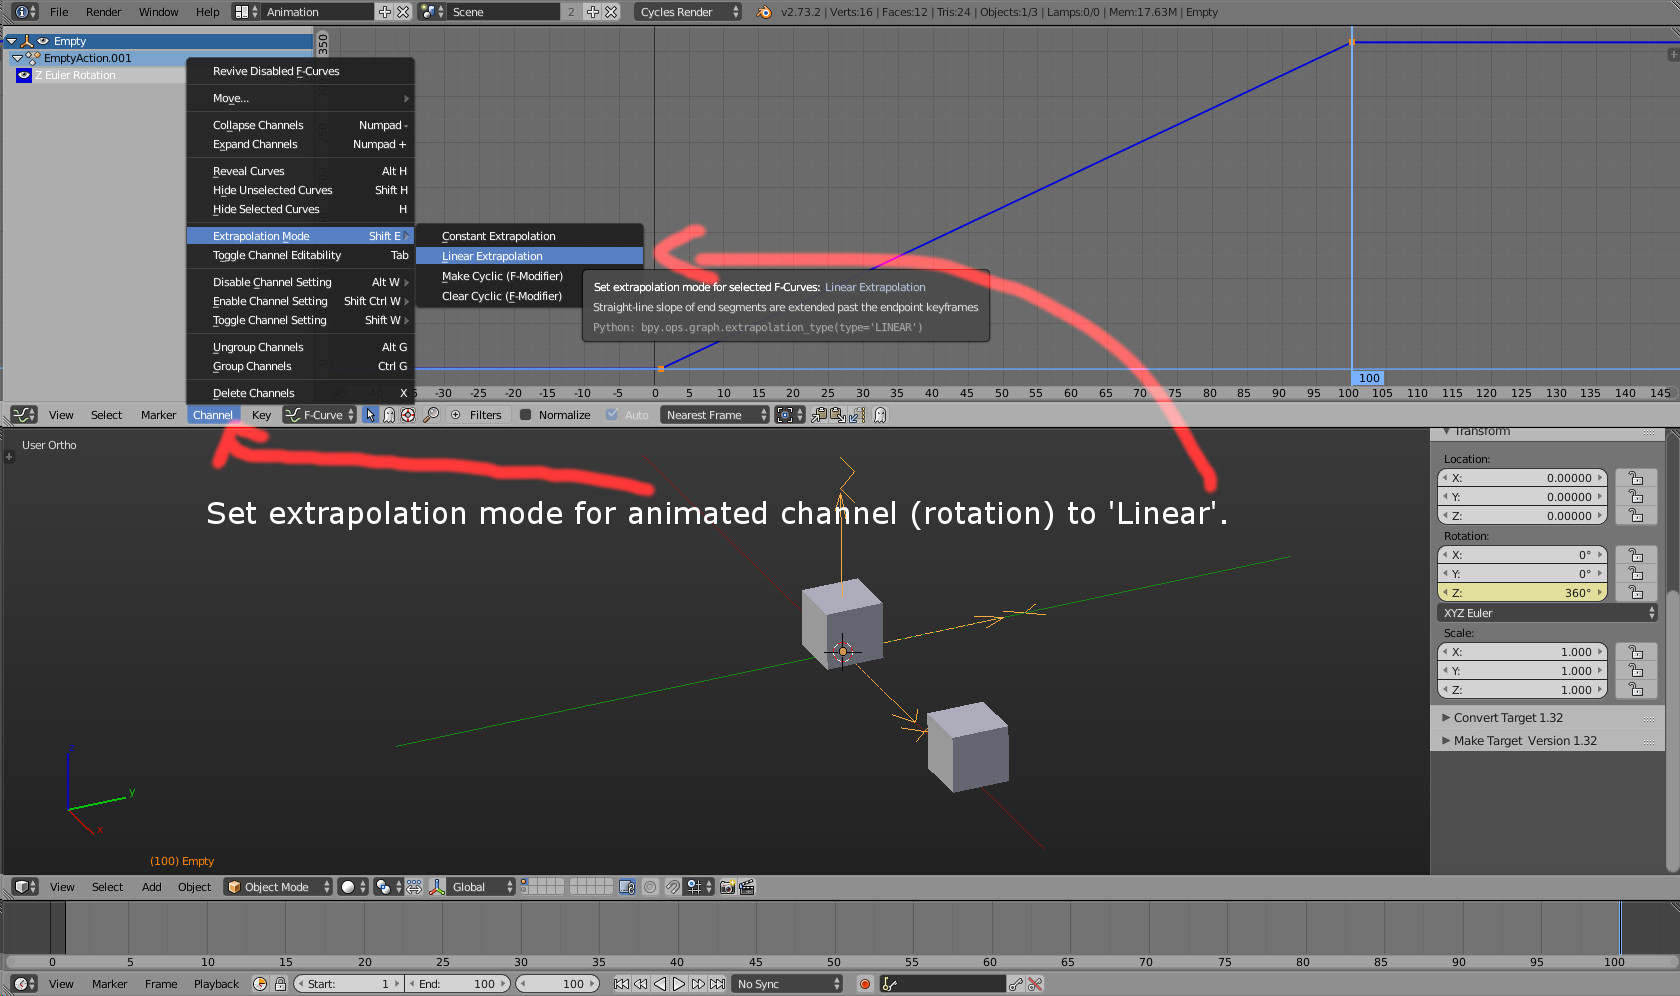
To get a continuous rotation, insert a rotation keyframe as a starting point, then advance a few frames, rotate the empty, then insert another rotation keyframe. In the graph editor select the rotation value and change channel extrapolation to linear. Channel->Extrapolation Mode->Linear Extrapolation.
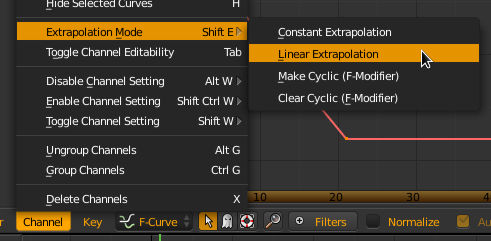
This allows you to have two keyframes on the rotation and have it constantly rotate. By changing the frame and the value you control the speed at which the object orbits around.
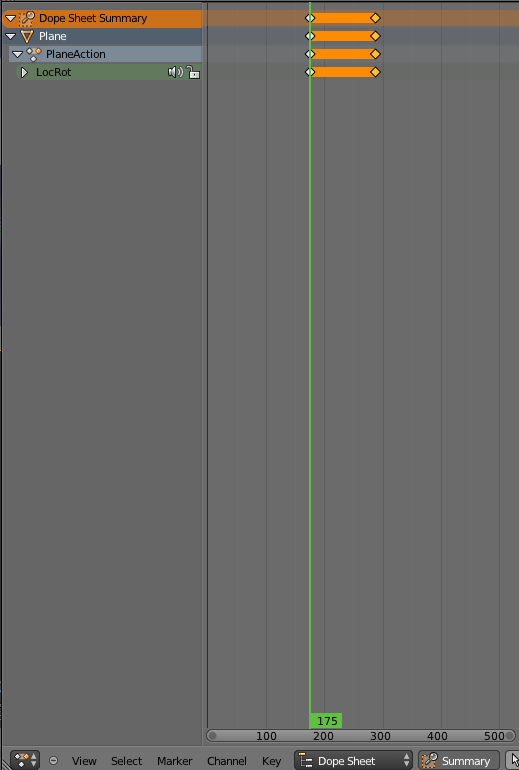
Ok if i understand what you are asking there is 2 ways to do this , The first is to set the finishing frame number to 100 in the following image :

The second being to duplicate the frames in the dope sheet. To do this select all the keyframes by pressing A twice ( make sure your mouse is over the dope sheet tab ) , and press Shift + D , And move your mouse over until it is sitting next to the last keyframe , and also make sure the finishing frame number is set to the number which the last keyframe is on.
Just parent your object to an empty, then parent empty to an object you want to orbit around, animate one cycle, extrapolate channel to Linear:
I'm surprised no one has mentioned geometry nodes yet! You can't apply geonodes on a camera because it's not a mesh but you can apply translate and rotation transforms on a mesh through geonodes and through vertex parenting apply them on a child camera
- Add any mesh, for example a cube that you'll call cameraman
- click on the cameraman then shift+click on the camera to select both
- Ctrl+P to make the camera the child of the cameraman, select the
vertex (triangle)option - Rotate the camera 90° on the Y axis (shortcut: click on camera, then R, then 9,then 0)
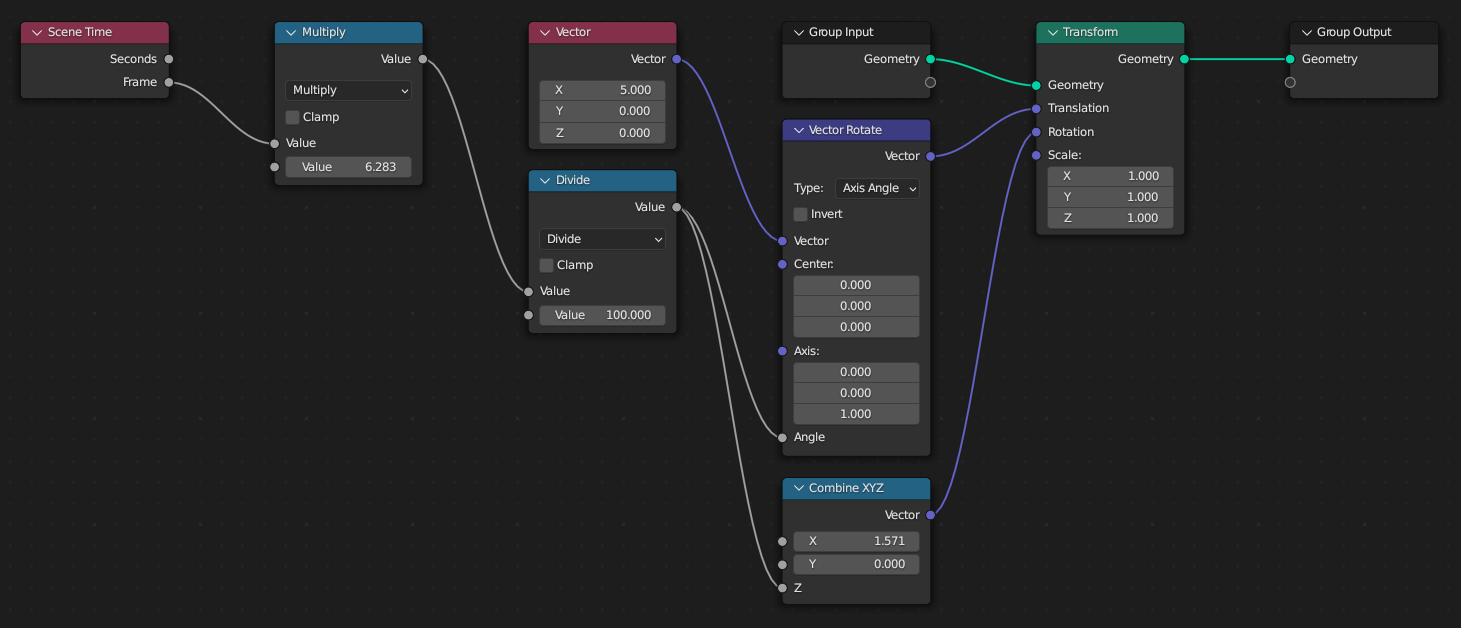
- Create this geonodes modifier on the cameraman so that it rotates around the circle:
This works by translating the cameraman by a vector of $(5,0,0)$ (5m is the radius I chose here), and having this vector rotate by one full rotation (ie an angle of $2*pi$, which explains the multiply by 6.253, once every 100, which explains the divide by 100.
At this point the camera is translated along a circle, but in order to look at the center one must also add the Combine XYZ { x: pi/2, y: 0, z }.
You can find a .blend file showing just that in this .blend collection.

