4
$\begingroup$

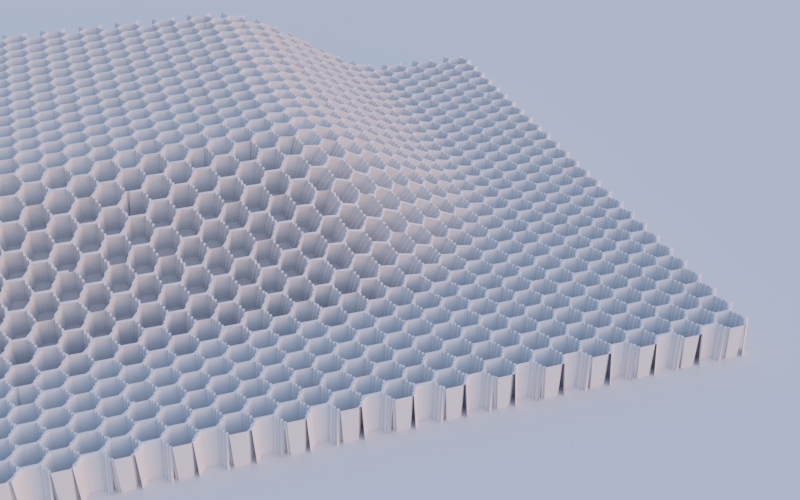
Currently for work I'm supposed to visualize honeycomb patterned cardboard filling in more complex shapes, and I'm struggling a lot with finding a good workflow for doing this.

The first option I tried was using shrinkwrap as well as deformations to deform a real honeycomb mesh onto it's shape. This was very messy and slowed down my workflow tremendously..

Second option I tried (after lots of googling) was layering a lot of alpha image textures on top each other to fake depth to give the impression of the honeycomb pattern being a 3D object. This seemed to work really well and made me happy to work with, but only works when the top and bottom layer are the same, which almost always doesn't seem to be the case (me and my boss later found out)..

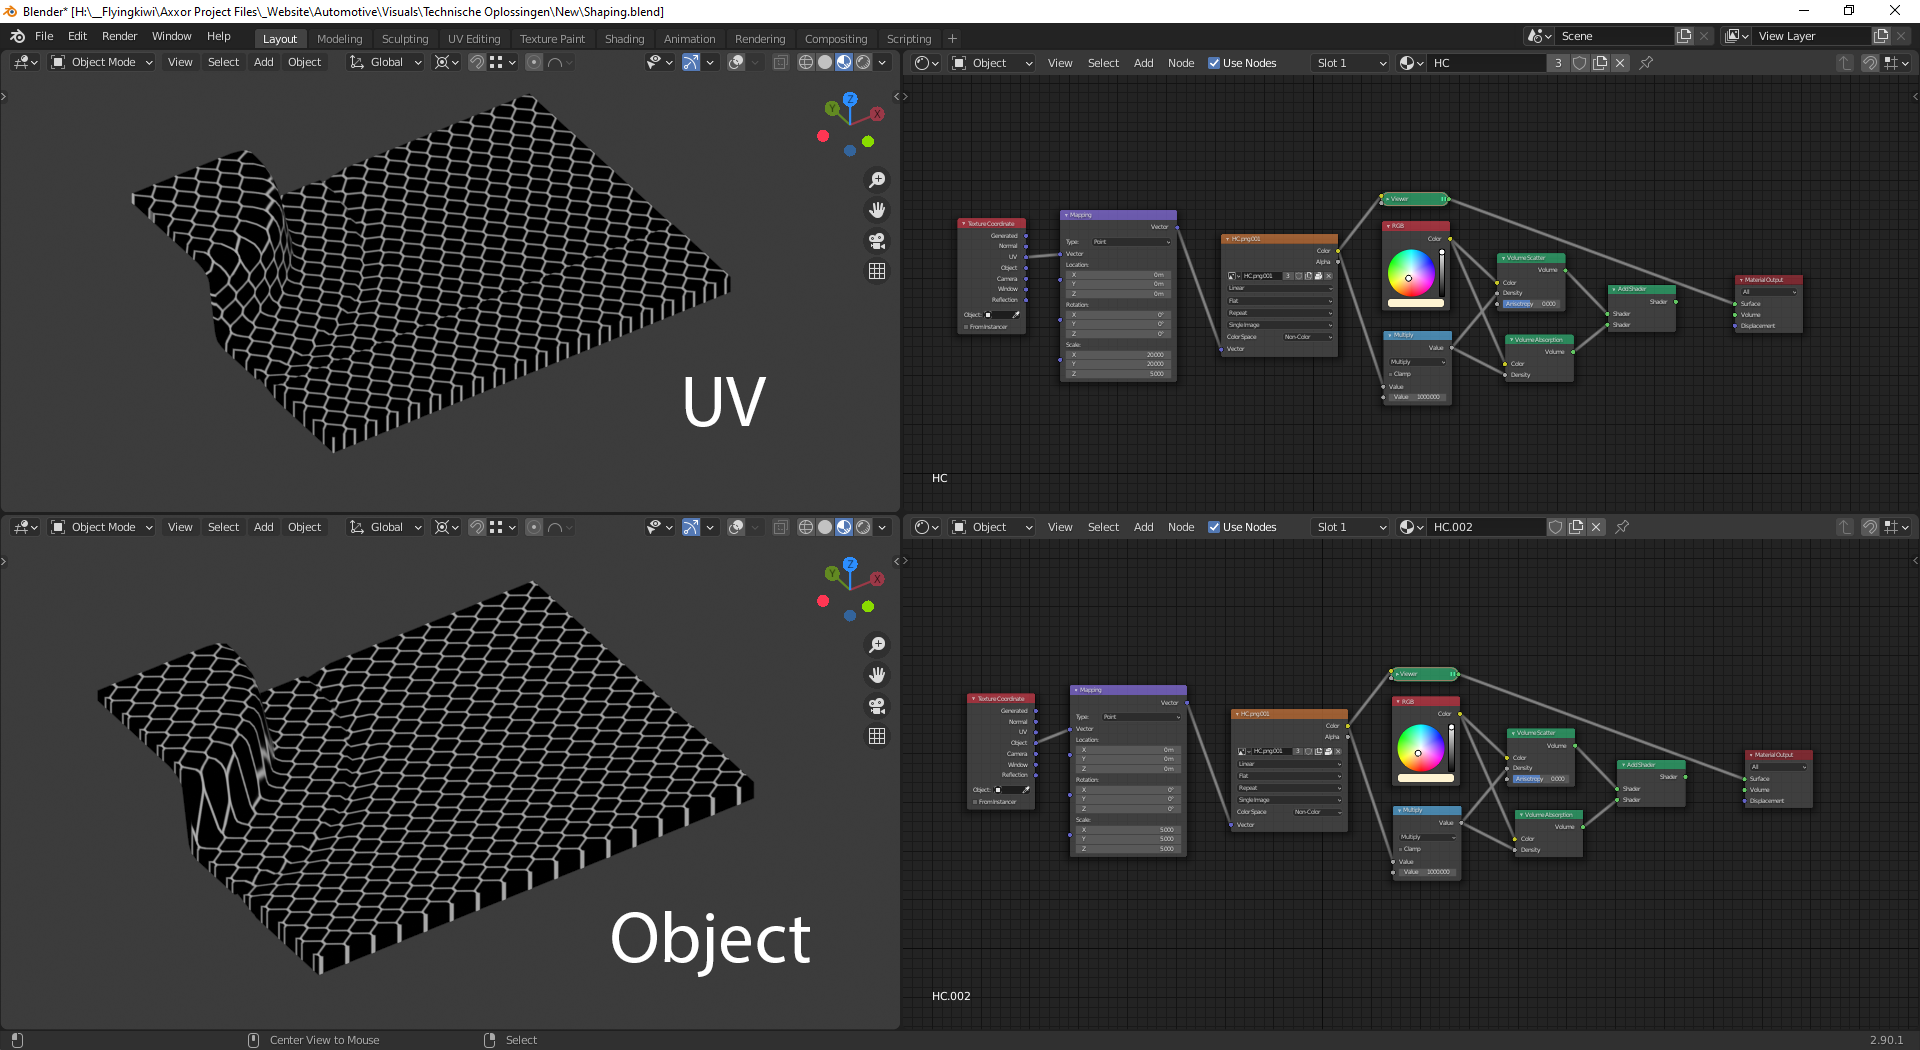
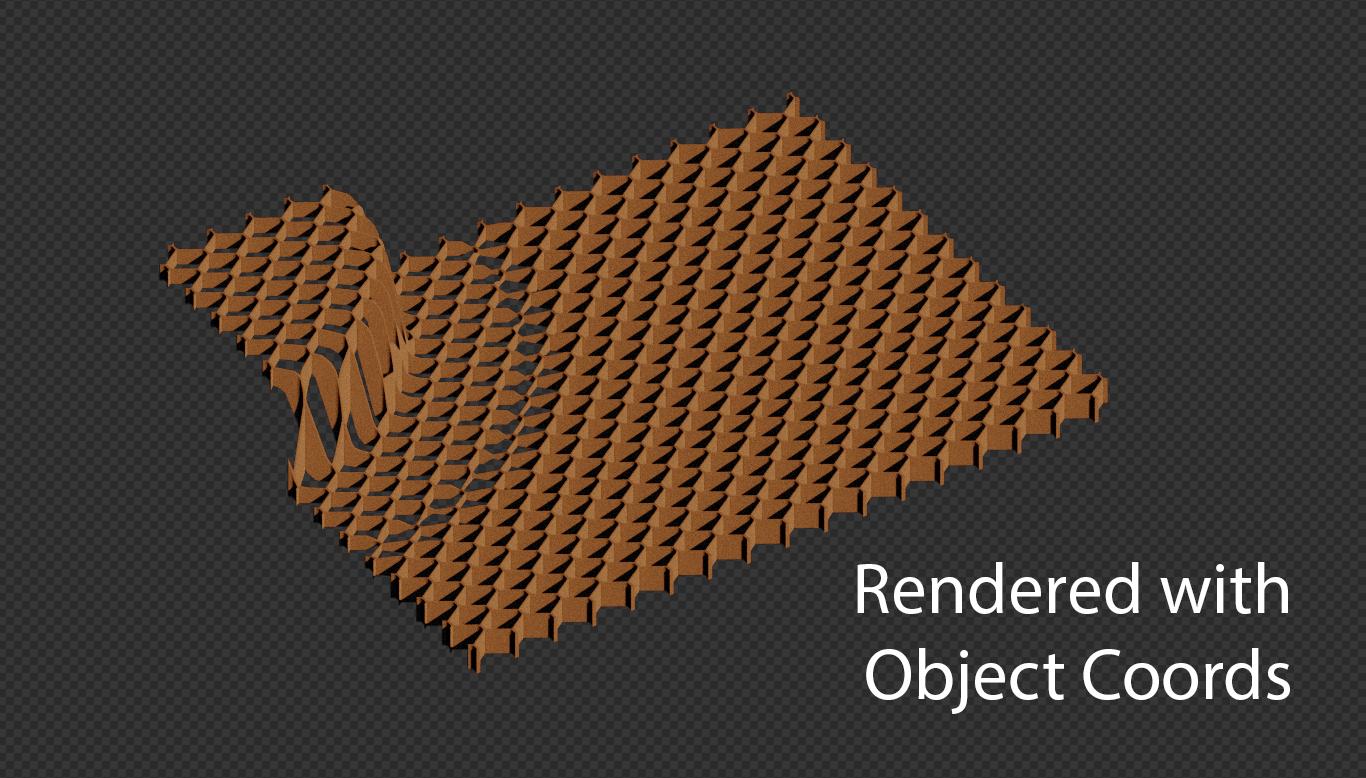
Third option (my current method). This method I really like, Via an object I project the HC pattern on the mesh and via a shader it generates a 3D hard volume of the honeycomb. This method seems to work really well, but there is one issue with it.. I can't use UV coordinates! Not being able to use the UV's makes it very hard to show the honeycombs bendabillities since it now projects only from the top

I'm not some kind of node wizard so I'm really clueless how I could fill complex shapes with a honeycomb pattern that looks 3D and is also nice to work with.. Am I at the edge of what's possible via 3D? Is there another way?

Thanks in advance, any help is very much appreciated!

enter image description here

enter image description here

enter image description here

Thanks a lot to Jachym for helping!

$\endgroup$
1
  • 1
    $\begingroup$ Hello Jachym! The desired flow is actually the black and white result where it says UV next to it. The pattern actually follows the shape as opposed to using object coordinates that project straight down from the top.. Reason I cant use the UV coordinates is because the volume shader doesn't work with 2D coordinates, since the pattern is generated via a volume! $\endgroup$
    – Macarmoni
    Commented Oct 2, 2020 at 13:39

1 Answer 1

4
$\begingroup$

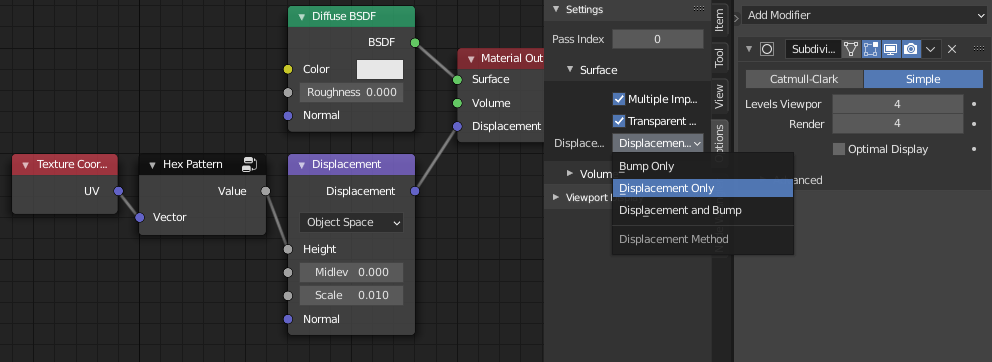
I'm no node wizard, so I'd recommend the Displacement node.
Then you can use UV maps for better control.

  1. Add a Subdivision modifier set to Simple (4+ levels)
  2. Use your hexagon texture to drive the Displacement node
  3. Enable true Displacement in material properties

enter image description here enter image description here


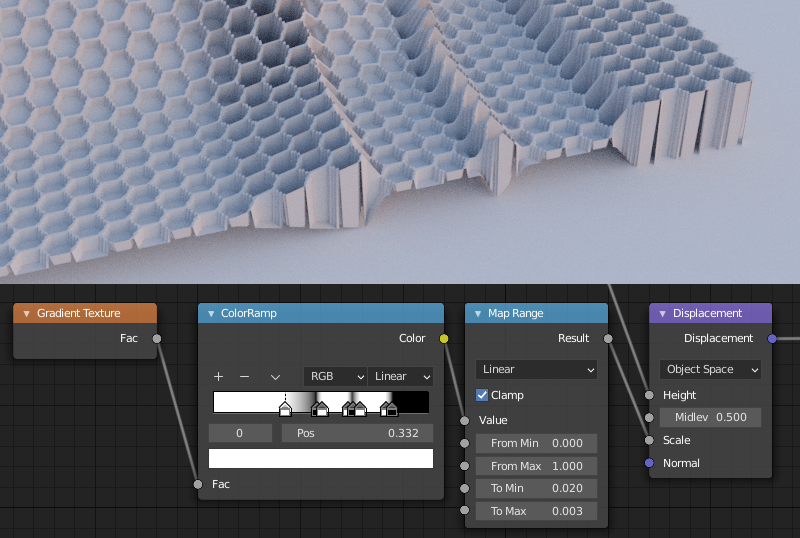
You can also drive the thickness using a BW texture enter image description here

$\endgroup$
6
  • 1
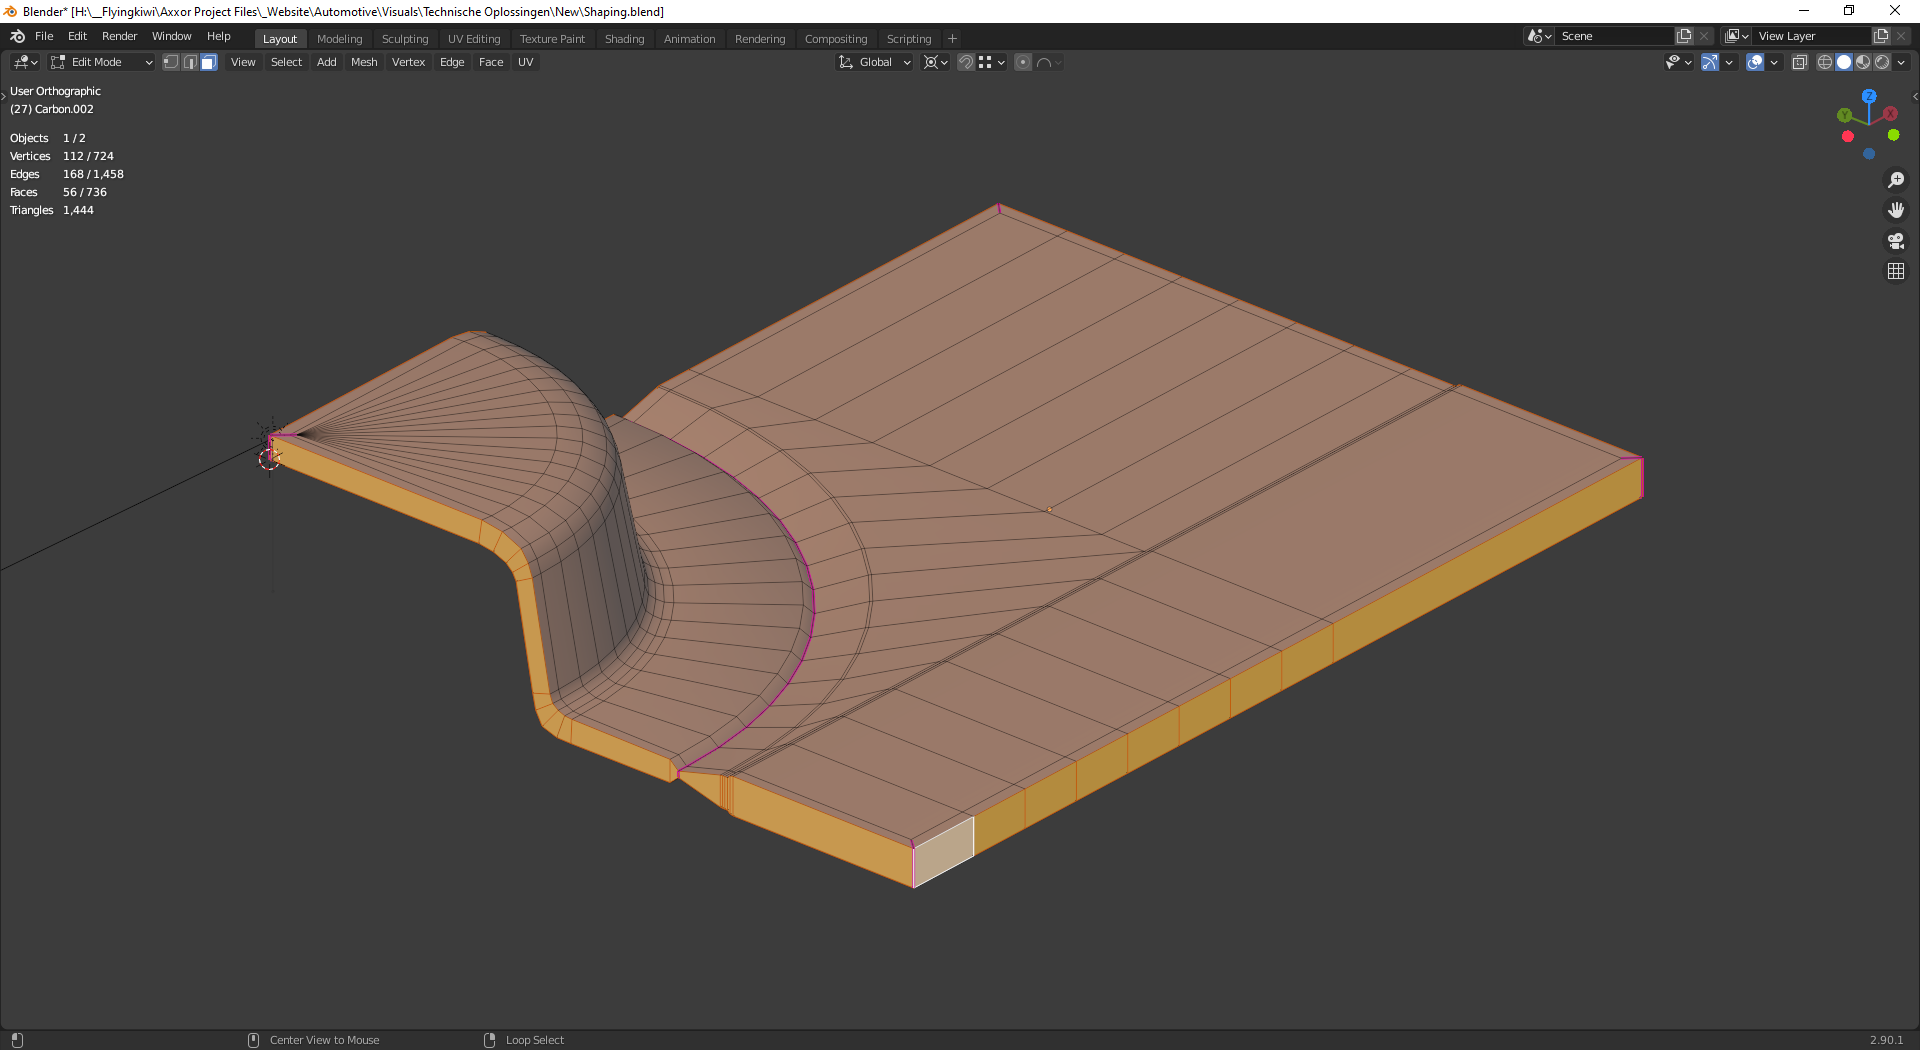
    $\begingroup$ Thanks a lot for the response Jachym. This result looks pretty good but I don't think it'll work well with my current shape, because the shape isn't the same thickness overall. I added another pic where you can see the shape. Difficult thing this is! If only there is a way for me to use UV coords with the volume node, but that's impossible it seems.. Thanks a lot again, I hadn't considered displacement mapping before $\endgroup$
    – Macarmoni
    Commented Oct 2, 2020 at 18:11
  • 1
    $\begingroup$ Hey :). You can easily drive the thickness with another texture. Simple BW gradient works. $\endgroup$ Commented Oct 2, 2020 at 18:17
  • 1
    $\begingroup$ oh wow I didn't realize that was possible! I'll look more into this and will update, thanks a lot again! $\endgroup$
    – Macarmoni
    Commented Oct 2, 2020 at 18:51
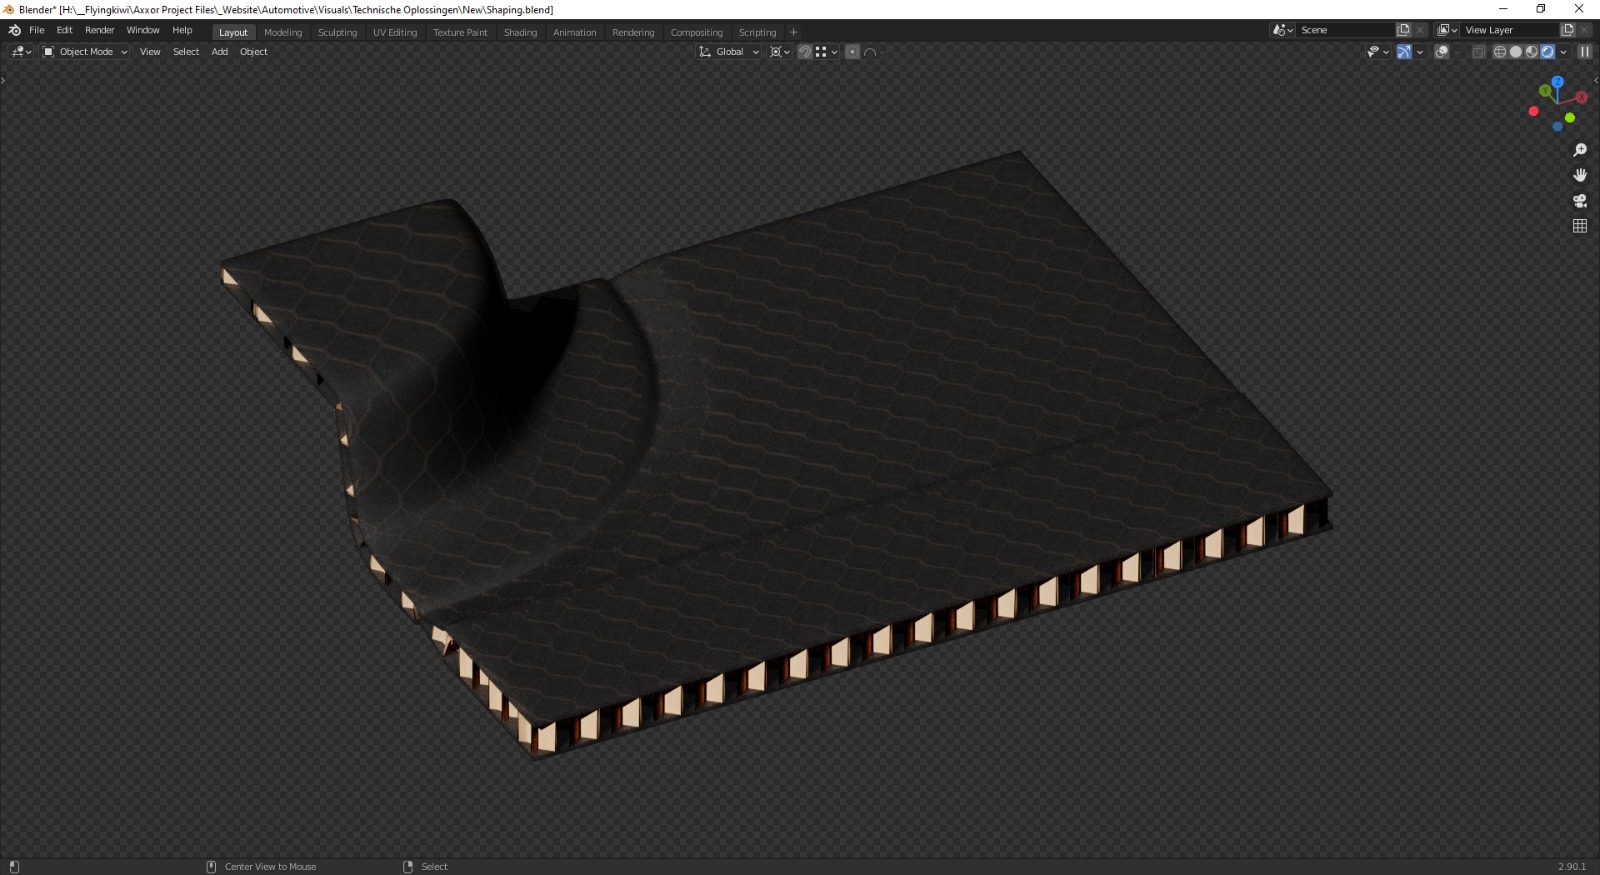
  • $\begingroup$ Added an example into the post - just to see how well it works :). $\endgroup$ Commented Oct 2, 2020 at 19:12
  • 1
    $\begingroup$ No problem :). If you get stuck anywhere, feel free to ask a new question. This one was fun. $\endgroup$ Commented Oct 5, 2020 at 9:41

You must log in to answer this question.

Not the answer you're looking for? Browse other questions tagged .