I'm modelling a gun at the moment, and already have a texture colour map in mind. I'm going to use Cycles render, to create the materials using the same diffuse but with different brightnesses. I know that I can bake normals by making a low and high poly version of the gun and then baking the normal maps via blender. I know normals create a sense of depth to an otherwise flat surface, but how can I go about "baking" the details of the high poly (eg bolts) onto the low poly model, so that when I apply the normal map it will work well? Thanks
2 Answers
The first thing to understand about this answer is that it's not really a new answer. This question has been asked and answered before plenty of times before - but it seems the part you are getting stuck on is how to bake from multiple objects to a single target object, so I will address that.
Before going any further, here are some resources to help you learn about texture baking in Cycles:
In your situation, you are aiming to bake from multiple Selected objects to a single Active object. What does that actually mean in Blender? Let's examine.
A Selected object is any object that you have selected, and it will be highlighted in orange (or in my case blue because my theme settings have been customized). The Active object is the last object you have selected, and it appears highlighted, usually in a lighter color.
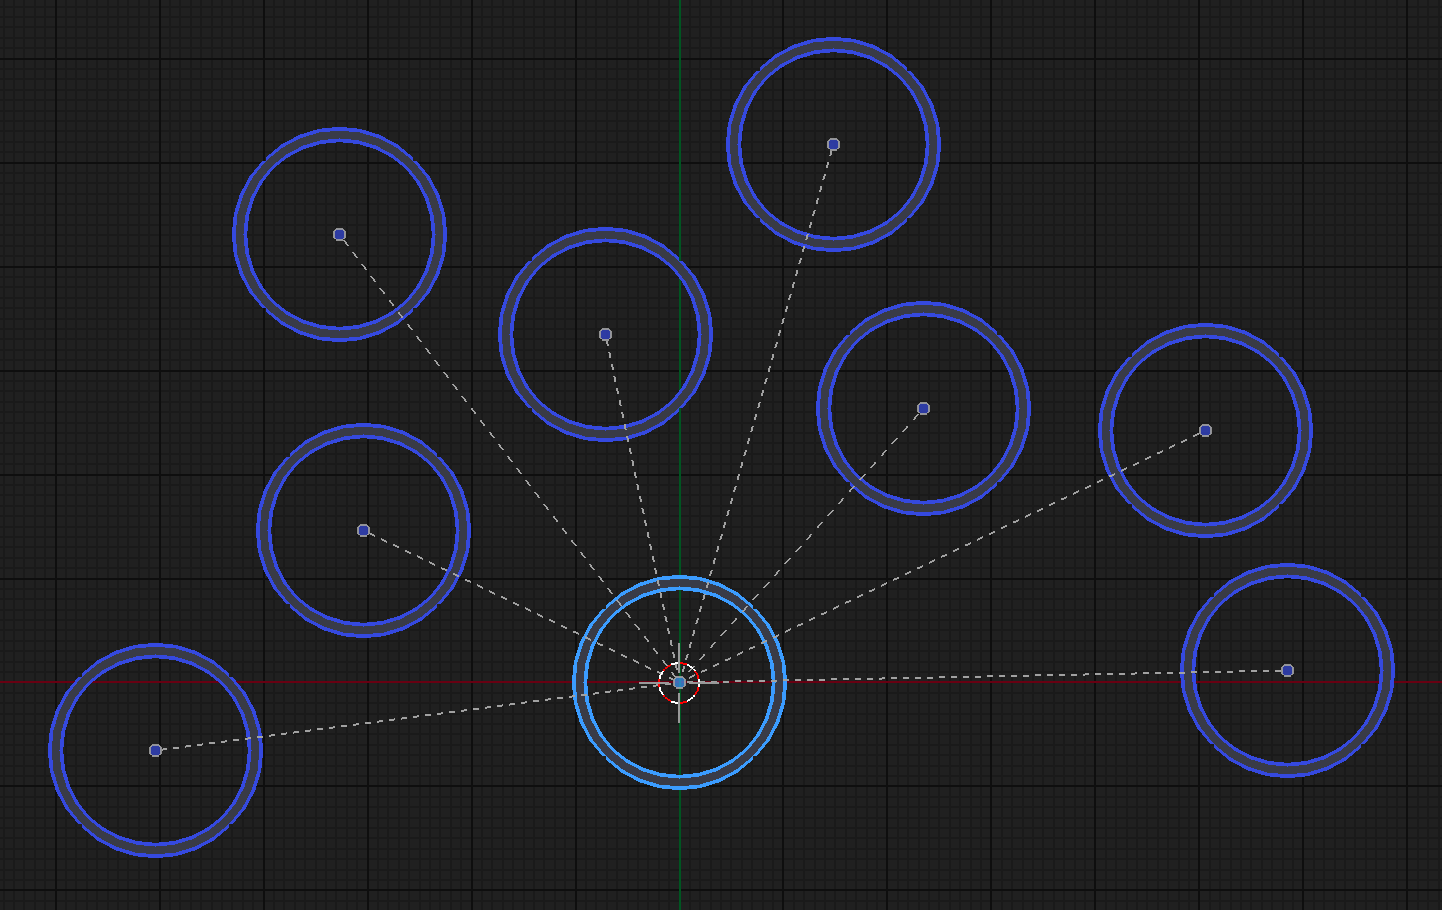
Here are multiple Selected objects, parented to a single Active object.
(The parenting has been done simply to generate the dotted lines showing the relationships. You don't need to parent in order to bake.)
So, how to bake a texture? Let's get to it!
Select all of your high-poly/detail objects, and then lastly select your target low-poly object. (the lastly selected object will be the Active object.)
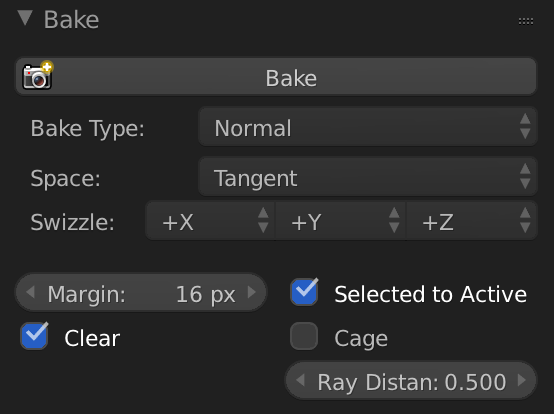
And adjust your Bake settings:
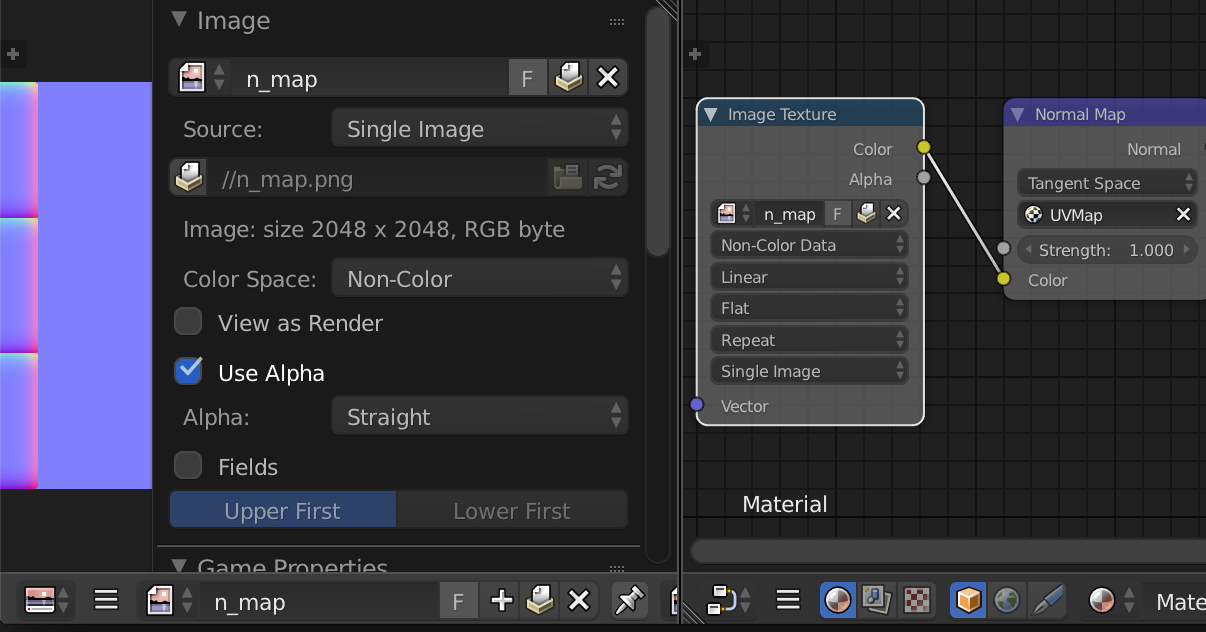
Make sure you've created an image texture in the UV/Image Editor, and that you have created a material that utilizes that image, and assigned it to your bake target object. Then R-Click to select the Image Texture node for that texture. Selecting it will tell Blender which texture to bake to, since materials will often contain more than one image texture.
For an image that will be a Normal Map, choose Non-Color Data. This is because the colors in a Normal Map are really vector information, not values to be interpreted as actual color.
Then back in your Bake settings, with selections made, and the bake target still as the Active object, click the Bake button.
You probably won't get the result you want at first, and this is because you must adjust the Ray Distance slider to suit the size of your meshes. Play with this value until you get it right. In cases with very tricky geometry you may need to bake at multiple ray distances and combine the best parts in an image editor like Photoshop or GIMP afterward.
Here's an example .blend.
While baking, leave the image data disconnected from the shader's Normal input. Then connect it after baking. Otherwise you'll see a warning about a "cyclical dependency", meaning the object you're trying to bake a texture to is depending on that texture in order to calculate its own bake.
I may add more details later, but hopefully this gives you a basic idea of how the process works.
-
$\begingroup$ Could you add more detail to your answer please? Do I make the target low poly first, then do I model a high poly with all the details? Once I've done that, how do I then proceed to bake the details to the low poly? $\endgroup$ Commented Aug 23, 2017 at 8:01
You have to retopo your model, and make a uv map. You can manipulate the depth in a program like photocopy or gimp
-
$\begingroup$ I'm in the process of retopo-ing my model. Once I've done that, how do I bake the 3d details onto the UV map? $\endgroup$ Commented Aug 23, 2017 at 10:18
-
$\begingroup$ You can check this: youtube.com/watch?v=_0FwsMkWm0k $\endgroup$ Commented Aug 23, 2017 at 10:22


