2
$\begingroup$

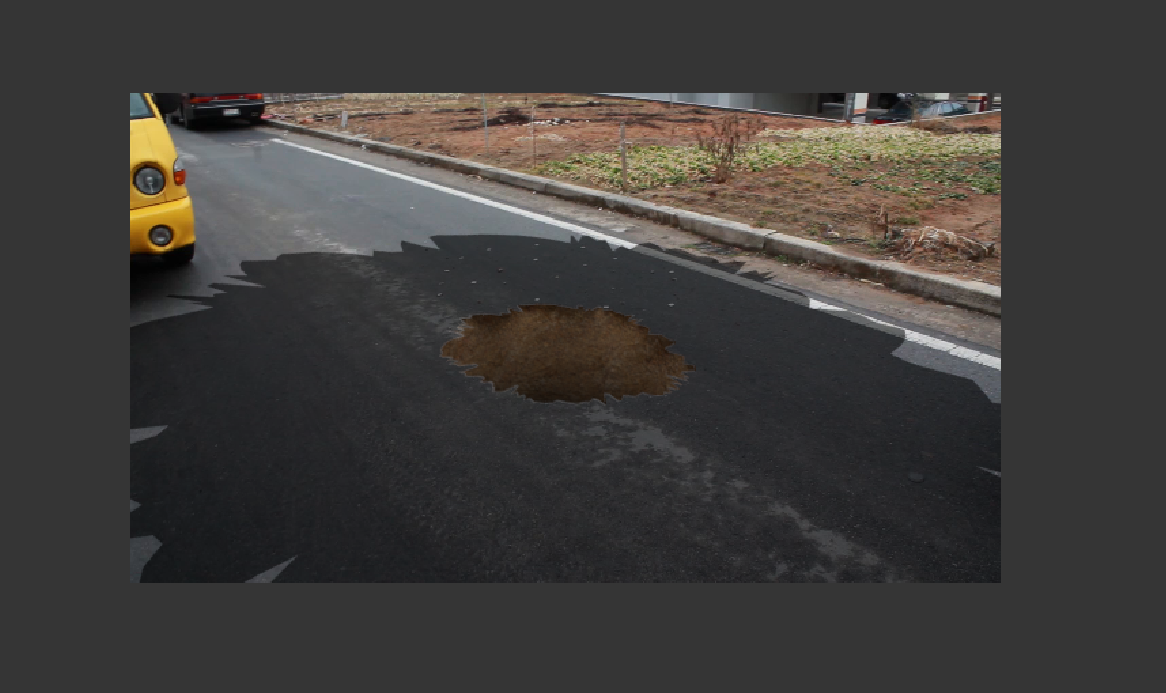
In the Introduction to Camera Tracking tutorial by Blender Guru, in the first 40 minutes, he gives an introduction to Camera Tracking and then shows how to make a hole in a road. He did this in Blender Render, but I'm trying to do this in Cycles. Somehow, I made a few mistakes because this is my rendered image.

enter image description here

Notice how there is a huge shadow where my mask is. Any thoughts on what I can do better?

Here is the .blend file:

$\endgroup$
2
  • $\begingroup$ It's your nodes for the plane. They are not optimized for Cycles. I'm writing up an answer now. $\endgroup$
    – Shady Puck
    Commented Aug 11, 2016 at 13:42
  • $\begingroup$ ohhh.... supers. $\endgroup$
    – user13877
    Commented Aug 11, 2016 at 13:53

1 Answer 1

1
$\begingroup$

As I said in my comment, the problem is caused by your nodes for the plane. In BI, your plane rendered white with black cracks. In Cycles, you rendered black with white cracks, I believe. Also, your UV Mapping needed some touching up, as only part of the cracks image was actually showing. After fixing your nodes and the UV Mapping, I achieved the following result.
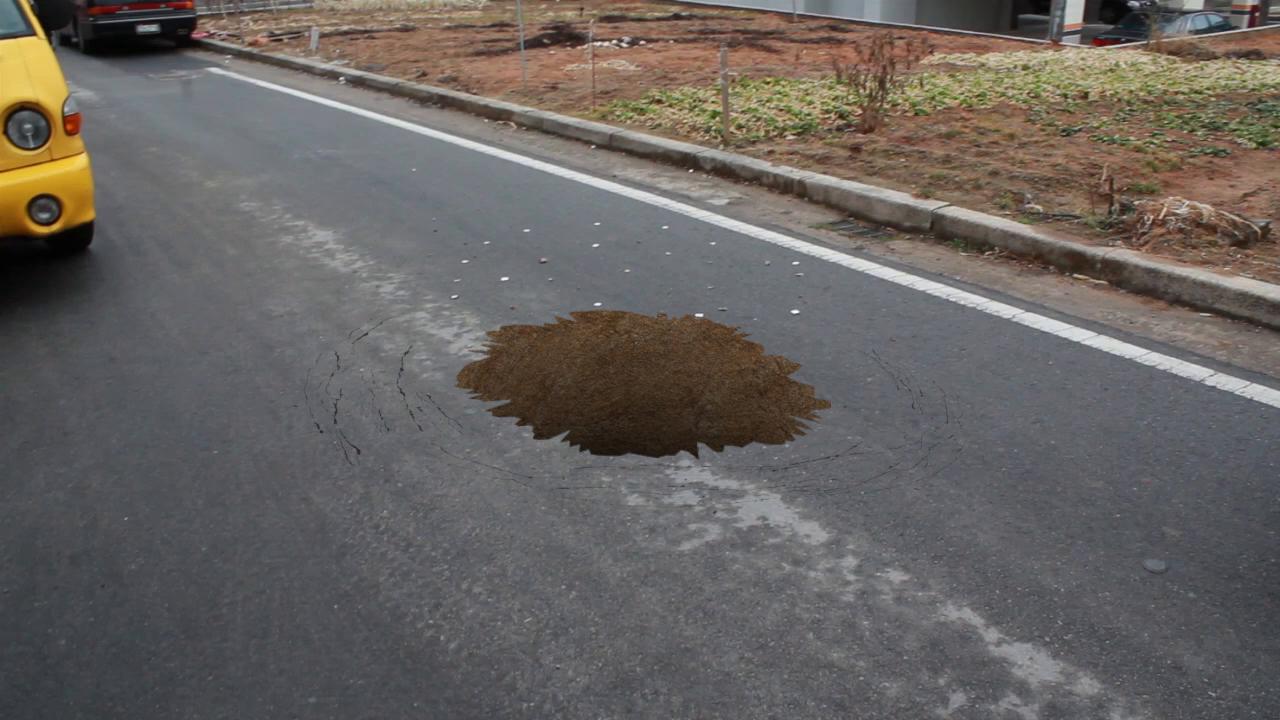
enter image description here

The following is the modified node setup for your plane mask. I used the Emission and Light Path > Is Camera Ray nodes to achieve the Shadeless effect provided in BI (logic from Import Images as Planes addon Cycles node setup). Then, I used the Alpha output of the cracks Image Texture to differentiate between white, normal, and cracks, black. I used the Alpha instead of the Color with Bright/Contrast to make a Fac: because in this case, there was a readily available B/W Fac: already.
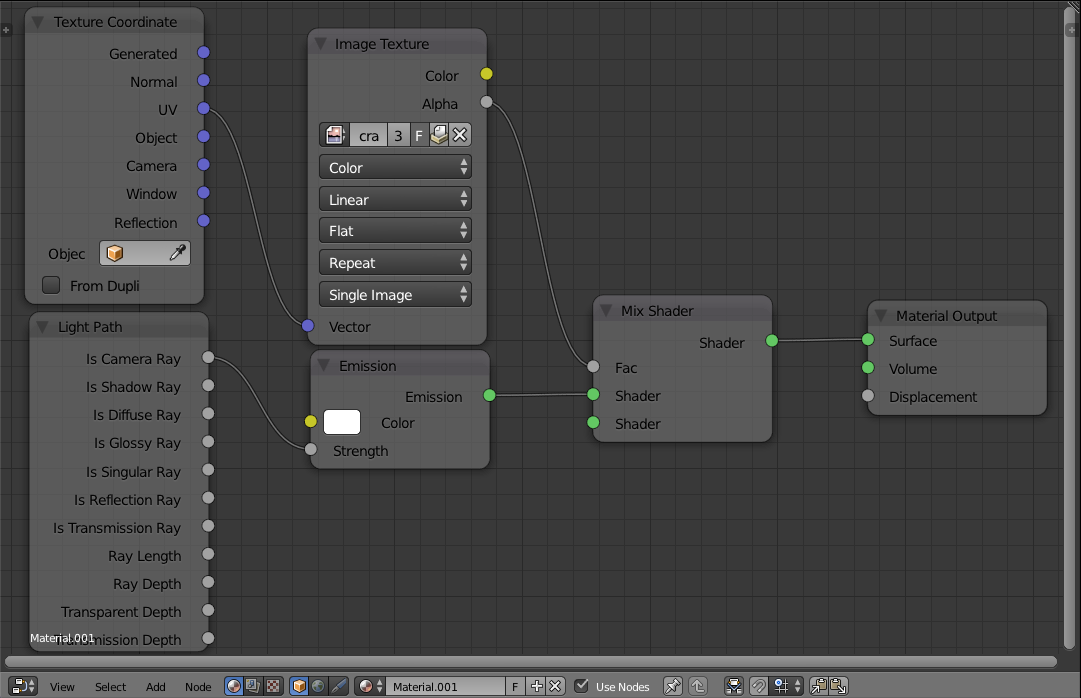
enter image description here

Here is the .blend file. Note that I may have messed up several of your paths.

As an alternate solution, you can use the following compositing. Note the changes in the two nodes immediately following the mask's RenderLayer node. If you do this, do not utilize the above solution as well. I will say that this works slightly worse, but it's still reasonable.
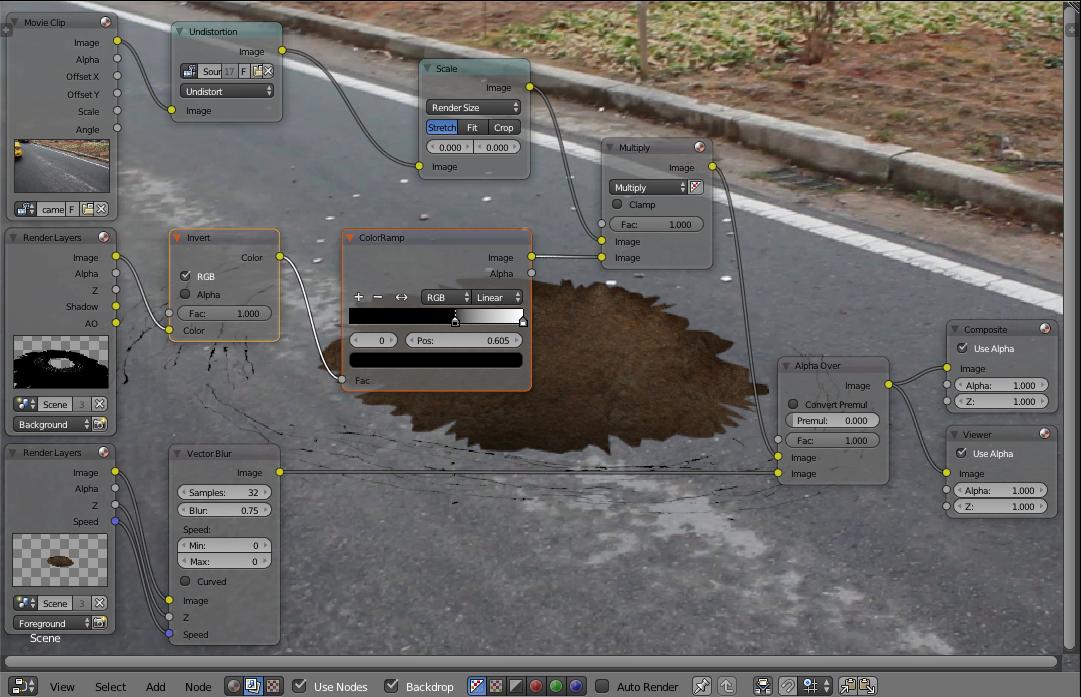
enter image description here

$\endgroup$
9
  • $\begingroup$ I did post the problem with the cracks as a separate question blender.stackexchange.com/questions/60687/… I will now study both answers and try to come to an understanding :) Thanks a lot $\endgroup$
    – user13877
    Commented Aug 11, 2016 at 14:12
  • $\begingroup$ @OldMan Ok, I didn't see it. All I did was scale down the map until there were no cracks showing in the hole in the center. Then I just moved it around a bit to center the cracks better. Lastly, I rotated the map so that the cracks appeared facing towards the camera. I did all of this while in rendered view, so I could see my results. $\endgroup$
    – Shady Puck
    Commented Aug 11, 2016 at 14:47
  • $\begingroup$ no problem at all. I am very glad that you dive into this problem and learn me things :) Only reason that I mentioned that other question is that it might give you second thoughts. $\endgroup$
    – user13877
    Commented Aug 11, 2016 at 15:04
  • $\begingroup$ maybe off-topic, but ... do you simply know an awful lot or do you have a gift to analyse new problems and come up with completely new answers (also for you) ? I am simply interested how you came up with this answer because this is really very unexpected answer for me (never heard of Light Paths) $\endgroup$
    – user13877
    Commented Aug 11, 2016 at 15:32
  • $\begingroup$ your solution clearly works very well, but I have this "feeling" that to apply the texture with alpha channel like showed in blender.stackexchange.com/questions/60687/… (but without duplicating the circle object) should also work somehow ... but I cannot get it figured out $\endgroup$
    – user13877
    Commented Aug 11, 2016 at 16:28

You must log in to answer this question.