10
$\begingroup$

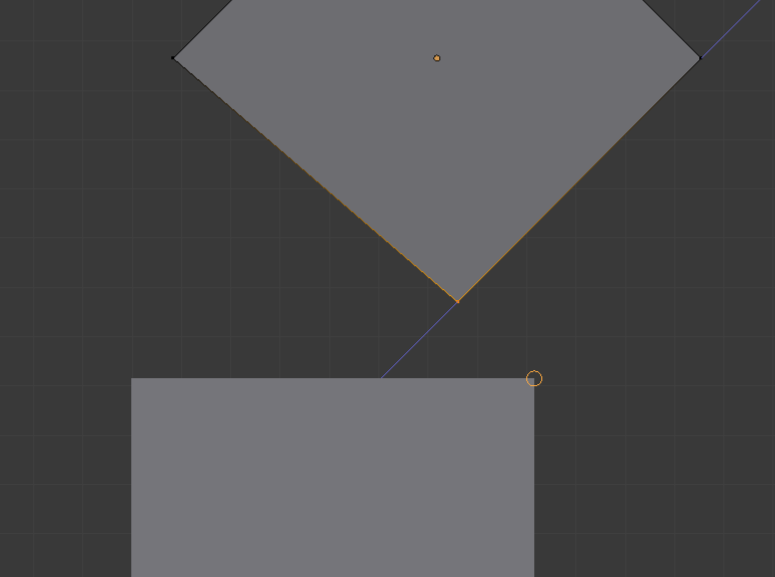
If I'm trying to move a vertex along any axis other than global X Y or Z, it doesn't snap to another line or face (at least not in a useful way). For example, this is what I want:

enter image description here

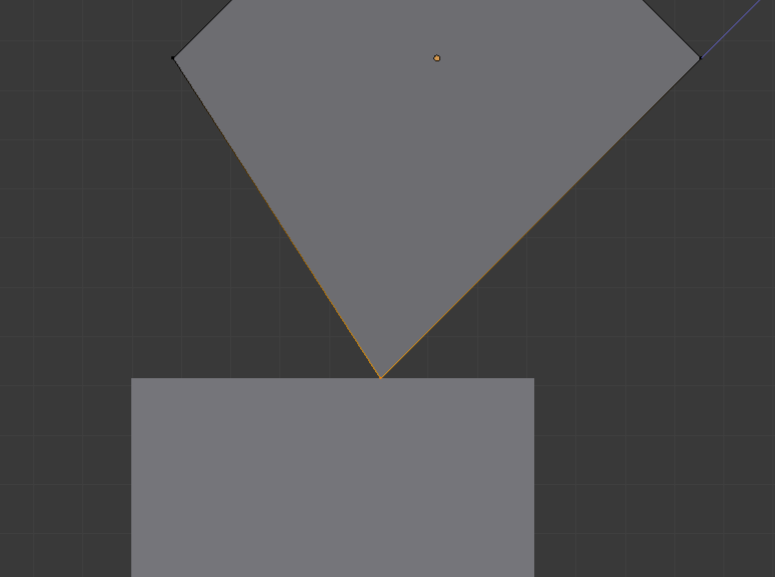
But trying to snap to a vertex results in this:

enter image description here

And snapping to an edge results in this: enter image description here
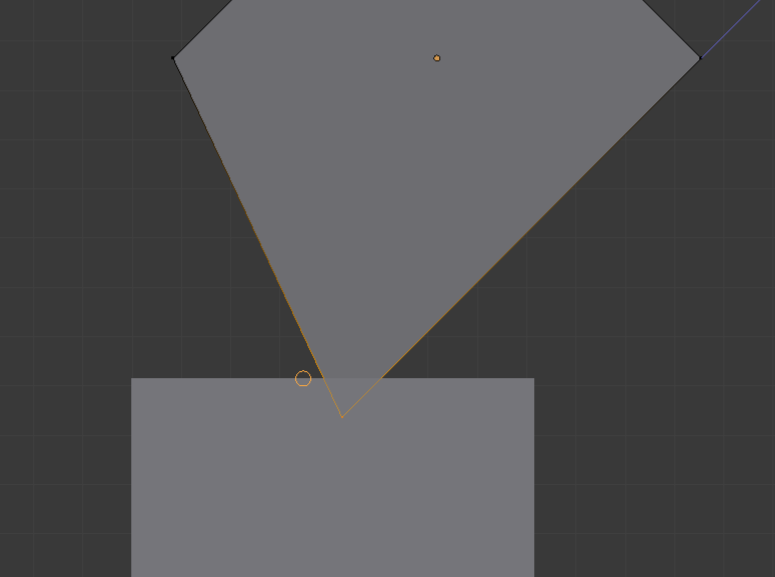
The problem is that when I'm moving a vertex along a local axis, the snapping also uses the local axis. I'd like to move it along a local axis but use a global axis for the snapping.

EDIT: To explain my use case a bit; I do a lot of modeling for mechanical parts, and this situation comes up frequently. I have found 2 ways to accomplish this, but they are both fairly cumbersome.

One is to use a shrinkwrap modifier, but that requires creating a vertex group, setting up the modifier, and in some cases creating a new object to use for the target since the the object I'm wanting to snap to doesn't necessarily lie on the path I'm moving the vertex.

The other is to extrude the vertex beyond the point I want to snap it to and then use a boolean operation to clip the mesh. This one is a fairly bad solution though since a boolean operation requires the mesh to be manifold, and it often does unpredictable things.

The shrinkwrap method is the least painful method I've found, but I'd really like a way to do this simply and quickly, just like snapping a vertex in any other scenario.

$\endgroup$
8
  • $\begingroup$ - Consider a shrink wrap with a vertex group of one vertex $\endgroup$ Commented Aug 24, 2015 at 15:15
  • $\begingroup$ Static placement for single image .. or dynamic placement for video. If you explain your intended use a little more it would be helpful. $\endgroup$ Commented Aug 24, 2015 at 15:33
  • $\begingroup$ @atomicbezierslinger I updated the question with a bit more about my use case. I'm not sure what you mean about static placement and dynamic placement though. Could you please explain that a bit? $\endgroup$
    – Mike
    Commented Aug 24, 2015 at 15:57
  • $\begingroup$ To get result from the 1-st photo I switched Transform Orientation to Normal, set snapping to Edge and grabbed vertice down (normal X in my case). I used 2 planes, top one rotated by 45 degrees in Object mode. Is that what you want ? $\endgroup$
    – Mr Zak
    Commented Aug 24, 2015 at 17:06
  • $\begingroup$ @MrZak That doesn't seem to work for me. It still snaps to any arbitrary point along the edge, which is what's happening in the third photo. Is there something I'm missing? Does this not happen for you? $\endgroup$
    – Mike
    Commented Aug 24, 2015 at 18:09

2 Answers 2

2
$\begingroup$

Look at TinyCAD, aside the for me only downside that the edges need to be in the same mesh, it should be the perfect solution for you. It comes with Blender and can be activated in the preferences.

In your case i then would:

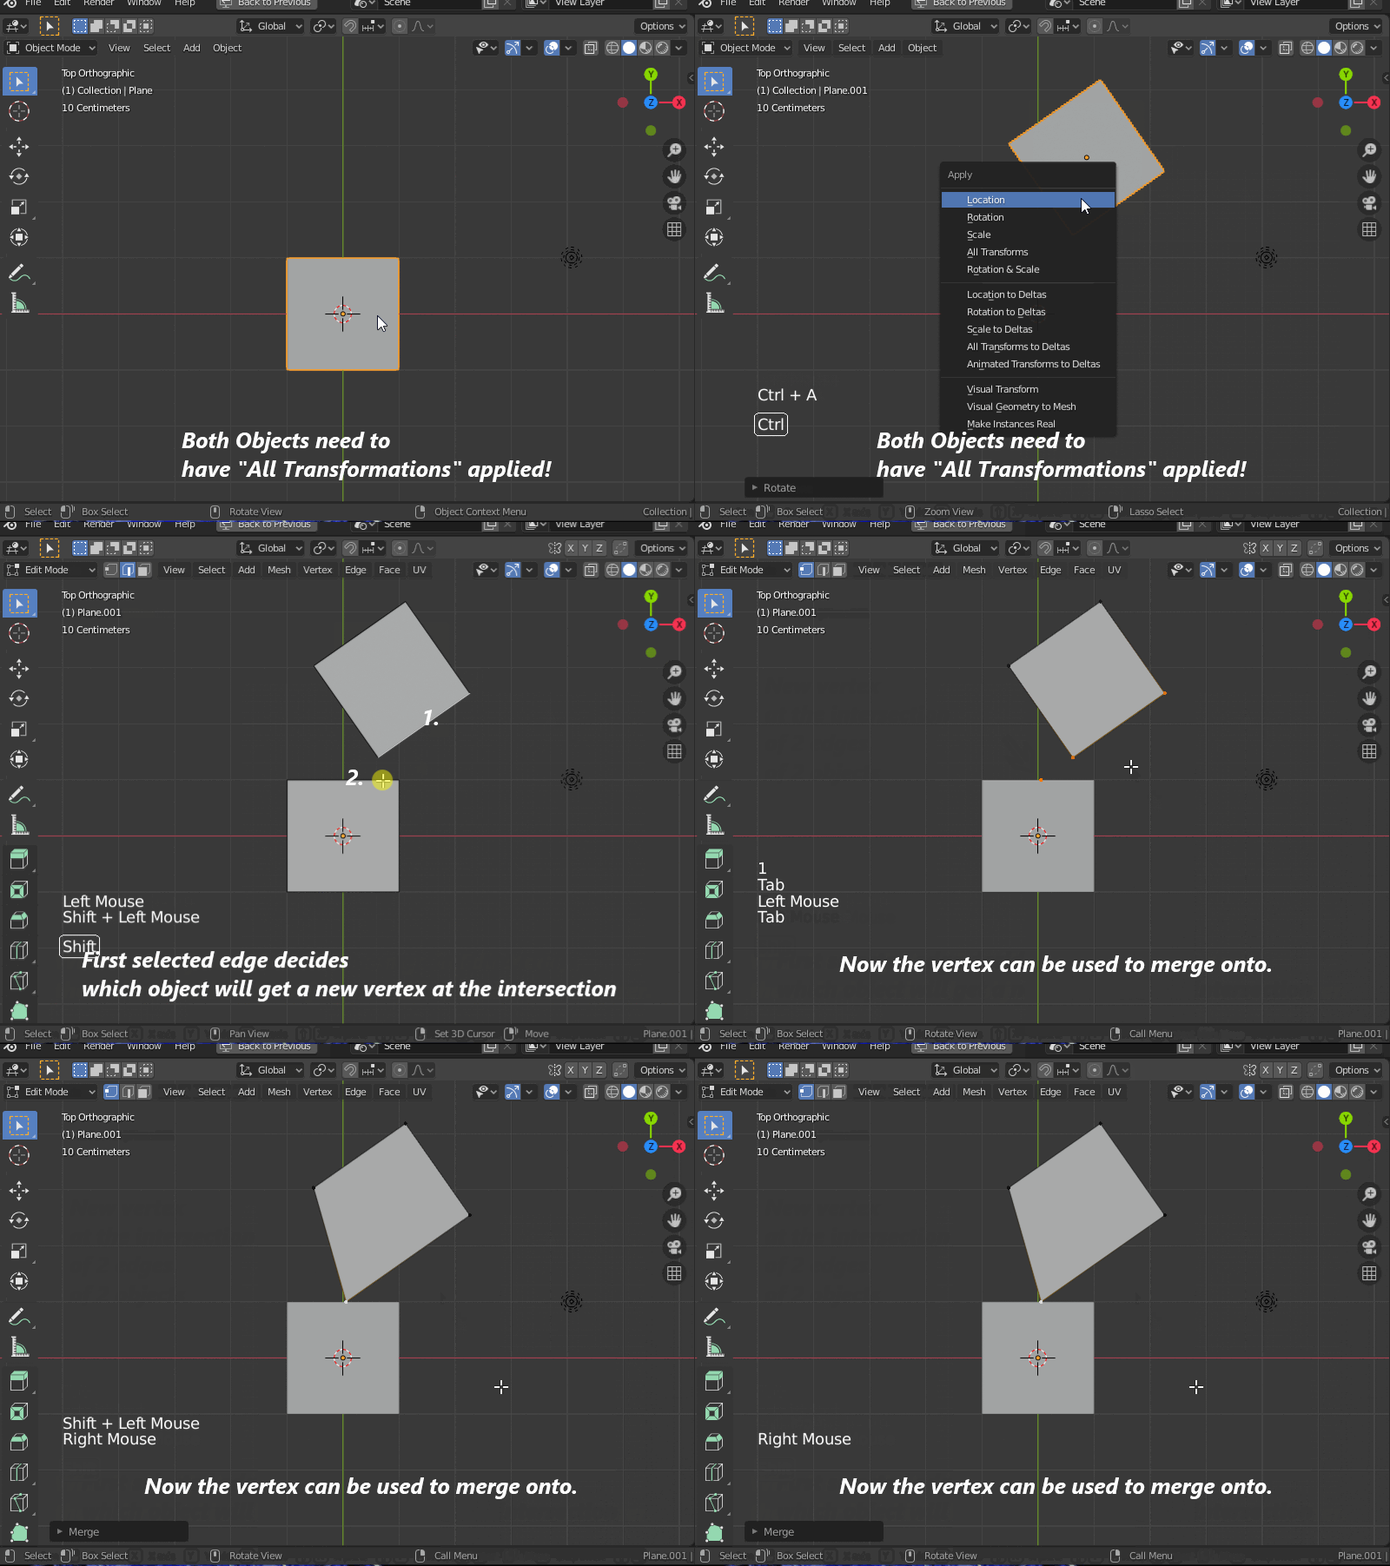
  1. Create a duplicate of the edge from the lower object with Shift+D
  2. Leave it in place by pressing RMB
  3. Separate by selection with P press Enter to accept the first choice.
  4. Go in Object Mode and select the new object and the upper object
  5. Join those objects with Ctrl+J
  6. Now you select the joined object, go in Edit Mode and use the "V2X - Vertex at intersection" function of TinyCAD in the RMB menu.
  7. You get a new vertex at the intersection, which you can then use to merge the corner of the upper object on.

As i mentioned, the add-on has the drawback that it needs you to join meshes, so i forked the add-on and adjusted the V2X function, if you have more of those situations it might be interesting for you to check it out. My forked version got merged, so here the link to the original repository. TinyCAD/b28branch

Here a little explanatory visual:

enter image description here

This version is for Blender 2.8+ You can replace the files in the "scripts\addons\mesh_tiny_cad" folder of your Blender installation. I recommend to make a backup of the files first.

$\endgroup$
0
$\begingroup$

The best solution to your problem may be to use a different tool than snapping. If I were starting with your second image, and wanted to get to the first one, I would select the vertex you have selected in the second image, and use a vertex slide (SHFT - V). If the vertex was not exactly in the correct place after the slide, I'd use the move (G) tool, perhaps constrained to an axis if that was necessary, to adjust it.

$\endgroup$

You must log in to answer this question.

Not the answer you're looking for? Browse other questions tagged .