2
$\begingroup$

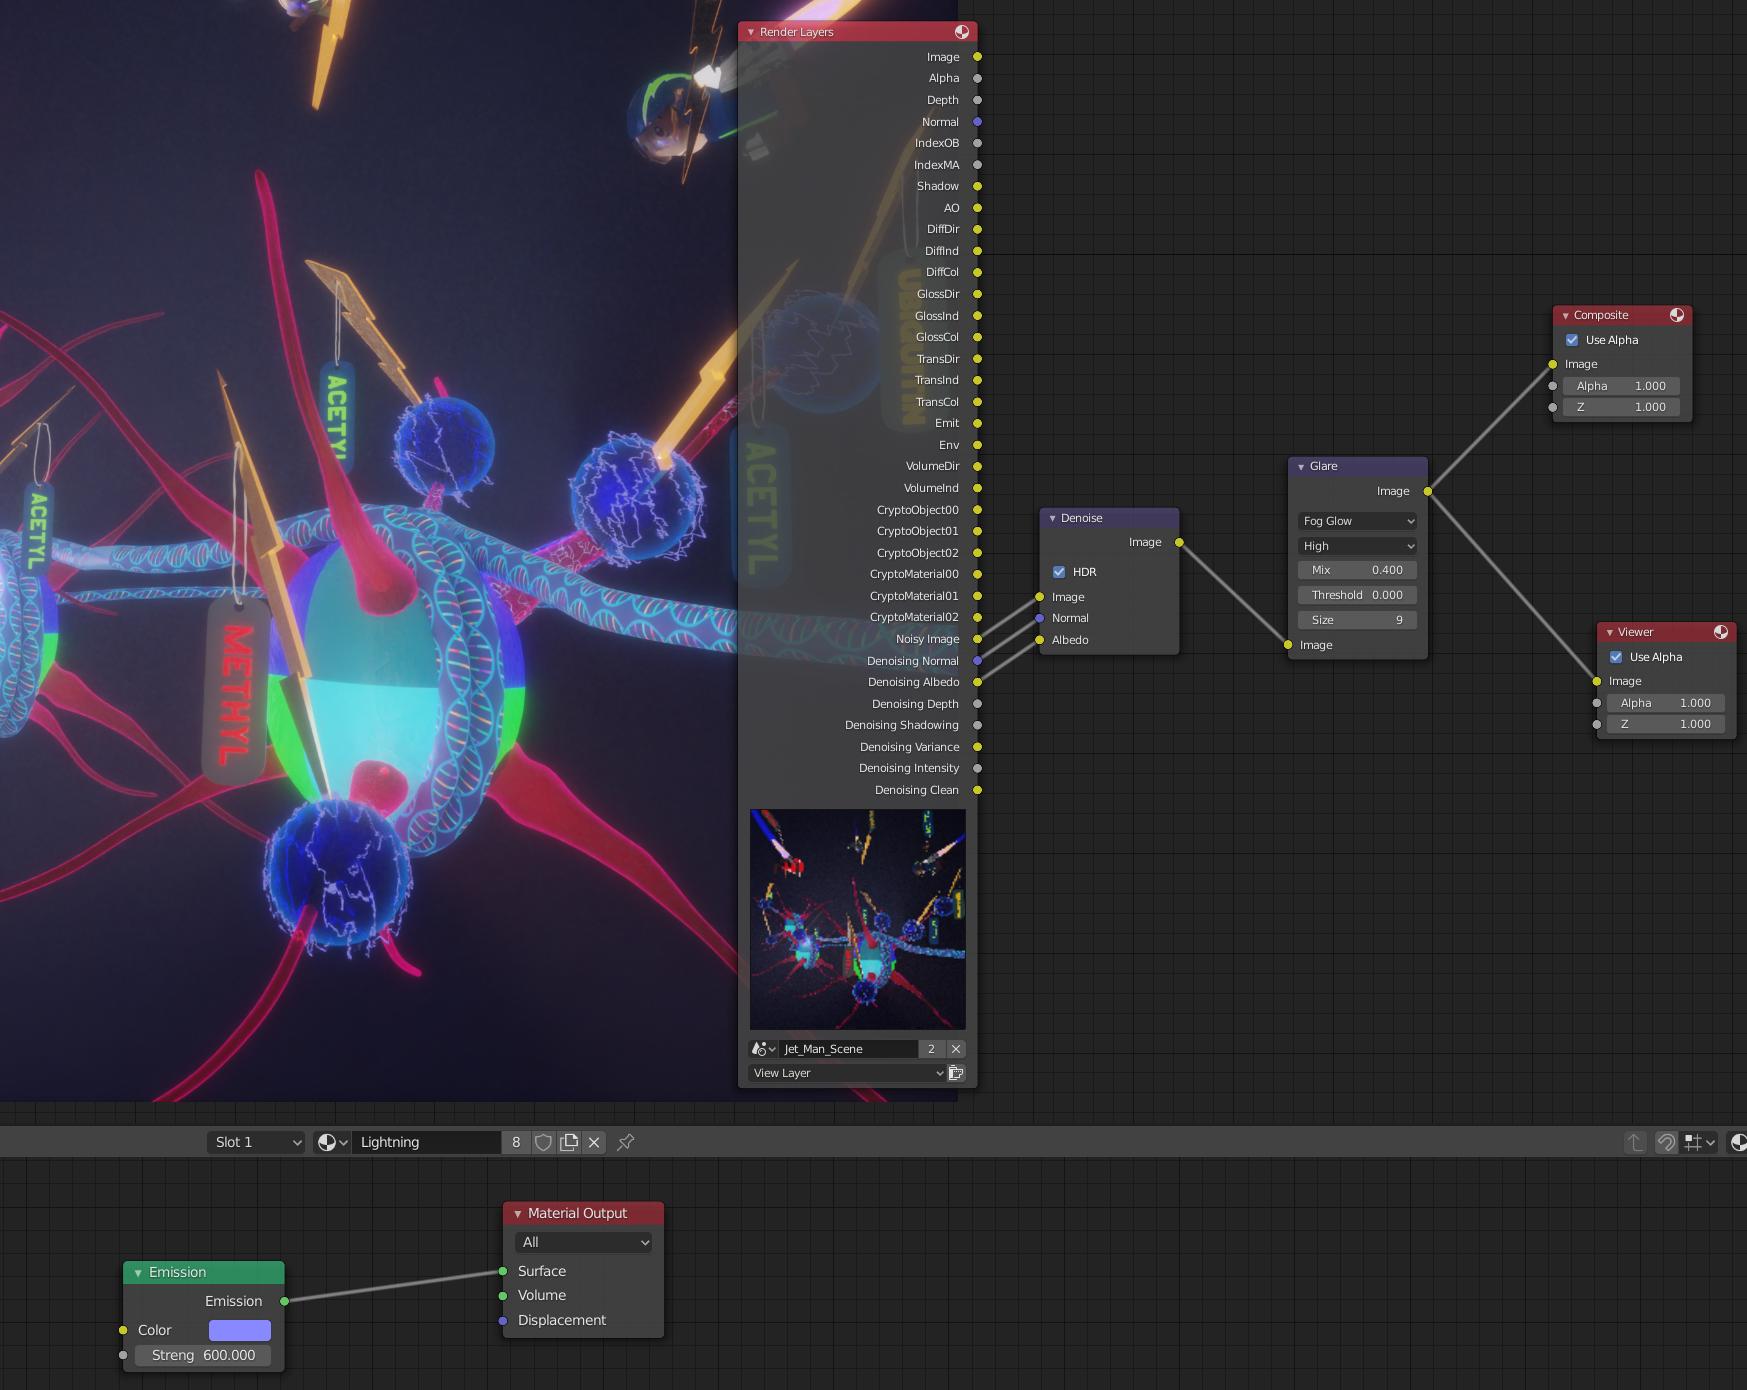
I created a scene with balls surrounded by glowing lightning. The lightning is shrink-wrapped to the balls to give a Tesla-like effect (not that convincing - but it's the best I could come up with). Anyhow, the lightning shrink-wrapped to the balls is not glowing at all. The emission shader for the lightning material is set to 600 (I started out at 1 and progressively ratcheted it up trying to get an effect to no avail).

I've played around with all kinds of different settings in the Glare node of the Compositor, also to no avail. I changed the Filmic contrast level to high and very high contrast. No luck.

I tried with both a daytime and nighttime HDRI environment texture from HDRI Haven. No luck. I tried with no background texture at all. No luck. I also tried with and without a Volume Scatter node in the World settings. No luck.

The lightning uses a skin modifier mesh that I tried both applied and unapplied.

Can anyone point me in the right direction to get the lightning material glowing like lightning?

Thanks in advanceenter image description here
$\endgroup$
4
  • $\begingroup$ Have you turned on "bloom" in the render properties panel? $\endgroup$ Commented Jul 27, 2020 at 15:32
  • $\begingroup$ My understanding is bloom isn't available in Cycles (at least in 2.8x: youtube.com/watch?v=Tu3U6wD7lu4&feature=youtu.be). It's only available in Eevee. $\endgroup$
    – Poe
    Commented Jul 27, 2020 at 15:40
  • $\begingroup$ Sorry. just saw it was cycles... my bad $\endgroup$ Commented Jul 27, 2020 at 16:06
  • $\begingroup$ Glow in cycles is done in the compositor, or by adding volume scatter on the world or on a mesh that surrounds the object or scene. $\endgroup$
    – susu
    Commented Jul 27, 2020 at 16:07

2 Answers 2

2
$\begingroup$

It's probably best to use a separate glow node just for the lightning in this case:
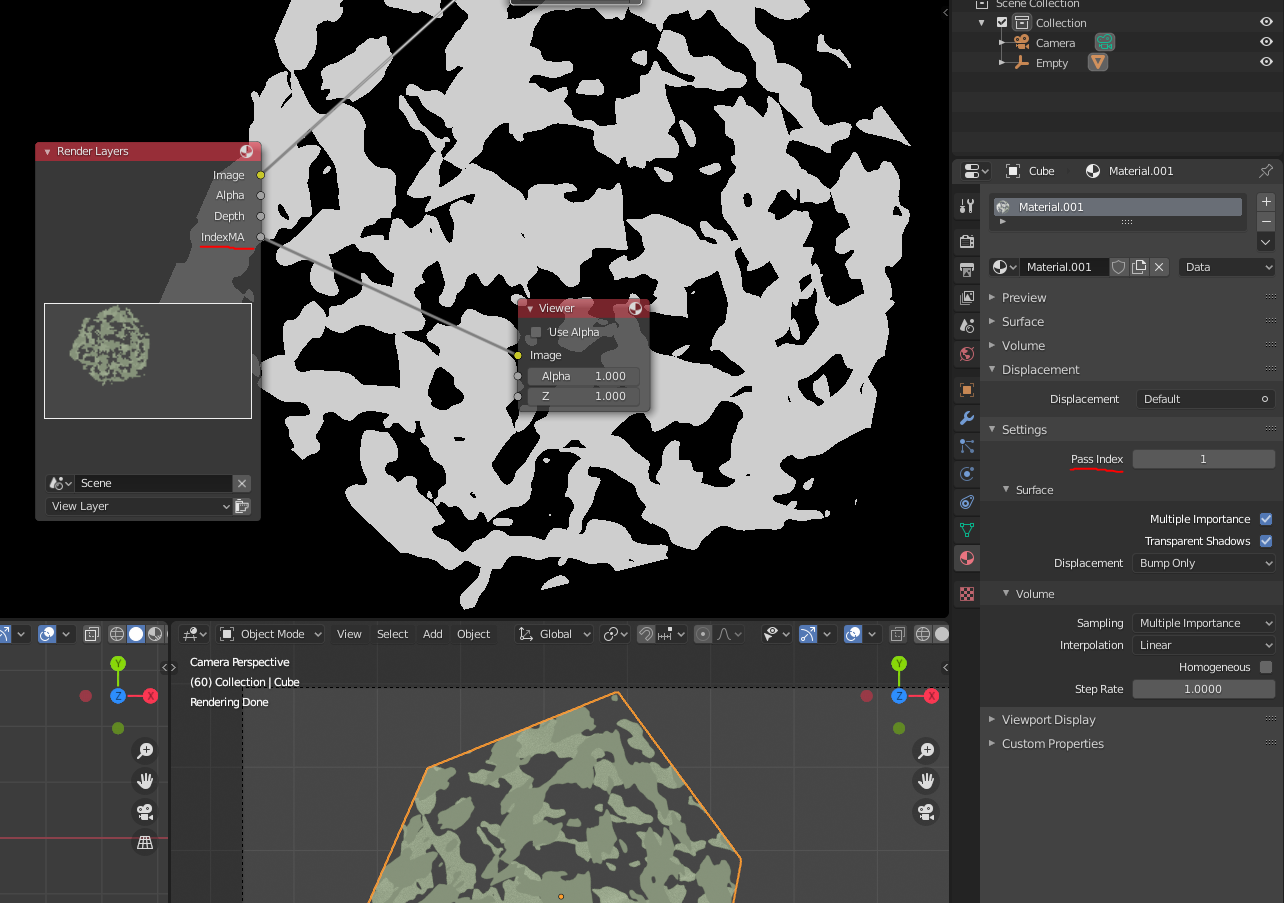
enter image description here

  1. In the Render Layer options turn on Material Index In your material under settings use a pass indes that you haven't used for anything else.
  2. Connect the index MA output to a glow node and add or screen it back onto the original image.
  3. You can also use the original colors, if you multiply the image with the mask and let that glow.

Also: the blur node is your friend in this scenario.

$\endgroup$
2
$\begingroup$

The issue here is your Glare node settings.

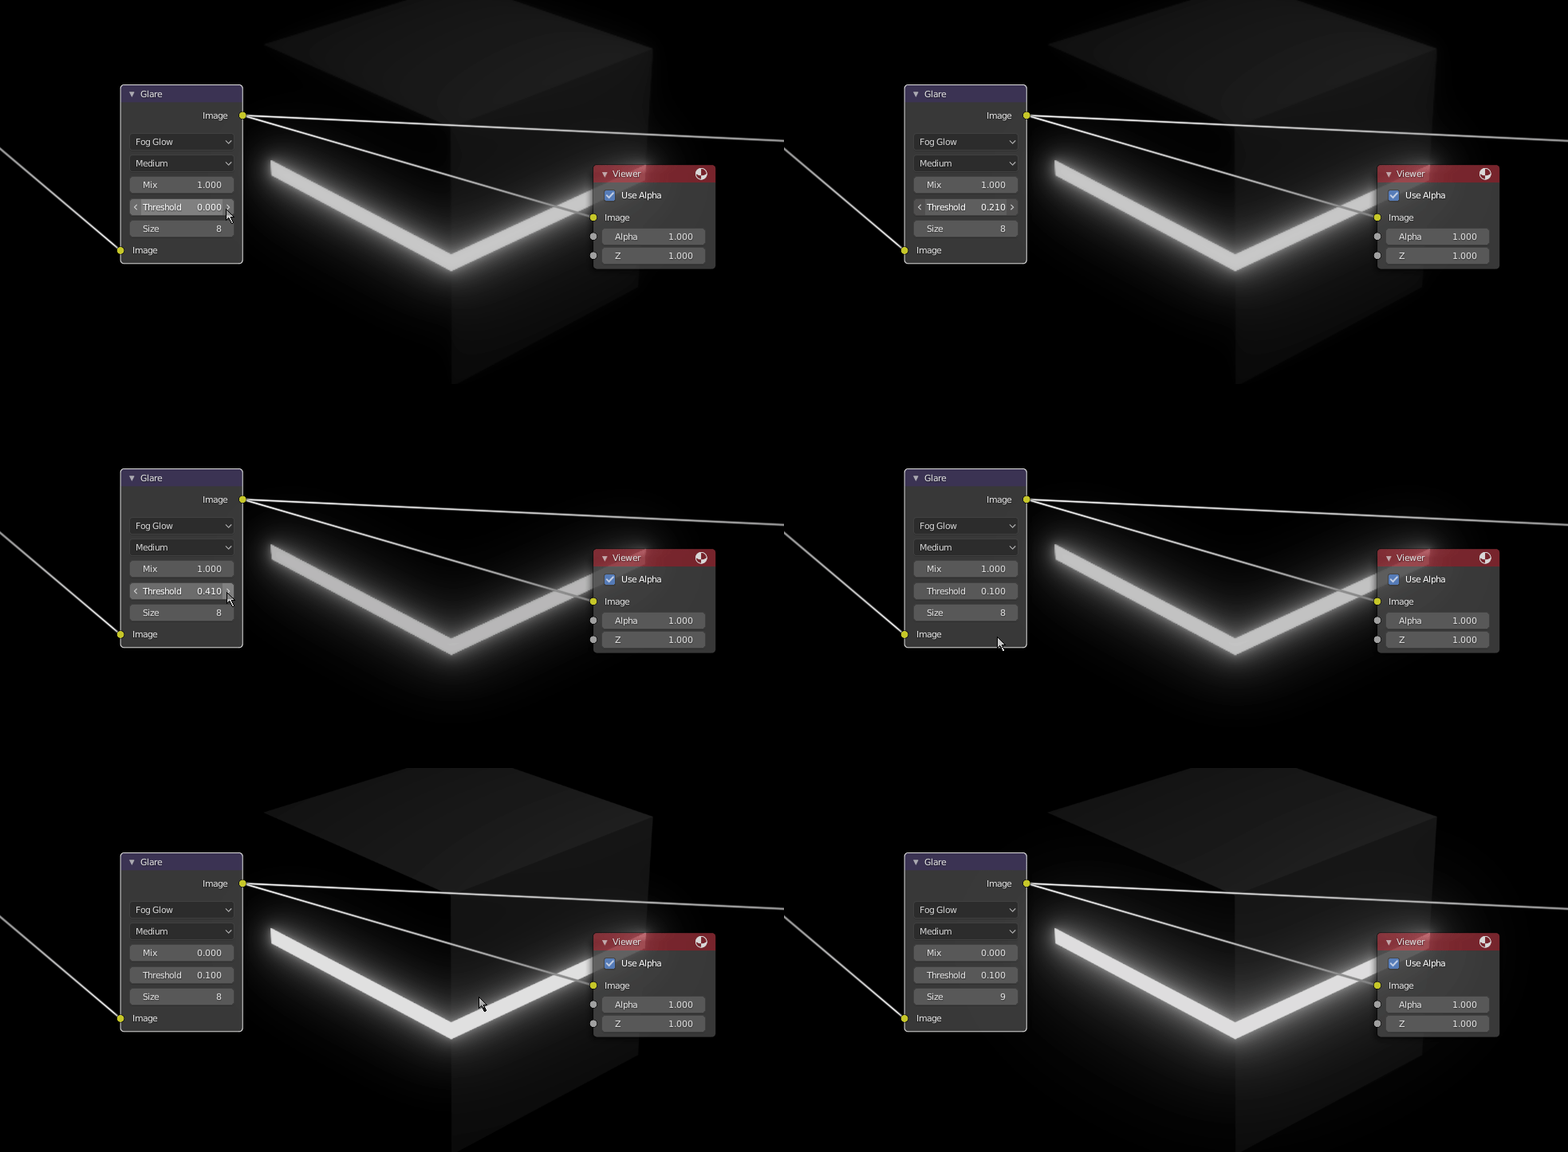
The threshold basically means "which luminosity values on image will I exclude from glowing". When set to zero, it will apply the effect everywhere.

I suggest you temporarily set the mix value to 1 so you can see the raw node's effect without mixing it back to your original picture.

Then, play with the threshold value until you see only the parts you need to glow.

Only once this is done, you get back to a mix of 0 and play with the size.

setup demo gif

$\endgroup$
1
  • 1
    $\begingroup$ The threshold works with the values for luminosity in the rendered image. Those values below the threshold will not be affected by the glow. Only values that are larger than treshold will glow. See: blender.stackexchange.com/questions/54168/… $\endgroup$
    – susu
    Commented Jul 27, 2020 at 16:27

You must log in to answer this question.

Not the answer you're looking for? Browse other questions tagged .