I'm looking to create a procedural basic rough texture in blender with some texture nodes. Can someone either share a node tree or a link to a video on it? Thanks!
-
$\begingroup$ Hello, please a picture of the kind of texture you would like to reproduce $\endgroup$– moonbootsCommented Nov 21, 2019 at 9:20
-
$\begingroup$ I don't have a picture of the texture. I just want to rough the surface up a little bit. $\endgroup$– Pro Effects MAXCommented Nov 22, 2019 at 19:44
2 Answers
It depends if you mean roughness as a 2D effect or 3D effect.
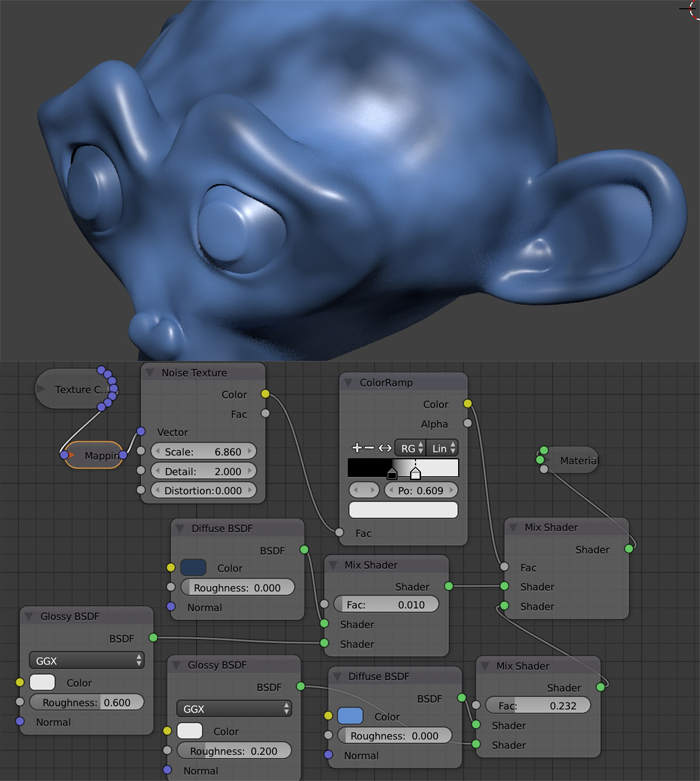
For 2D roughness you can use a Noise (or this kind of texture) as a factor in a mix between a glossy and a non glossy material:
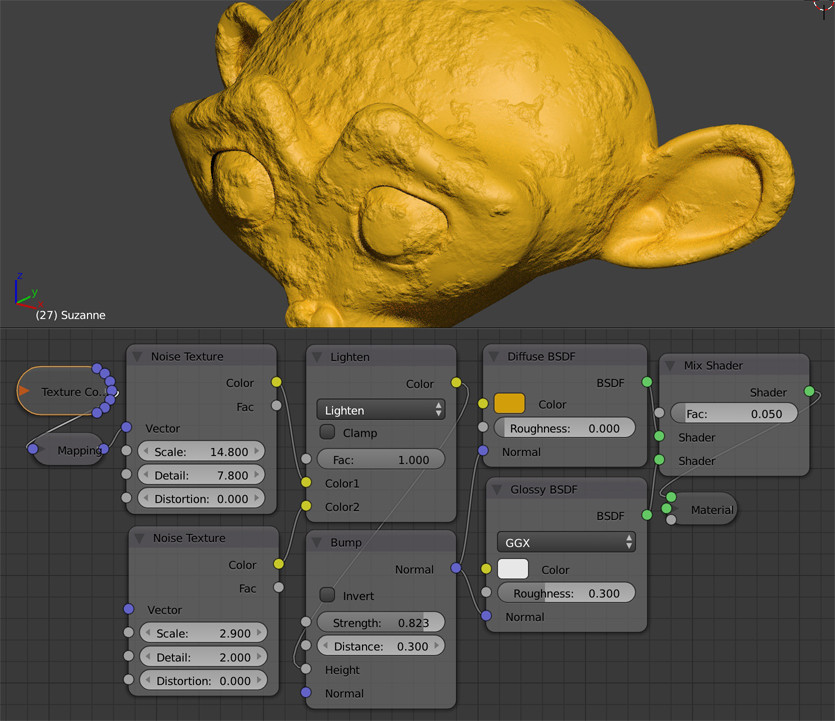
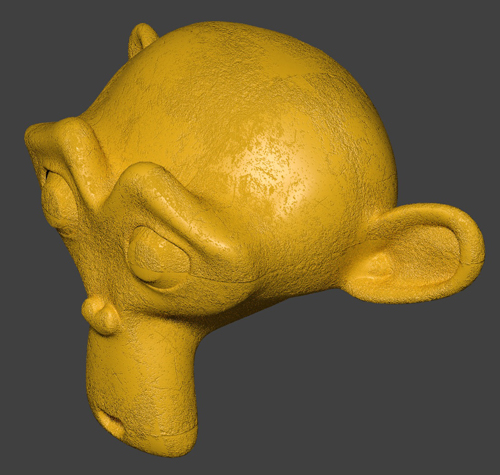
For 3D roughness you need to plug a Noise (or this kind of texture) into a Bump node that you plug into the Normal sockets of your nodes. Here I've mixed 2 Noise Texture nodes into a MixRGB (try Overlay or Darken or Lighten mode) in order to have some smoother areas.
If you're not fully procedural and use an Image Texture:
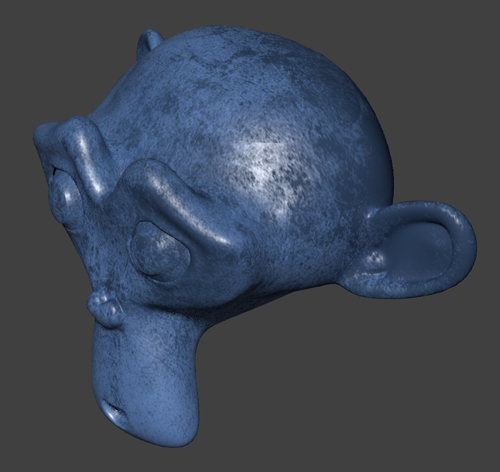
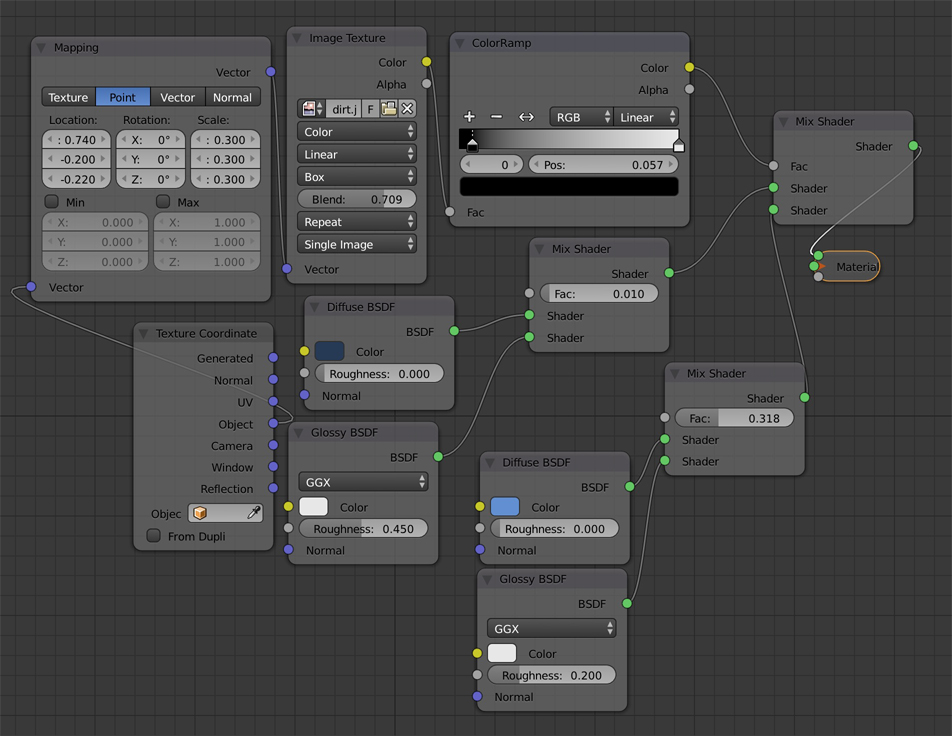
In the case of a 2D effect, if you use an Image Texture you can create something without any unwrap, I guess it's the quickest way:
- Prepare your dirt texture (a simple black and white jpg is ok).
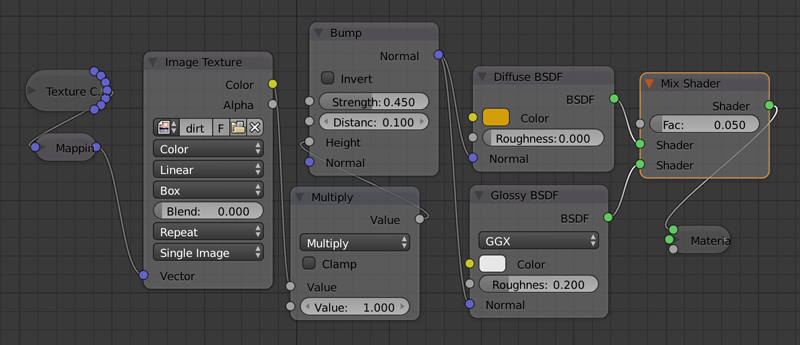
- Create this nodes setup: Texture Coordinate (Object output) > Mapping > Image Texture > ColorRamp > Factor socket of a Mix Shader.
- In the Image Texture, load your dirt image, choose Box instead of Flat so that the texture will be projected all around the object. You may need to play with the Blend factor to avoid any seam effect.
- In the Mix Shader, plug the 2 materials, the one that is supposed to be the glossy and the rough one.
- You can play with the Location and Scale of the Mapping node, but don't play with the Rotation if you want to avoid stretching.
In the case of a 3D effect, same setup on the left, then:
- Plug your Image Texture node into the Height socket of a Bump node.
- Plug the Bump into the Normal sockets of your Diffuse and Glossy nodes.
- Here I've used a (Math) Multiply node instead of a ColorRamp. - Play with the Strength of the Bump to increase the 3D effect.
-
$\begingroup$ The recent versions of Blender have Map Range node but you could have had it before as a node group. I find it a good way to control some important values when you need to have some variations but on a certain scale. $\endgroup$– unwaveCommented Nov 23, 2019 at 14:07
-
$\begingroup$ oh ok I don't know anything about it $\endgroup$ Commented Nov 23, 2019 at 15:09
-
Put a noise (procedural) texture instead of image texure as this node tree shows,and you get a basic rough shader.how-to-make-a-bump-map-from-a-texture-paint

