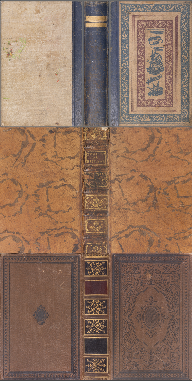
I have 100 book cover textures and I'd like to condense them into one material and have it randomly assign the textures to the books. I tried the random output found in the Object Info node but this only recognizes two of the textures. Any ideas?
-
$\begingroup$ Are all the books separate objects? If so, then the random output of the object info node is what you want, and i'll explain. $\endgroup$– Greg ZaalCommented Aug 18, 2014 at 7:54
-
$\begingroup$ Yes, all the books are separate objects. Please explain because right now I use the random output of the object info node but it only recognizes two of the textures. My setup is combining 2 of the textures in a Mix RGB node then setting the Fac amount as the Random output of the object info node, I keep repeating this until I have two trees of Mix RGB nodes with Random Fac amounts, then I combine these two trees using the same method. But the material only uses two of the textures for some reason. $\endgroup$– Abdul-mu'min SmithCommented Aug 18, 2014 at 14:53
6 Answers
As long as all the books are separate objects, we can use the Random output of the Object Info node.
That gives us a random value (per object) ranging from 0 to 1 (black to white):

All we need to do then is tell it to use different materials for different value ranges. I'm sure there are many ways to do this, but here's the first I could think of:
We can add two math nodes with the operations on Greater Than and Less Than, setting the bottom socket values to encapsulate a certain range (e.g: between 0.1 and 0.3) and plugging the Random output into the top sockets. Then multiply the two math nodes and you'll have a mask showing white on the books where the random value is between that range:

Then we can connect that mask to the Fac of a MixRGB node, and thus the first socket of the mix node would be the original colour, and the second socket would be whatever colour/texture you want to show in the value range.
Since you'll be using that same node set-up over and over again for each texture, it's a good place to turn it into a node group:


And thus by chaining a few of these groups together, you can easily randomise the colours/textures of objects with that material:

-
$\begingroup$ Thank you, this worked! Side note: I find this method works best when the 'From' and 'To' values are within a max range of .200 from each other. e.g. .200-.400, .600-.800 etc. $\endgroup$ Commented Aug 19, 2014 at 14:10
-
$\begingroup$ Depends on how many textures you have. If you've got 100 textures, you'll want to use a 0.01 range $\endgroup$ Commented Aug 19, 2014 at 14:35
While the accepted answer works, it certainly is very tedious for a large amount of objects, such as in this case, since you have to edit a lot of parameters. Thus, a better solution would be as follows:

The components are fairly straight forward. The first Math node is just putting the input random value in the range from 0 to n; then the other two after it are a floor rounding. Then this value is used in a MixRGB node to decide which image to use - if the Fac is 0, it uses the top image, otherwise it uses the bottom image (since it can only be a integer, there's never any interpolation between different images). Then, if there still are images to choose from, what you can do is subtract one from the output of the floor function and use that as the Fac between the previous mix and another image. Then you can use the Random input, found in Input>Object Info>Random to get a random texture.
It is fairly easy to expand this setup to allow more images:
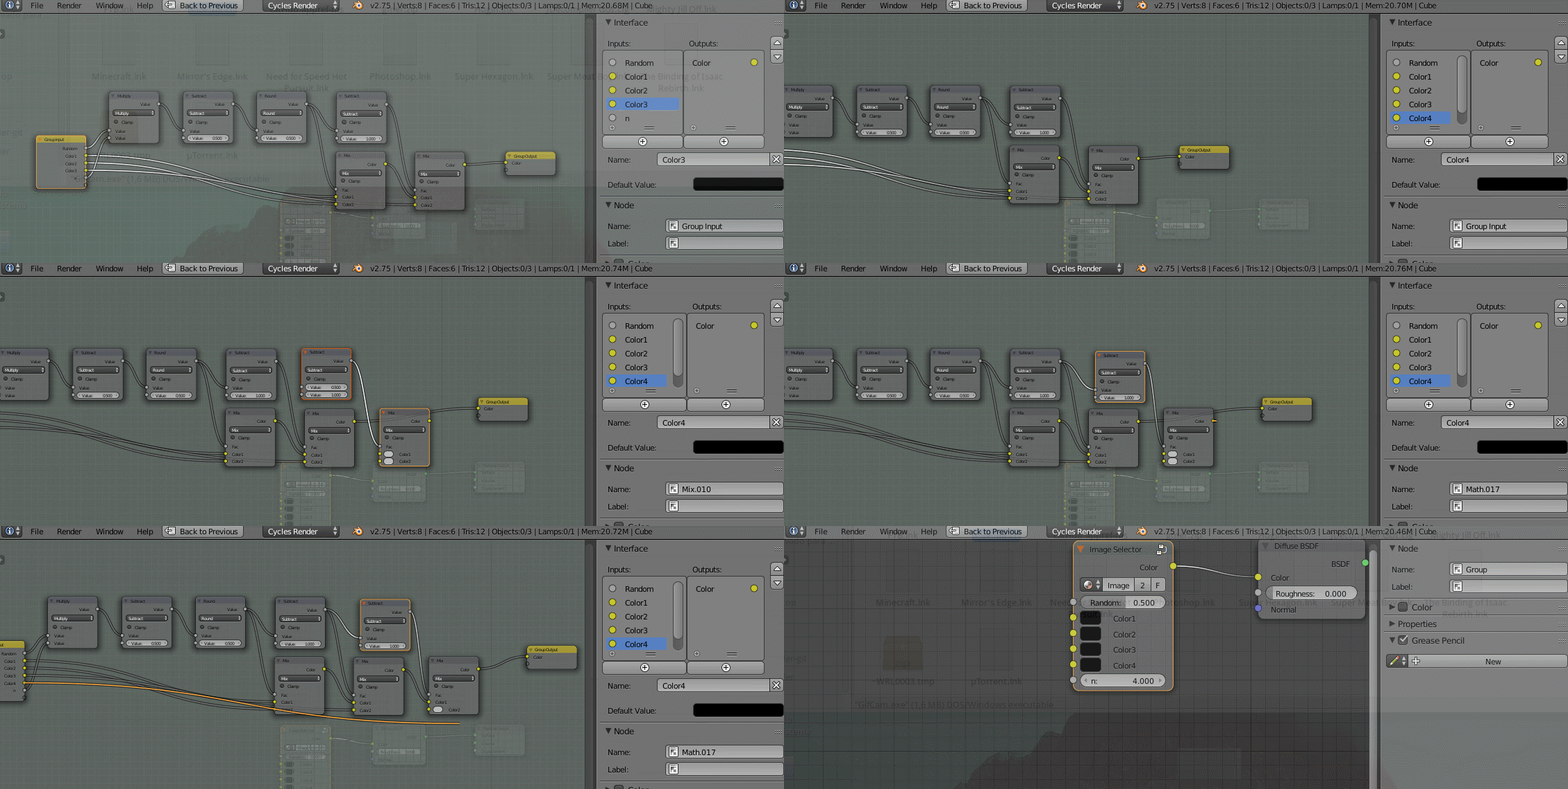
And you can use the same process to expand it even further. Just remember to go out of the group and update the n input too.
Here's a quick demonstration of how it works:
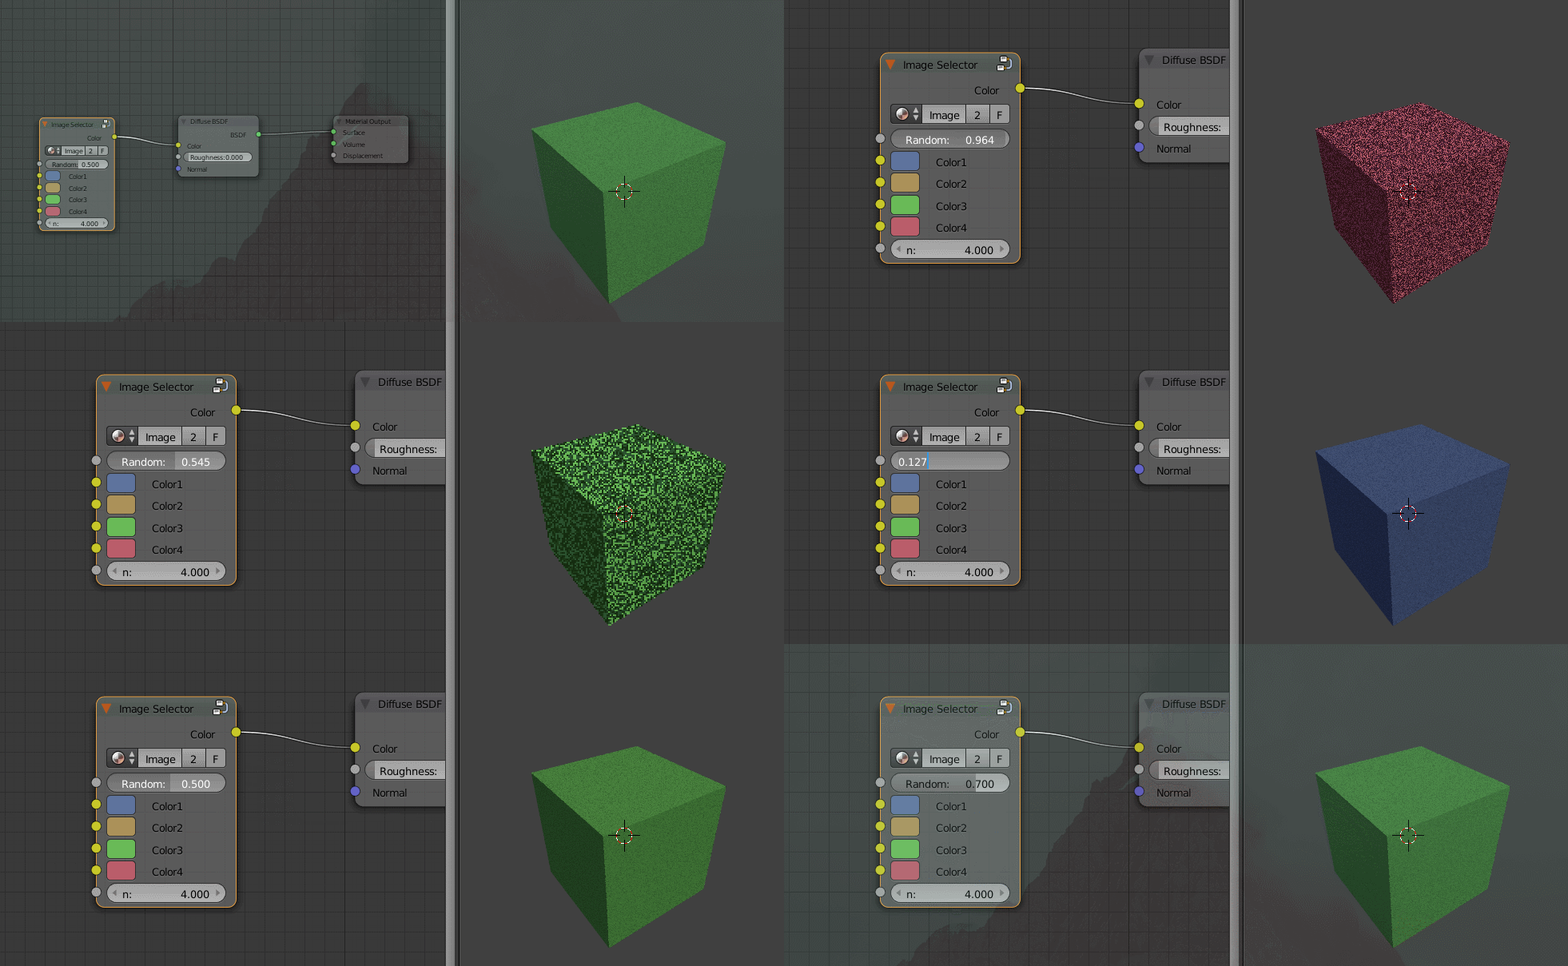
-
$\begingroup$ Excellent, worked smoothly! And thanks a lot for the file! $\endgroup$ Commented Dec 9, 2020 at 20:39
Building on top of other answers, and especially theStandard's idea, I came up with Texture Atlas approach.
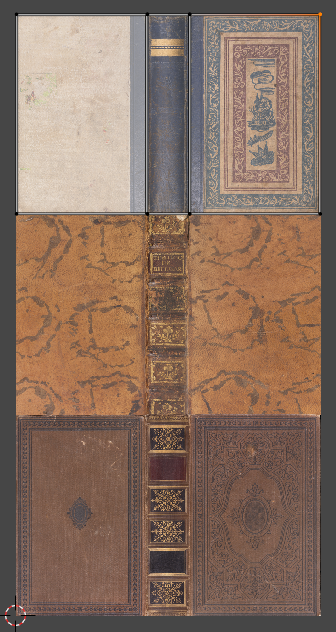
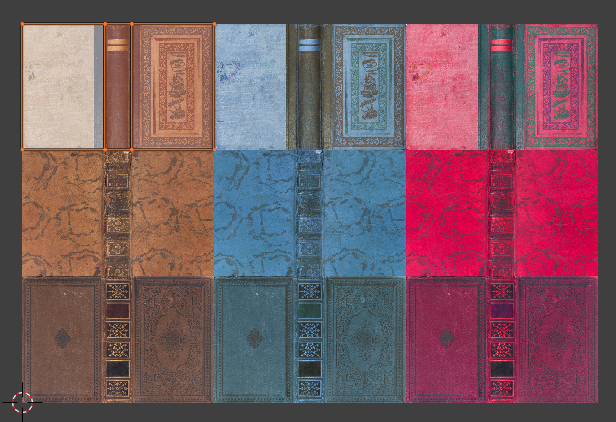
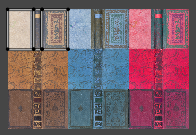
- For each texture type (albedo, normals etc.) combine all variants to a single file, e.g. if you have 3 base color textures and 3 normal textures, combine them to 1 base color texture and 1 normal texture. For example, you could combine albedo textures vertically like this:
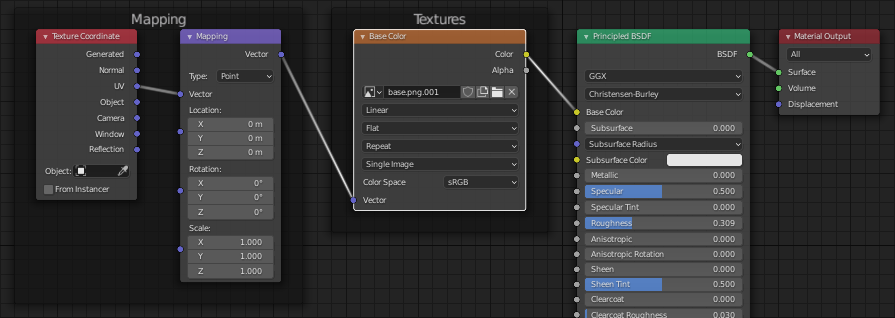
- Create a default material, select Principled BSDF node, press CTRL + SHIFT + T for default setup (you need to have Node Wrangler enabled in preferences->addons).
- UV map the mesh to the first texture in the file:
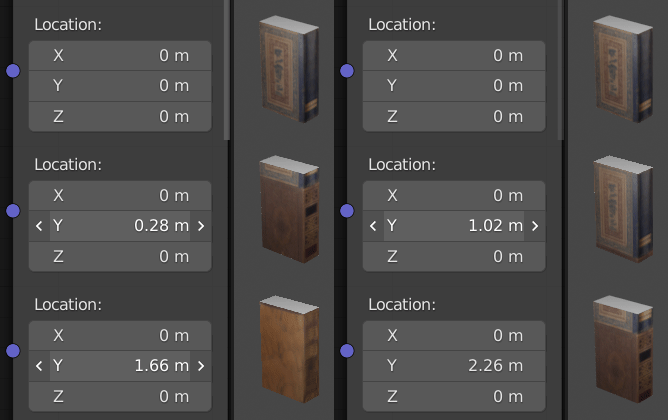
- Changing the Y location in mapping will now scroll through the texture atlas:
You can notice that 0.33 m will point to the 2nd texture, and 0.66 m will point to the last one. That's because there are 3 textures, and each takes 1/(number of textures) m height.
- Add a Value node, rename it to
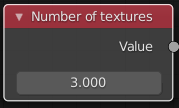
Number of texturesfor future reference and set the value to3(as in this example there's 3 textures in the atlas)
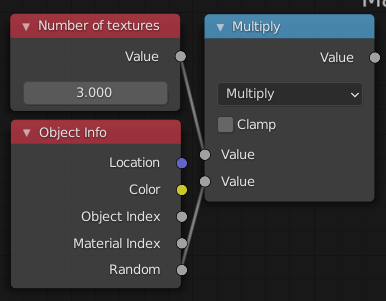
As in Greg Zaal's answer, add Object Info node for the "Random" value.
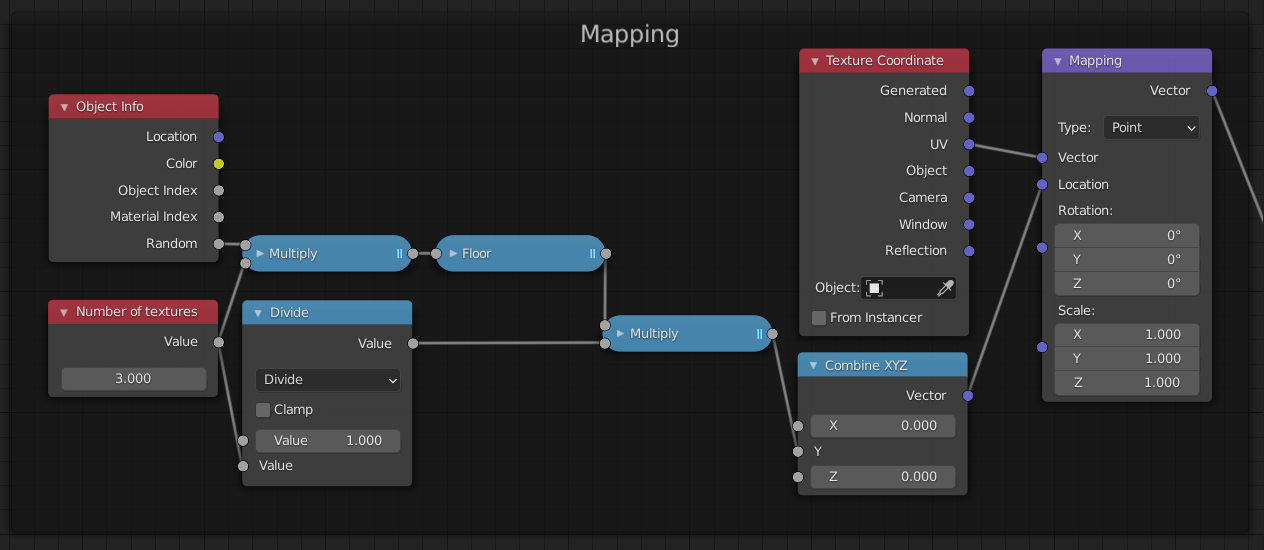
Add Math node and multiply Random by number of textures, to convert our random range from
0 <= x < 1to (in this example)0 <= x < 3:
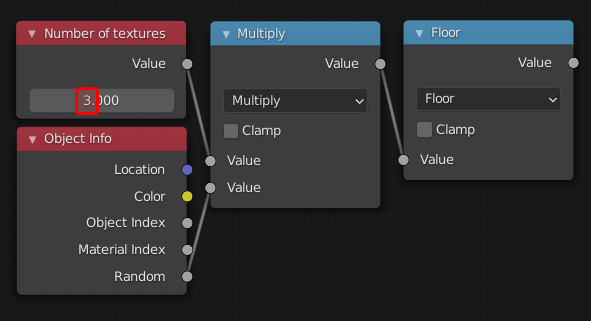
- Add another Math node, to Floor the previous value, converting it from
0 <= x < 3tox ∈ {0, 1, 2}. The following node setup simply converts a value in range0..1(excluding 1) to a non-negative integer lower than the integer we provided (marked red on the screenshot).
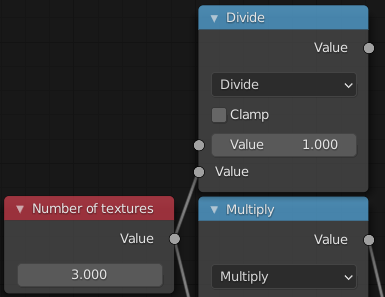
- As mentioned in p. 4. The offset for each texture is 0.33 or 1/3 m. We could just input it as another value, but it's better to calculate it automatically, so we don't have to manually update it, when we change the number of textures in the atlas (and so only the node added in p. 5. will have to be manually updated):
- Now let's multiply one by another to convert
x ∈ {0, 1, 2}tox ∈ {0, 0.33, 0.66}, and then use Combine XYZ node, as we can't put our Y directly to Mapping node [I also rearranged the nodes visually a little].
Final node setup:
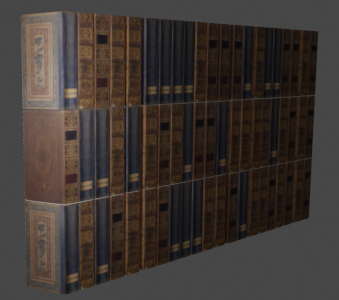
And their effect:
How to make the atlas two-dimensional
If you have a 3x3 grid of textures in your atlas, you have 9 possible textures, so you update Number of Textures to 9. So now the multiply -> floor nodes will produce a number in {0, 1, 2, 3, 4, 5, 6, 7, 8}. If you write down a table on how they correspond to the atlas, you will get this:
| y / x | x:0 | x:1 | x:2 |
|---|---|---|---|
| y:0 | 0 | 1 | 2 |
| y:1 | 3 | 4 | 5 |
| y:2 | 6 | 7 | 8 |
A standard way to convert index to row index is to make an integer division of the index by the number of columns. A standard way to convert index to column index is to calculate the integer division remainder (so-called modulo operation)
- 0 // 3 = 0 (remainder: 0)
- 1 // 3 = 0 (remainder: 1)
- 2 // 3 = 0 (remainder: 2)
- 3 // 3 = 1 (remainder: 0)
- 4 // 3 = 1 (remainder: 1)
- 5 // 3 = 1 (remainder: 2)
- 6 // 3 = 2 (remainder: 0)
- 7 // 3 = 2 (remainder: 1)
- 8 // 3 = 2 (remainder: 2)
(first bold number above is Y coordinate, second is X coordinate)
Now when we change the texture atlas and update the UV:
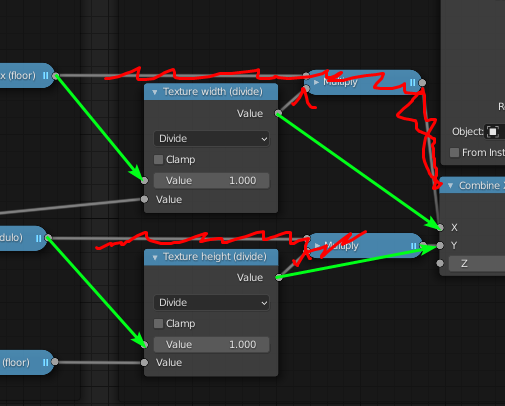
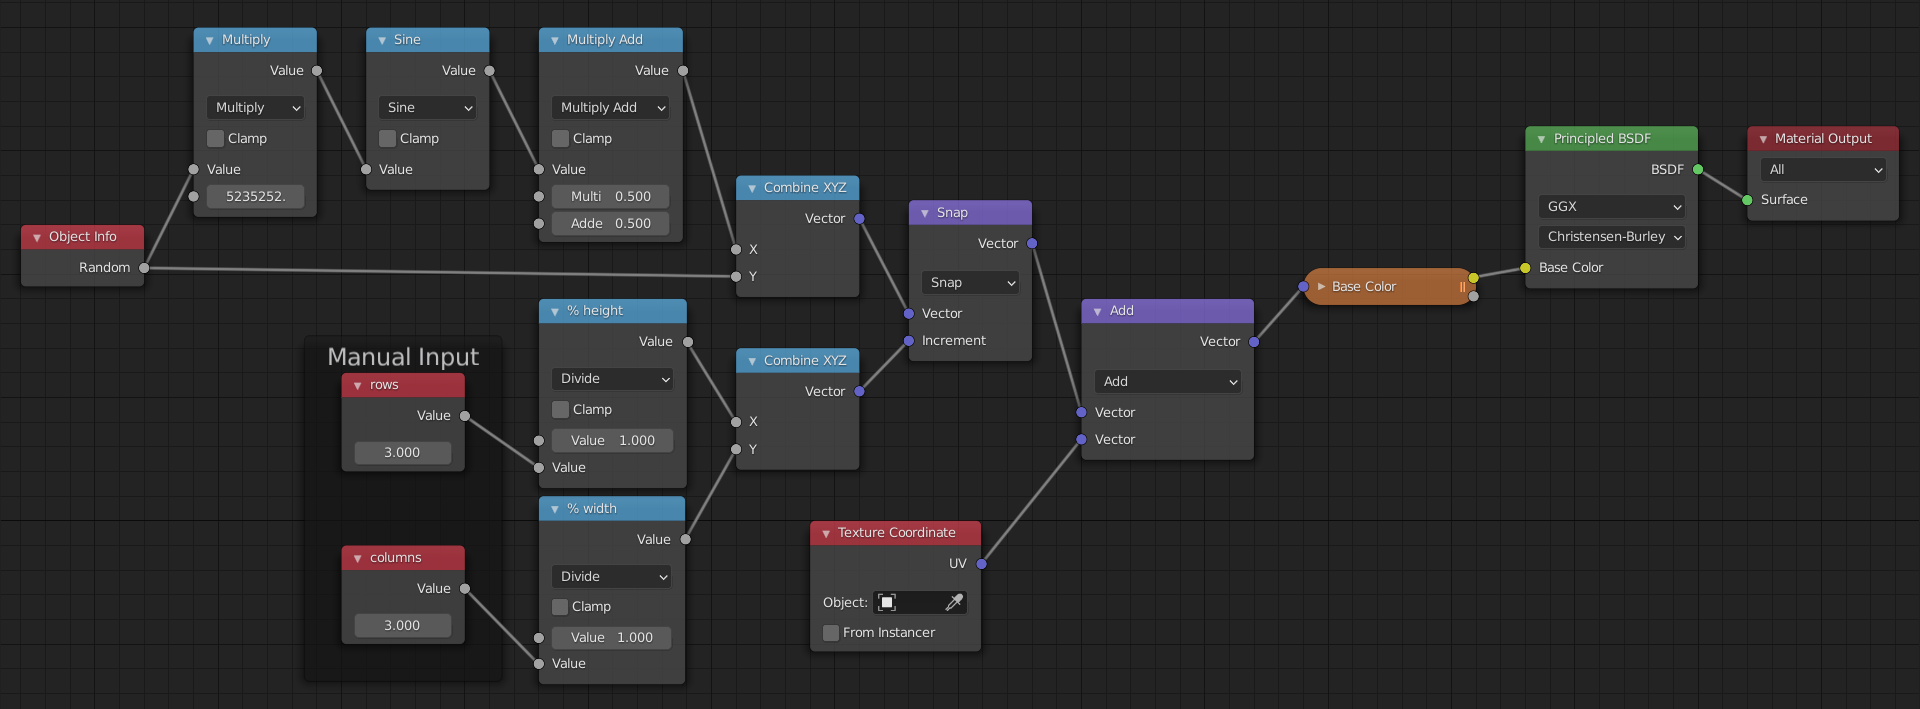
We can use this node setup:
It's quite ugly, we can simplify this part:
Final result:
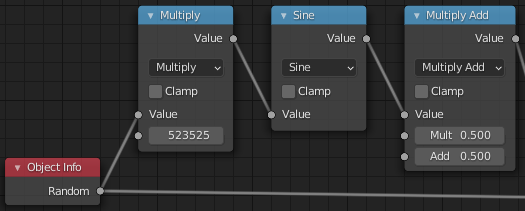
Other than that, the setup would be much simpler if it just randomized X and Y separately - but that would assume the last row is full, as opposed to having e.g. 8 elements in a 3x3 grid where the bottom-right corner is empty. Update: To get a second random value don't listen to my comments under the clamping, as that can give uneven distribution. You can just pass your random value to a 1-dimensional noise, but that also can give you uneven distribution. So I'm using a setup like this:
-
$\begingroup$ This really helped me out as I have a similar problem as OP. So thank you for that. I have one question though. If my atlas is, for instance a 5x5 grid, how would I go about randomly choosing the UV in the X and Y directions? I thought it would be as simple as plugging the last Multiply node into the X and Y inputs on the Combine XYZ. Obviously that didn't work. Any help with this would be greatly appreciated $\endgroup$ Commented Feb 9, 2021 at 2:14
-
$\begingroup$ @kingsushi001 you would have to duplicate the entire setup for X (together with the input value), and plug it to Y. So you would tell the setup how many columns there are and randomize X based on that, and tell the setup how many rows there are, and randomize Y based on that. This would assume you always fill your grid completely (no empty space on the last row) - If you want to fit e.g. 23 elements into 5x5 grid - look into the update of my answer. $\endgroup$ Commented Feb 9, 2021 at 11:20
-
$\begingroup$ Thank you for the reply, highly appreciate it. I am interested in the method you described at the end of your post, randomizing X and Y separately. I have tried doing as you said, duplicating the X to make Y etc etc, unfortunately I'm still having troubles. I have attached my blend file. Maybe you can have a look? [www38.zippyshare.com/v/lyGeedEF/file.html] $\endgroup$ Commented Feb 9, 2021 at 18:01
-
1$\begingroup$ @kingsushi001 you duplicated everything except the random node. Sadly I don't know how to get two random values for each object. So what I like to do is to copy my random value into a cup (sine math node), and stir it a lot (big number in multiply math node). Remember to clamp the sine node, so instead of
-1..1range you get clamped0..1, the same as random range from Object Info node. i.imgur.com/jN3hgT8.png $\endgroup$ Commented Feb 9, 2021 at 18:49 -
$\begingroup$ Thank you very much @Markus von Broady. My node setup is now working. $\endgroup$ Commented Feb 9, 2021 at 20:13
You can also put several math nodes into the random output and use the Compare method.
For example if you have four textures that should be randomized, you can use three math nodes as factors in three mix shaders in series; first with value $0.125$ and epsilon $0.125$, second with value $0.375$ and epsilon $0.125$ and the last math node with value $0.625$ and epsilon $0.125$.
To summarize, the number of math nodes and Mix Shader (or Mix RGB) nodes are $\mathit{number of textures} - 1$. The value for each math node is $\frac {1} {\mathit{ nbrOfTextures} * (1 + \mathit{textureNbr})}$ where $\mathit textureNbr$ in this case is $0$, $1$, $2$. The epsilon is always $1 + \mathit{textureNbr}$.
I have made an add-on for this exact purpose which creates a material node setup automatically for different number of textures.
You could use a vector mapping node with random texture position values, so for 100 books you could do ((random value between 0 and 1) * 100 + 1) * x, and the same for y.
-
$\begingroup$ I'm not sure what you mean. $\endgroup$ Commented Aug 18, 2014 at 1:17
-
$\begingroup$ Use a random position on the texture (you said you'd combine them into one). $\endgroup$ Commented Aug 18, 2014 at 1:27
-
$\begingroup$ What I meant was I want to use all the Image textures in one material. $\endgroup$ Commented Aug 18, 2014 at 14:50
-
$\begingroup$ This has the potential to be a great answer if only the author would elaborate. Making complex setups for a lot of textures is tedious, and the complexity of the setup will grow exponentially as you add more and more textures. However, having it all in one texture and just using maths to calculate the coordinate on the texture makes for a very concise setup. $\endgroup$ Commented Jan 31, 2021 at 9:19


