2
$\begingroup$

I have a tapestry on a wall, and I want it to fall. Preferably, I'd like one of the top corners to come loose first, so it starts to fall towards that side; then the other top corner would come loose, and then the whole thing would end up in a reasonably realistic pile on the floor.

I've tried messing around with something like the curtain tutorial here: https://www.youtube.com/watch?v=PVGnvVij9Oc . But A) I can't keep the cloth from going through the wall my tapestry is hanging on, and B) even if it would stay out of the wall, I can't figure out how to animate the falling part.

Any suggestions?

$\endgroup$
4
  • $\begingroup$ I am not looking at the tutorial at the moment, but off the top of my head it sounds like a super standard cloth simulation. $\endgroup$
    – TheLabCat
    Commented Nov 12, 2021 at 20:43
  • 1
    $\begingroup$ Is there some trick to keeping a cloth from intersecting what it touches? $\endgroup$
    – cleek
    Commented Nov 12, 2021 at 21:34
  • 1
    $\begingroup$ yes. Select the object I.e. the wall, go to Properties -> Physics, and enable Collision. $\endgroup$
    – TheLabCat
    Commented Nov 12, 2021 at 21:35
  • 1
    $\begingroup$ doh. well that was dumb of me. Next dumb question, I hope: how do you pin the corners up? I tried a Fixed empty, but that doesn't seem to work for cloth (tooltip says "rigid bodies") $\endgroup$
    – cleek
    Commented Nov 12, 2021 at 21:47

2 Answers 2

4
$\begingroup$

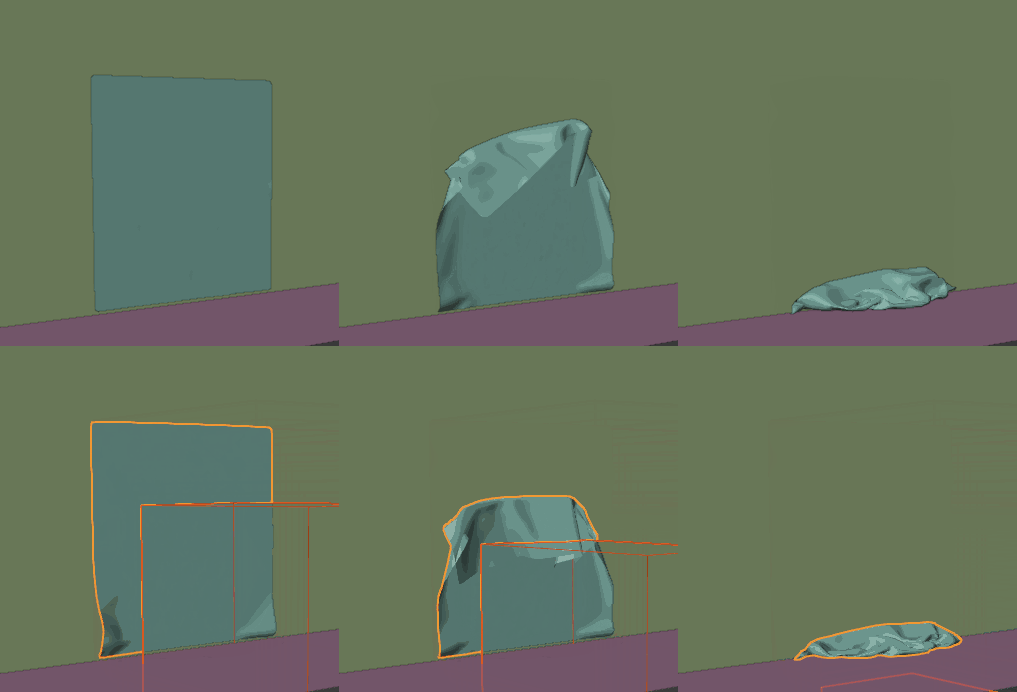
Here is another option. It's using the Vertex Weight Proximity modifier and good to simulate a poorly glued wallpaper that is coming off the wall.

animation

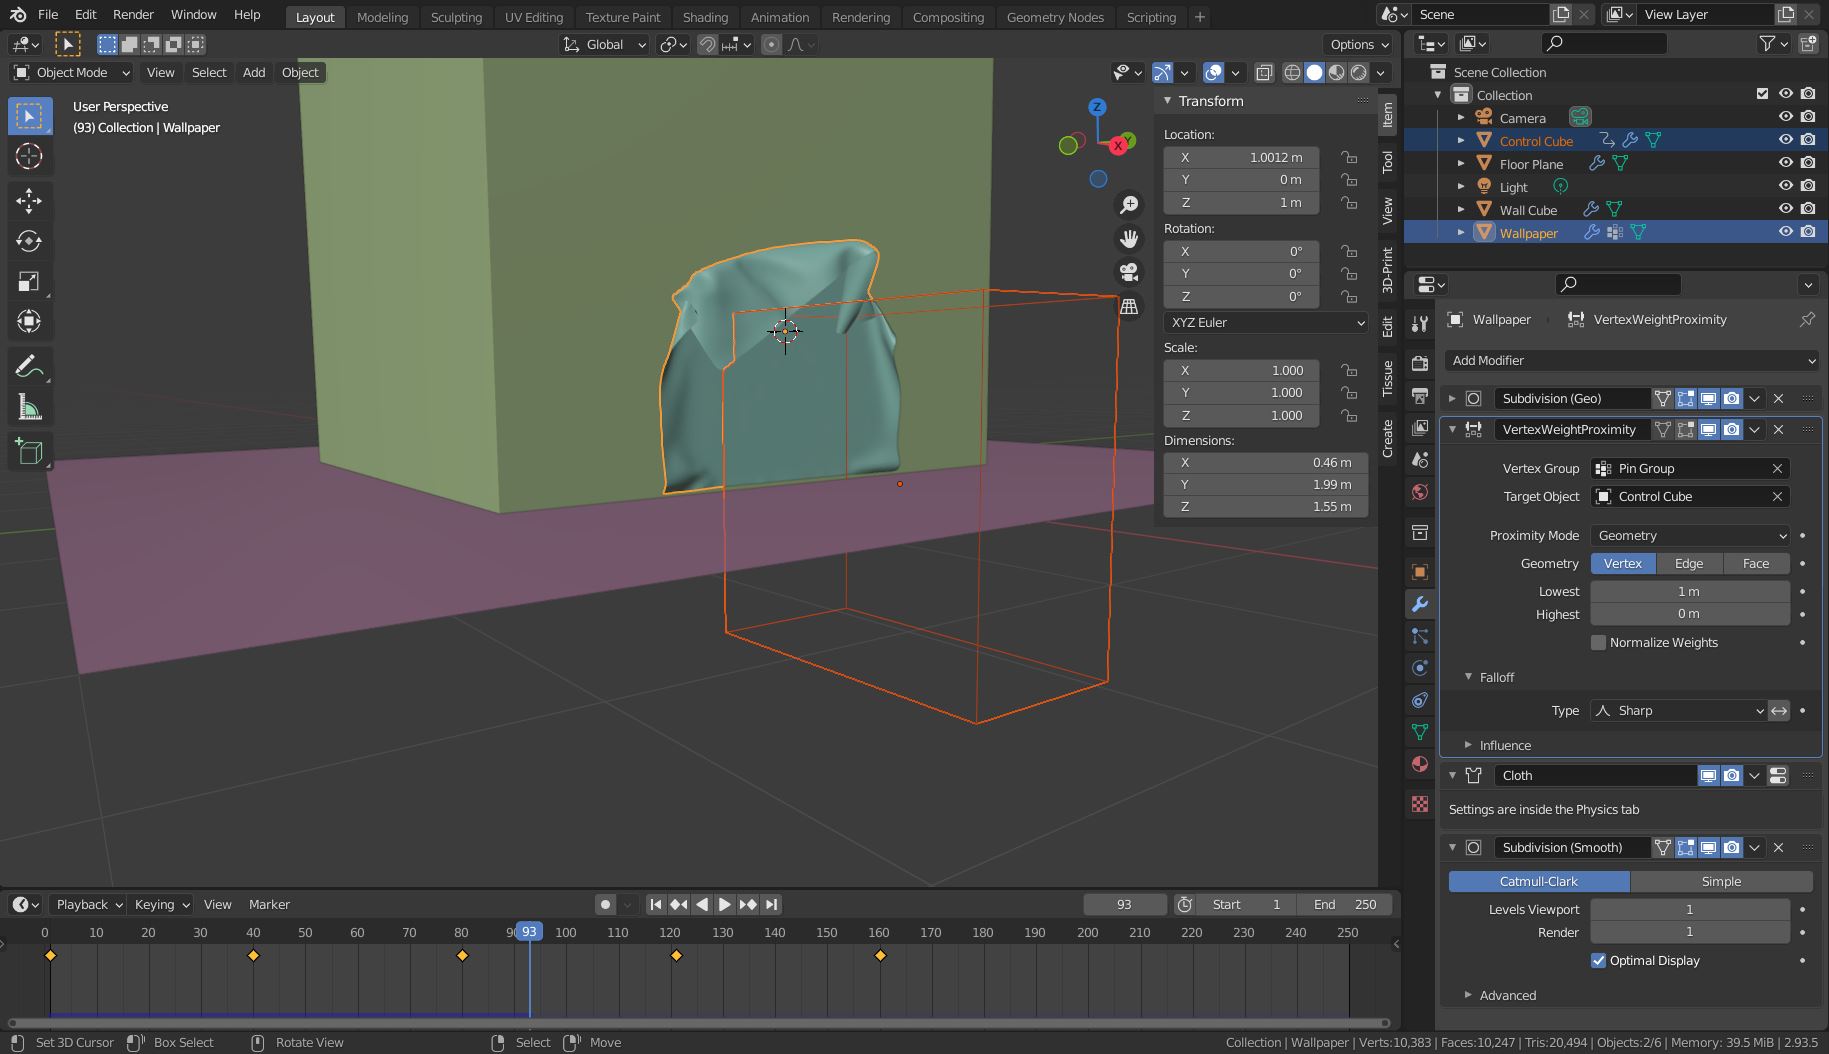
The cloth simulation has a Pin group. The weights of this group are modified by the Vertex Weight Proximity modifier which is controlled by a hidden cube. (Don't forget to hide it for render.)

screenshot

In the cloth settings, you need to set the Collision > Distance to a small value like (0.005). Place the control cube very close to the wallpaper and give it enough geometry. In the example, the default cube with 5 subdivision levels is used.

$\endgroup$
0
2
$\begingroup$

You can use the Vertex Weight Mix modifier.

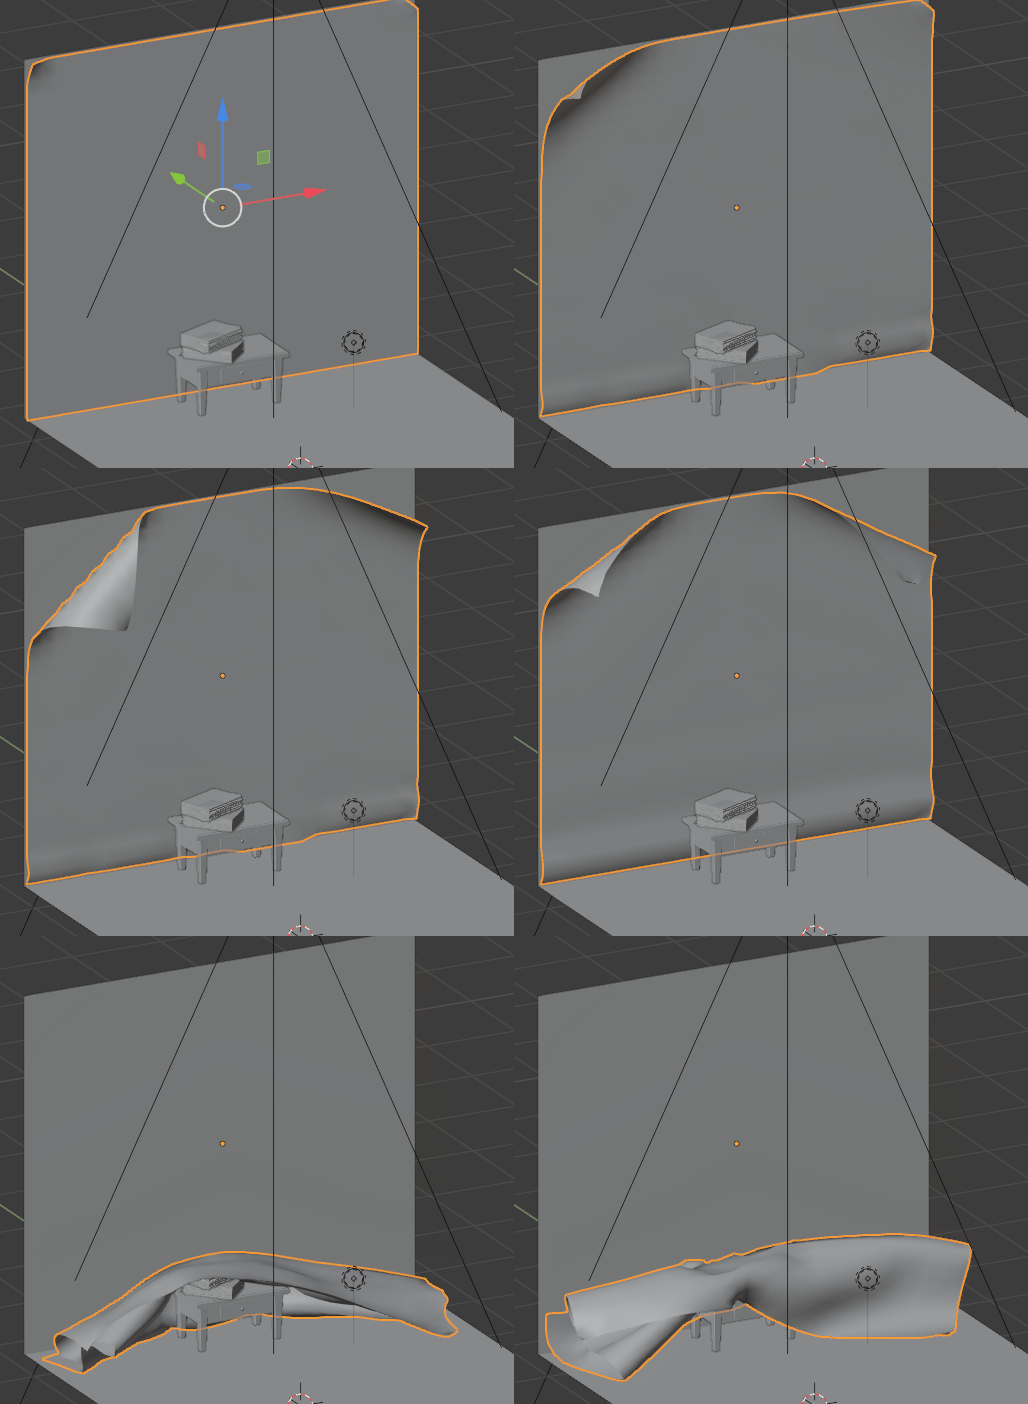
Don't subdivide your wallpaper mesh too much if you don't want it to look too flexible. You can create 2 groups: The Pin group (the whole paper except the 2 top corners) and a group with no vertex that you'll call NoPin. Give your paper a Vertex Weight Mix modifier, then Cloth, then Subidivision Surface. In the Physics panel > Cloth > Shape choose the pin group. In the Vertex Weight Mix modifier, select Vertex Group A (Pin) and B (NoPin). Choose Vertex Set > VGroup A or B, Mix Mode > Replace. Keyframe the Global Influence value the way you want in order to mix from A to B:

enter image description here

enter image description here

$\endgroup$
5
  • $\begingroup$ Sounds like a plan. Thanks! $\endgroup$
    – cleek
    Commented Nov 12, 2021 at 22:05
  • $\begingroup$ you can even create 2 objects and replace the first one when it has finished its simulation $\endgroup$
    – moonboots
    Commented Nov 12, 2021 at 22:08
  • $\begingroup$ Master of wallpaper +1 $\endgroup$
    – Chris
    Commented Nov 13, 2021 at 8:31
  • $\begingroup$ @Chris, it was not my fault, the glu was too bad $\endgroup$
    – moonboots
    Commented Nov 13, 2021 at 8:54
  • $\begingroup$ @moonboots : and who bought the glue? 🤨 $\endgroup$
    – Chris
    Commented Nov 13, 2021 at 9:06

You must log in to answer this question.

Not the answer you're looking for? Browse other questions tagged .