2
$\begingroup$

im new to blender, and im modeling and rigging my first 3d models for 3D game development.

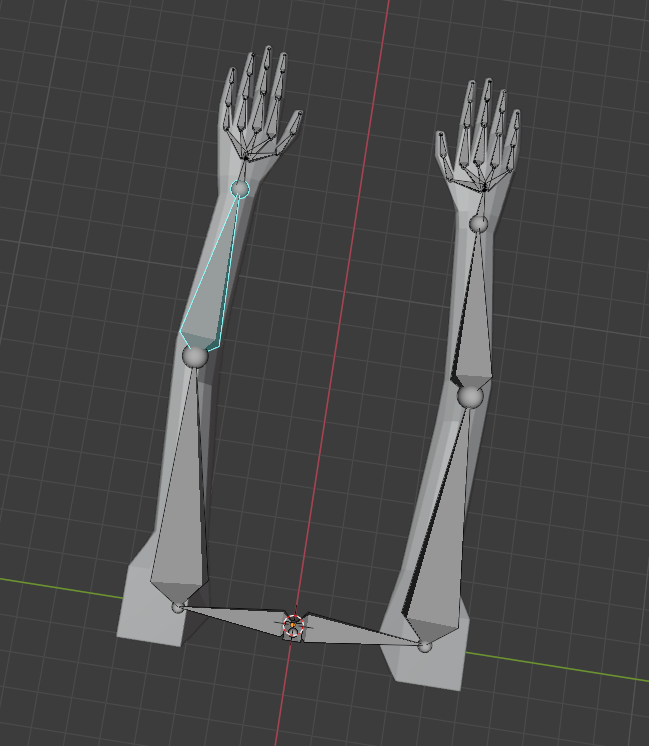
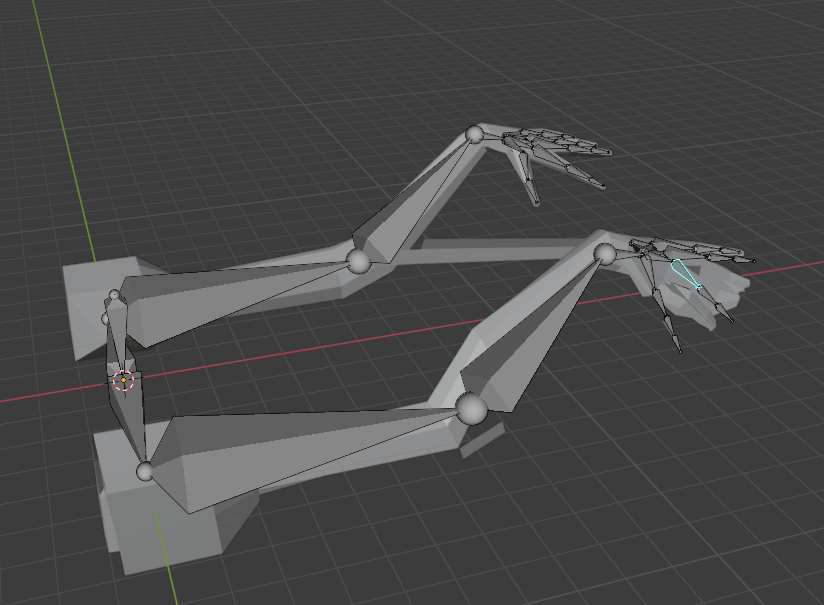
So i modeled 2 arms, which i want to rig and animate for a first person camera game. i designed an armature and parented it with automatic weights. One arm is totally fine, all weights are perfect, the other arm... not.

I modeled the mesh and then copied and mirrored it.

Yeah, i could weight paint all for my self, but i dont quiet understand weight painting, and i thought, if one arm works, why doesnt the other one does fine too?

Help would be appreciated :)

Here are some pictures:

No pose

With pose

$\endgroup$
7
  • $\begingroup$ Can you share your blend file? (How to add a blend file) $\endgroup$ Commented Sep 23, 2021 at 18:22
  • $\begingroup$ Sure, here it is $\endgroup$ Commented Sep 23, 2021 at 18:25
  • $\begingroup$ <img src="https://blend-exchange.com/embedImage.png?bid=kPlsOoJp" /> $\endgroup$ Commented Sep 23, 2021 at 18:25
  • $\begingroup$ That version of the file doesn't show the automatic weights or the arms parented to the armature. However when I parent the arm to the armature I do see some problem. Unfortunately, auto weight painting never works perfectly. You're going to have to learn a bit about weight painting and adjust some of the weights manually. $\endgroup$ Commented Sep 23, 2021 at 18:33
  • $\begingroup$ beans, i thought i could avoid this :D $\endgroup$ Commented Sep 23, 2021 at 18:36

1 Answer 1

1
$\begingroup$
  1. undo any parenting
  • Select the mesh
  • Go to Object properties and under Relationships click the x for Armature if you still have it parented.
  • Go to modifiers and click the x to remove the Armature modifier if you still have it present.
  • Go to Object Data Properties; click the down arrow on the right of Vertex Groups and select Delete All Groups
  1. In Object mode, rotate both the armature and the mesh -90 on the Z axis. (Shortcut: RZ-90Enter) Apply the rotation (Shortcut CtrlA and select Rotation from the popup.) You need to do these steps once for both the mesh and the armature.

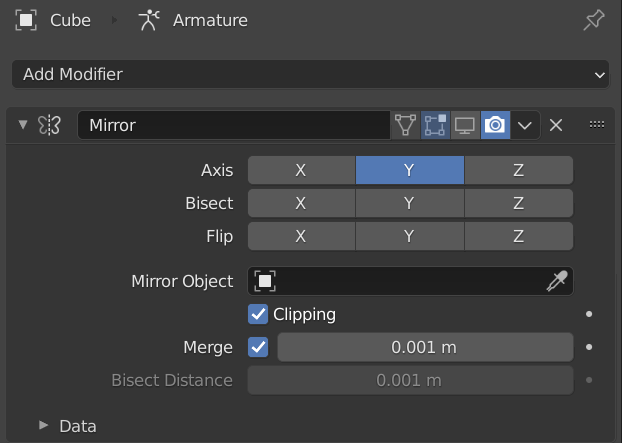
  2. Delete the right side of the mesh and add a mirror modifier, mirroring on the Y Axis.:

Mirror modifier

Make sure that clipping is enabled.

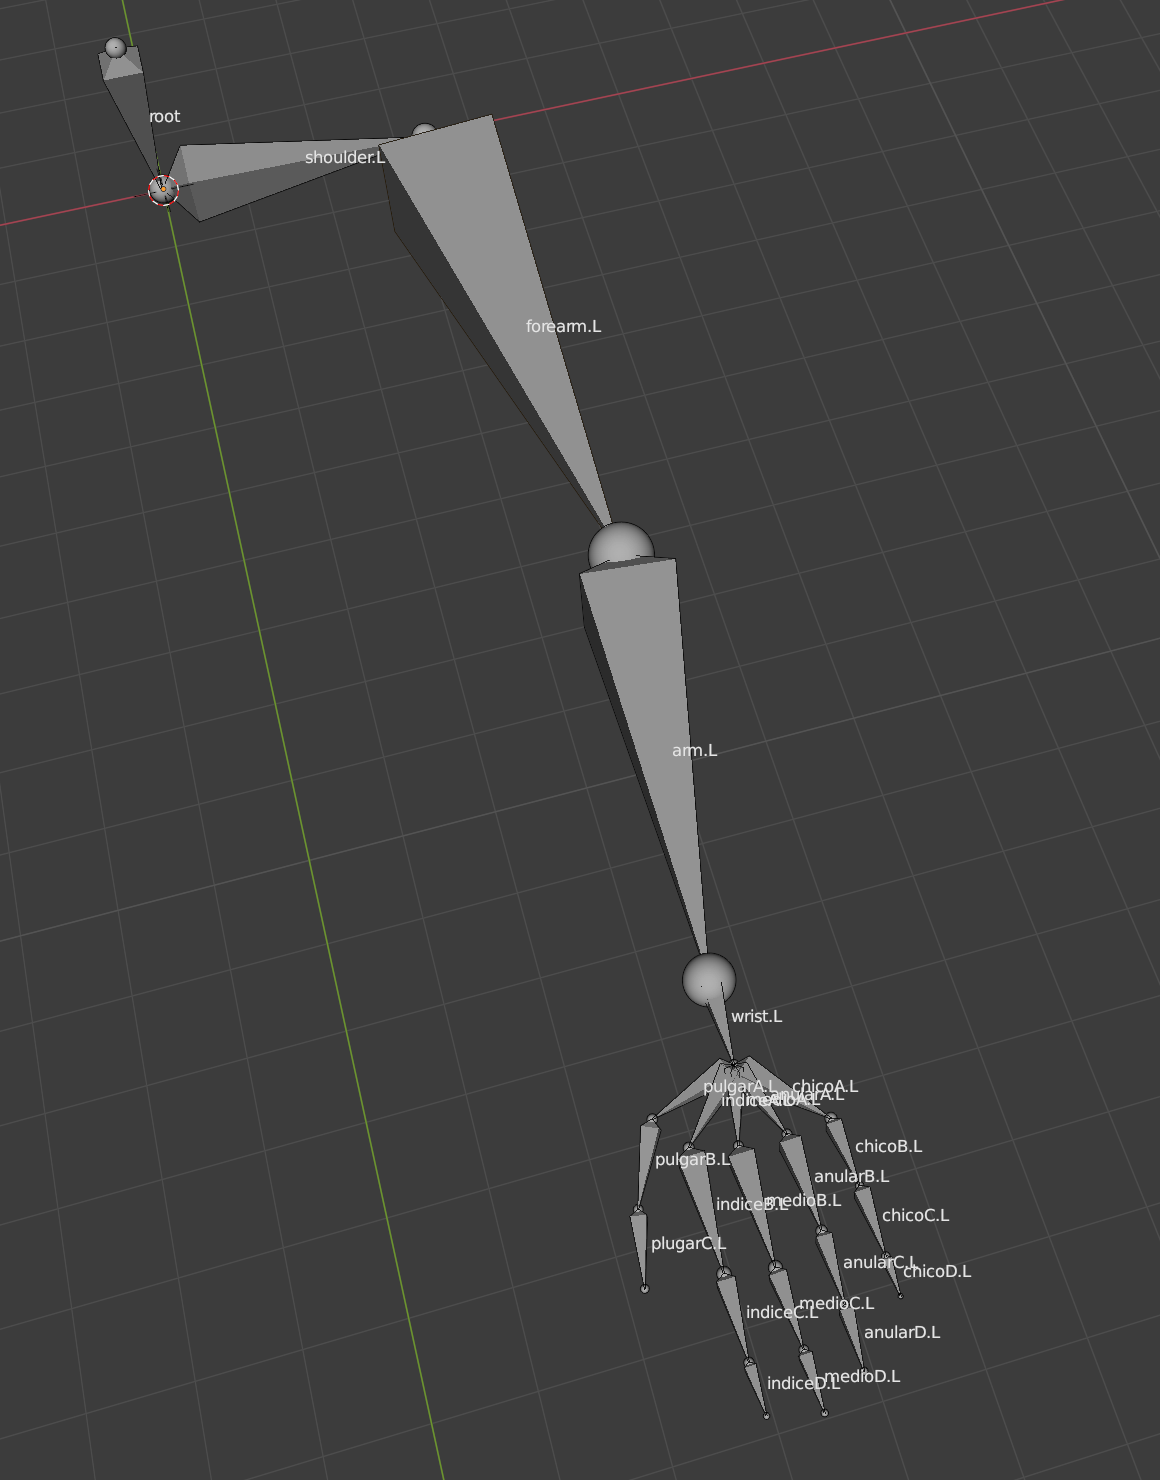
  1. This is the hard part. Blender knows about left/right symmetry, but you have to tell it where to apply it. Delete all of the bones on the right side, and add '.L' to the names of the bones on the left from the armature's viewpoint, not the viewers If you enable names in the armature's viewport display you'll end up with something like this:

left arm showing '.L'

NOTE: It is very good practice to give your bones reasonable names. I named them according to anatomy, using the names for fingers that classical guitarists learn. You can invent your own.

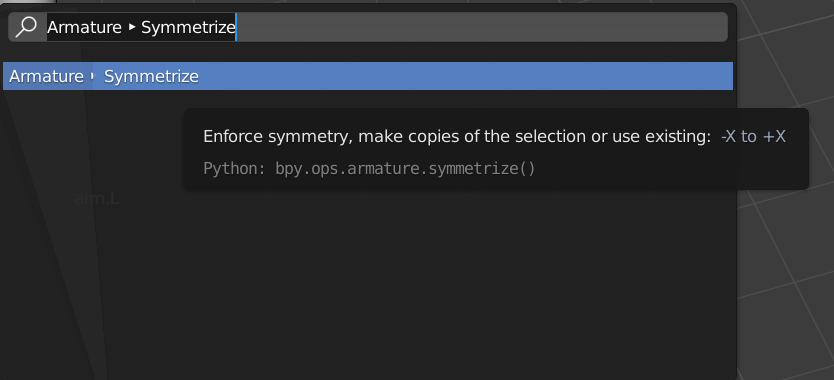
  1. To create the right arm, select all of your bones except the root bone, and type F3 the F3 key, and search for Symmetrize

Searching for symmetrize

Select the command that comes up. This will create your right arm. This is very useful anytime you create an armature with bilateral (left/right) symmetry and you should get into the habit of naming bones this way.

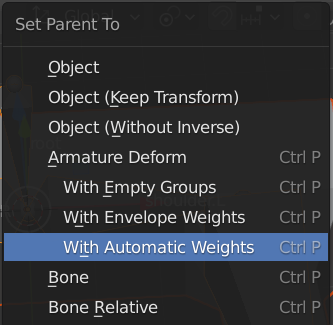
  1. Parent the mesh to the armature using automatic bone weights.

parenting with automatic bone weights

This should give you a very good fit on the bone weights, because by symmetrizing you've fixed any small errors in bone placement.

You really should learn how to weight paint though. It's not that hard and once you get the hang of it your models' animations will improve.

As a bonus, here's my renamed bones version of your armature

$\endgroup$
3
  • $\begingroup$ Wow! Thank you so much! never thought somebody would do so much effort for helping :) nice, i will do this right away :) $\endgroup$ Commented Sep 23, 2021 at 20:47
  • $\begingroup$ Thats perfect! I had this problem for days now, and this almost made me quit modeling $\endgroup$ Commented Sep 23, 2021 at 20:54
  • $\begingroup$ You are very welcome. I like to encourage people who are just starting out. I look forward to seeing your progress. (Just saw your 'almost quit' comment. Blender can be very frustrating because when you're starting out it's hard to know what to call things when you try to search for answers. Don't give up, you did a good job on your geometry and bone placement. You only missed a bit of rigging technique. There are good rigging tutorials (Humane Rigging is good but old) and weight painting tutorials on ut00b, and elsewhere. $\endgroup$ Commented Sep 23, 2021 at 20:55

You must log in to answer this question.

Not the answer you're looking for? Browse other questions tagged .