86
$\begingroup$

I know that this question is a bit old or maybe overdone, but I'm running the latest edition of Blender and when I use the Cycles engine I get really fuzzy results and I can't find a simple, non-compromising solution to the quality. I don't know exactly what I'm doing wrong here, but I'm sure others share my frustration.

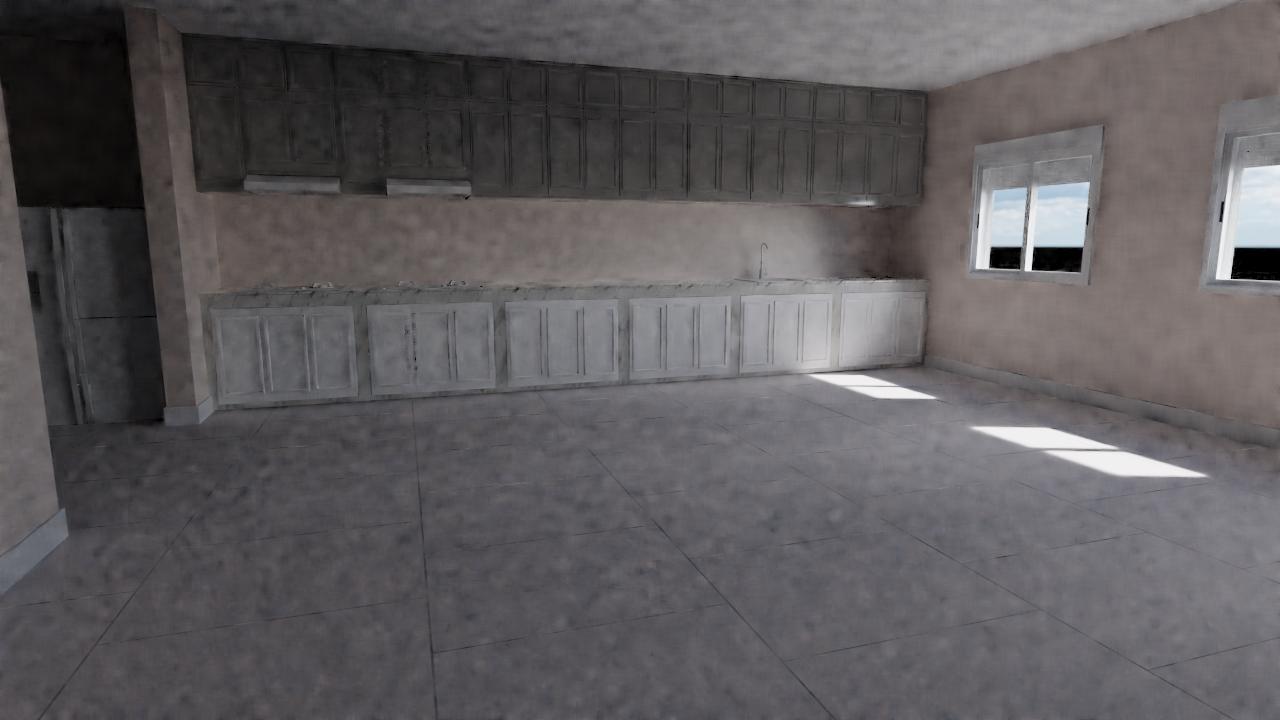
Leaving everything in default settings, I started a new project and switched to the Cycles render. I duplicated the cube and set colors for two Diffuse BSDF shaders, then went ahead and made walls and a floor all sharing the same diffuse shader. I made two windows to emit blue light. The screenshot has gaps between the walls because of the setup: Blender Cycles render
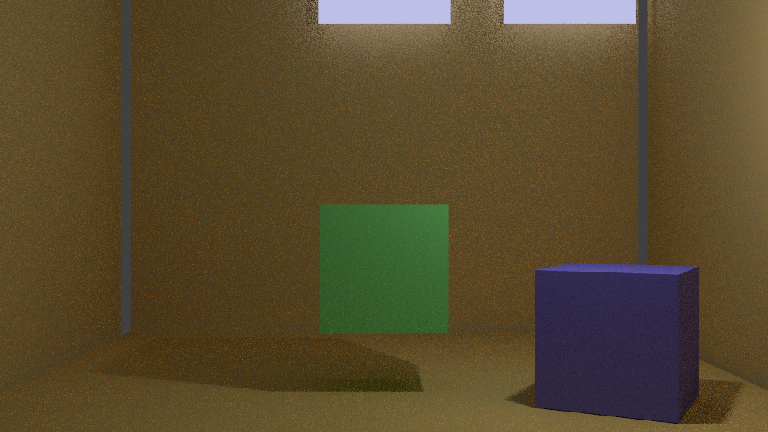
I'm aware that it's considered very incomplete and many have come to terms with some amount of noise, but is this normal? Furthermore, with default settings or not, I can't change the amount of noise produced. Supposedly, using "progressively refine" in the rendering tab should make it refine itself indefinitely, however Cycles only counts to 10 refines and then stops, creating a render which is a pixel-perfect match of the ordinary rendering method when it's completed.

I understand that there are tricks that can be used to reduce noise, but at the cost of extra processing time and usually small quality conflicts, like blurring. My question essentially boils down to is this Cycles' current limit?

$\endgroup$
1
  • 5
    $\begingroup$ Note: theres a post on BlenderArtists which may be helpful to anyone wanting to avoid noisy renders: blenderartists.org/forum/…! $\endgroup$
    – ideasman42
    Commented Apr 4, 2014 at 0:32

9 Answers 9

69
$\begingroup$

Samples:

What you want is the number of Samples.

A Sample refers to cycles firing a "ray" into the scene and returning information based on the color and other properties of objects it interacts with.
E.g. If a ray bounces off a red object and then hits a light source, the corresponding pixel will get a red color.

Also see Why can't cycles cast one ray per image pixel, instead of rendering progressively to infinity?

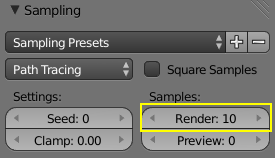
You can change the number of samples taken per pixel in Render settings > Sampling > Samples > Render:

enter image description here

Increase this value to take more samples and reduce noise. See the manual:

There are two integrator modes that can be used: path tracing and branched path tracing. The path tracing integrator is a pure path tracer; at each hit it will bounce light in one direction and pick one light to receive lighting from. This makes each individual sample faster to compute, but will typically require more samples to clean up the noise.

Progressive refine:

Progressive refine does not change the number of samples, it disables tiled rendering. With tiled rendering each tile is rendered to the full number of samples before starting the next. Disabling this is useful for rendering the entire image all at once, so the user can manually stop the render and get a finished image.

Note that the render will still stop at the number of samples defined in Sampling > Samples > Render using this setting, and rendering the entire image this way is much slower than rendering with tiles.

$\endgroup$
5
  • $\begingroup$ Thanks for the heads up. I can't believe I missed that for so long :) I just hope the question won't be construed as ignorant (I think enough people struggle with the same thing anyway). $\endgroup$
    – kettlecrab
    Commented Nov 19, 2013 at 7:14
  • 4
    $\begingroup$ You should probably mention that Progressive Refine is incredibly slow and should only be used to find out how many samples you need for future renders. $\endgroup$
    – Greg Zaal
    Commented Nov 19, 2013 at 7:38
  • $\begingroup$ Ah, but you already mentioned it and putting asides in the question dilutes it (I've done that enough already). $\endgroup$
    – kettlecrab
    Commented Nov 19, 2013 at 7:48
  • 1
    $\begingroup$ @Stopforgettingmyaccounts... I explained about the Progressive refine setting because you seemed to think it did something else. I thought it best to explain what both the samples and progressive refine settings do so you aren't left wondering what it is and how it's different :) $\endgroup$
    – gandalf3
    Commented Nov 19, 2013 at 7:51
  • $\begingroup$ Worth noting that there are 'number of samples' settings on the actual light objects too, not just in the render settings. I'm doing a very simple but long animation render, and increasing this setting eradicated noise much more efficiently (i.e. less increased render time) than anything in the render settings did. $\endgroup$
    – entheh
    Commented Sep 26, 2016 at 10:50
54
$\begingroup$

Time for a new answer...

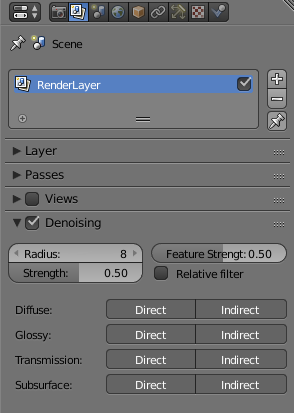
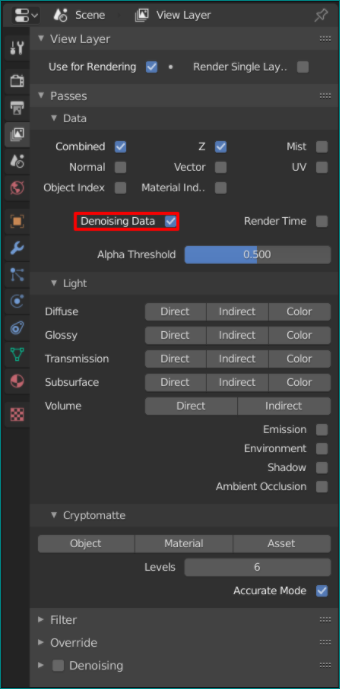
Starting with blender version 2.79 there is an option to Denoise the image as is being rendered.

Quoting from the manual

Denoising filters the resulting image using information (known as feature passes) gathered during rendering to get rid of noise while preserving visual detail as well as possible.

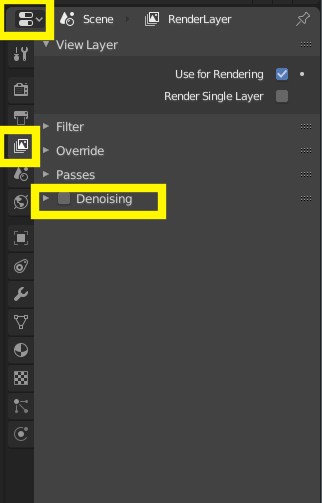
The denoiser is at the bottom of the render layers tab in the properties window

enter image description here

in 2.8

enter image description here

For more info Read: How do I use the cycles Denoiser?

Here's an example.

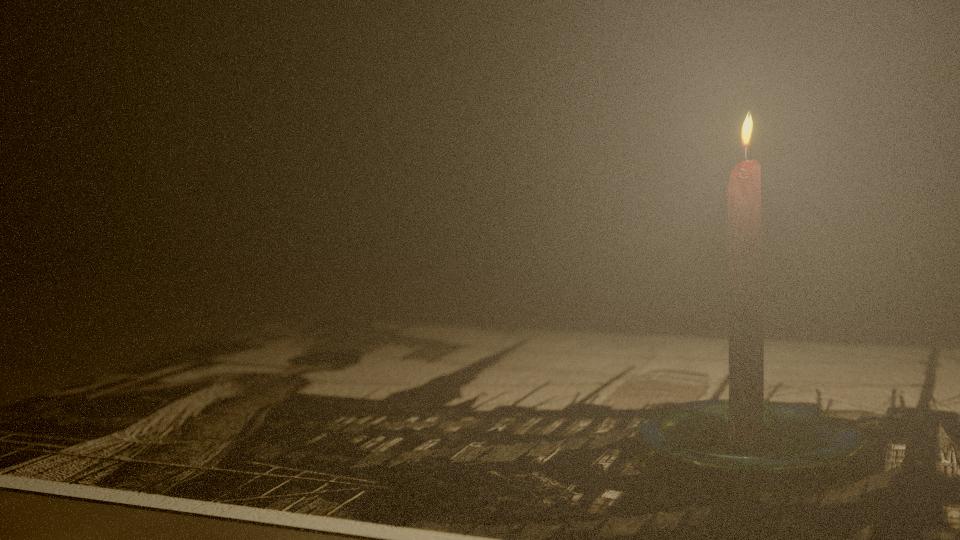
Using 250 samples with no denoise, the image has a lot of noise, as expected.

enter image description here (click on the images to enlarge)

Bringing up the samples to 2000 (with no denoising) yields a cleaner image, but it takes 600% longer to render.

enter image description here

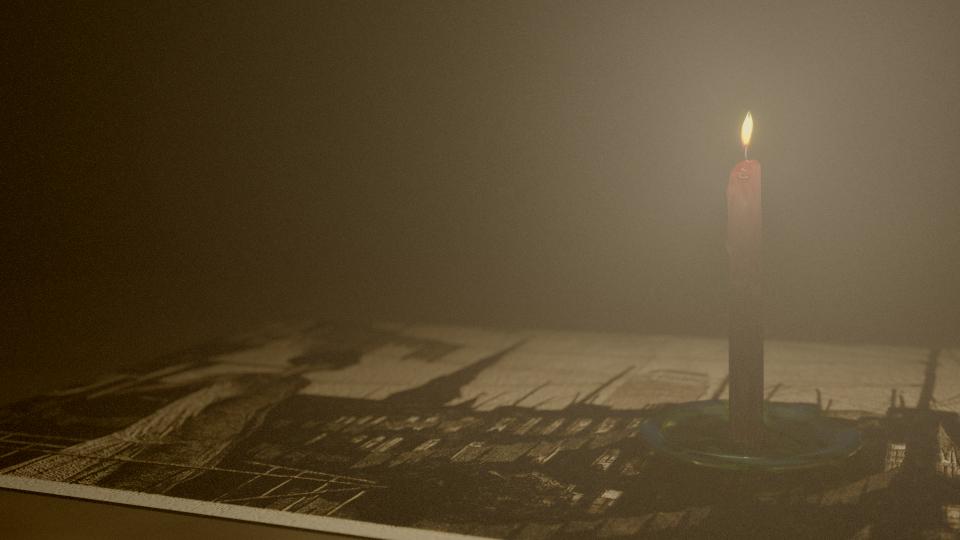
Same image at 250 samples with denoising enablend, using the default settings:

enter image description here

Denoised at 500 samples:

enter image description here

Note that denoising is not a magical button. It is not a substitute for the information and tricks outlined in the other answers on this page, but it should be thought as an additional tool. In other words: a high number of samples will yield a cleaner picture, but denosing might help to get acceptable results with a reasonable number of samples and with shorter render times.

Problems and artifacts when using denoise.

Denoising will introduce new artifacts: some segments of the image might look strangely blurrier or blotchy.

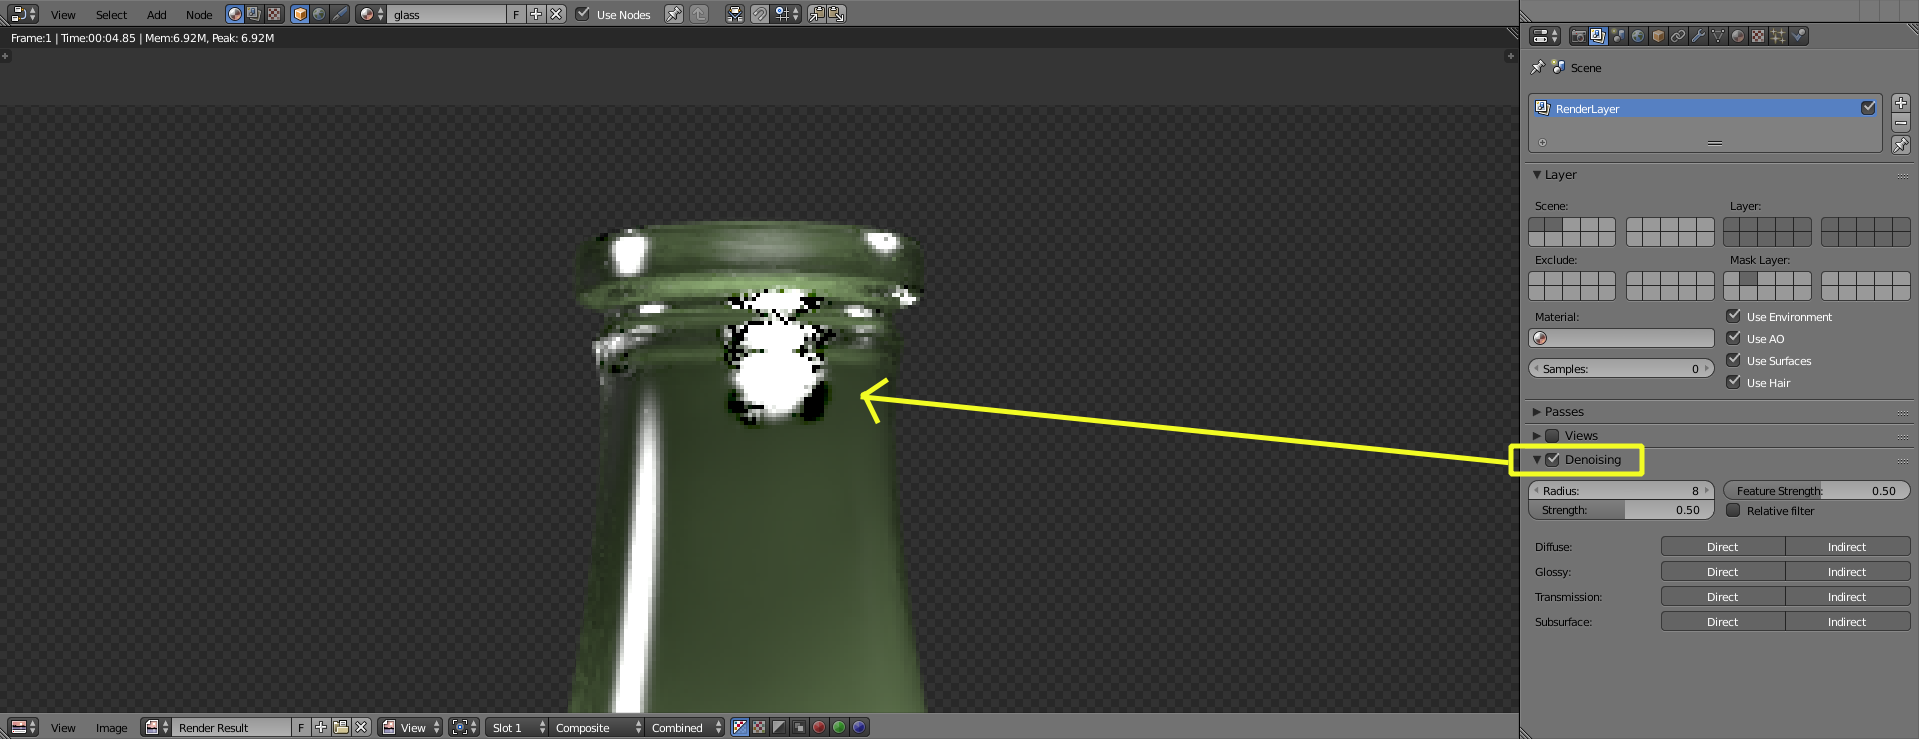
On sections where there are small bright areas (like fireflies) surrounded by darker pixels you might find or some dark "donuts"

So conservative when playing with the denoise settings. Usually using a smaller denoising radius or a lower strength will make things better.

Examples: Blotchy or smeared:

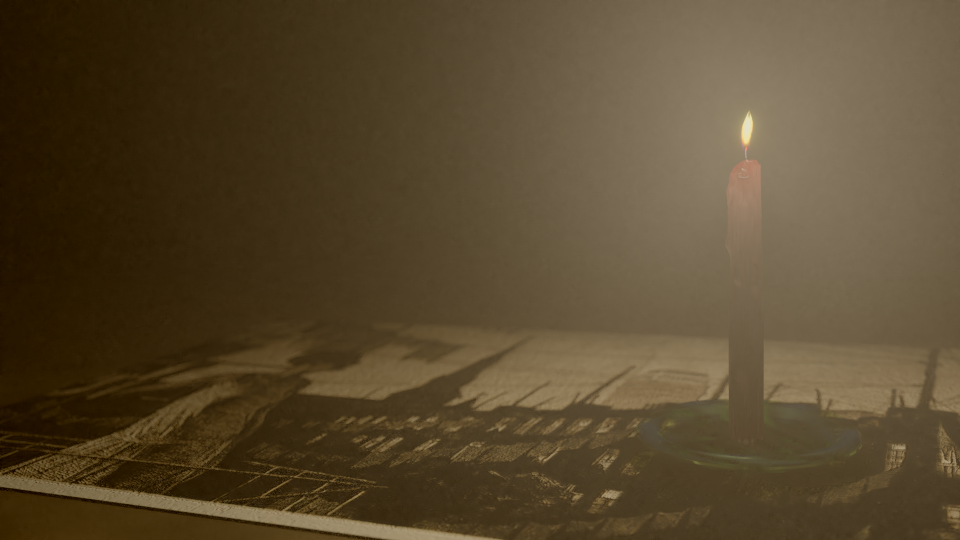
enter image description here

Unexpected black pixels around bright areas:

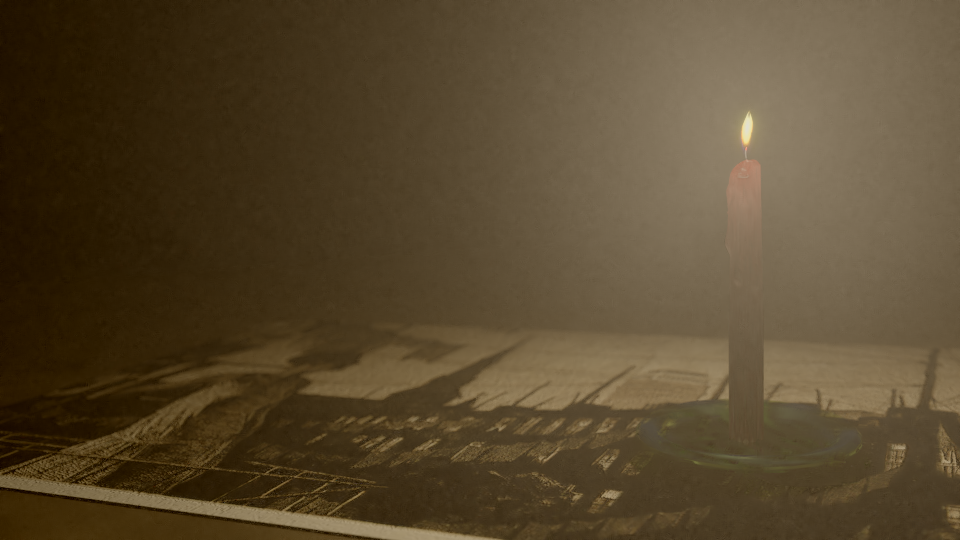
enter image description here

More examples on this link: How to properly denoise renderings?

Memory Usage.

Denoising demands a lot more resources from your computer and might even yield "out of memory errors" or make your computer hang or crash. Denoising needs the information of all of the adjacent rendered tiles to work, meaning that for every tile being rendered blender will keep in RAM the information of all the surrounding tiles and will only release that ram once a tile has been denoised.

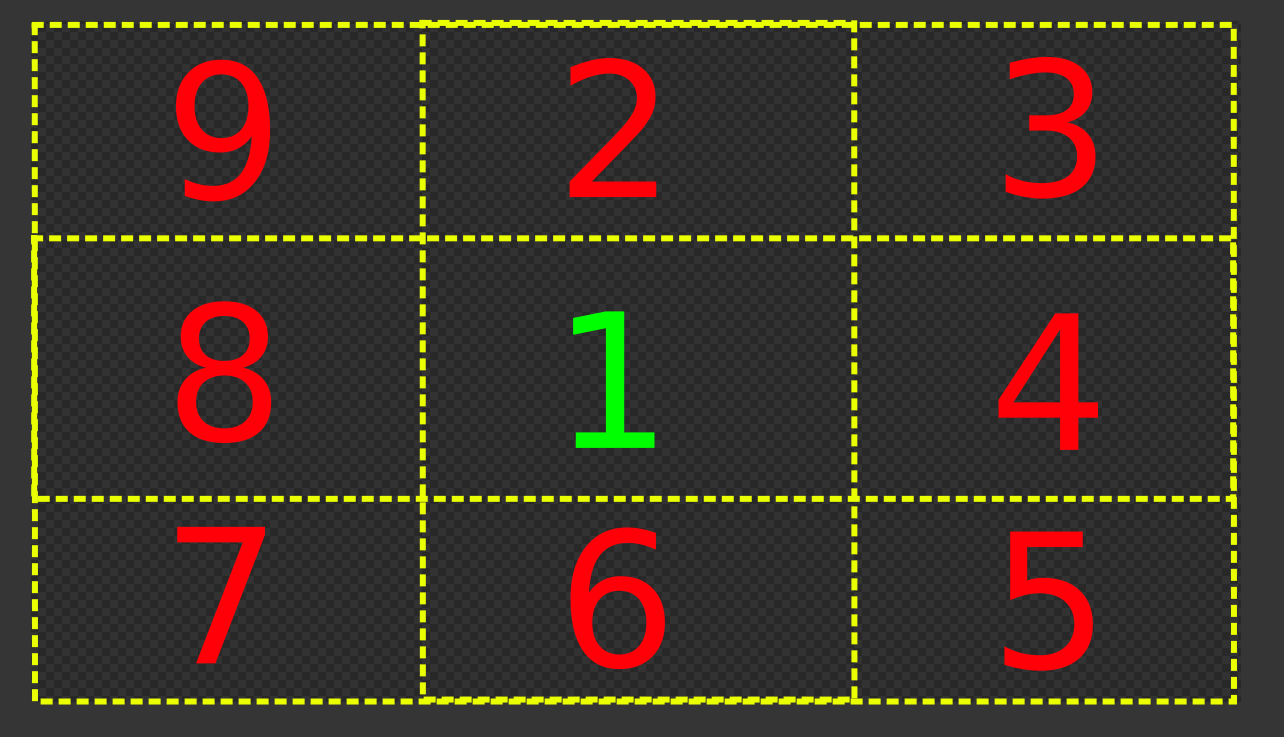
As an example: to denoise tile 1, the denoiser needs the information from the surrounding tiles: 2 through 9.

enter image description here

But the most important thing to understand about denosing:

DO NOT EXPECT MIRACLES, use an appropriate number of samples for your scene instead.

$\endgroup$
2
  • 4
    $\begingroup$ As of September 2017, this is the best answer, please upvote. Denoise works incredibly well in Blender 2.79, which is no longer beta and has been released. The denoise feature basically saves you 3 times the time: I did a test with a internal scene with 1200 samples and 400 samples looked exactly the same, amazing! This will save a TON of time for people in the future. $\endgroup$ Commented Sep 26, 2017 at 10:09
  • $\begingroup$ Great answer. I have upvoted. $\endgroup$ Commented Apr 21, 2019 at 15:11
10
$\begingroup$

An addition to gandalf3's answer lies also with optimization of the scene's and objects settings. Given the example scene with all diffuse and emission BRDFs you could turn off or limit the bounces of some of the rays being cast. For example, there are no glossy materials then disable the glossy bounces in the Light Paths section of the Render panel. You could also lower the number of Diffuse bounces at the expense of less light being thrown around.
http://www.brendanorr.com/hotlinks/ss1.png to http://www.brendanorr.com/hotlinks/ss1a.png

I sometimes also change the super-sampling/anti-aliasing method from Gaussian to Box especially if I'm rendering an animation. Lastly for global render settings if you are using your GPU to render change your tile size. I believe it depends a little on the scene content but I usually bump mine up to 256x256 with good results.

There are other per-object optimizations too. Sometimes I will disable certain kinds of rays from the Cycles Settings section in the Object settings panel:
http://www.brendanorr.com/hotlinks/ss2.png

In cycles materials there are optimizations that can be made with Mix shader and Light Path nodes to send rays through a Transparent shader instead of a more costly Glass, Glossy, or other Refraction node if it doesn't need the computations.

All in all the idea is to pare the unnecessary features and samples so that more samples can be thrown at the rays that will contribute more to the scene.

$\endgroup$
3
  • 5
    $\begingroup$ Your images are broken. $\endgroup$
    – chicks
    Commented Dec 23, 2016 at 13:44
  • 1
    $\begingroup$ @brendan_orr this is a clear example of why it it preferred to host the images using this site's built in tools. The images are now gone making the answer less useful... please re-upload the images $\endgroup$
    – user1853
    Commented Dec 23, 2016 at 15:47
  • $\begingroup$ Yep, I forgot I hosted those files there and nuked them when I upgraded Drupal. I can't find any of the original files. Being 3-going-on-4 years from this post many things have changed and there are better answers above to this. $\endgroup$ Commented May 13, 2019 at 23:34
8
$\begingroup$

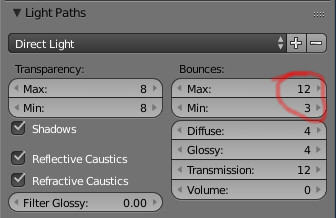
Everything of the above, but FIRST: As you stated in your question: you used the default settings: default settings:

This will always give you noise, no matter how many samples you render.

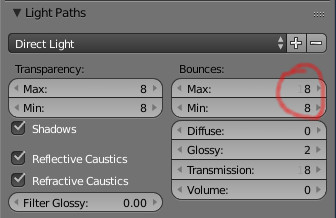
If you change the settings (Bounces min/max) to some equal number, render time goes slightly up (sometimes less than 1%!), depending on your scene of course, but you can get a noise free solution after all. Just test and see for yourself. Example:

enter image description here

$\endgroup$
1
  • 2
    $\begingroup$ I tried this with 256 samples, comparing 12,3 with 12,12 and there was very little difference in the amount of noise. The only place I saw a difference was where there were several specular objects by each other (maybe because the min bounces was less than the number of glossy bounces ). Render time went from 50.9s to 53.4s $\endgroup$
    – Steve
    Commented Mar 16, 2017 at 21:29
7
$\begingroup$

Andrew Price aka. Blenderguru has written a blog post about getting rid of fireflies. There he says:

  1. use bigger light sources.

  2. use bigger shadow sizes

  3. use "multiple importance sampling" if you have HDRs in your scene

  4. use "filter glossy"

  5. check "no caustics"

  6. use "clamping"

  7. more samples

Of course, some of then will change your scene - but if it's under your control, maybe that's still a valid option.

$\endgroup$
3
$\begingroup$

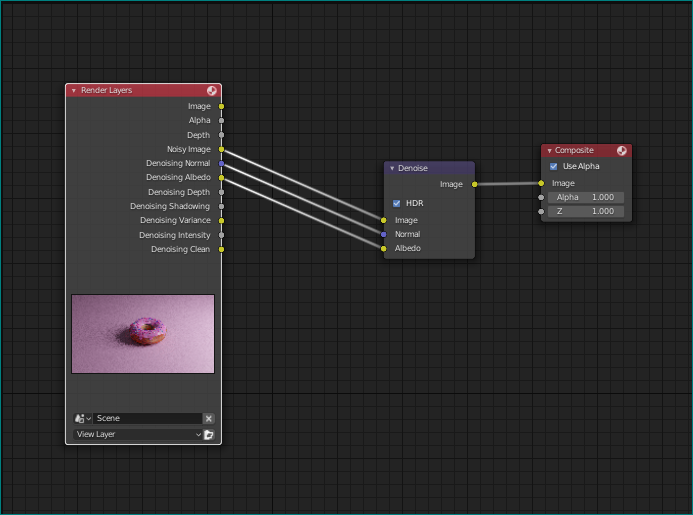
I will suggest this very easy trick. Remember, this trick will only work for blender 2.81 and above. Go to compositing, and enable nodes. Then, click on add and select search and enter denoising. Then, drag the node to the middle of both present nodes. Something like this:

enter image description here

If you are unable to find denoising normal and denoising albedo, you will find it here on the left:

enter image description here

This is a very simple and easy trick that will save you a lot of time. You could also go with blender's built-in denoiser, but that is not as accurate and fast as the compositing trick. You can get the render that looks like it has 10K samples while you can render it at as low as 5 samples and get amazing results and it's built-in!

$\endgroup$
1
$\begingroup$

You can use the D-NOISE addon. It's a much better version of the standard denoiser, I can normally use only 40 samples and get an artifact-free render.

A lot of people say to minimize light paths, I wouldn't recommend this as it makes the render less realistic and is very noticeable with interior renders lit with a hdri as the light cant bounce of the walls properly.

link > https://remingtongraphics.net/tools/d-noise/

$\endgroup$
2
  • 1
    $\begingroup$ Perhaps add a few words about what it does? $\endgroup$ Commented Mar 21, 2019 at 8:56
  • $\begingroup$ it's a denoiser it removes noise from rendered images $\endgroup$
    – d m
    Commented Mar 21, 2019 at 10:07
0
$\begingroup$

Light Portals

In addition to the answers regarding samples, you could use portals to decrease your render time, allowing more samples for the same amount of render time. (Sometimes, portals get rid of a bit of noise as well)

Note: Portals don't change the look of your render, they get rid of the non-visible light rays outside of your room.

$\endgroup$
-1
$\begingroup$

Another fun way is to use AI to enlarge your render. By rendering out at a lower scale you safe time and thereby can increase the samples. I use Gigapixel AI: https://topazlabs.com/gigapixel-ai/

$\endgroup$

You must log in to answer this question.

Not the answer you're looking for? Browse other questions tagged .