2
$\begingroup$

New user here. I am using Blender to create meshes for an MMO which allows you to import .3ds files to its native designer. That designer has a very limited and low-resolution texture palette, with no unwrapper.

I would like to be able to emulate textures using geometry, for certain situations, by the following or an equivalent process:

  1. Take an image of a given size.
  2. Create a plane in blender such that it has a grid of faces equal to the resolution of the image.
  3. Map the colour value of each pixel onto the corresponding face, as a material.
  4. "Reverse-unwrap" the result, mapping the coloured grid onto a guide object.
  5. (Separate by material, export as 3ds and recolour in the native designer.)

Can I achieve this efficiently, and if so, how? I have tried tracing images using Inkscape, but the resulting geometry is too messy to work with.

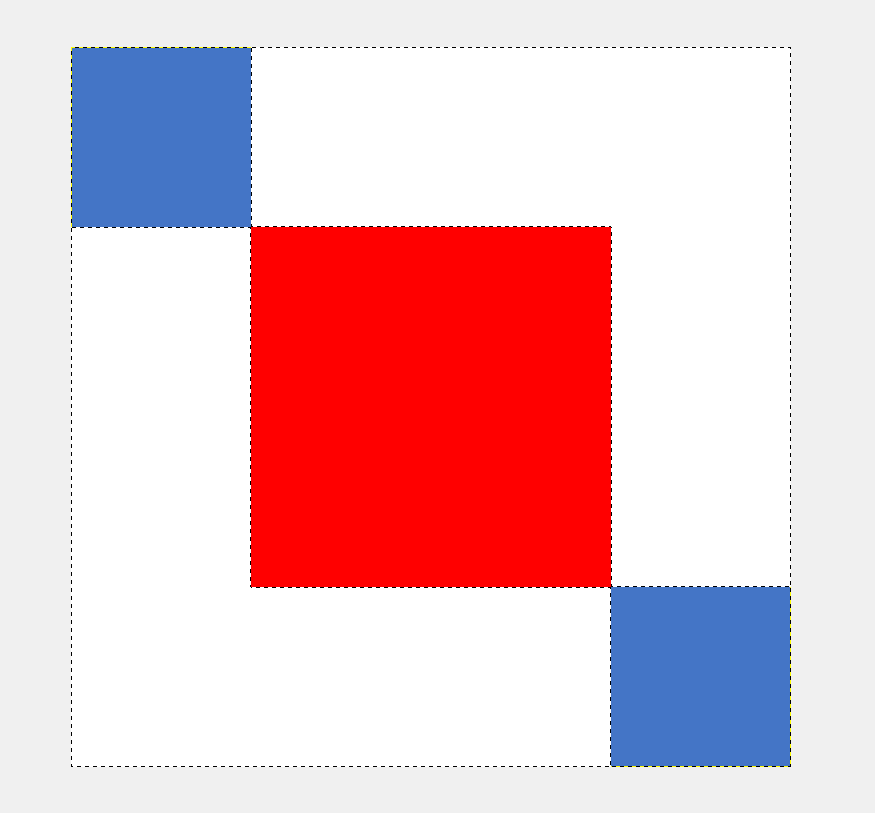
EDIT: 1. Take an image: enter image description here

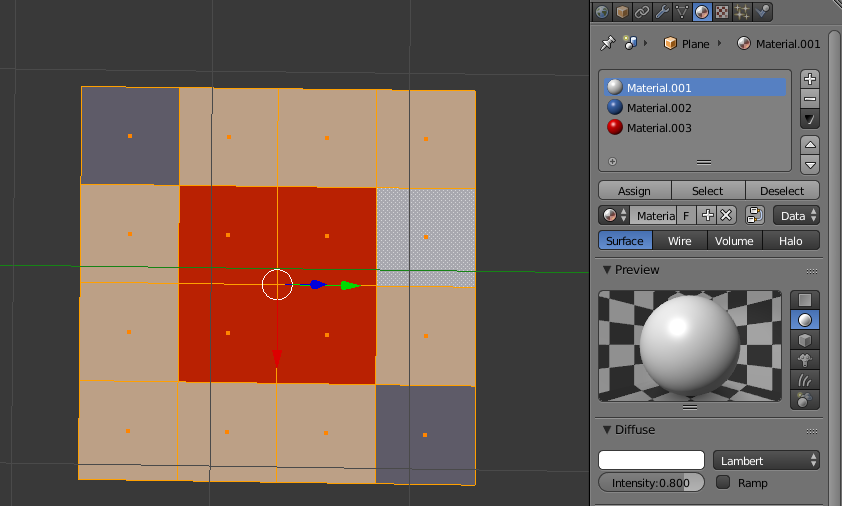
  1. Create a plane and colour the faces: enter image description here

That was a 4x4 image so I copied it by hand, but I'm looking for an automated method that could generate meshes for 1024x1024 textures.

$\endgroup$
4
  • $\begingroup$ Welcome to Blender.Se. Could you try to better explain what you are trying to achieve and where are you exactly stuck? Also showing what you were able to do so far would be helpful in order to understand the whole picture. $\endgroup$
    – Carlo
    Commented Aug 16, 2017 at 10:14
  • 2
    $\begingroup$ Related ? blender.stackexchange.com/questions/84718/… Also if you want to use geometry to simulate actual pixels it sounds like you don't need a texture $\endgroup$ Commented Aug 16, 2017 at 11:35
  • $\begingroup$ I hope the pictures make it a bit clearer. That link is interesting but not really the same thing. $\endgroup$
    – Vectorus
    Commented Aug 16, 2017 at 12:09
  • $\begingroup$ You could try with Cubester, using a plane as a target, or scaling the resulting cube to zero height $\endgroup$
    – Kabu
    Commented Mar 1, 2018 at 21:14

2 Answers 2

3
$\begingroup$

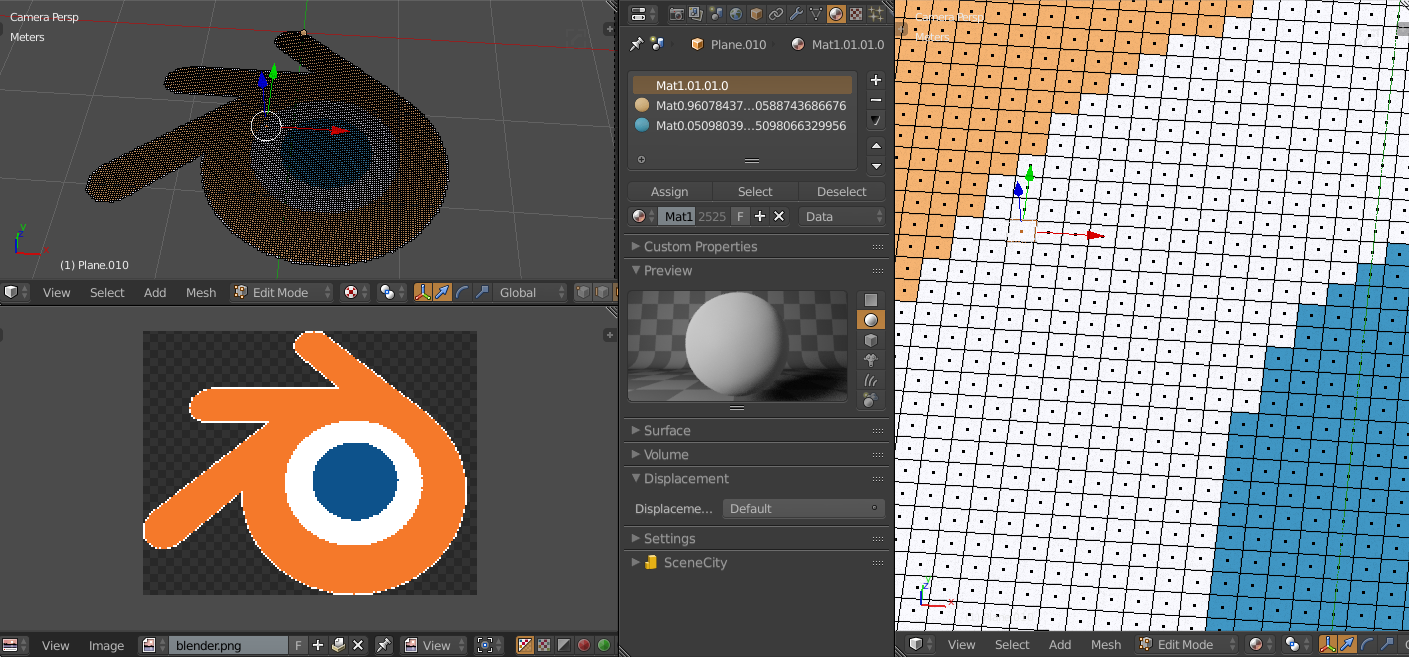
Here is the Add-On: https://github.com/benkl/pixeler

enter image description here

I will try to make it a plugin but for now this should help you. Open the source image in blender and replace the "test_file =" image variable (then run with open system console to see the progress). It will create a set of planes colored with the pixel values. You can then switch to edit mode and "Remove Doubles" to make it a consistent mesh (or seperate by loose/materials). It will slow down with bigger images (64*64 is quite fast - 1000*1000 takes a while). As a bonus pixels with alpha 0 will be skipped - so you can recreate icons eg (i tested single frame jpg and png). I am a designer and code is probably terrible - but it works (feel free to improve it).

#pixeler v0.1 by BK for Blender 2.79 21/01/2018

import bpy

# Set Data Path
D = bpy.data

# Set File Name
test_file = 'blender.png'

# Set img
img = D.images[test_file]

# Get and set image width and height
w = img.size[0]
h = img.size[1]
tfac = img.pixels[:]

# Set basemesh
bpy.ops.mesh.primitive_plane_add(location=(-2.0, -2.0, 0.0))
basemesh = bpy.context.object
dmat = bpy.data.materials.new(name="origin")
basemesh.data.materials.append(dmat)

#Create Grid from Image
z = 0
y = 0
for index in range(0,h):
    x = 0   
    for index in range(0,w):
        x = x+1              

        # Get pixel position in flat array
        colar = (x+(y*w))*4

        # Set color values at current Pixel
        r = tfac[colar-4]
        g = tfac[colar-3]
        b = tfac[colar-2]

        # Alpha Check
        if tfac[colar-1]>0:

            # Add object at Pixel Location
            # bpy.ops.mesh.primitive_plane_add(location=(x*2, y*2, z))
            basemeshi = basemesh.copy()
            basemeshi.data = basemesh.data.copy()
            basemeshi.location.x = x*2
            basemeshi.location.y = y*2                
            bpy.context.scene.objects.link(basemeshi)

            # Get material
            matname = "Mat" + str(r) + str(g) + str(b)
            mat = bpy.data.materials.get(matname)
            if mat is None:

                # create material
                mat = bpy.data.materials.new(name=matname)
                mat.use_nodes = True
                prinode = mat.node_tree.nodes.new(type = "ShaderNodeBsdfPrincipled")
                dif = mat.node_tree.nodes["Diffuse BSDF"]
                outshad = mat.node_tree.nodes["Material Output"]
                mat.node_tree.nodes.remove(dif)
                mat.node_tree.links.new(prinode.outputs[0], outshad.inputs[0])
                #rgb = mat.node_tree.nodes.new(type = "ShaderNodeRGB")

                # PBR Color
                prin = mat.node_tree.nodes["Principled BSDF"]
                prin.inputs[0].default_value = [r, g, b, 1]
                prin.inputs[7].default_value = 0.6

                # Set editor color from pixel value                          
                bpy.data.materials[matname].diffuse_color = (r, g, b)

            # assign to 1st material slot
            basemeshi.data.materials[0] = mat            

            # Join newly creatd meshes
            basemeshi.select = True
            bpy.context.scene.objects.active = basemeshi
            basemesh.select = False                   

            # Print Pixel placement confirmation
            print("Placed object @ x " + str(x) + " y " + str(y))

    # Join line
    bpy.ops.object.join()

    # Incerement y last    
    y = y+1
    #bpy.ops.object.select_all(action='DESELECT')

bpy.context.scene.update()
print("pixels to planes is done")          
$\endgroup$
1
  • $\begingroup$ Hi, do you have code for this that works for blender 3? $\endgroup$ Commented Mar 12, 2022 at 11:30
1
$\begingroup$

To get a plane with the same aspect ratio as the image :

  1. enable the "Import images as planes" add-on
  2. go to File > Import > Images as Planes.

to have the same number of faces as the number of pixels in the image :

  1. go to Edit Mode
  2. select 2 parallel edges
  3. go to "Mesh > Edges > Subdivide" and enter the number of cuts in the Tool Shelf, corresponding to the witdh or height (minus 1 since you're adding edges inside)
  4. do the same for the other 2 parallel edges

The plane already has a UV map.

I didn't understand your steps 4 and 5. You can clarify them and I will edit my answer.

$\endgroup$
4
  • $\begingroup$ Thanks ChameleonScales. It's a good thought, but as far as I can see all you get with this is a plane where each pixel of the image happens to be coterminous with a face. What I actually want is a plane where each face has a material corresponding to that pixel's colour - such that you could delete the image file altogether and still have a coloured plane left. If you look at my second attached picture, you can see that the colouration is achieved with materials. $\endgroup$
    – Vectorus
    Commented Aug 16, 2017 at 14:03
  • $\begingroup$ oh, wow. That's a whole other kettle of fish. I'm not sure there's any script out there that can do that. But mostly that seems very unoptimized for games. I'm sure an image texture would be a better solution. $\endgroup$ Commented Aug 16, 2017 at 15:27
  • $\begingroup$ It is unoptimized! As I outlined, however, the limitation of the in-game designer is that it does not support UV coordinates or user-submitted textures. It only has a very basic set of built-in tiled textures. On the other hand, the game has such a basic lighting model that high poly counts don't make much impact. There actually was a script that could do what I ask, but it doesn't work with the current version of Blender and I don't know anything about scripting myself. (Old script is here: blender.stackexchange.com/questions/33071/…) $\endgroup$
    – Vectorus
    Commented Aug 16, 2017 at 16:41
  • $\begingroup$ cool you found that. But then why not use the version of Blender the script was made with ? If there's something open source software is good at, it's giving access to old versions. $\endgroup$ Commented Aug 16, 2017 at 18:37

You must log in to answer this question.

Not the answer you're looking for? Browse other questions tagged .