1
$\begingroup$

I am trying to create some terrain, specifically in the shape of an island.

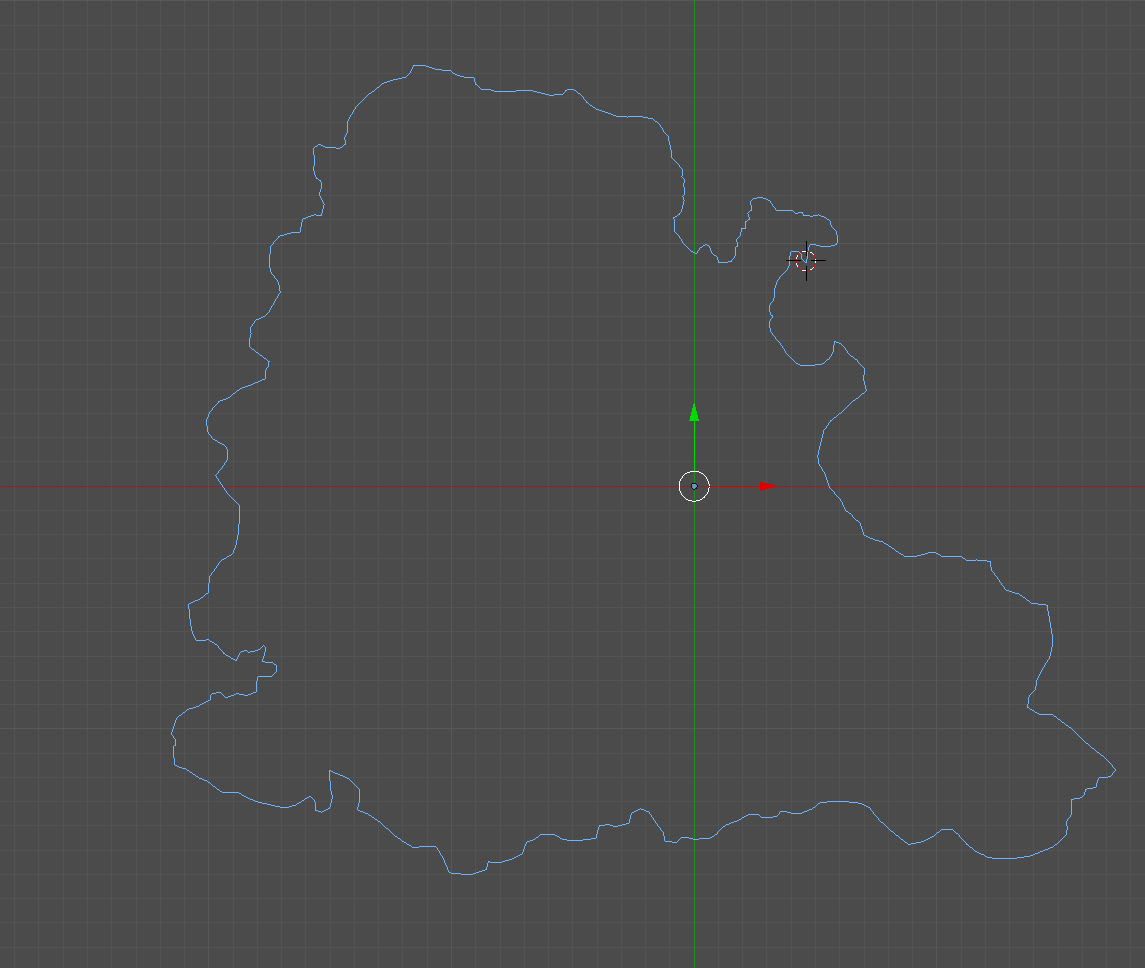
I drew an outline of the island with a single vert. I want to create a mesh so there can be different levels of height on the terrain.

Vertex Outline Example:

enter image description here

What I tried first was using a plane that was subdivided many times and then intersecting the plane with my filled vertex outline with the Boolean modifier. This worked to some extent, however I ended up with a bunch of ngons around the edges of the outline. Secondly, I read here saying to possibly try the grid fill option, but I believe the geometry isn't setup to work with that as it did nothing.

What is a good way to generate a custom shape mesh in the form of an island so that I can apply and shape terrain on the top surface?

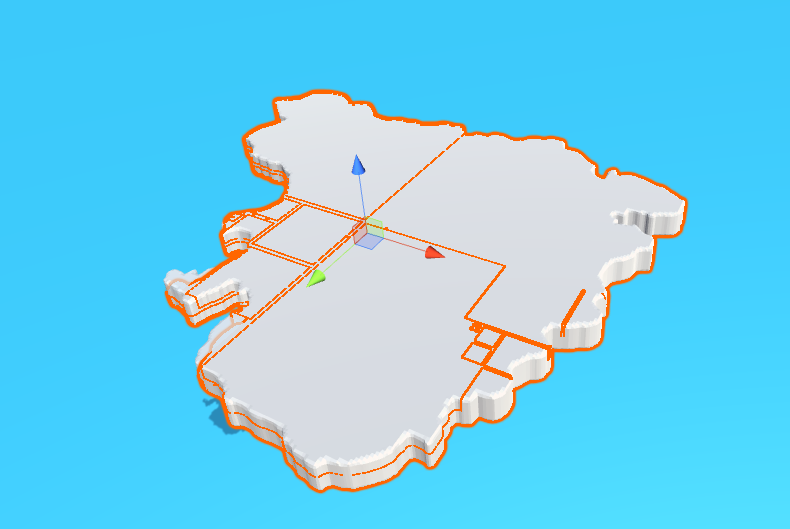
Update In Regards to Mr.Zaks Answer It's importing into Unity 3D as one mesh, but in pieces. This is because Unity 3D has a 64k vert limit. You can correct this by either lowering the vert count or creating tiles of your mesh into 4 pieces. Hopefully this helps someone else in the future!

enter image description here

$\endgroup$
2
  • $\begingroup$ @MrZak When I add the remesh modifer, I don't see it making any changes. Any idea? $\endgroup$
    – CodingGuru
    Commented Jun 6, 2017 at 16:24
  • $\begingroup$ @MrZak It appears the problem was the surface was too flat. So I extruded it upwards and the remesh modifier properly recalculated the topology. Thanks! $\endgroup$
    – CodingGuru
    Commented Jun 6, 2017 at 16:36

1 Answer 1

1
$\begingroup$

There are several ways to make that profile with more or less even topology suitable for further landscape editing; one is to use curve's 2D type to fill the outline and then once converted to mesh edit the topology.

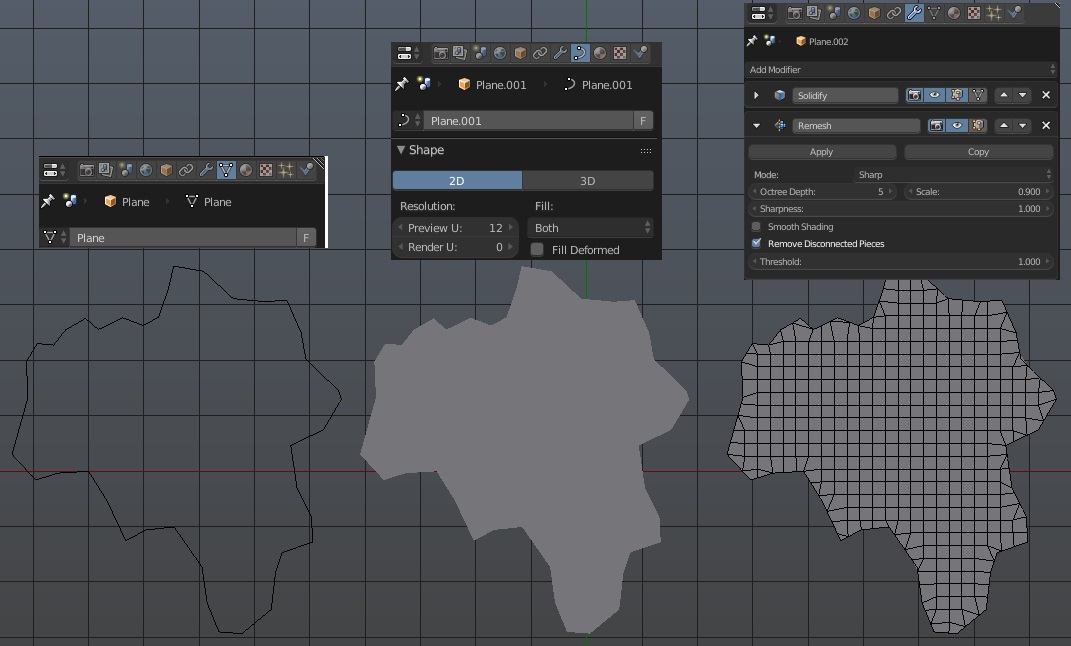
On the image below, from left to right:

  • original outline created as mesh;
  • outline converted to curve, its Z axis is clamped because it's set up as 2D curve but it's filled with faces;
  • outline converted to mesh and has 2 modifiers - Solidify and Remesh. The first one to give thickness to the outline as Remesh doesn't work with meshes without any thickness, the second one to generate new topology. Adding thickness is possible without modifier, e.g by extruding curve in the Geometry scroll.

screenshot-outlines-evolution

Note that those tiny quads in the corners might not be desired as they can cause problems especially with any kind of subdivisions; it's best to change them before giving outline any thickness.

$\endgroup$
5
  • $\begingroup$ This works perfectly and as desired, but when I import into Unity 3D, it's showing strangely as two separate meshes and the faces are a bit messed up. Is there a way in blender to ensure it's all combined back into one single mesh? $\endgroup$
    – CodingGuru
    Commented Jun 6, 2017 at 20:44
  • $\begingroup$ @CodingGuru in general make sure to recalculate normals (Ctrl+N with all selected) and check non-manifold elements before exporting. It could make problem clearer if you show a screenshot of the mesh. $\endgroup$
    – Mr Zak
    Commented Jun 6, 2017 at 21:40
  • $\begingroup$ That was it. Thank you very much! This was so helpful. I greatly appreciate it! $\endgroup$
    – CodingGuru
    Commented Jun 6, 2017 at 21:48
  • $\begingroup$ Actually, they are still importing in Unity 3D as separate pieces still for some reason. Screenshot attached to the main thread. $\endgroup$
    – CodingGuru
    Commented Jun 6, 2017 at 22:00
  • $\begingroup$ I believe this is an issue with Unity 3D rather than Blender, as Unity has a 64k vertex limit for one mesh. So I simply lowered the vert count. Thanks for all your help! $\endgroup$
    – CodingGuru
    Commented Jun 6, 2017 at 22:05

You must log in to answer this question.

Not the answer you're looking for? Browse other questions tagged .