3
$\begingroup$

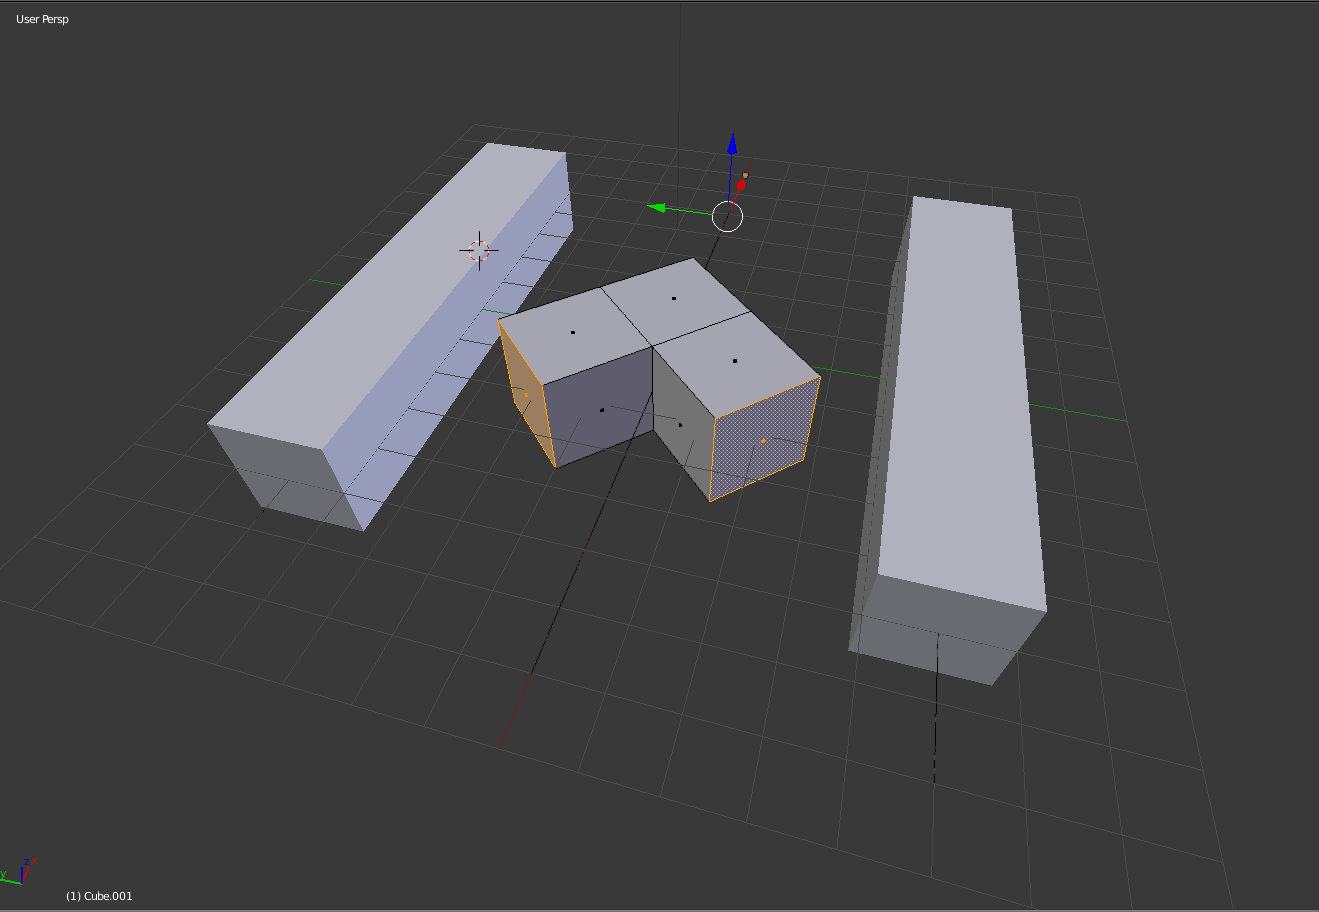
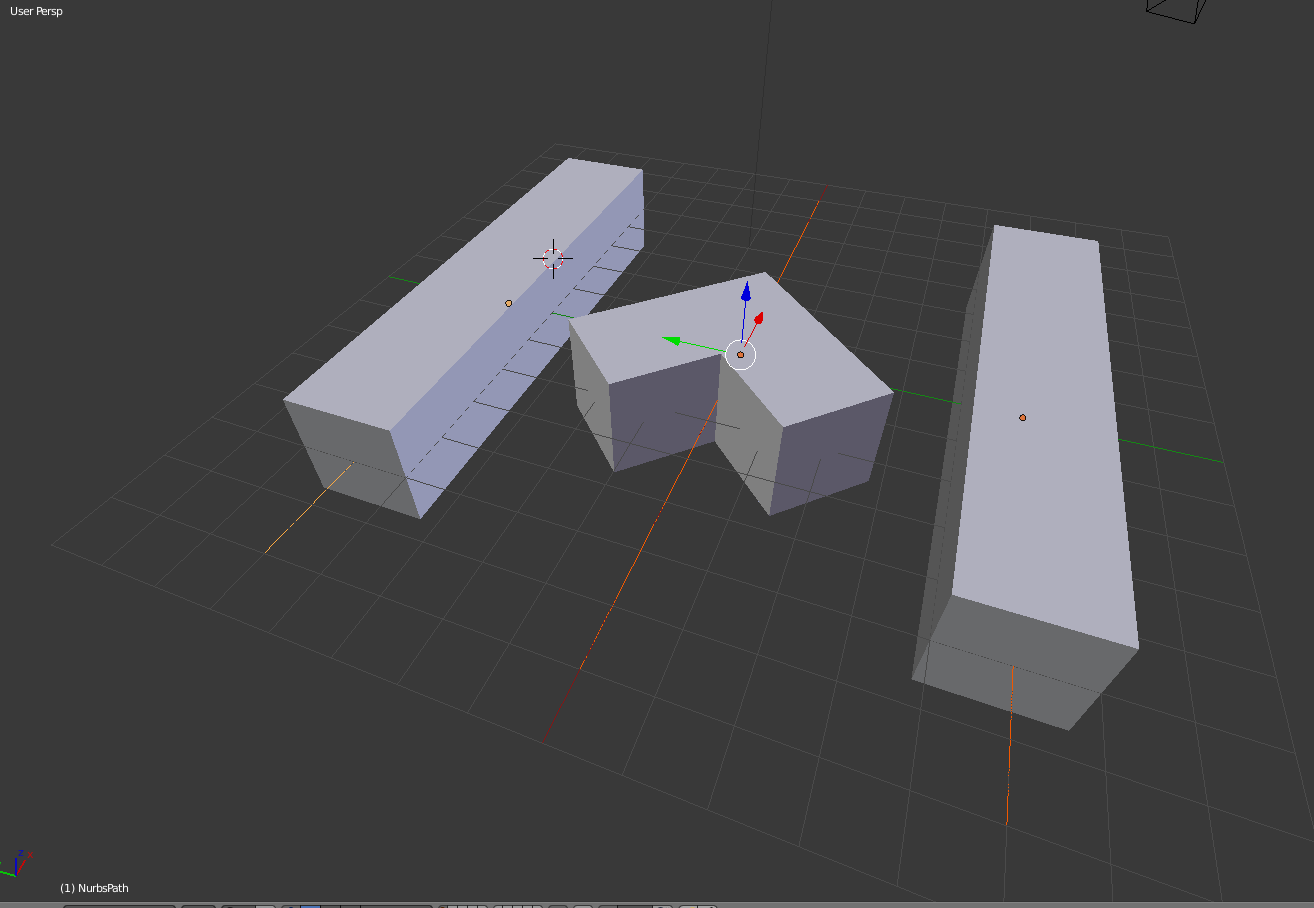
I'm trying to create a 3 meshes. Each mesh has it's own curve modifier so I can bend them how I want. enter image description here

How can I connect the middle mesh to the outside meshes with face shown on picture and keep 3 curve controls for each mesh? Another thing is that I want keep the 45 angle of the middle mesh so it looks like arrow even if I bend the outside meshes along their curves.

This is just an example but I want to repeat the middle mesh every meter so there will be few of them.

enter image description here

$\endgroup$

2 Answers 2

3
$\begingroup$

You can have multiple curve modifiers per object and control what each of them deforms with Vertex Groups.

Join all your meshes into a single object (preferably the arrow at the center of the scene).

Then create one Vertex Group for each deforming curve you wish to have. Assign the desired vertex of the mesh part to each Vertex Group corresponding to a curve.

Then proceed to add one curve modifier for each curve, limiting its effect to each one of the previously created Vertex Group.

Afterwards add the curve objects one by one making sure you align their centers with the mesh object so they match perfectly; and aligning them to each part of the mesh they will be deforming, so they don't deform the in unexpected ways. Assign each curve to one of the Curve Deform modifiers.
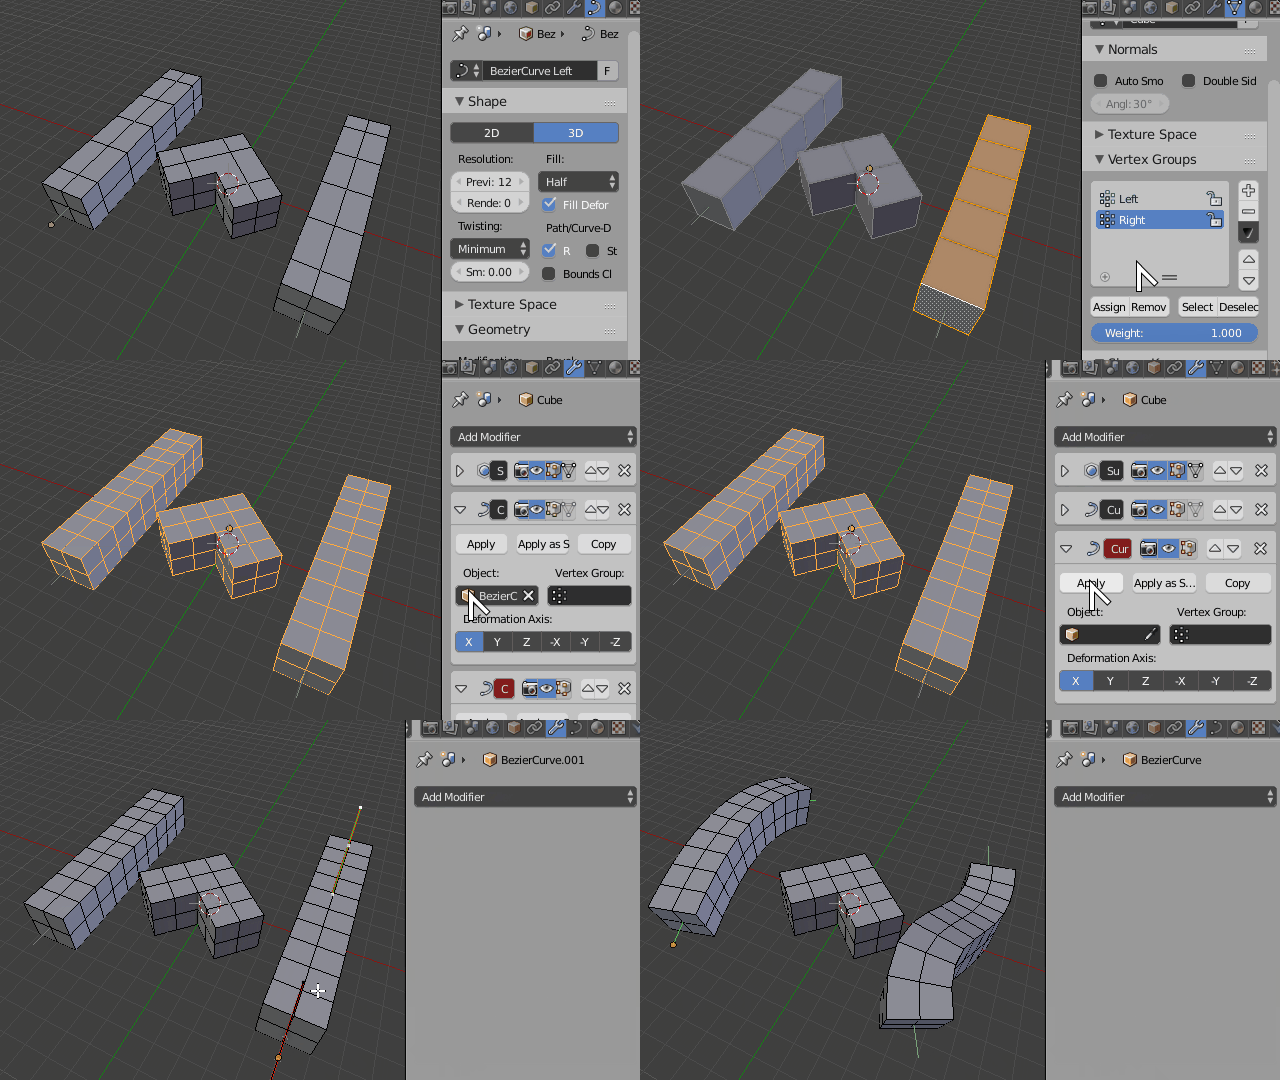
Curve Deform Vertex Groups

You can also connect the faces, and remove the top vertex from the vertex groups in such way that deformations wont affect them, but it is then up to you to control the curves sensibly, otherwise extreme deformations may lead to weird results
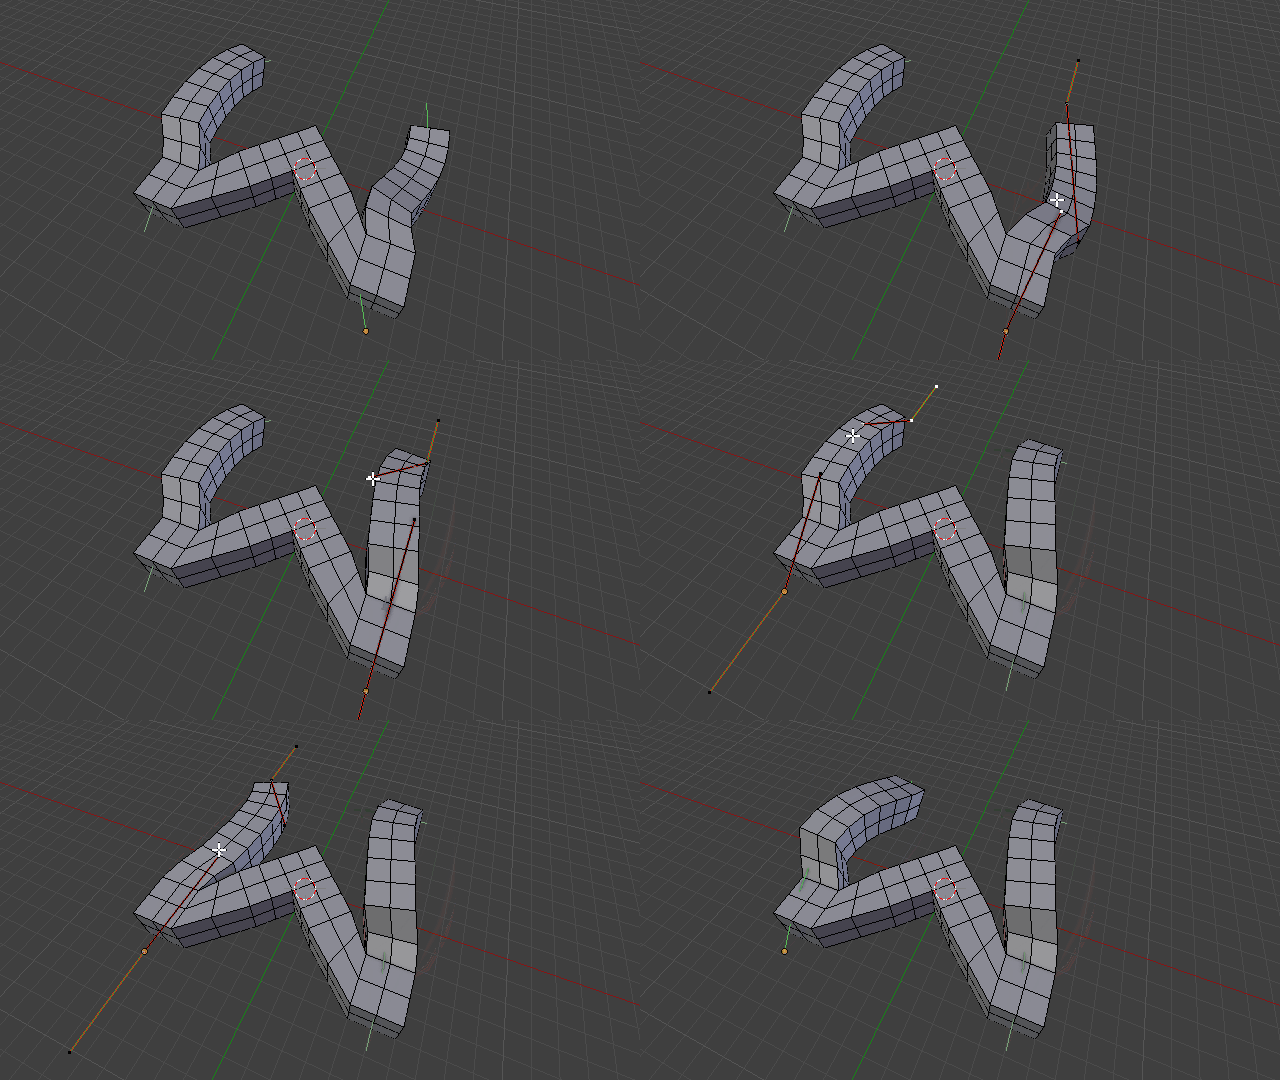
Curve Deforms Connected

One way you could do the 45 degree connection would be by using the Knife Project operator, then pressing C to activate Angle Constraints and snap to 45 Degree increments. From there just cut the relevant geometry and proceed to delete all surplus faces and rebuild from the remaining vertex.
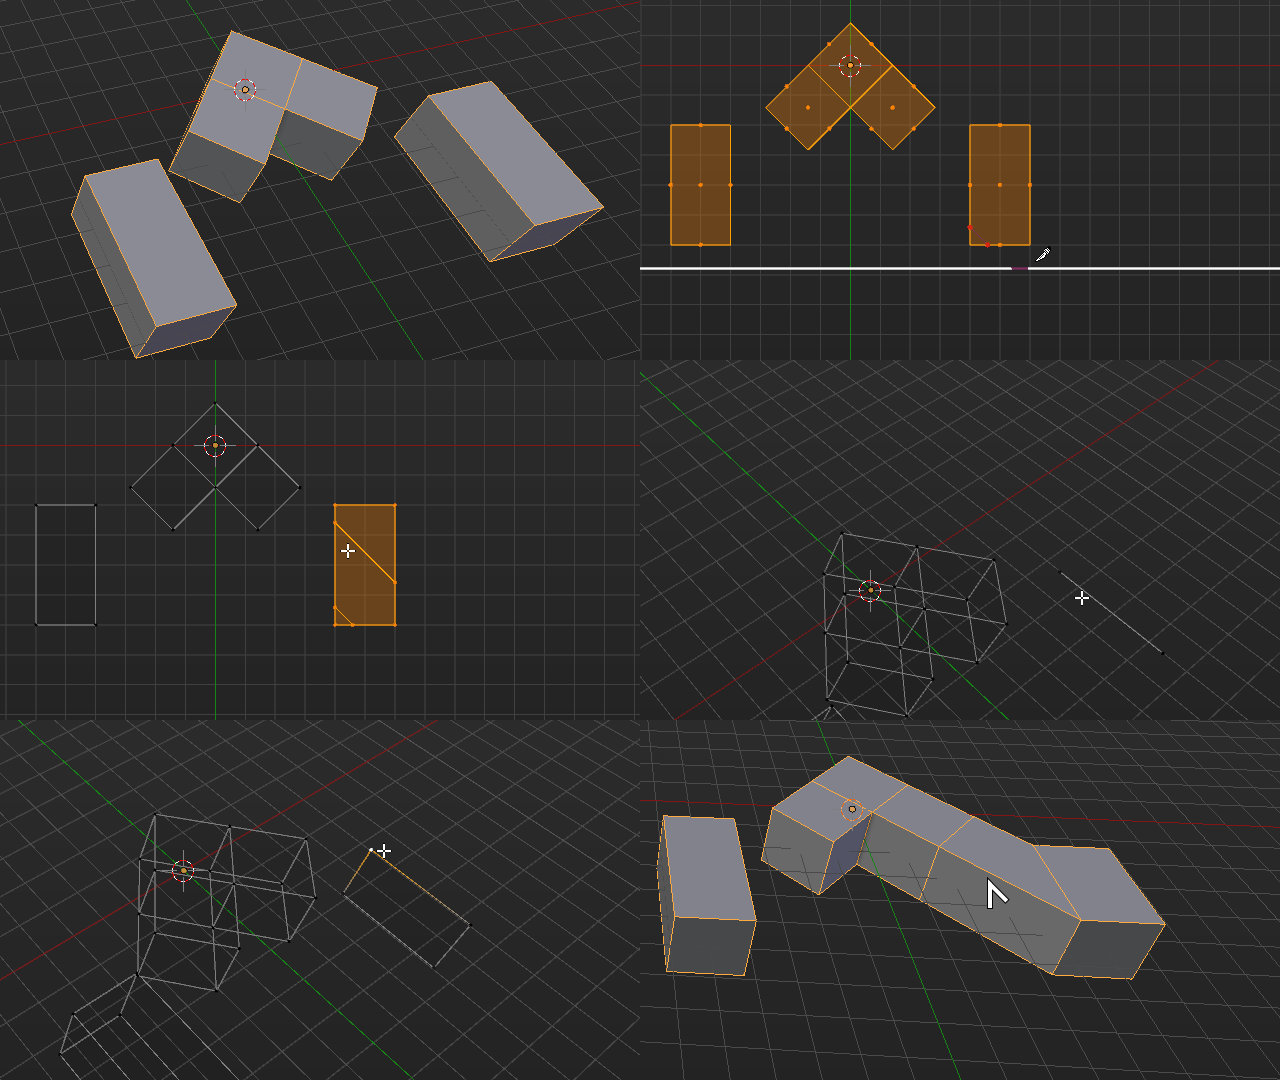
45 Degree Cut

$\endgroup$
5
  • $\begingroup$ On second though this might have been a whole lot easier if you just used a single curve object with a square section as bevel object altogether. $\endgroup$ Commented Jan 25, 2017 at 0:45
  • $\begingroup$ This is great explanation. Everything is clear, well almost everything. How can I connect this arrow to the sides of outside mesh and keep the 45 degree angle? $\endgroup$
    – Voyteck
    Commented Jan 25, 2017 at 19:30
  • $\begingroup$ Well easy way, just select the two faces and bridge them with the Bridge operator, but that may cause some level of distortion, depending if the face sizes are compensating for the angle or not. For a more precise solution I can update my answer later tonight when I am back at the computer $\endgroup$ Commented Jan 25, 2017 at 20:19
  • $\begingroup$ Answer edited with modelling info $\endgroup$ Commented Jan 26, 2017 at 4:11
  • $\begingroup$ That's what I needed. Thanks a lot again! $\endgroup$
    – Voyteck
    Commented Jan 26, 2017 at 14:05
0
$\begingroup$

An easy way to keep all of the functionality, would be to parent all of these items (all 3 meshes & all three curves) to an empty object.

In Object Mode:

  1. Shift + A >> Empty >> Plain Axis

  2. Select All 3 meshes & All 3 curves making sure to hold Shift while selecting your empty last.

  3. Ctrl + P >> Object.

Now you can move/scale/rotate your empty, and it will keep all of these things together, responding in relation to each other, but you will have the added benefit of having the granular control that you have already built to date.

$\endgroup$

You must log in to answer this question.

Not the answer you're looking for? Browse other questions tagged .