0
$\begingroup$

I'm trying to achieve this effect in this video: https://www.youtube.com/watch?v=2-6Xz4tWigM&t=49s

Animation is at 0:47.

I'm reletively new to the node editor but understand its mechanics but a noob to masking.

I believe a mask could be used to affect only the two characters in the image but i don't know how to achieve it in the node editor.

My process so far: add image node, which ive cropped and transformed to get the image in position so i can see it in the viewer. Create Mask of boy on the left in the UV image editor using ctrl click and ctrl c to finish making the mask. Add mask node and select mask. Add Movie clip of an ink drop and changed its colour to red.

That's it so far, completely stumped

Any help would be greatly appreciated.

$\endgroup$

1 Answer 1

1
$\begingroup$

Even though you have part of the process completed, I will give an overview of the steps.

You could transform all images in the node editor, but since Blenders transformation nodes are inefficient to handle, I will suggest the 3D space.

  1. Load your image into the compositor. Set the project size to match it's dimensions.
    enter image description here
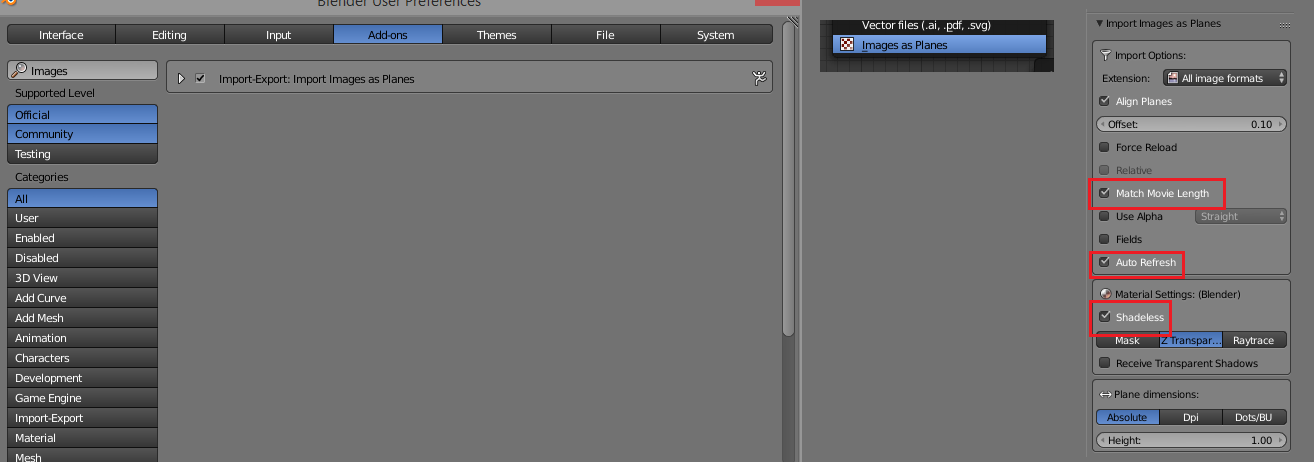
  2. I will use the images as planes addon to quickly get my ink movie clip into the 3D view. Import it with the options Auto Refresh and Shadeless.
    enter image description here
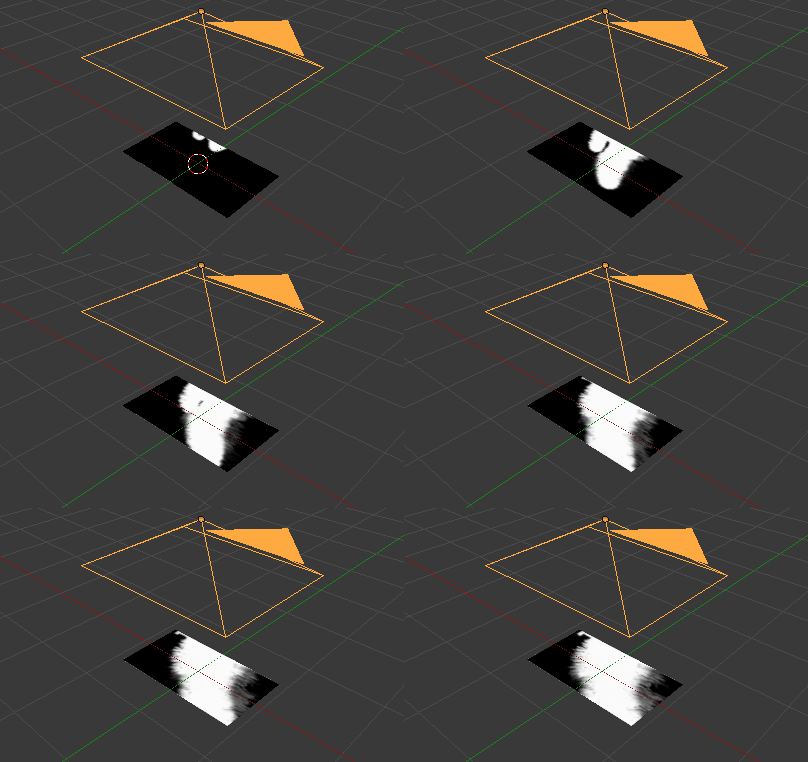
  3. Then I added an orthographic camera. The movie clip should play, if you selected auto-refresh.
    enter image description here
  4. Set the image as a background image in the 3D view. Transform the movie clip plane in camera view.
    enter image description here
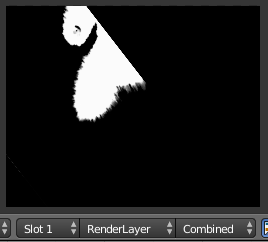
  5. Set the World Background to black. The render will be used as a mask based in the luminance.
    enter image description here
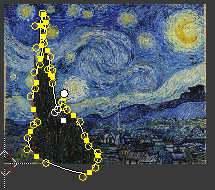
  6. Mask the image in the Movie Clip Editor.
    enter image description here
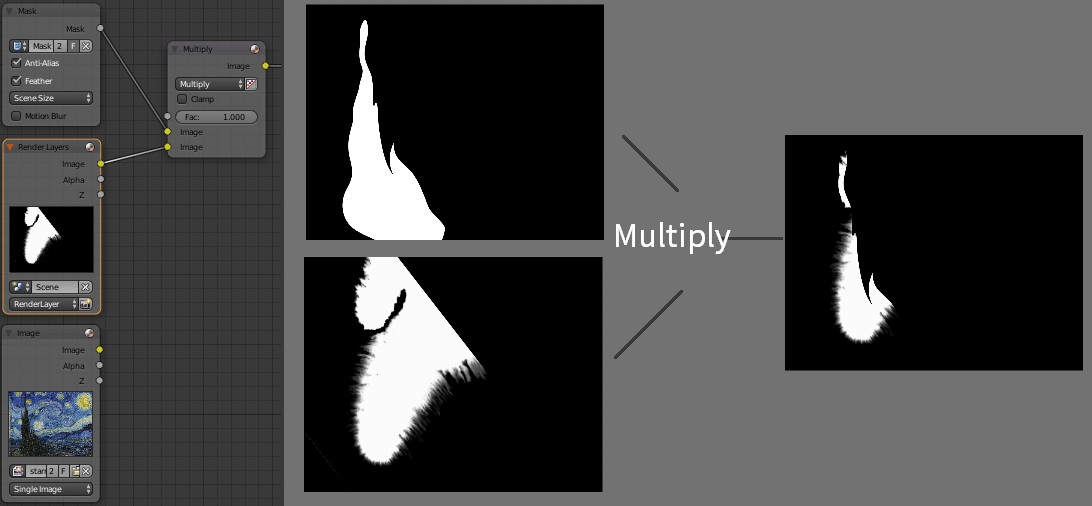
  7. Load your Renderlayer and Mask into the compositor and multiply them with a ColorMix node.
    enter image description here
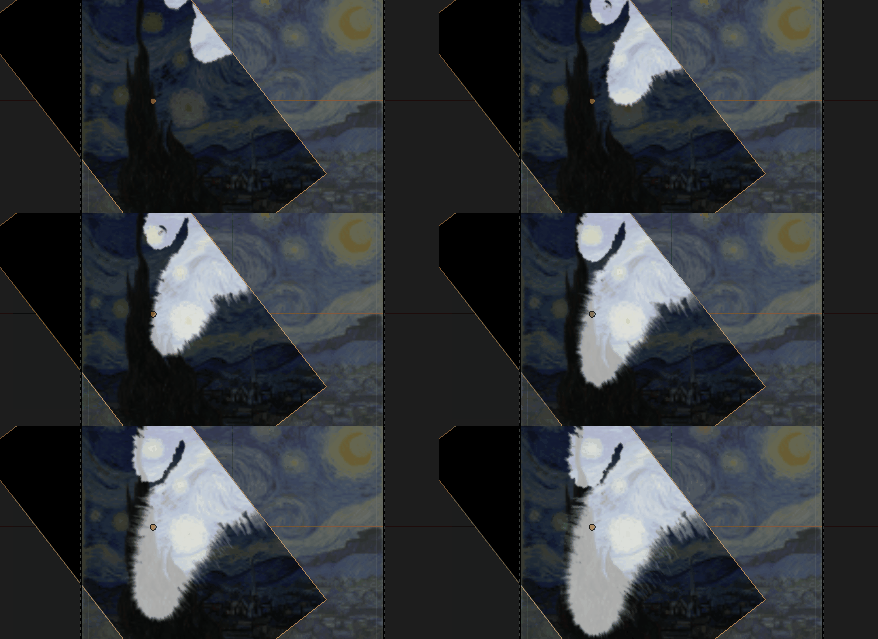
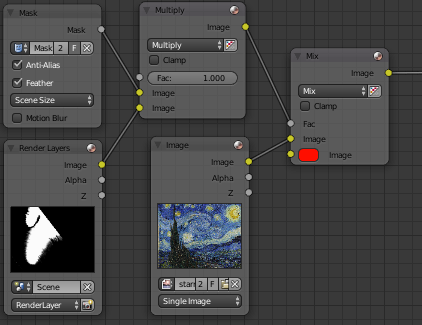
  8. To color the masked portion red, use a ColorMix node. Connect the multiplied masks with the Fac input.
    enter image description here

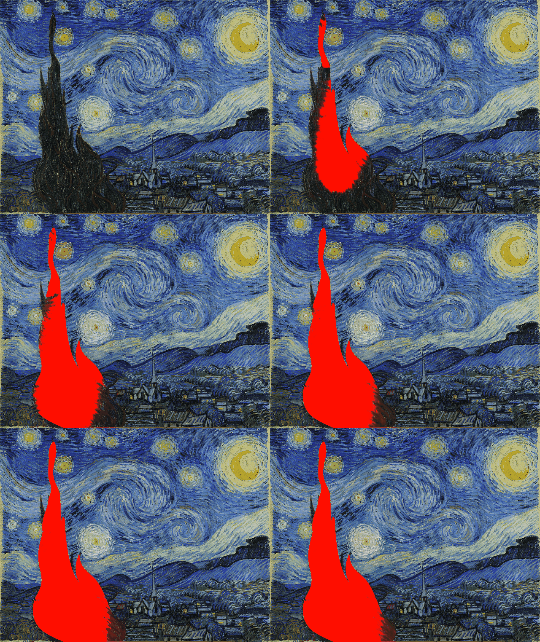
Rendering it results in the desired effect.

enter image description here

Further notes.

  • If you change your scene size (using the percentage slider), you will need to add a scale node to the Input Image.
  • If the ink movie clip mask is not white, the effect will not be 100% opaque. You a RGB Curves node or a colorramp to shift its whitepoint.
  • You can use the mask with many other nodes other than a MixRGB node.

enter image description here

$\endgroup$
5
  • $\begingroup$ Hi thanks for the reply. I'm following along with your instructions but now that i've imported the movie clip it isnt playing on repeat even though i've turned on auto-refresh. It's a mp4. file if that helps. The only thing that's hlepd os changing shading option form multitextured to GLSL as when i scrub through the timeline below the movie clip moves. Any help please? cheers! $\endgroup$
    – user33287
    Commented Jan 4, 2017 at 21:38
  • $\begingroup$ My movie clip isn't playing on repeat, the gif just repeats the a small section. | To see the animation playback, you have to be in textured view mode and GLSL shading, that is correct. | Does is not play back when you hit Alt-A, or do you want it to loop? Please clarify. If the issue differs greatly, ask a new question. $\endgroup$
    – Leander
    Commented Jan 4, 2017 at 22:26
  • $\begingroup$ I didn't do alt-a so that's sorted. I've just rendered my final animation and it looks fantastic exactly i wanted. Just One question left. If i wanted to add two masks and both be affected by the same render layer at the same time how much i arrange my node set up to accomplish that? I can't thank you enough for all this help, you're the best! $\endgroup$
    – user33287
    Commented Jan 6, 2017 at 13:38
  • $\begingroup$ In the movie clip editor you can create multiple shapes in the same mask. If you have created multiple masks add both of them in the compositor with two mask nodes. Then add a Converter>Math node and set it to "add". Check the clamp checkbox. Connect the mask outputs to the Add inputs. The resulting add output is both masks combined. Next time don't hesitate to ask a new question, e.g. "how to combine two masks". That way others can answer faster and people can search the questions more easy $\endgroup$
    – Leander
    Commented Jan 7, 2017 at 12:45
  • $\begingroup$ thanks, you've answered all my questions with clarity and urgency. Thanks for all your help, greatly appreciated! $\endgroup$
    – user33287
    Commented Jan 7, 2017 at 17:24

You must log in to answer this question.

Not the answer you're looking for? Browse other questions tagged .