16
$\begingroup$

So the makers of the Tissue addon for Blender (for Tesselation) have uploaded this picture on their website co-de-it.com under the topic of the "Dual Mesh"-Functionality in Tissue:

<a href="http://www.co-de-it.com/wordpress/wp-content/uploads/2015/07/tissue_graphics.jpg" title="The render">Link to co-de-it.com</a>

Since I am fairly new to Tissue, is anyone able to explain to me how this could have been produced?

$\endgroup$
2
  • 3
    $\begingroup$ The developer, @zompa84, briefely explain the tools he used in this post on Blender Artist . $\endgroup$
    – Carlo
    Commented Nov 13, 2016 at 22:39
  • 1
    $\begingroup$ Thank you for that reference, I did not find this thread. $\endgroup$
    – hoppla1232
    Commented Nov 18, 2016 at 20:25

1 Answer 1

19
$\begingroup$

As the developer of the add-on (zompa84) briefely explains in this post on Blender Artist, he generated the mesh...

... with displace and decimate (with vertex group for get density variation)...

So, starting from a heavily subdivided Icosphere basemesh, you could enter weight paint mode and start tracing some cliffs upon the surface. Notice how the decimate and the displace modifier are both using the weight/vertex group we are paintinting on.
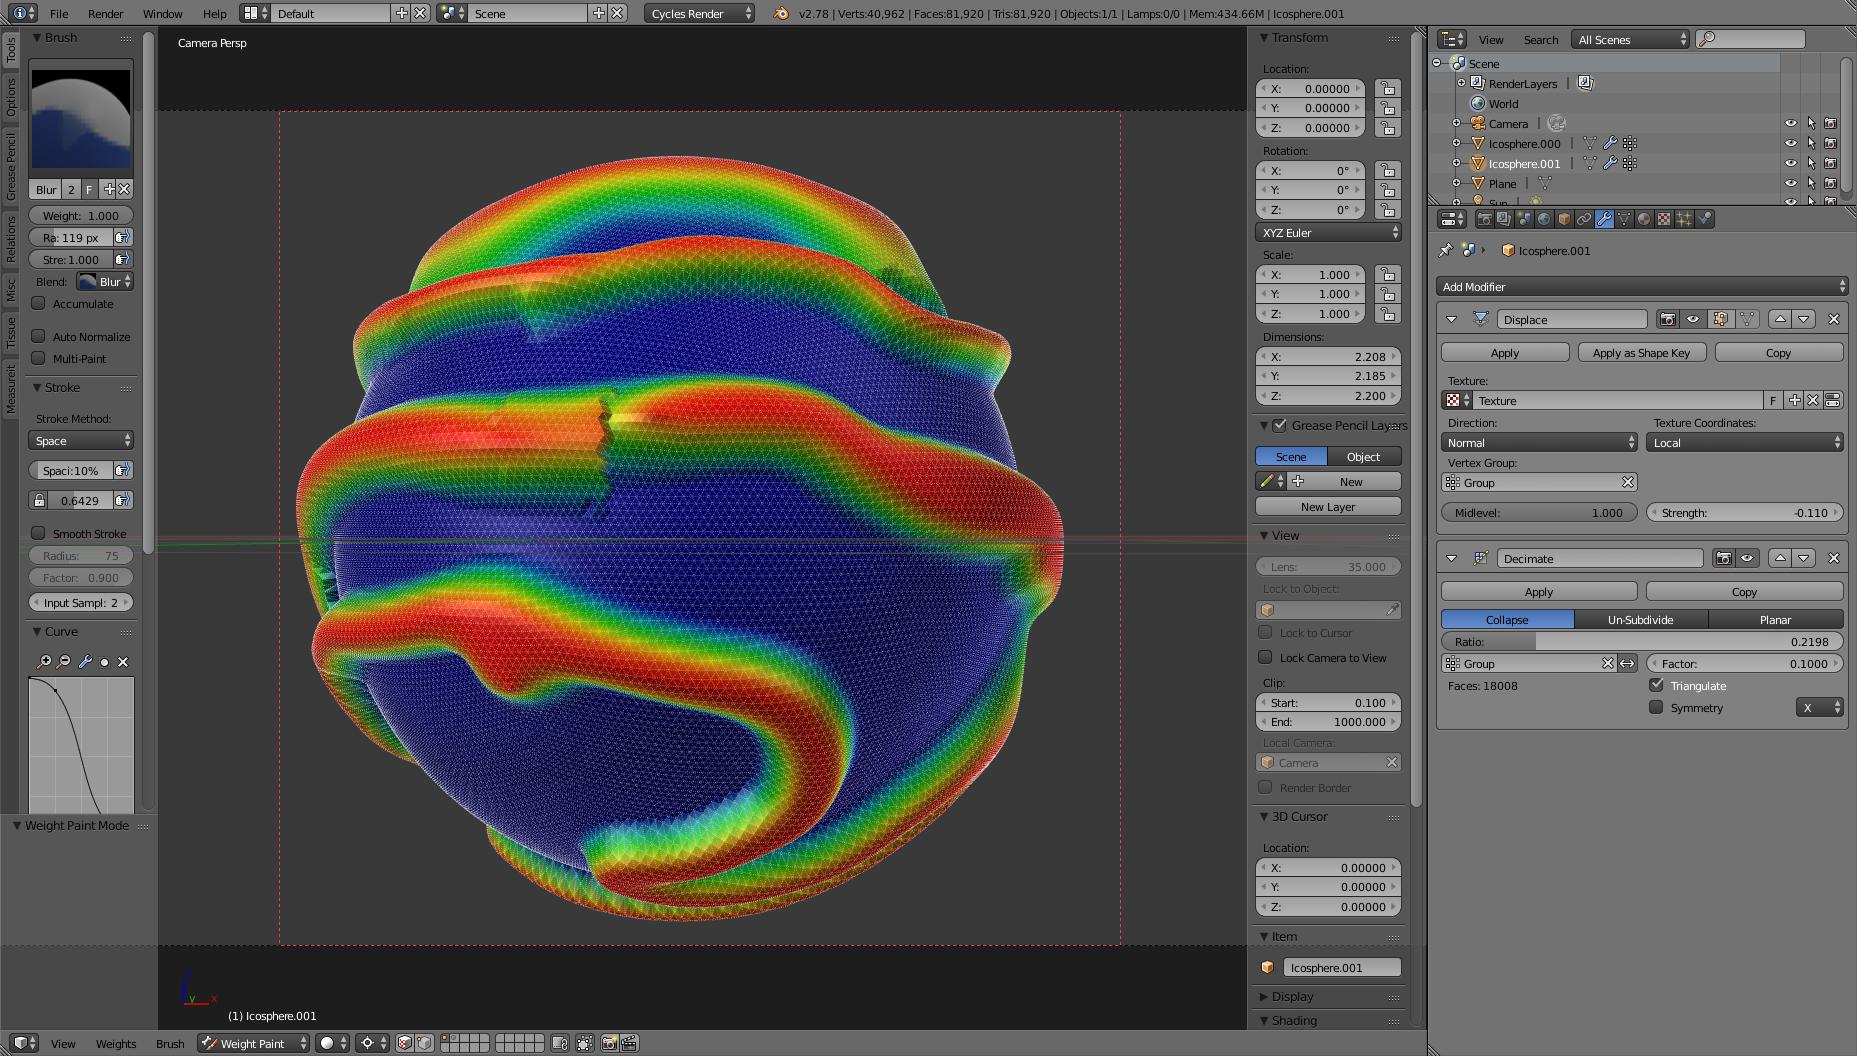
enter image description here

Then he continue by using...

.... Dual Mesh for create polygonal texture based on tris/quad faces

At this point we should apply the modifiers in order to run the Dual mesh coommand you can find in the lower section of the add-on panel. An explanation of what a dual mesh exactly is, from the same author, can be found here.
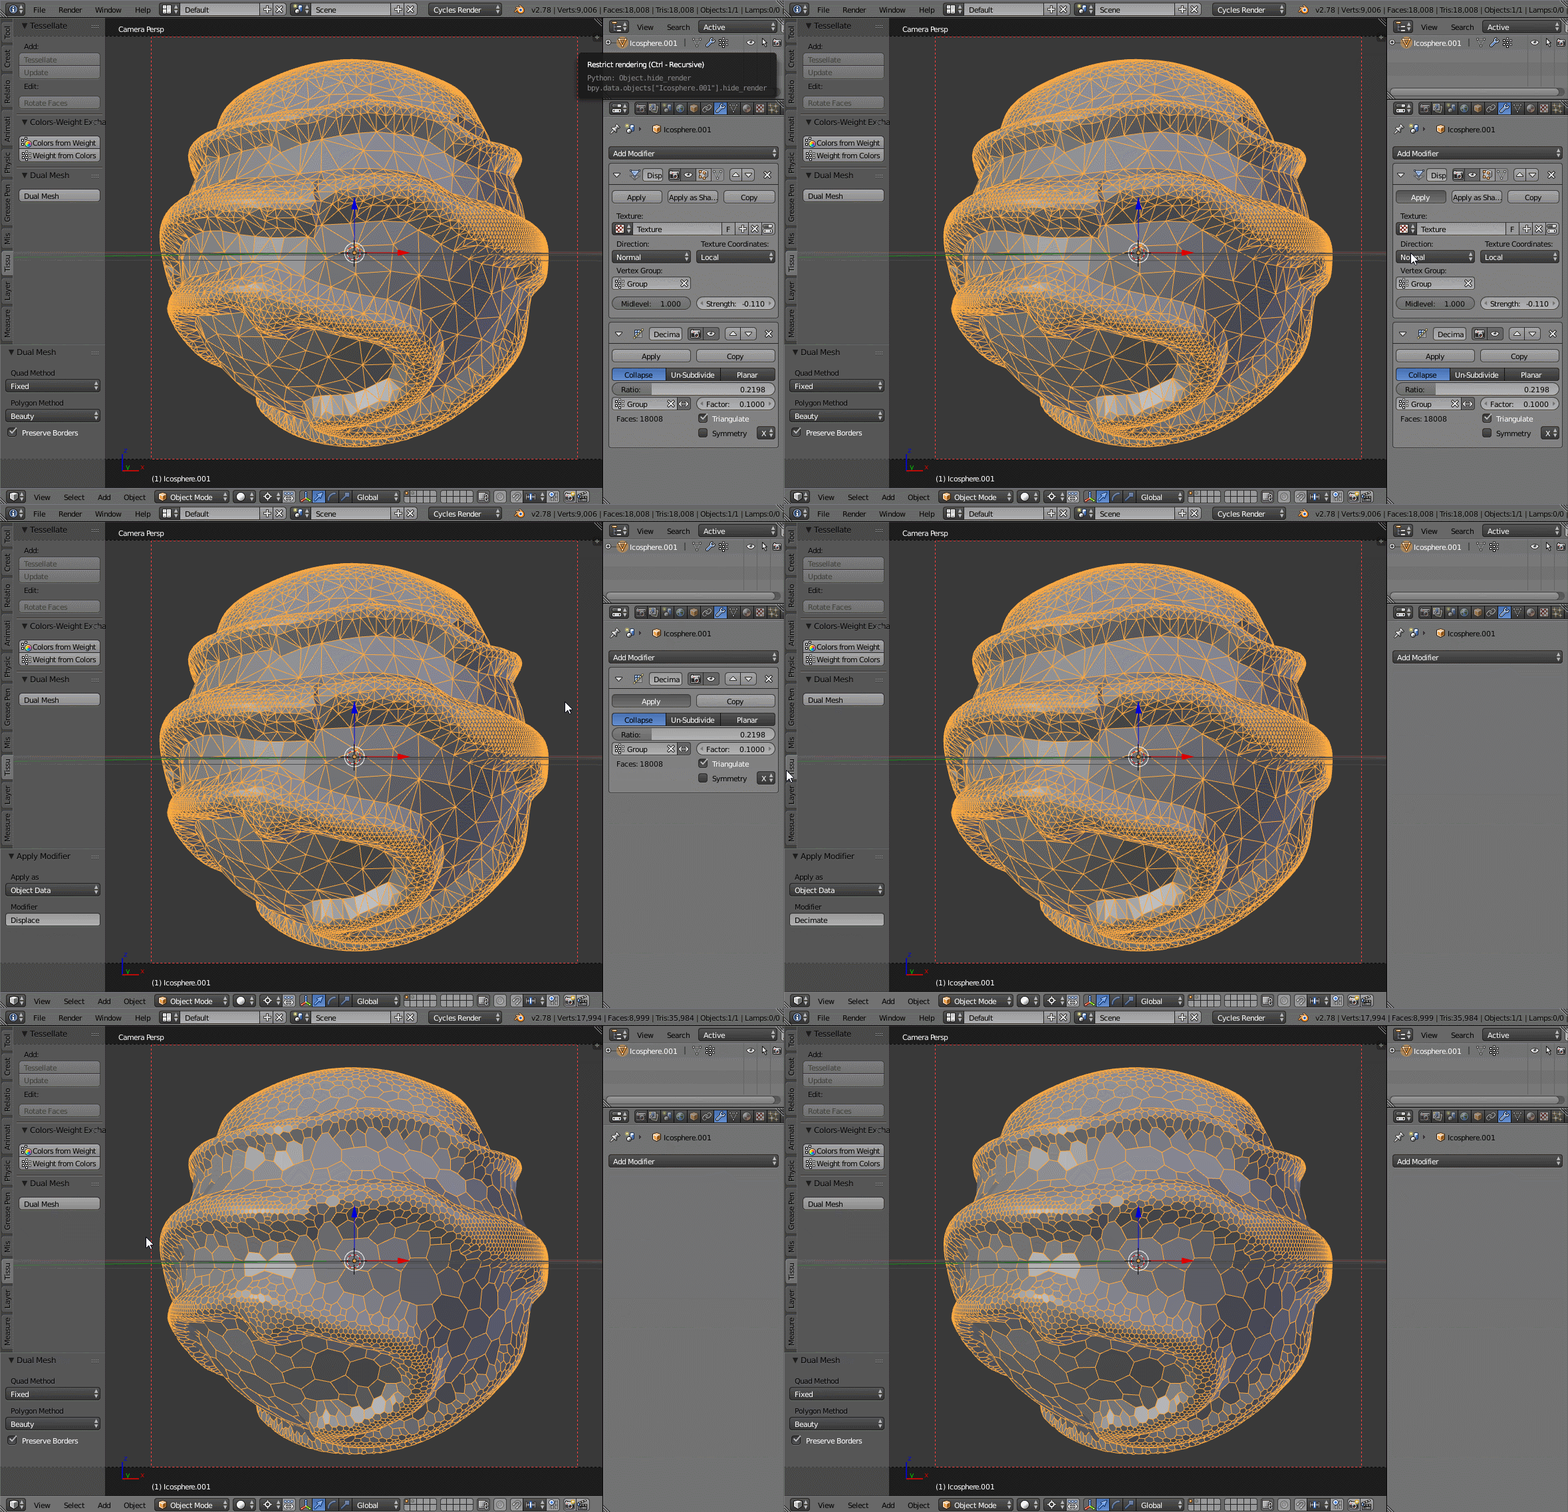
enter image description here

Last step is to use...

...other modifiers, like wireframe

To achieve a variance between the thickness of the hole, I suggest to feed the Wireframe modifier with the vrtex group as we already did in the previous part. I also disjoined all the faces by selecting all the edges and runnning the "edges split" command you can find in the edge menu (Ctrl+e) to achieve a multiple-ring look.
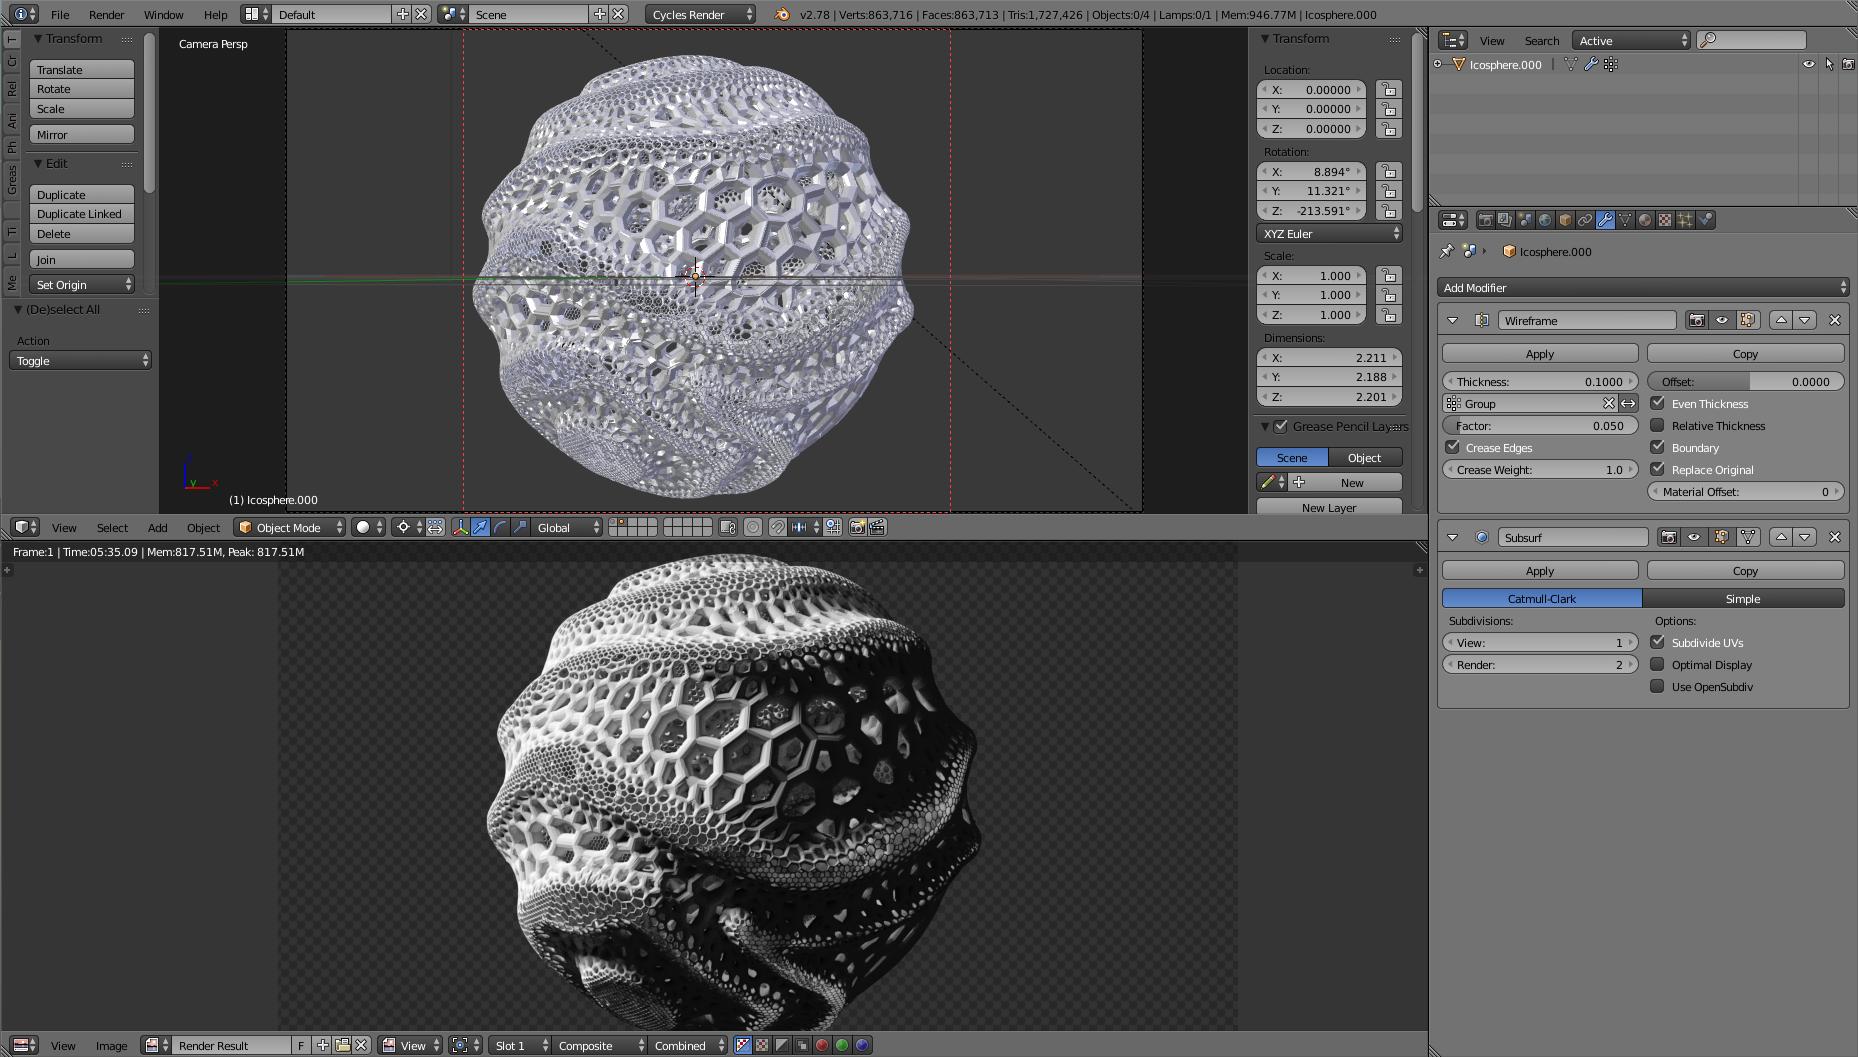
enter image description here

$\endgroup$
5
  • $\begingroup$ Sorry for being lamebrained, but can you explain just a bit further how you did the step to produce the "multiple-ring"-look? $\endgroup$
    – hoppla1232
    Commented Nov 24, 2016 at 20:21
  • $\begingroup$ Certenly, I didn't went deep in that because I was not sure about it and it was not the main subject of the question. Let me know if now its more clear what I mean. $\endgroup$
    – Carlo
    Commented Nov 25, 2016 at 0:03
  • $\begingroup$ Using your method, I got more separated "edges", but I also have the "glitchy-looking" rifts that you also have on your newly added picture, where the original edges are. $\endgroup$
    – hoppla1232
    Commented Nov 25, 2016 at 11:30
  • $\begingroup$ That's exactly the intended purpose of the method. In my opinion, you can find the rifts also in the reference image, and what I presented is my wild guess on how them were made. I see "several intersecting exagonal doughnut" rather than a continuous surface. $\endgroup$
    – Carlo
    Commented Nov 25, 2016 at 18:30
  • $\begingroup$ Yeah you are right, I just did not notice the rifts in both the source image and your finished one. Thanks for your help! $\endgroup$
    – hoppla1232
    Commented Dec 4, 2016 at 6:40

You must log in to answer this question.

Not the answer you're looking for? Browse other questions tagged .