14
$\begingroup$

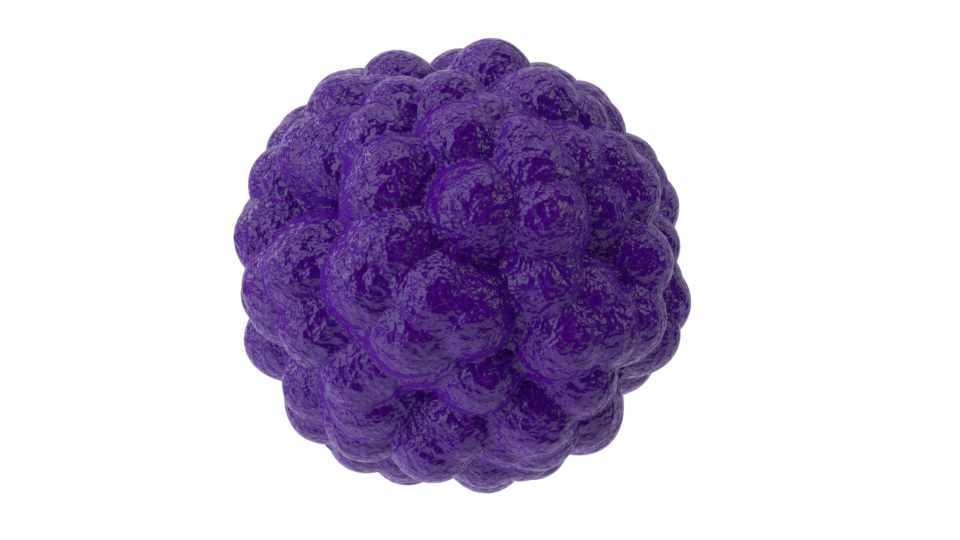
I am looking for an efficient way to cover a mesh with cells (spheres) to obtain results similar to the image below (i.e. a realistic biological tissue).

target result: render of an organoid

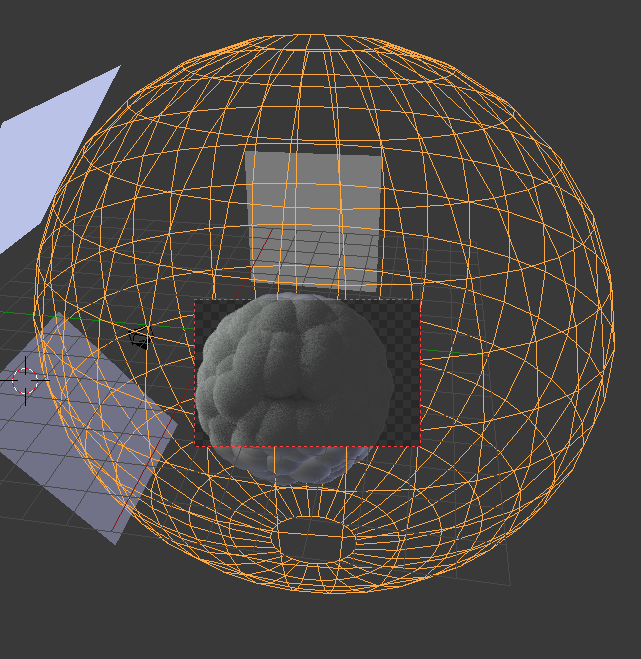
It's a problem I have struggled so much and I have tried many things but I am probably missing something. The closest I have ever got to it was by sourrounding the mesh with a particle emitter (the wireframe sphere in the image below) and having the cells fall from it and stick to the mesh, like here:

best try: particle emitter setup

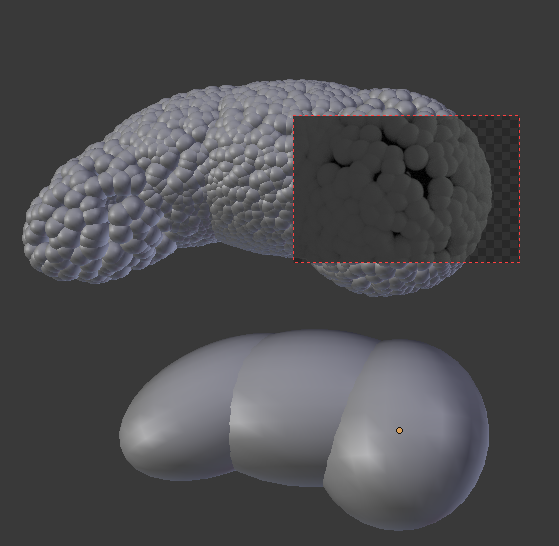
The problem with this setup is that I have little control on where the cells land, and it seems I need to generate so many more than required because many overlap. Moreover, when I try with more complex shapes, cells have a hard time reaching all points and leave empty gaps:

gaps in surface coverage

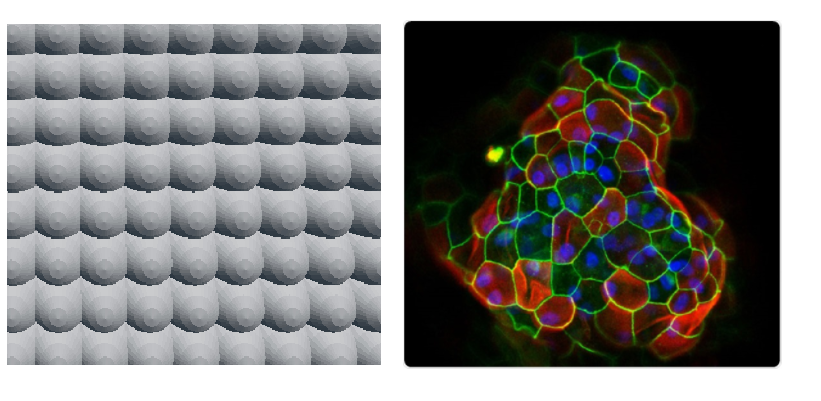
I have also tried with the tesselate function of the tissue addon, but it leads the pattern that is generated is too "regular" (EDIT: added picture for clarity), I would need cells to be all offset to each other, and possibly adapt to each other's shape at contact points, like in the example image above.

tesselate vs real tissue organisation

Do you have any solutions I could try? Thank you very much in advance!

$\endgroup$
4
  • $\begingroup$ Normal tissue is regular. Real biological systems don't pick random points on a surface exactly because it leads to overlap and leaves holes behind... $\endgroup$ Commented Feb 11, 2018 at 11:08
  • 1
    $\begingroup$ @JohnDvorak Sorry, I must have used the wrong words, I have added a comparison picture between the tesselate result and a real tissue to illustrate what I meant. In real biolgoical tissues there are no gaps because as cells divide and grow thay adapt to the available space and to the shape of neighbouring cells, which is a process I find very hard to mimick in Blender. Regardless, I think we would both agree that the arrangements in the original picture is far from regular no? $\endgroup$ Commented Feb 11, 2018 at 11:22
  • $\begingroup$ We do agree on that, yes. Do you need separate objects, or would a single texture suffice (possibly as a displacement map)? If it's the latter, play around with the Voronoi texture node. $\endgroup$ Commented Feb 11, 2018 at 11:31
  • $\begingroup$ I agree, micro displacement texture might be the best way to get regular coverage. But your UV will have to be good $\endgroup$
    – 3pointedit
    Commented Feb 11, 2018 at 13:48

3 Answers 3

13
$\begingroup$

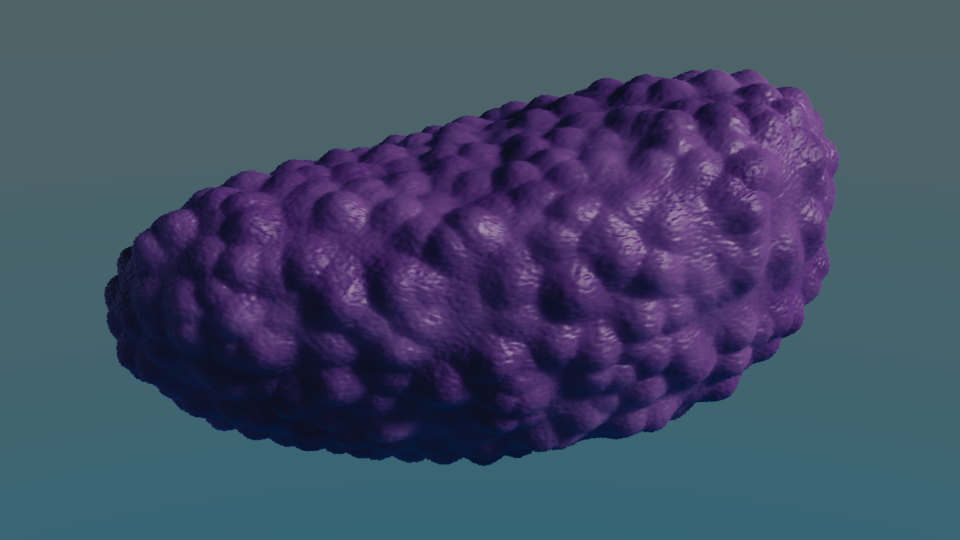
Final:

final

Overview:

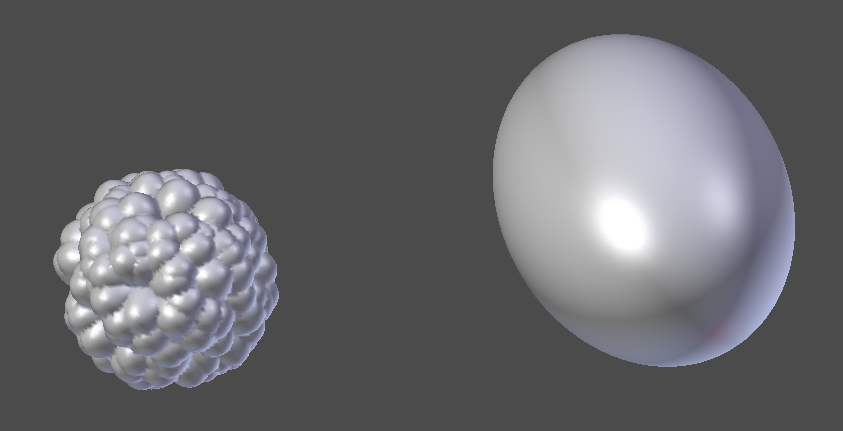
I think the best option would be to use Metaball as a Hair object.

This method will need a little bit of experimenting as it could highly differ between meshes.

scene

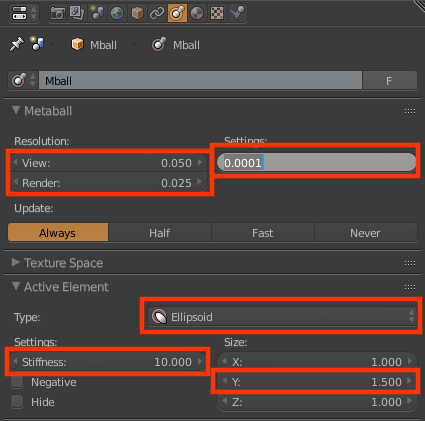
Metaball settings:

In Edit Mode set Resolution as low as possible, it will be better looking while rendering, as preview resolution is always a bit lower.

Really low Threshold along with high Stiffness will give more defined Mballs. As well as scaling Ellipsoid on Y axis. Higher scaling, more noticeable bumps.

mball

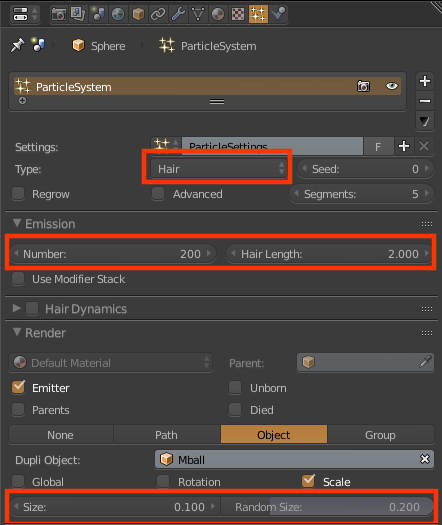
Particle System settings:

Nothing fancy here.

Tweak all settings as you like. In this example I've used ones below.

particle

$\endgroup$
7
$\begingroup$

Well I am not sure this solution is suitable, one of the other answers may be a better bet, but so you have options to play with here is another way to go.

Rather than using a particle system, you could try a displace modifier (or several displace modifiers).

cells image

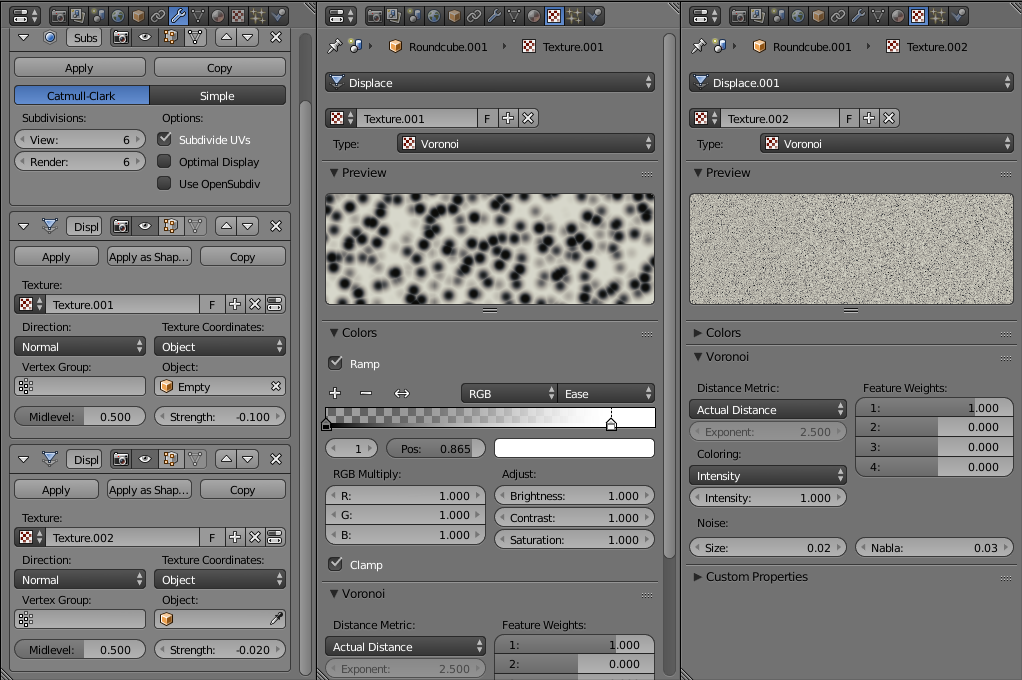
The example image you provided is rather voronoi-ish, adding two voronoi textures at different scales provides details that seem somewhat like your image. A rather high level of subsurf is needed to make out fine details.

cells texture setup

I would say that this example might not be "organic" enough for your purposes, but it is perhaps a concept that could be worked with if the particle system solutions run into problems?

$\endgroup$
5
$\begingroup$

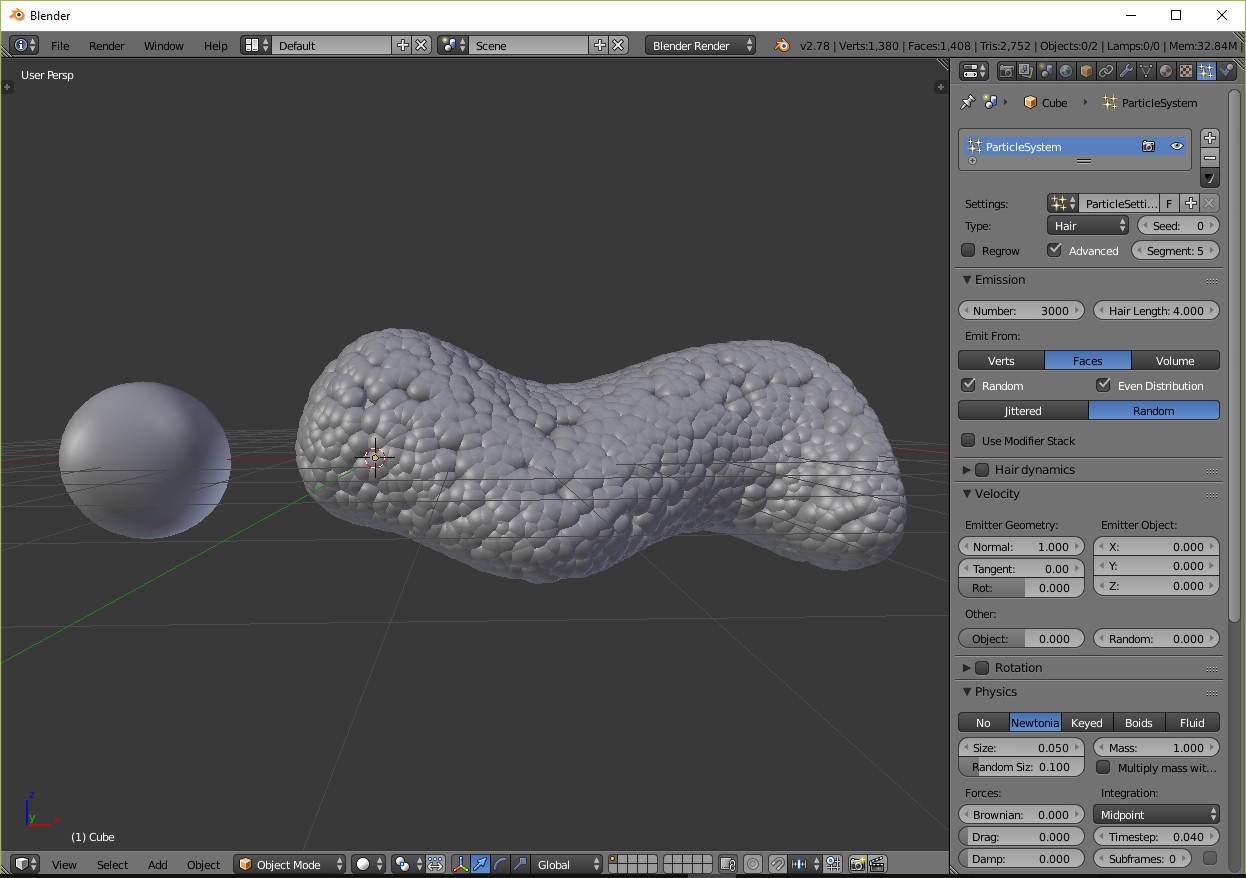
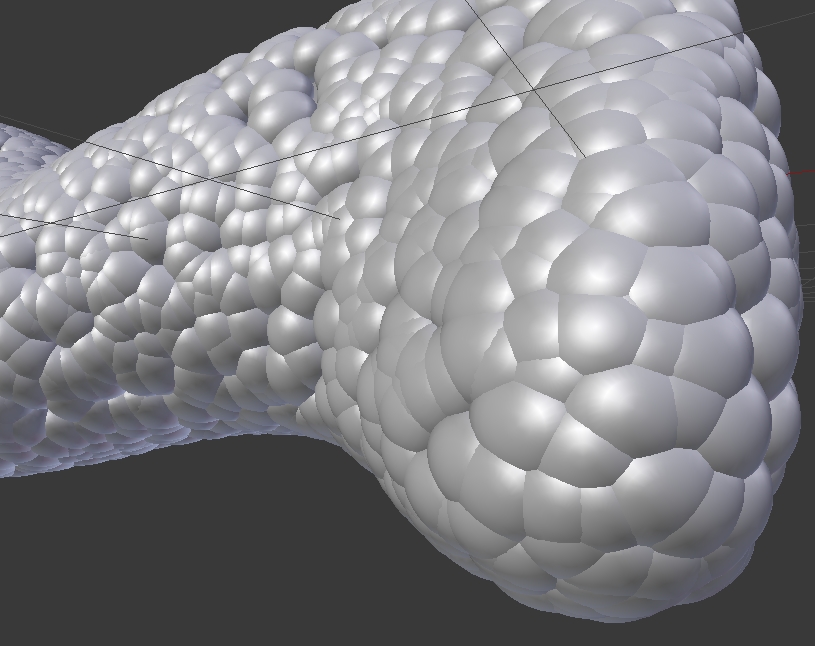
I'd suggest using a hair particle system.

enter image description here

You'll need a rather high particle count (depending on the size of the base cell object) to completely remove any "holes" since the placement is random, but the result seems to be more controllable and close to what you're looking for.

Open the image above to see my particle setup.

enter image description here

$\endgroup$

You must log in to answer this question.

Not the answer you're looking for? Browse other questions tagged .