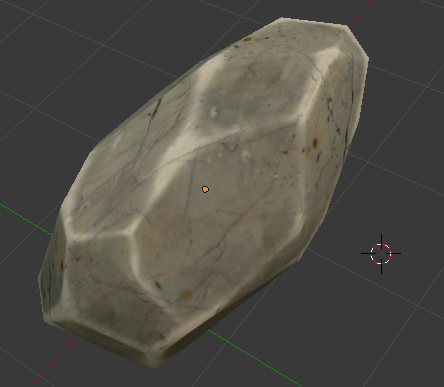
Could anyone explain how you can create a low poly mesh while the texture details are high? I have been searching for quite a while now and I can't seem to find anything about it.
-
3$\begingroup$ Create a high poly mesh, bake it to a normal map texture and apply this you the low poly mesh $\endgroup$– someonewithpcCommented Jan 31, 2015 at 14:05
-
5$\begingroup$ @someonewithpc Why don't you add an answer showing how to bake to a normal map? $\endgroup$– PGmathCommented Jan 31, 2015 at 15:22
-
$\begingroup$ That would be quite helpful $\endgroup$– BaneCommented Jan 31, 2015 at 15:24
-
3$\begingroup$ and it would help other users! $\endgroup$– ruckusCommented Jan 31, 2015 at 15:52
2 Answers
I'll show the most simple way to bake a normal map and then convert it to another format so that it's more widely compatible with game engines.
I am leaving out ALL theory and best-use scenario information since this topic almost always seems to cause arguments for some silly reason.
I'll just show how to bake an Object Space map and then convert it into a Tangent map since this method of creating a Tangent space map isn't widely known and tends to be very useful especially for a situation like the one I'm showing here. Instructions for other methods are easy to find.
Have your simple model ready and while in Edit mode press u and select-> 'Smart UV Project', make sure there is a bit of space between all the UV islands as shown in the next image. Then press 'New' and add a texture which will be baked to.
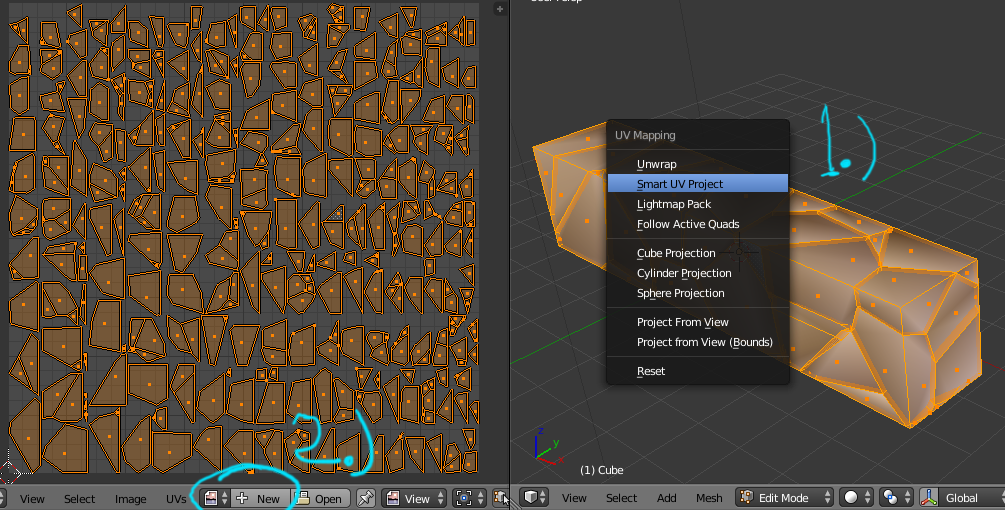
Now if you add a bunch of Modifiers to increase the geometry and shape it a bit, such as Subdivision, Displace, (Bevel sort of works for this), you can then press 'Bake' and you will have a normal map.(there is a link to a simple modifier tutorial at the end)
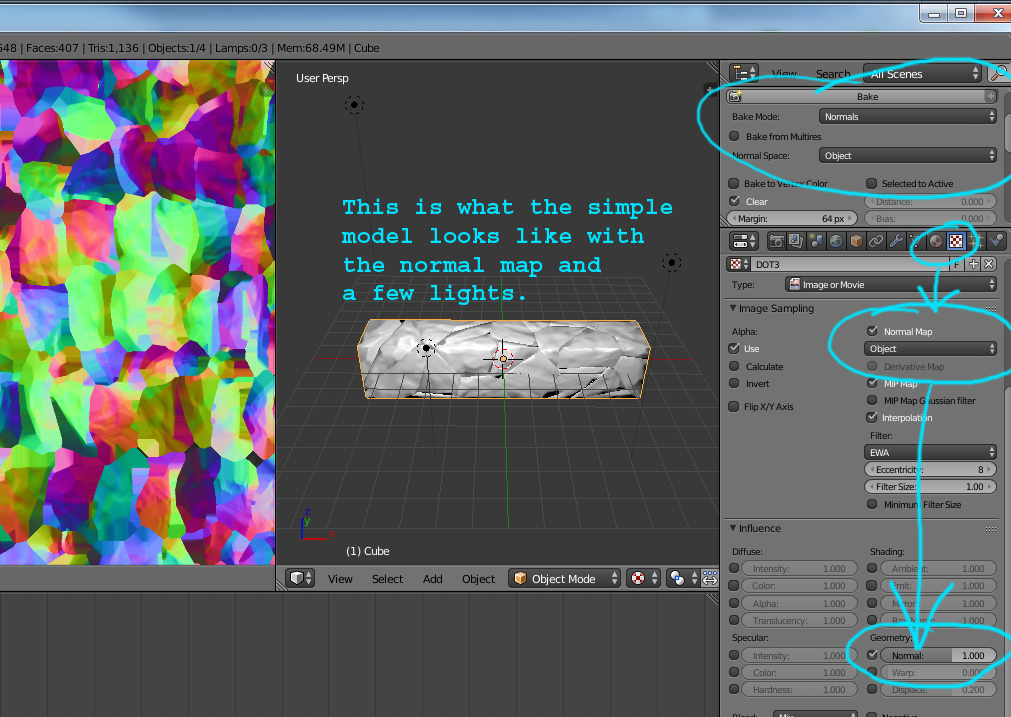
Now you can add a new material then move one tab over to the textures and add one of those as well. The relevant settings are shown below.
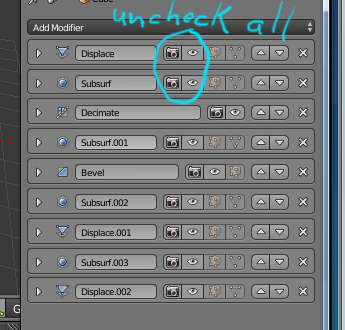
Now to convert this to a Tangent Space map, First of all, deactivate all of the modifiers by unchecking the eyeball and camera icons, otherwise the next stage will fail. We want the normals to come from the map that we already baked.
Now add another texture using the UV image editor and make sure that you are in Edit mode and have all the faces selected when you add the texture. This way of adding a texture is primarily used for baking in Blender Internal, I mention this because many beginners think that they have added a texture to their model but that's not really what's happening here. There is a big difference between adding a bake-to texture and adding a material texture.
Anyways, with this second texture added, go over to the bake section and change the setting to bake to a Tangent map.
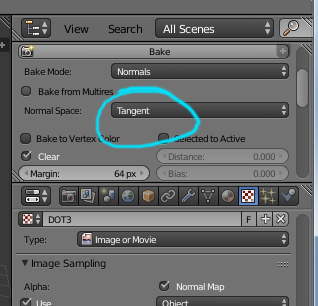
Press bake and you should now have a normal map that looks mostly pale blue. Instead of adding a second texture slot, you can just replace the Object Space map with the Tangent space map and change the Image Sampling section to Tangent map as I've circled in the image.
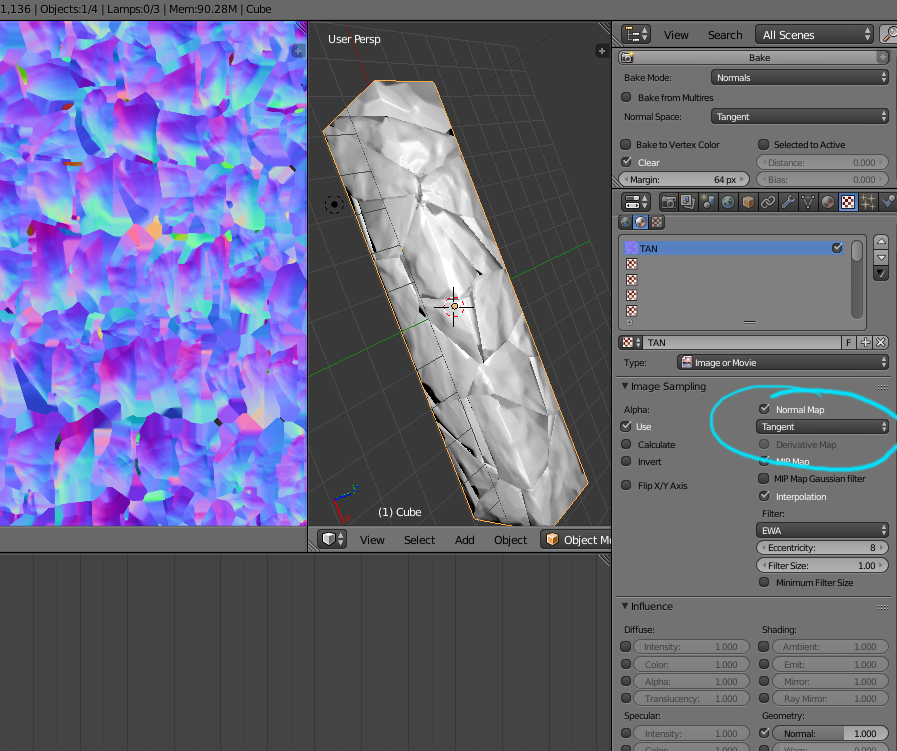
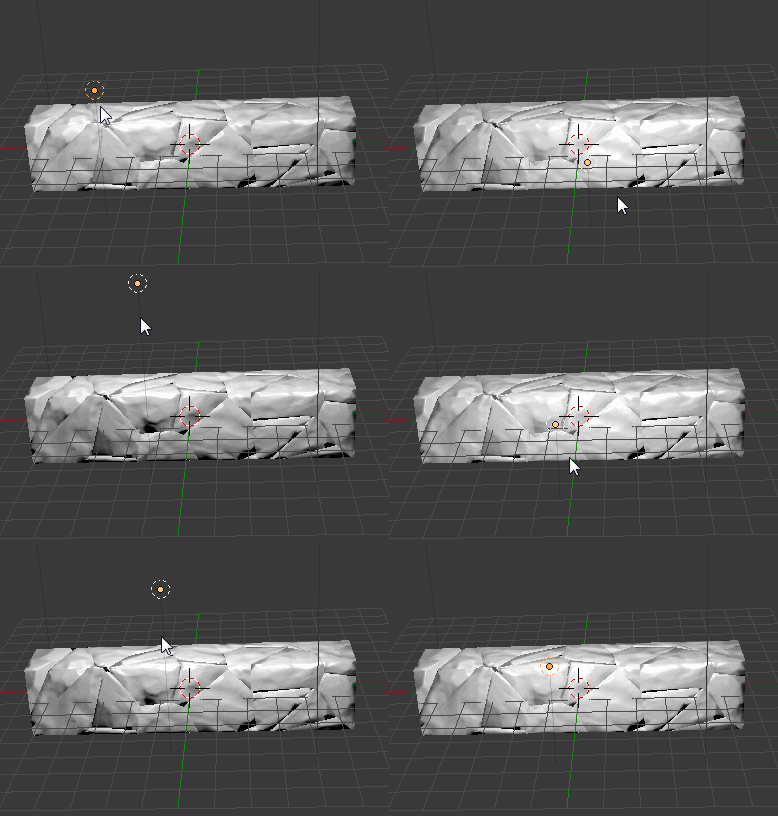
The modifier stack is based on the following webpage.
Create Stone Wall in Blender - Tip of the Week
http://www.evermotion.org/tutorials/show/9267/create-stone-wall-in-blender-tip-of-the-week
Here's the .blend file. The images are not packed so even though they should be listed, you'll have to recreate them. http://www.pasteall.org/blend/34142
Here's another way to use baking to transfer high-poly details to a low-poly model. The example uses Cycles baking.
Here is simple object that I'd like to have look like a rock. It has only 36 vertices. In the attached image, it is highlighted with a light blue border.
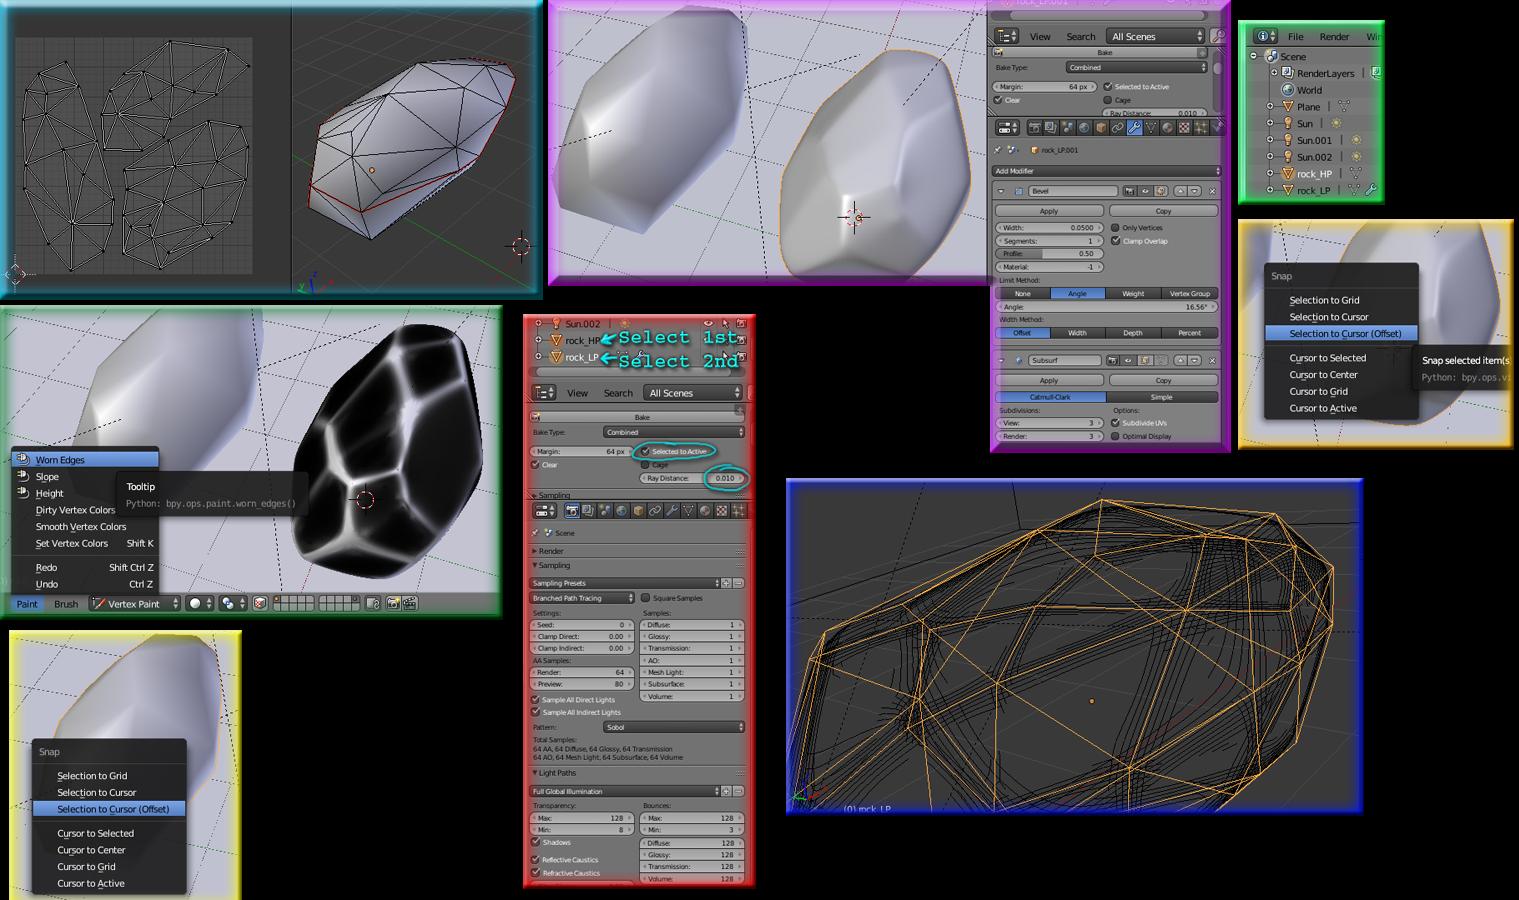
Next I added two Modifiers, the first is Bevel and the second-> Subdivision Surface.(purple border).
The purple bordered image also show the bake settings. 'Selected To Active' is activated and the 'Ray Distance' is set to 0.01.
Since the high and low poly rocks are the same size, the origin should still be at the same place. You can select either, then use Shift+s -> 'Cursor To Selected' and then select the other and use Shift+s -> Selection To Cursor(Offset). Now they should be at exactly the same spot.
I could have just left them at the same spot when duplicating but this is useful for visualization and good to know anyways.
You should also scale the low poly model up by a small amount so that it just barely encompasses the high-poly model as shown with the dark blue border.
You can do this by entering Edit Mode and use Alt+s to scale by normals.
Make sure that they both have sensible names in the Outliner so you can select them both since selecting overlapping models in the Viewport can be difficult.
Now go to the Outliner: First select the high-poly model, then hold Shift and select the low-poly model. This is how the bake setting 'Selected To Active' functions. It ray-traces the detail from a high-poly model to the low-poly model's texture. The texture that will be baked to should be the second one that is selected. It will be outlined with yellow while the high-poly model will be outlined with orange.
The following image shows the material used. The important thing to remember here is to add a texture node for the image that is being baked to, also, make sure it is selected otherwise you will likely encounter some error or another.

There is an extra step shown in those images that I did not mention yet but it's not always necessary. I used an Addon named 'Worn Edges' that works in Vertex Paint mode.
For Vertex Paint tools like this one to work well, you will likely want to 'Apply' the high-poly model's Modifiers first since Vertex Paint tools do not yet work with the Modifier stack. The Apply button is clearly visible on each modifier.
The Addon can be found using the following link/info.
Author:Oscurart
Addon: Worn Edges
http://blenderaddonlist.blogspot.ca/2013/12/addon-worn-edges.html
Here is a BlenderArtists forum link as well.
http://www.blenderartists.org/forum/showthread.php?291104-AddOn-Create-Worn-Edges-Map
The result of the bake is shown in the following image. 36 vertices-Cycles Global Illumination
