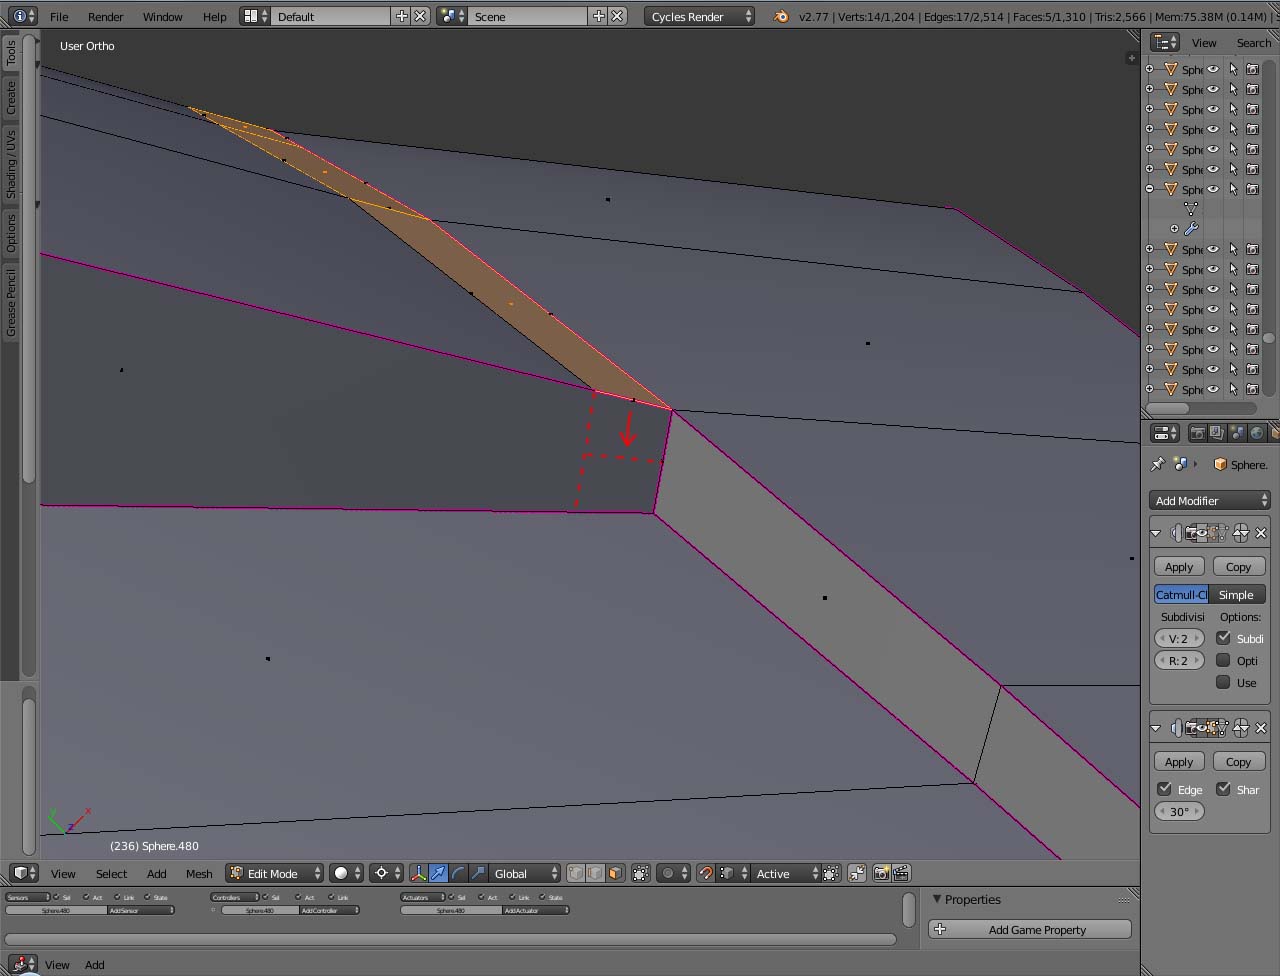
I'm wondering if there is a fonction to extrude down the faces selected to put them on the red dotted line, while maintening them parallel to the vertical edge?
$\begingroup$
$\endgroup$
3
-
1$\begingroup$ Possible duplicate of How to extrude inwards without leaving faces? $\endgroup$– Shady PuckCommented Oct 1, 2016 at 19:51
-
$\begingroup$ Here is how to set transformations from "Global" to "Normals" blender.stackexchange.com/questions/3413/… $\endgroup$– WhovianBron3Commented Oct 1, 2016 at 19:51
-
$\begingroup$ I've just read your link and tried it but it doesn't work or I'm doing something wrong. If I extrude the faces selected the reference of the axis aren't the vertical plane so it can't be parallel to it. $\endgroup$– GrobbyCommented Oct 1, 2016 at 19:59
Add a comment
|
1 Answer
$\begingroup$
$\endgroup$
2
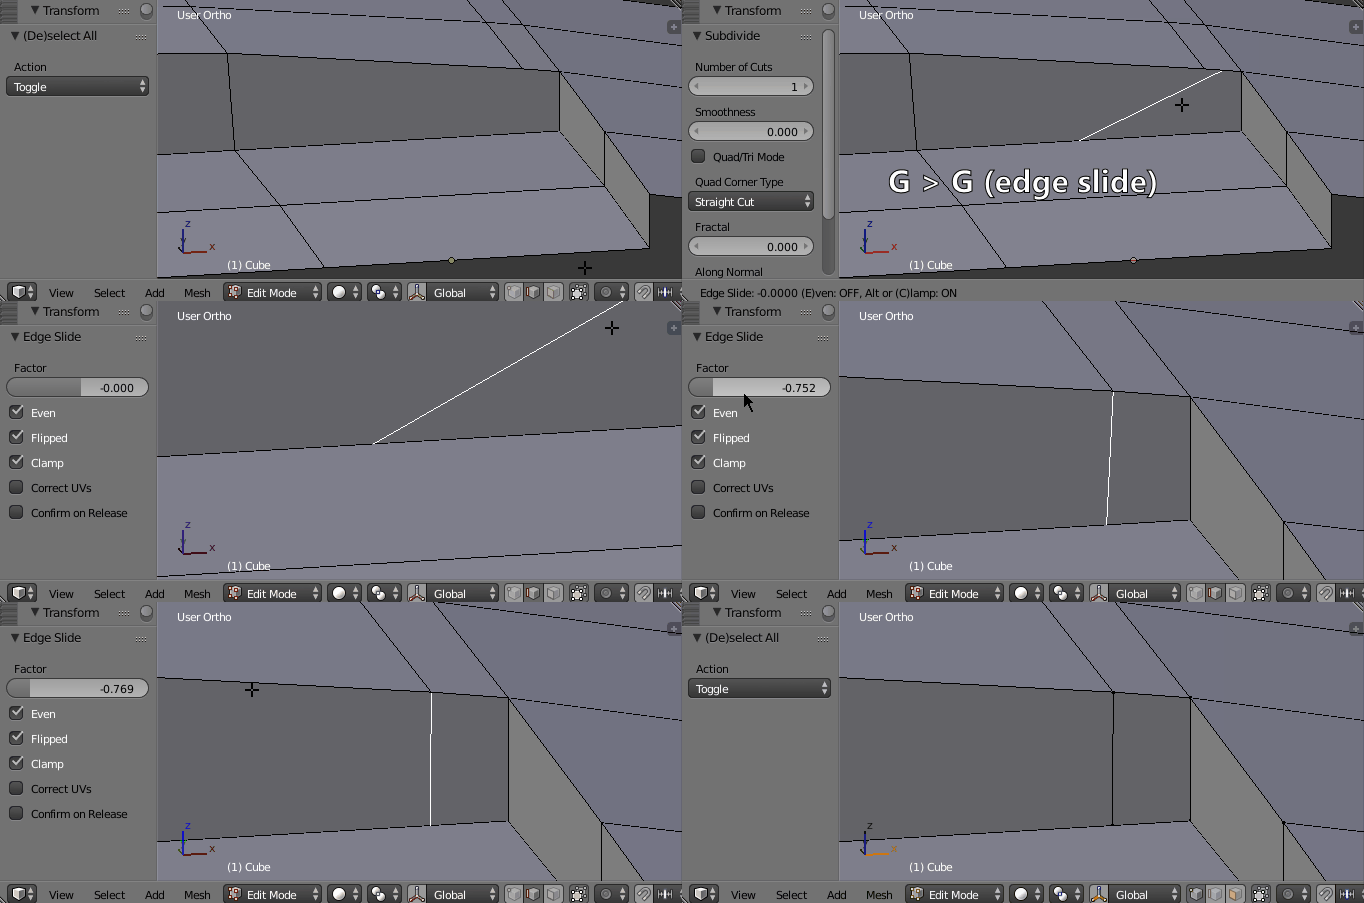
The fast, inaccurate way
- Select one of the upper edges and the lower edge, which you want to connect.
- Subdivide W > S
- Use the edge / vertice slide by pressing G > G
- Enable the Even checkbox in the edge slide operation settings.
- If necessary enable the Flipped checkbox in the edge slide operation settings.
- Adjust the Factor slider estimating the slide position closest to the upper vertex.
- Merge the upper vertices.
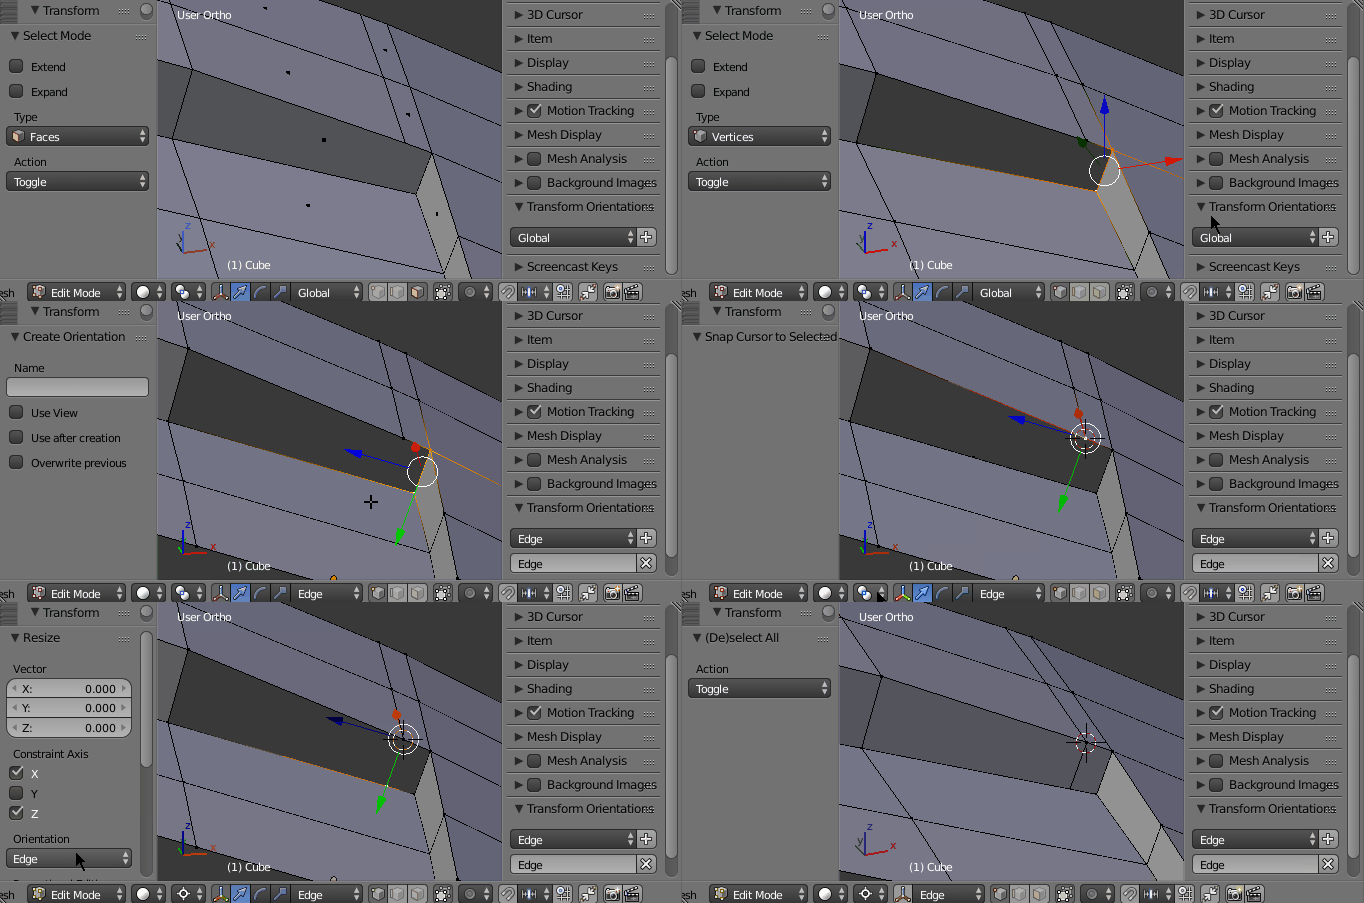
The slow, accurate way
- Delete the face, which you want to split with the edge (loop).
- Select the edge, which you want your new edge to be parallel to.
- Go into Normal transform orientation mode, then (in the Properties Panel under Transform) press the + icon.
 This will add the orientation of the edge as a possible transformation orientation.
 - Place a new vertex by subdividing the lower edge.
- Snap the 3D cursor to the upper vertex, from which you want the edge loop to start.
- Enable 2D Cursor as Pivot Point.
- Select the vertex on the lower edge and scale it to 0 (with the 2D cursor as a pivot point). Limit the scale operation to the X and Z axis. Select the transform orientation of the edge, which we added earlier.
- Make the new faces.
-
$\begingroup$ Sorry, the gif is a bit too fast. I have modified step 3 and 7 explaning how I added the Transform Orientation of the selected edge. Is it more clear now? $\endgroup$– LeanderCommented Oct 1, 2016 at 23:15
-


