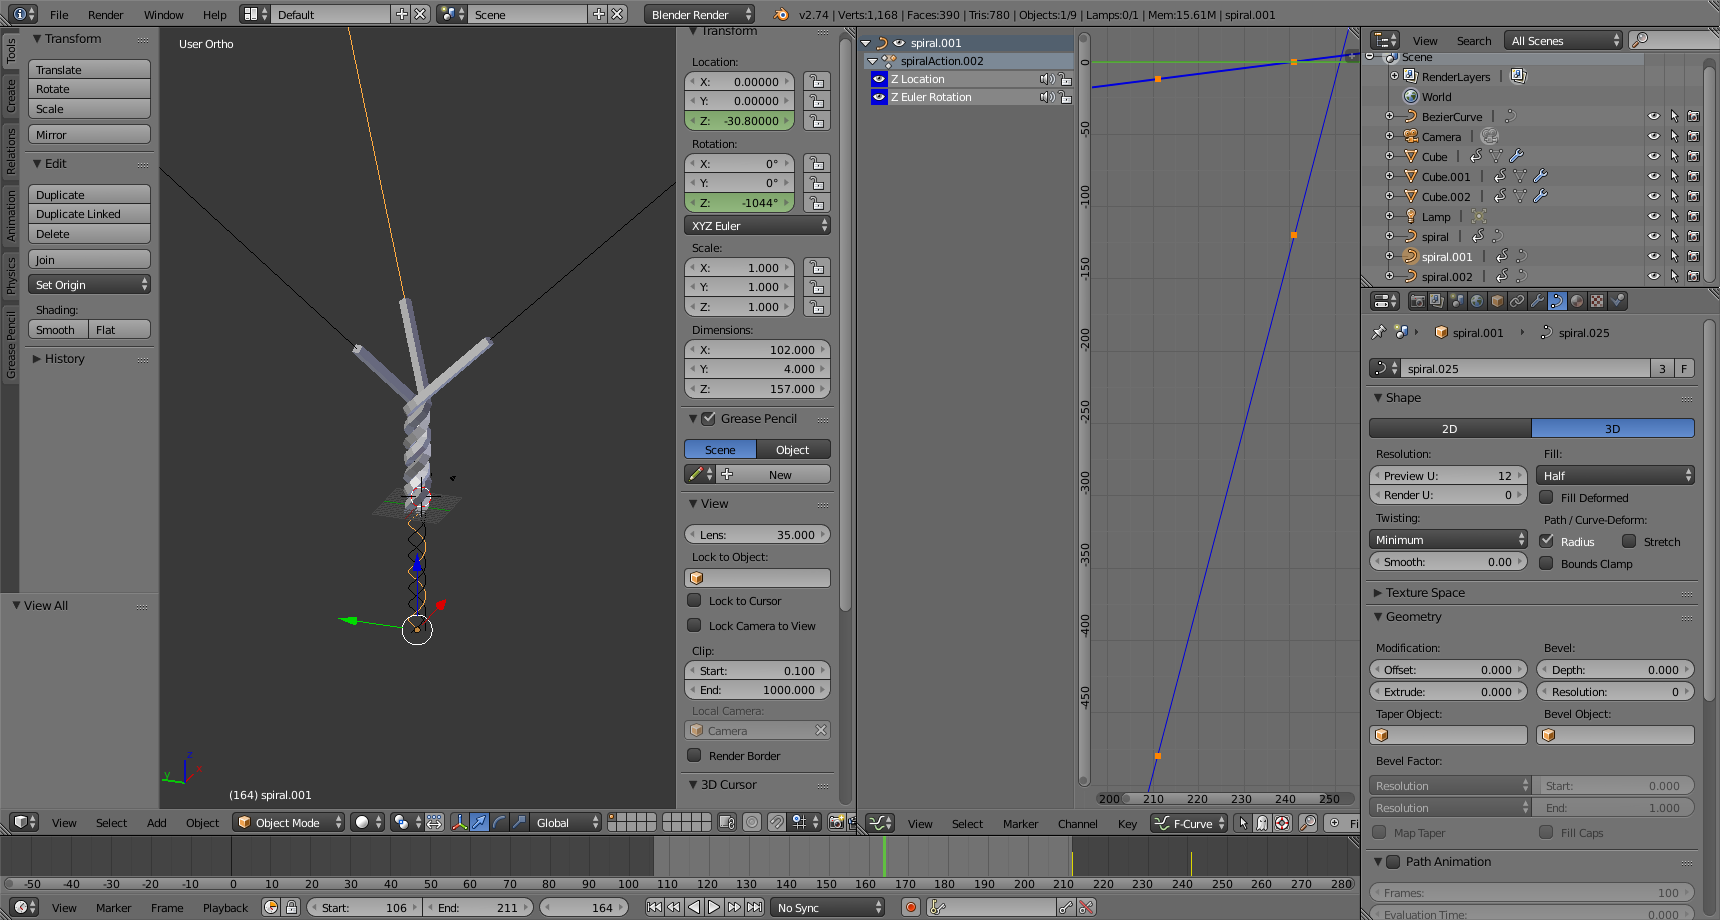
The twisting ropes is best accomplished using a curve modifier.
Start with a mesh that has a high enough resolution along the length
of the "rope". Then create a curve representing one of the twisted
ropes plus some untwisted rope leading away. Finally, add a Curve
modifier to the rope mesh; choose the guide curve, and set the
Deformation Axis to match the helical axis of the guide curve (I used
Z for my demo).
In a static situation you will see the rope coiled along part of the
curve, and then follow the untwisted part away. Create a 2nd and
third copy of the rope mesh and the curve guide to illustrate 3
threads twisting together. For 3 curves you will want to rotate each
one by 120 degrees.
In order to animate this, have each guide curve spin on its helical
axis. This will appear as three ropes spinning in a partly twisted
state. In order to make it seem like the twist is progressing along
the ropes, animate the curve to move lengthwise along its helical axis
(keyframes for the Z coordinate). The change in the relative position
between the mesh and the guide curve causes the mesh to change what
part of the curve it follows over time.
You will probably want the fcurves to be linearly interpolated
(t in the curves editor) and linearly extrapolated
(shift-e).
Unfortunately, the exact geometry of this situation causes the mesh to
slide backwards along the curve (because the length of the curve is
longer than the axial distance travelled). To compensate, you can
animate the mesh to translate in the opposite direction to the curve.

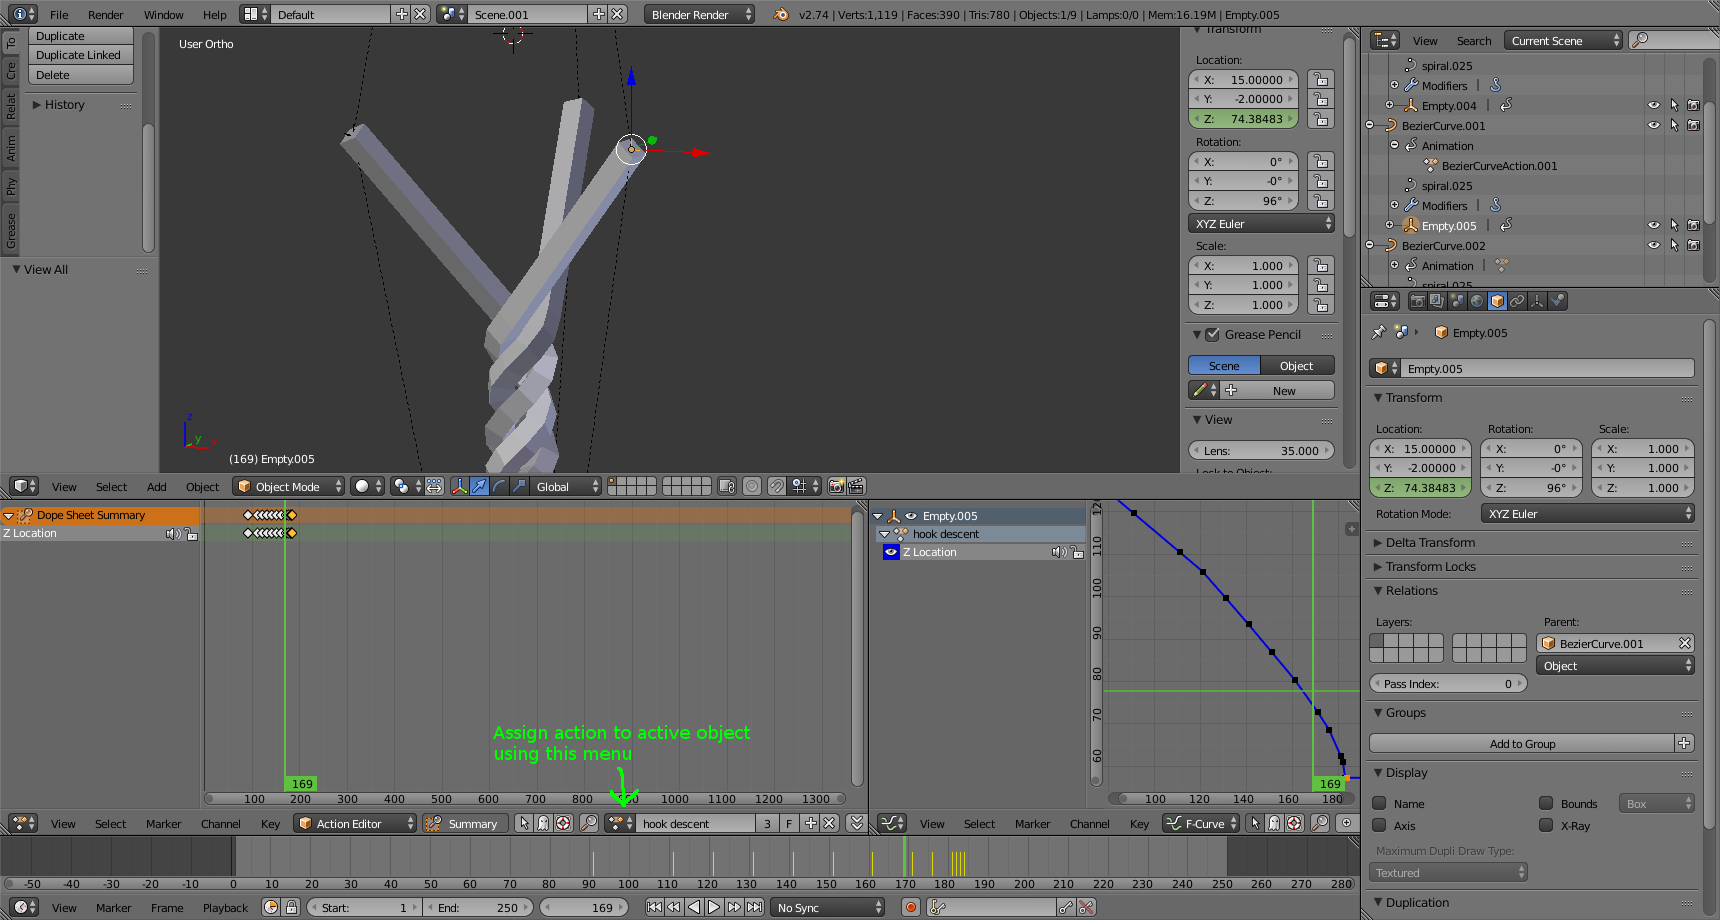
If you don't want to animate the Z location of each of the 3 meshes
independently, you can animate a single one and use the Dope Sheet's
Action Editor mode to give all of the meshes the same Action datablock
which will cause them all to animate identically.
Now you have an animation where the twisted end of the rope appears to
be spinning and the loose end with the threads is sliding up along the
Z axis. If the loose ends are supposed to be spinning, you will have
to animate the guide curves spinning as well.
If your guide curve is constructed by python, you should know exactly
how much translation represents a full twist of the helix. If not,
you can just eyeball it. Again: you will probably want the fcurves to
be linearly interpolated and linearly extrapolated.
There is a remaining twisting motion of the thread mesh that you can
counteract by animating the rotation of the mesh. You can eyeball
this (mostly because I don't know exactly what equations are in play
so I can't guide you to a mathematical calculation). Again, you will
want to make this linear to match the animation of the guide curves.
The final hairball is keeping the loose ends of the thread at a
constant distance from the helical axis. This requires us to animate
the SHAPE of the guide curve. This is accomplished using a Hook
modifier. The hook modifier can be used on curves and on meshes.
While the hook modifier can bind several vertices or control points to
the motion of another object or bone, the simplest situation is to
hook a single control point to a single empty.
Select the curve. Switch to Edit mode and select the control point
for the loose end. Use Ctrl-h to hook that
point to a New Object. Switch back to Object mode.
The curve is still the active object, and the new empty has
conveniently been added to the selection. Use
Ctrl-p to parent the empty to the curve. This
will allow it to rotate with the curve.
Now you must move the empty into position to match whatever frame the
"loose" ends of the thread are attached to. Since I chose Z for my
helical axis, that means my X and Y will remain fixed. I will animate
the Z so that the hooked empty lines up with the end of the rope mesh.
You probably want to take care not to keyframe the X and Y position
(you can select the unwanted data_paths in the Graph Editor and
x to get rid of them if you accidentally create keyframes
for X or Y).
(The reason you avoid keyframing X and Y is so you can reuse the
animation on the other hook empties. It revolves around the
obj.matrix_parent_inverse and could easily become its own essay if I
knew what the heck was going on).
At the beginning of the animation the keyframes of the hook empty can
be spaced out (1/rotation was fine at the beginning). However, as you
reach the end of the animation and the available rope begins to run
out, the Z will have to change faster, and non-linearly (I think it
ends up being a hyperbola). Just scrub through the time line; adjust
the Z coordinate; and insert a keyframe. If you aren't satisfied go
ahead and insert more keyframes whenever the hook deviates too far
from the end of the rope.
Once you have animated one hook you can repeat the hook-creation
procedure to create hooks for the other threads. However you do not
have to repeat the keyframing.
Since the hooks are children of the curves, you can reuse the
animation datablock. Go into the Dope Sheet and switch it to Action
Editor mode while the Empty is the active object. You can use the
menu button to pick the action from the previously-animated empty (you
might have to select that first empty so you can see its action name
in the Action Editor if you did not memorize it). Now the action is
shared between those objects. (The NLA editor also has the ability to assign actions to the active object, but as of 2.74 there are bugs in the UI that can confuse novice users).

At this point, your twisting ropes should be animating correctly, at
least for a certain range of frames.
If you go too early, your ropes will separate because they no longer
line up with the helical portion of the guide curve. And if you go
too late they "break loose" from the frame and become completely
wrapped.
Because I am better at python than hand-modeling, I constructed the curves using the script at http://web.purplefrog.com/~thoth/blender/python-cookbook/spiral-bezier.html . I will include a copy of the python source inline, even though it is only peripherally interesting, and you might need a different shape on your more advanced curves:
import bpy
from mathutils import *


def adjust_handle_right(bpoint):
    bpoint.handle_right = bpoint.co * 2 - bpoint.handle_left


def set_handles(bpoint, dx, dy, dz):
    bpoint.handle_right = bpoint.co + Vector([dx,dy,dz])
    bpoint.handle_left = bpoint.co - Vector([dx,dy,dz])


def make_bezier_spiral(name, radius, dz, cycle_count):

    curve = bpy.data.curves.new(name, 'CURVE')
    curve.dimensions = '3D'

    bez = curve.splines.new('BEZIER')

    after_spiral = 4 * cycle_count
    final_length = after_spiral +1
    bez.bezier_points.add(final_length - len(bez.bezier_points))

    for bp in bez.bezier_points:
        bp.handle_left_type = 'FREE'
        bp.handle_right_type = 'FREE'

    for i in range(cycle_count):
        bp0 = bez.bezier_points[i*4]
        x = radius
        y = 0
        z = (i)*dz
        bp0.co = (x,y,i*dz)
        set_handles(bp0, 0, radius*.5, dz/12)

        bp1 = bez.bezier_points[i*4+1]
        x = 0
        y = radius
        z = (i+0.25)*dz
        bp1.co = (x,y,z)
        set_handles(bp1, -radius*.5,0, dz/12)

        bp2 = bez.bezier_points[i*4+2]
        x = -radius
        y = 0
        z = (i+0.5)*dz
        bp2.co = (x,y,z)
        set_handles(bp2, 0, -radius*.5, dz/12)

        bp3 = bez.bezier_points[i*4+3]
        x = 0
        y = -radius
        z = (i+0.75)*dz
        bp3.co = (x,y,z)
        set_handles(bp3, radius*.5,0, dz/12)

    bp = bez.bezier_points[after_spiral]
    x=100
    y = -radius
    z = dz*(cycle_count -0.25) + x/(radius*.5) * dz/12
    bp.co = (x,y,z)
    set_handles(bp, radius*.5, 0, dz/12)

    return curve

def mission1(scn, radius, dz, cycle_count):
    name = "spiral"
    obj = bpy.data.objects.get(name)
    curve = make_bezier_spiral(name, radius, dz, cycle_count)
    if obj is None:
        obj = bpy.data.objects.new(name, curve)
    else:
        obj.data = curve
    try:
        scn.objects.link(obj)
    except:
        pass

#

scn = bpy.context.scene
mission1(scn, 2, 12, 5)
This solution works well for twisting, but if you end up needing weaving or any other complex motions, you may need more hooks on the control points of your curves, or resort to more advanced techniques such as a hundred-bone armature chain.


