1
$\begingroup$

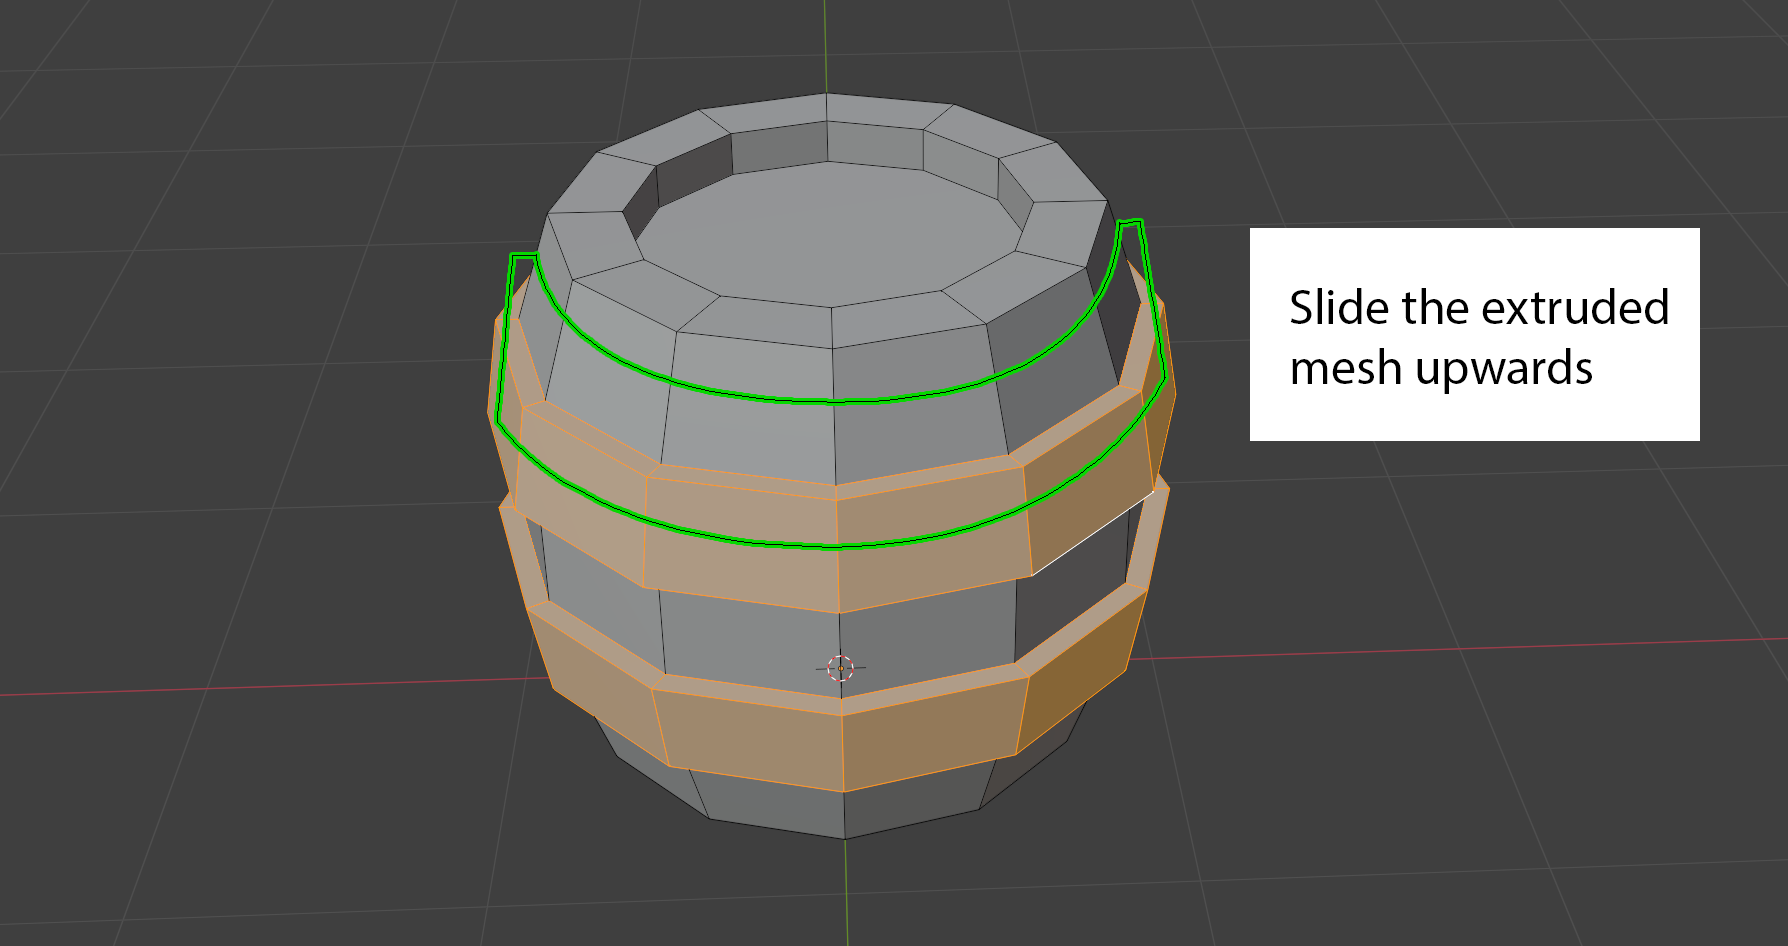
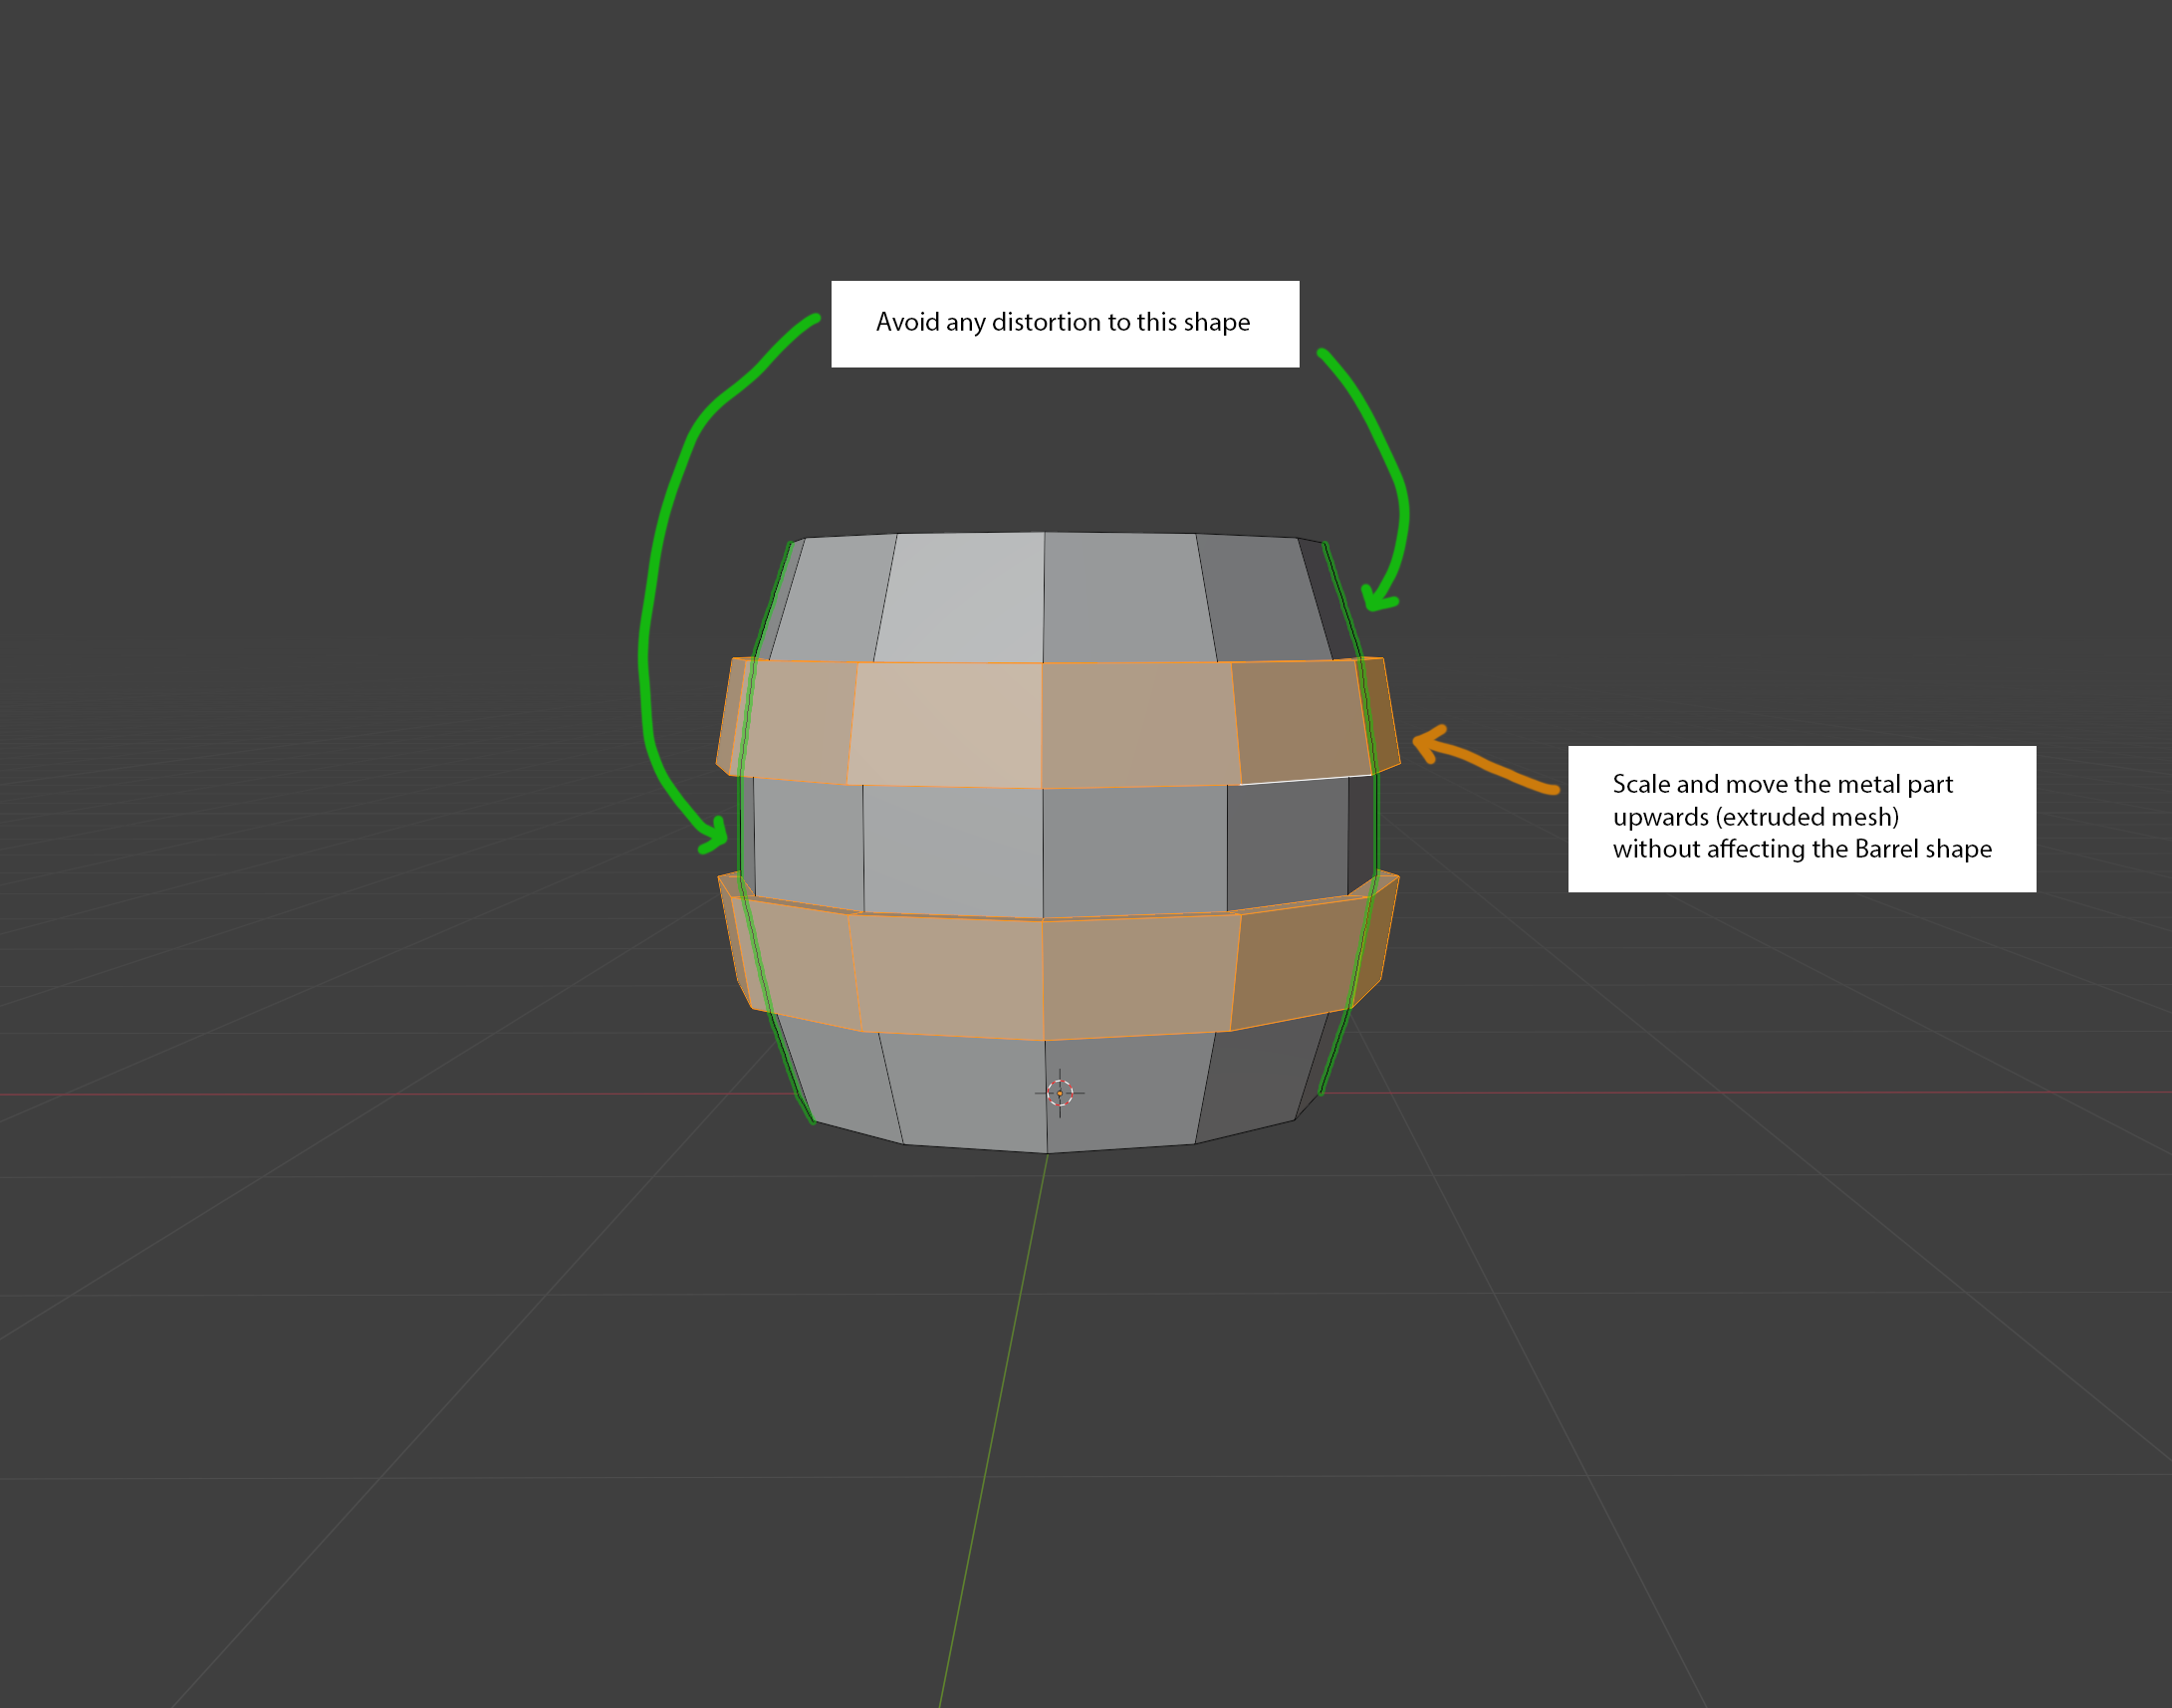
I'm starting to learn blender, and tried creating a low poly barrel from a cylinder. Which then I'm extruding the metal parts of the barrel from the same mesh.

I was hoping to know if there's a way to edit the metal parts (scale and position) without changing the shape of the barrel? Somewhat similar to the idea of "Edge sliding" the extruded mesh (which is the metal part of the barrel).

enter image description here

enter image description here

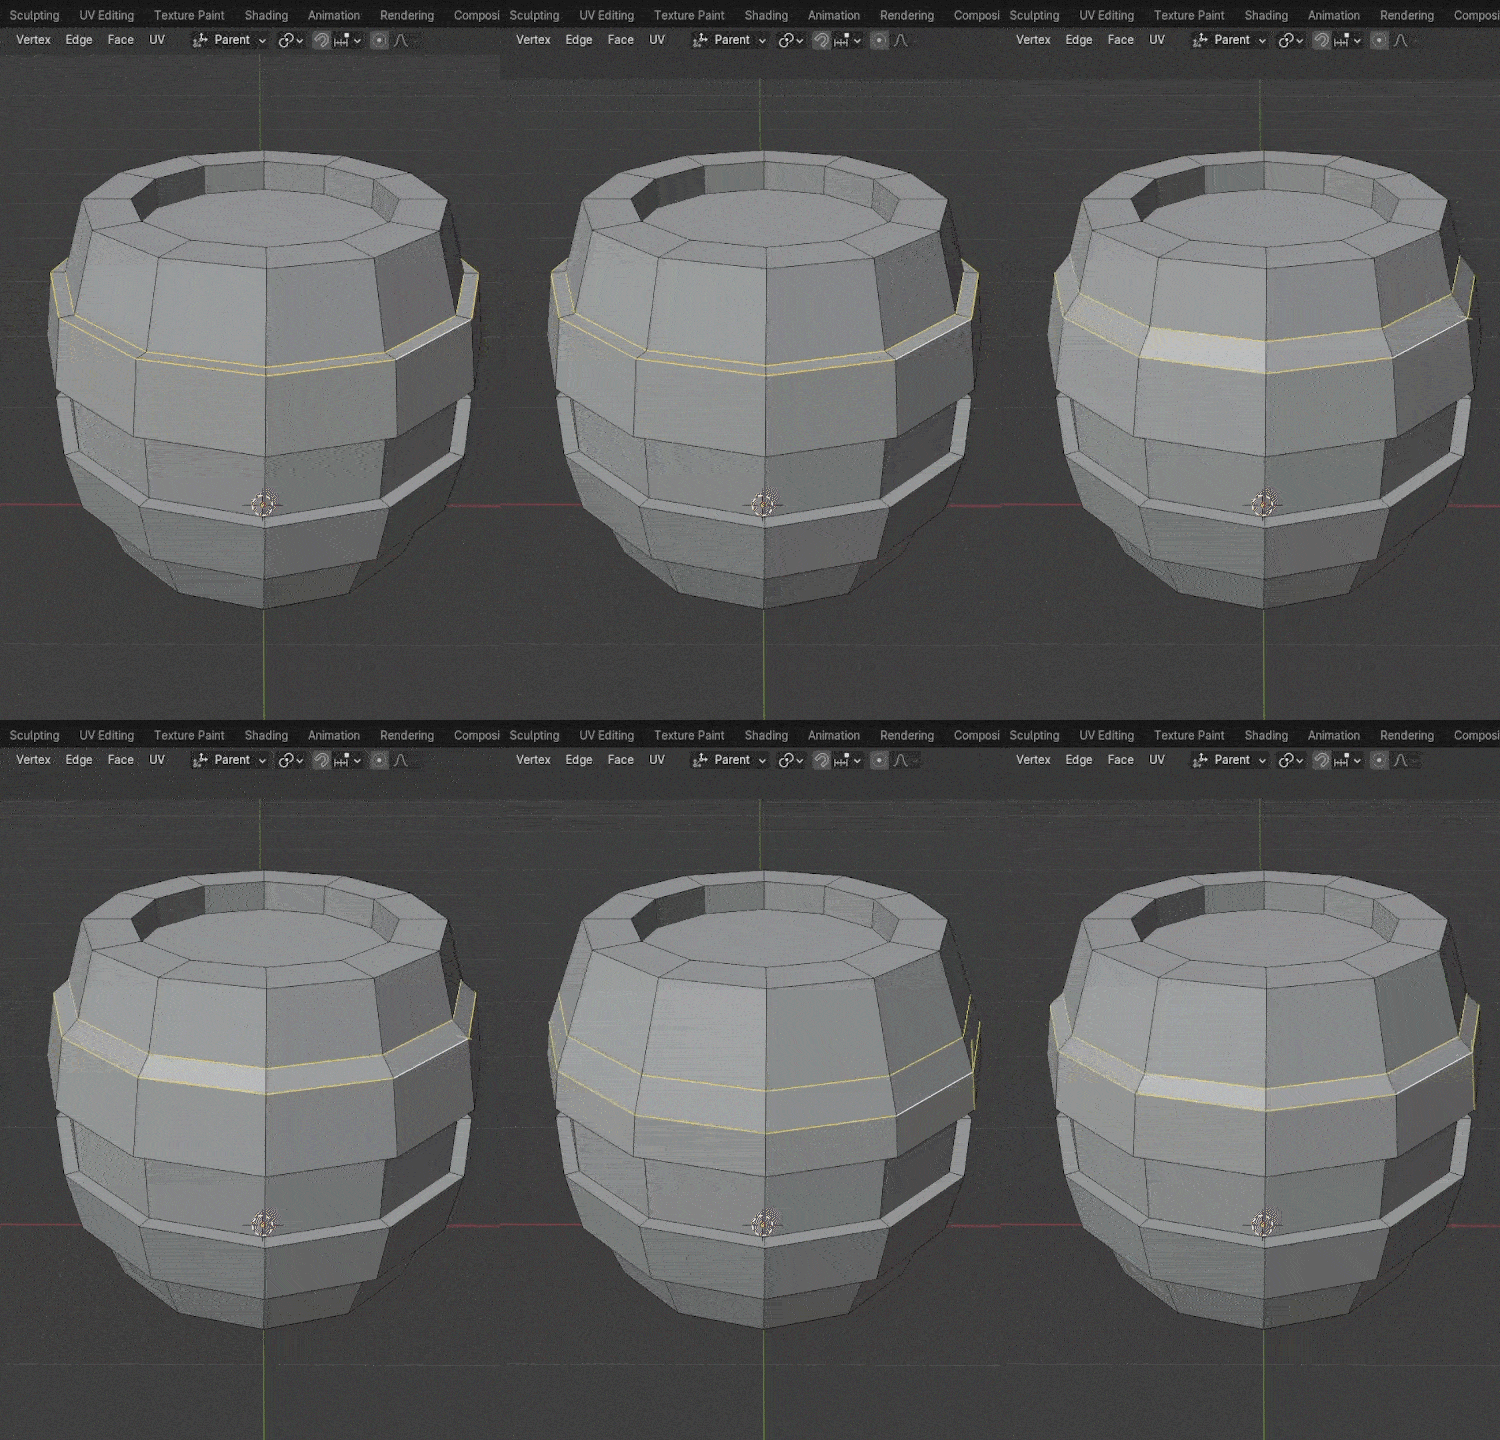
I've tried Edge sliding but seems that the edges are being slided individually.
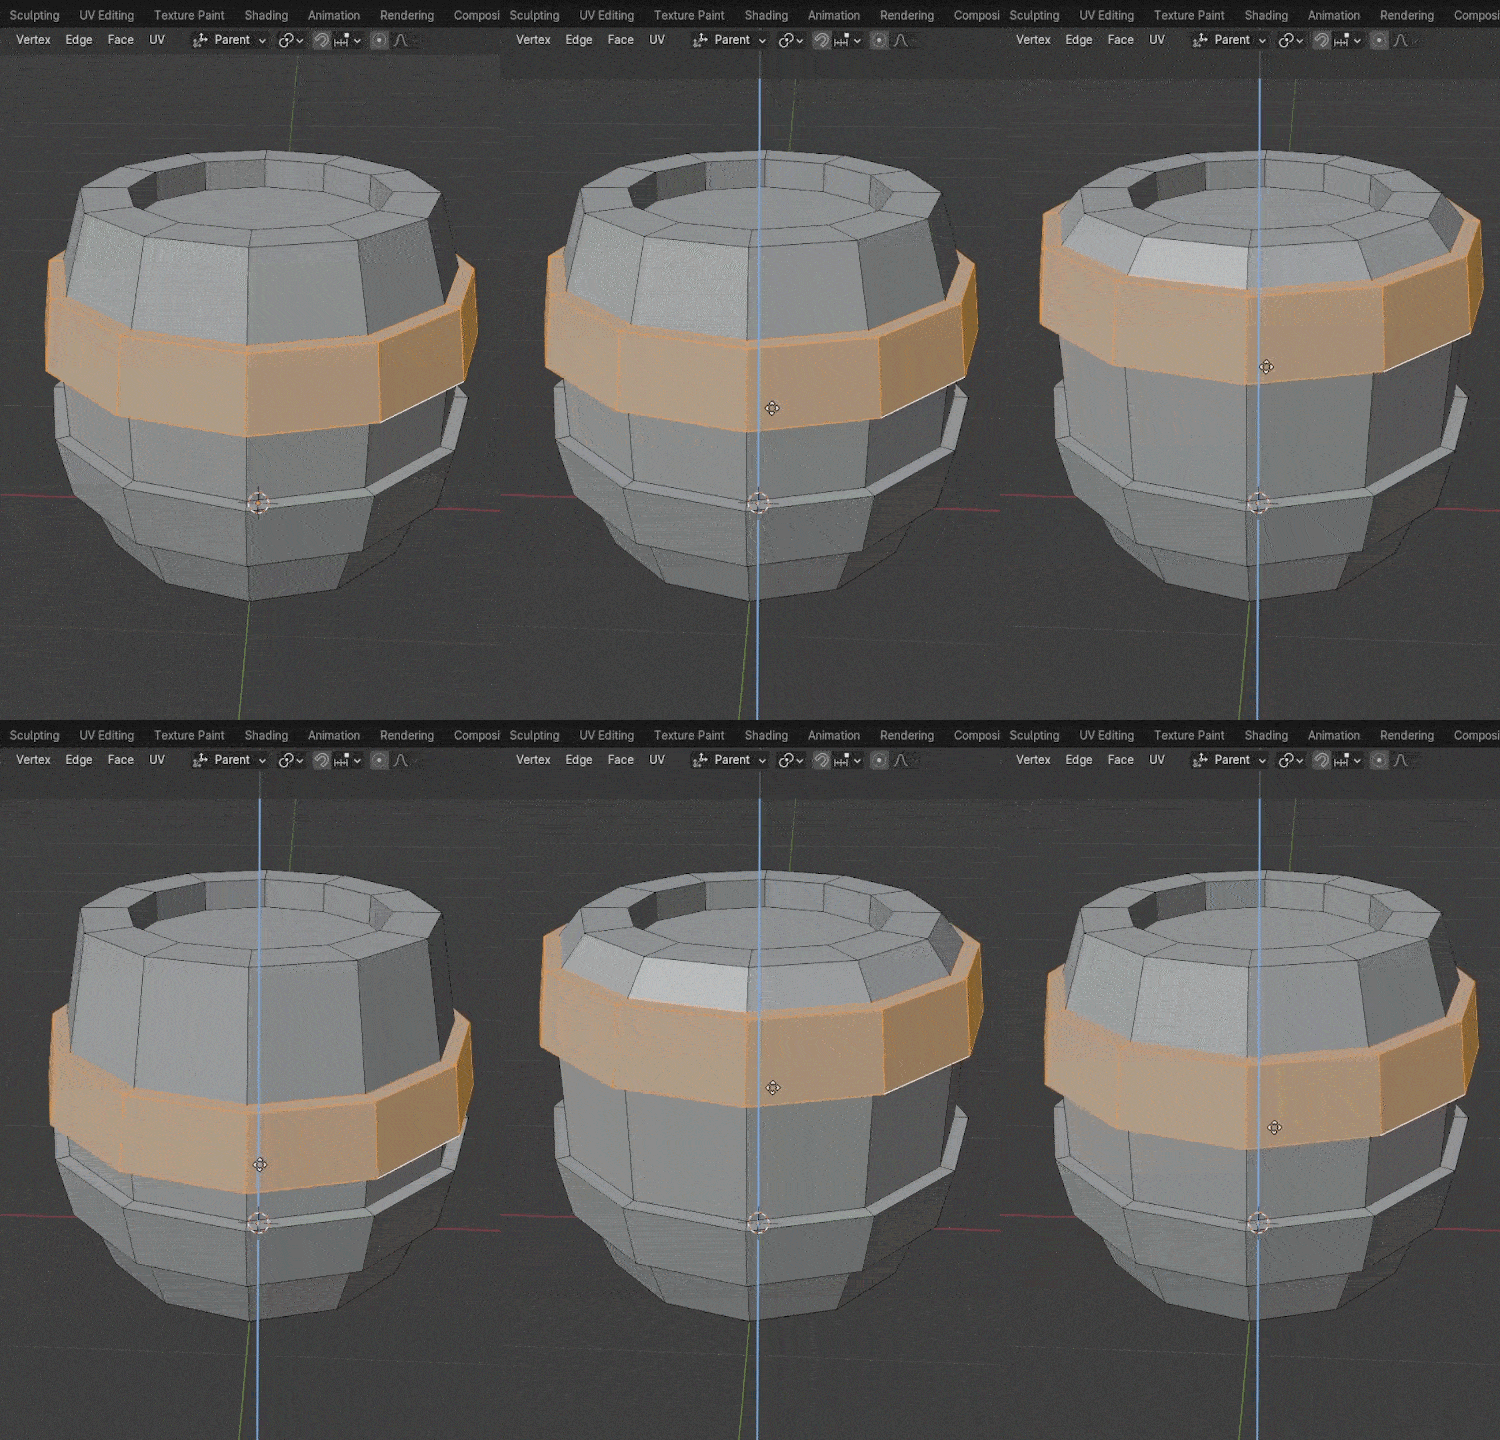
I've tried Grabbing in Z-axis but that will distort the shape of the barrel.

enter image description here enter image description here

$\endgroup$
8
  • $\begingroup$ What is the goal? "Slide" that ring upwards but the part above and below should not change, simply to make the middle part longer/higher? Then why not grab the complete upper half and move everything up? Or should the overall height stay the same and the part above the ring should be narrower? Then you have a problem, you cannot simply slide everything as it is. The center, ring and upper section are all individually angled edge loops. If you start to move the ring upwards, the ring would have to be split horizontally with different angles, and the center part as well. $\endgroup$ Commented Jul 8 at 10:13
  • $\begingroup$ Maybe a different approach using the Screw modifier to avoid this altogether blender.stackexchange.com/questions/28976/… $\endgroup$ Commented Jul 8 at 10:27
  • 1
    $\begingroup$ i think this isn't possible without a big effort which seems that's not worth here (e.g. GN). The "normal" Blender way (i think) would be to just create edge loops at the height you need them and then extrude them there (as you did it for the two you already have). $\endgroup$
    – Chris
    Commented Jul 8 at 10:35
  • $\begingroup$ @GordonBrinkmann yeah I'm still learning blender and testing on how to do stuff in a certain manner. Seems what you're saying is the one I tried in the GIF (Grabbing in Z axis) $\endgroup$
    – Tan H
    Commented Jul 8 at 12:56
  • $\begingroup$ @Chris I see... seems there's no going back once I extruded them haha! $\endgroup$
    – Tan H
    Commented Jul 8 at 12:59

2 Answers 2

0
$\begingroup$

I would disconnect the metal parts from the wooden parts, nothing prevents you from reconnecting them later on if you wish.

  • while in Edit mode, in edge selection mode, hold ⎇ Alt to select the edge loops shared between the metal and wood parts.
  • Press V to split them, then unselect everything
  • Press S⇧ ShiftZ to scale them on the Z plan and make the metal thick enough to go through the wood
  • hit L while hovering metal parts to select them, and you can move them up and down as you wish.

Moving the metal parts will reveal holes where you left them. You could select them with Alt and then use the Bridge tool from the LoopTools addon (to enable):

enter image description here

For polycount saving, you can dissolve the extra edge loops to turn the useless pairs into single loops by ⎇ Alt selecting the one you want to remove in edge selection mode and press ⎈ CtrlX to dissolve it.


Alternatively, you can separate the metal parts into a different object by selecting them in edit mode and then P > Separate by Selection.
Then select the vertices you want to affect in the shrinkwrap and hit ⎈ CtrlG to put them in a vertex group, and put that vertex group in the shrinkrwap modifier. You might still want to use a tiny bit of negative offset to force the vertices inside the mesh, just to not have holes in case you ever have a mismatch of geometry later on.
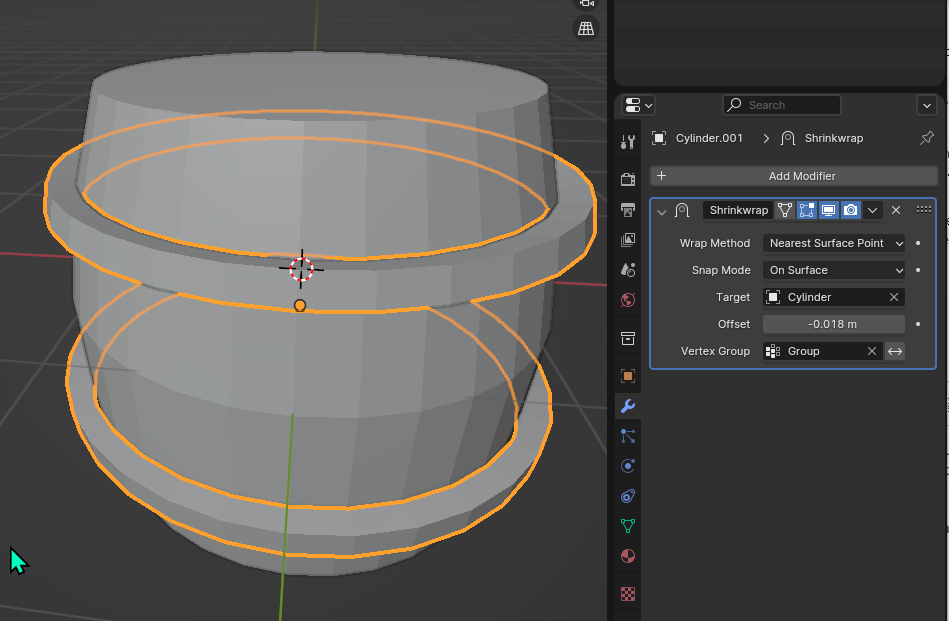
enter image description here

$\endgroup$
3
  • 1
    $\begingroup$ Thanks for your answer! Separating that mesh gave me flexibility to edit the metal part. Now I'm trying to combine it with Shrinkwrap modifier so it would hug the shape of the barrel. $\endgroup$
    – Tan H
    Commented Jul 8 at 22:45
  • $\begingroup$ You can do that, although you would need to separate the mesh parts into a different object (shortcut P > Separate by Selection). Then select the vertices you want to affect in the shrinkwrap and hit Ctrl G to put them in a vertex group, and put that in the shrinkrwap modifier. You might still want to use a tiny bit of negative offset to force the vertices inside the mesh, just to not have holes in case you ever have a mismatch of geometry later on. $\endgroup$
    – Lauloque
    Commented Jul 9 at 0:04
  • 1
    $\begingroup$ Thank you so much for this guide, this is very helpful! I followed your tips about setting up the shrinkwrap, and this is definitely what I was looking for. Cheers! $\endgroup$
    – Tan H
    Commented Jul 9 at 0:34
0
$\begingroup$

Edge slide works if you select the edges connecting the barrel and the metal ring and edge slide them up, and then select the outer edge of the ring and edge slide them down a bit and then use the C key to slide them up along those same edges as far as needed. Just be aware that the distance they slide is proportional to the length of the edges they're sliding along.

$\endgroup$
1
  • $\begingroup$ This works too! Thank you so much for that! I just need to be careful sliding the outer edge so that it won't go past the Z of the edge connecting the barrel and the metal part. $\endgroup$
    – Tan H
    Commented Jul 9 at 6:51

You must log in to answer this question.

Not the answer you're looking for? Browse other questions tagged .