4
$\begingroup$

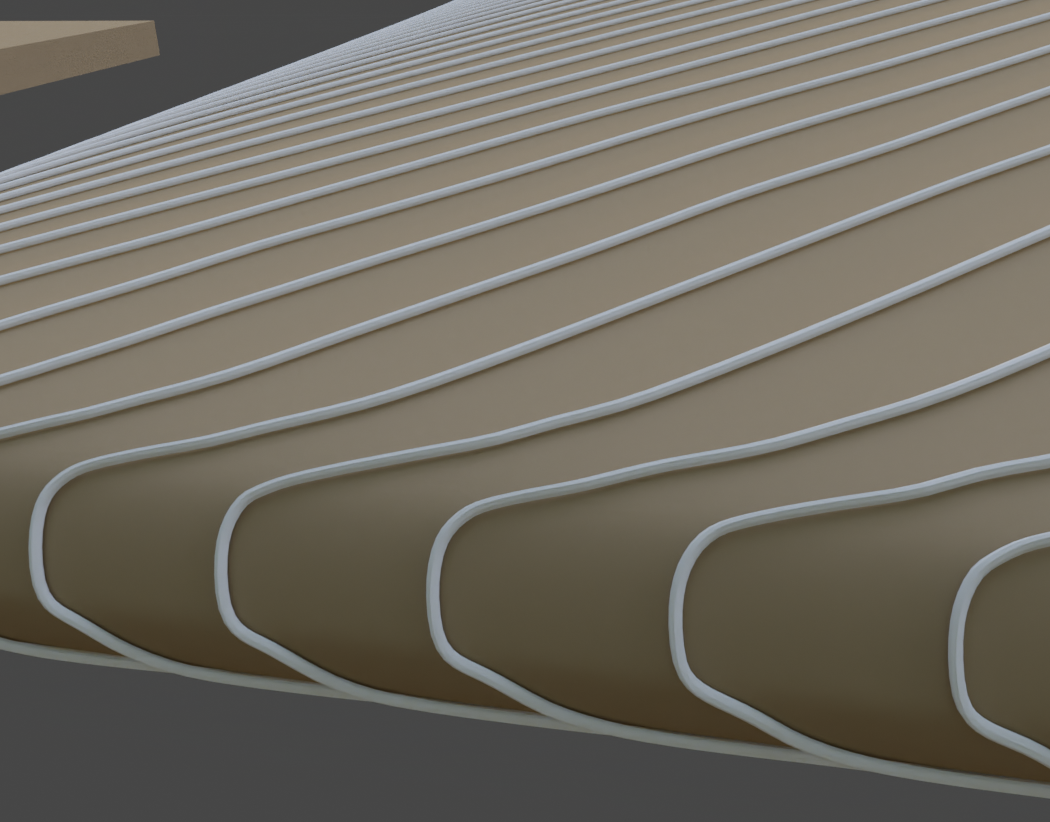
I try to model the CH Wishbone chair in detail. that means with the wrapped rope for the seat cushion part. I think Im on the right track with my example of using the screw and the Shrinkwrap modifier, but my result looks distorted and I can't work out how to fix it.

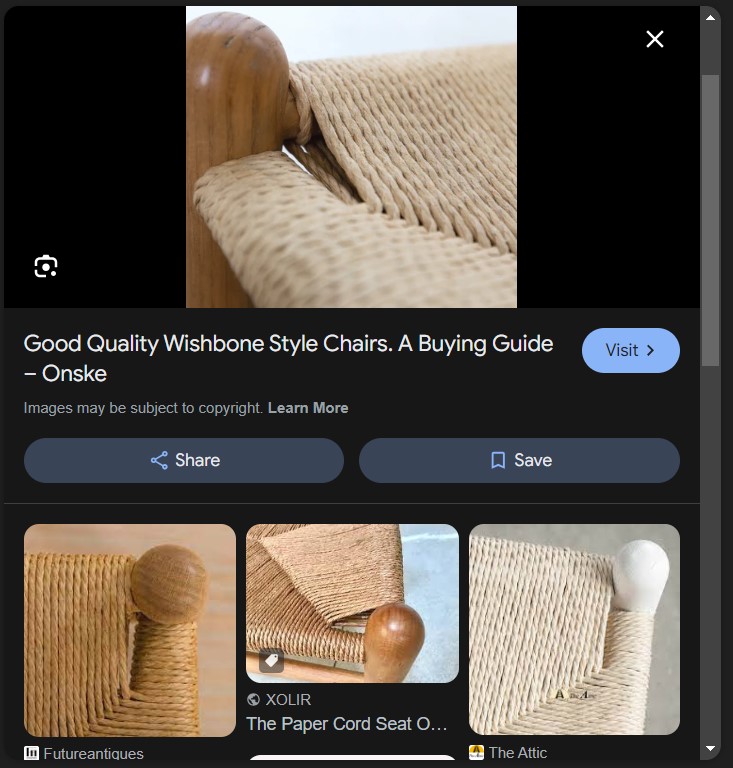
What I want to achieve

enter image description here

$\endgroup$
4
  • 1
    $\begingroup$ Also if you can show me how to attche my blender scene to the question I´m very happy to learn. thanks :) $\endgroup$
    – Philip
    Commented Apr 24 at 14:52
  • $\begingroup$ Use blend-exchange.com $\endgroup$ Commented Apr 24 at 14:55
  • 1
    $\begingroup$ Thank you aidan, i think it worked. would be lovle to learn how to get this wrapped. I though i create a curve spiral and shrinkwrap it to then run a mesh along it. or create the rope with screw modifier and then somehow tell it to wrap around the selected surfaces of the chare chusion part..... curios what you think is best! many thanks to you all! $\endgroup$
    – Philip
    Commented Apr 24 at 15:11
  • $\begingroup$ Could you be interested in using a Shader instead of actually meshing the rope ? $\endgroup$ Commented Apr 24 at 20:48

2 Answers 2

6
$\begingroup$

Wishbone chair with Geometry Nodes

1. Setup

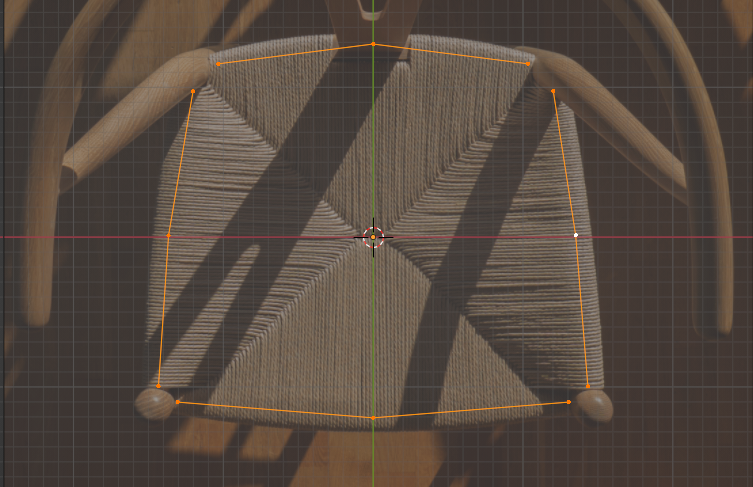
I'm starting with a simple setup, so that we can easily tweak the shape if needed. Each side represent the central point of the wooden poles, over which the rope is attached.
enter image description here

3 vertices is enough to control the shape of each pole. Additionnaly, I've added to each side a vertex group : Right, Left, Front, Back. We will use it in Geometry Nodes.

The shape of the poles can be changed easily, assuming you'll tweak some Map Range nodes to compensate.

2. Edges to curves

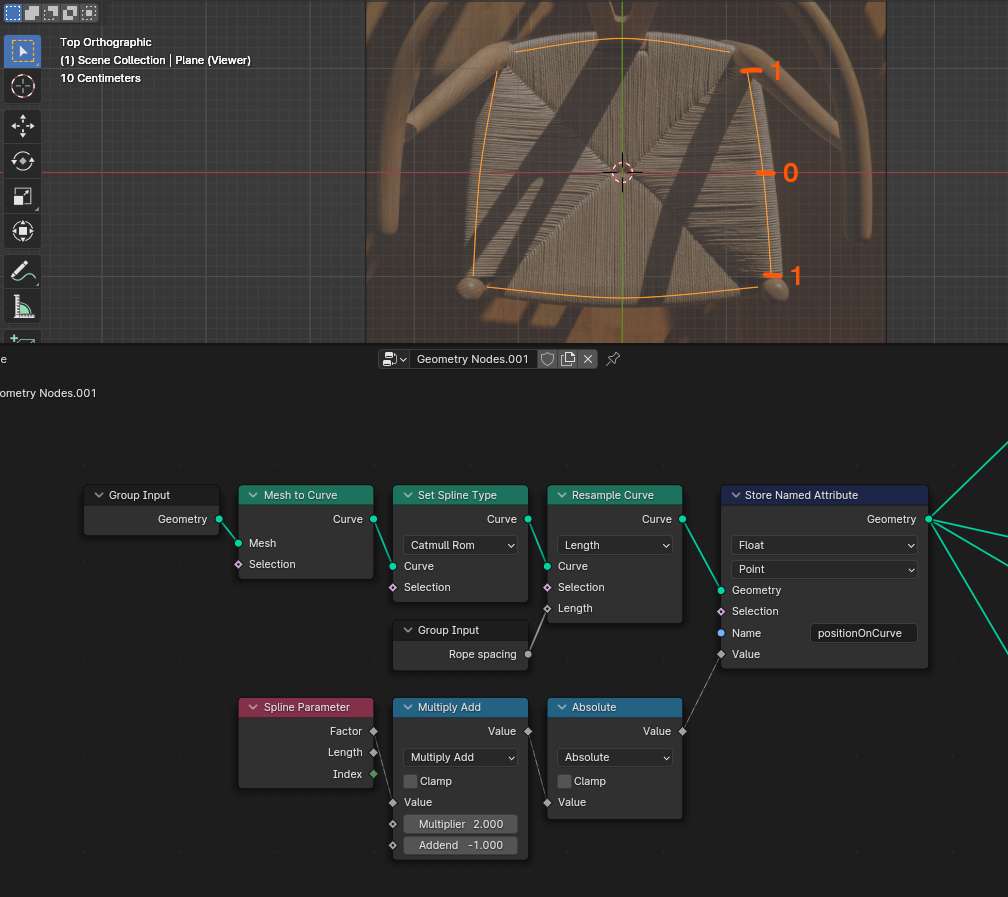
First we want to convert the shape to be smooth. Let's convert the edges to curves, change the spline type to Catmull Rom, and change resolution to match the rope spacing we want.
enter image description here

We also keep a copy of the factor of the curve as an attribute. Here I remap the factor from (0, 0.5, 1) to (1,0,1).

3. Generate ropes

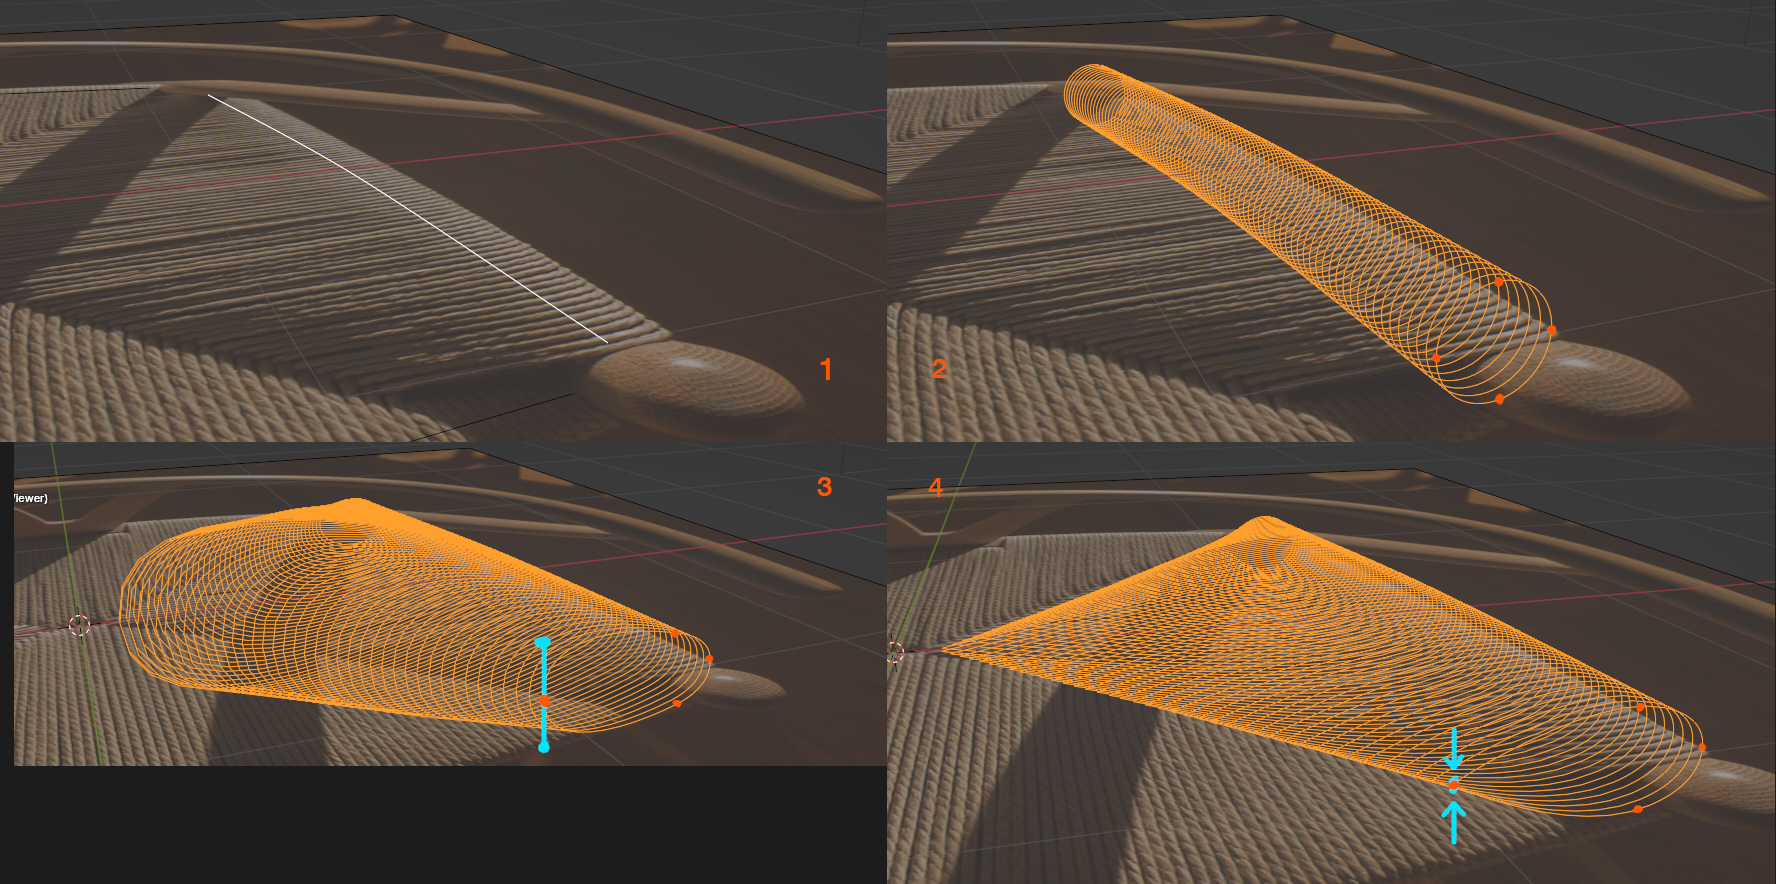
We repeat the process for each side of the chair (expect for the left side which will only be a mirrored version of the right side) :

  1. Starting from the base curve
  2. Spawn a base profile at each point of the curve
  3. Move the inner point to match the pattern
  4. Scale down the handle to be 0 (pointy end), in blue in the image below
enter image description here

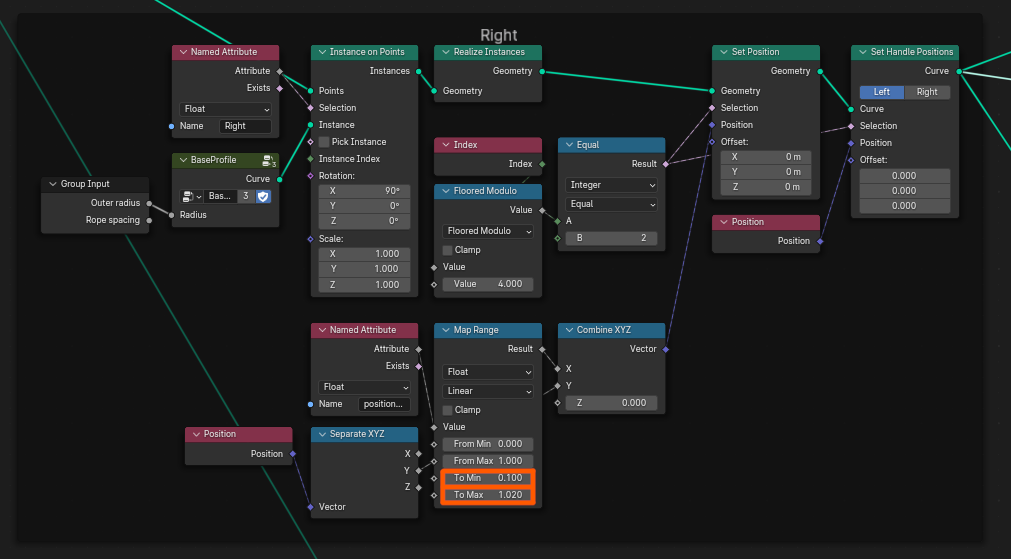
The nodes look like that :

enter image description here

With the 2 input of the Map Range changing how the behavior of the ropes in the inner parts, where each side connects to the other.

The nodes are the same for the front and back parts, with the addition of a Clamp node to reproduce the pattern :
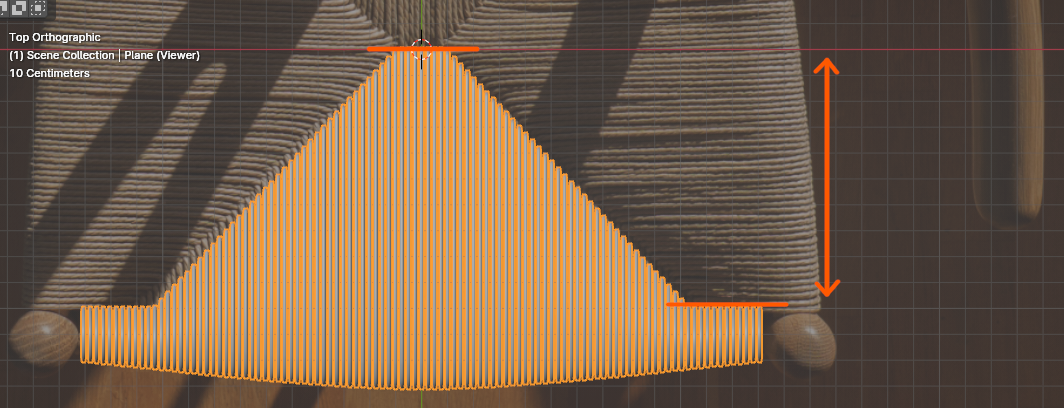
enter image description here

For the base profile that we deform, I'm using a 4-vertex circle as follows (this is what's inside the BaseProfile node group :
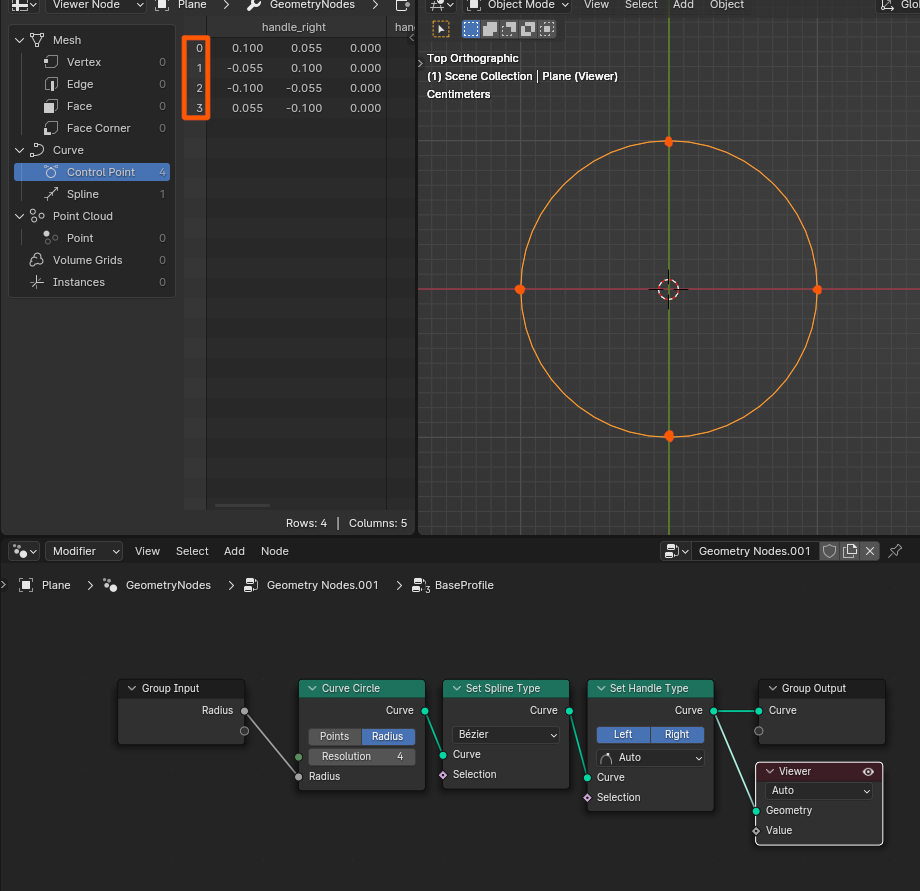
enter image description here

4. Generate profile

Then we can simply Curve to Mesh and get the final result.
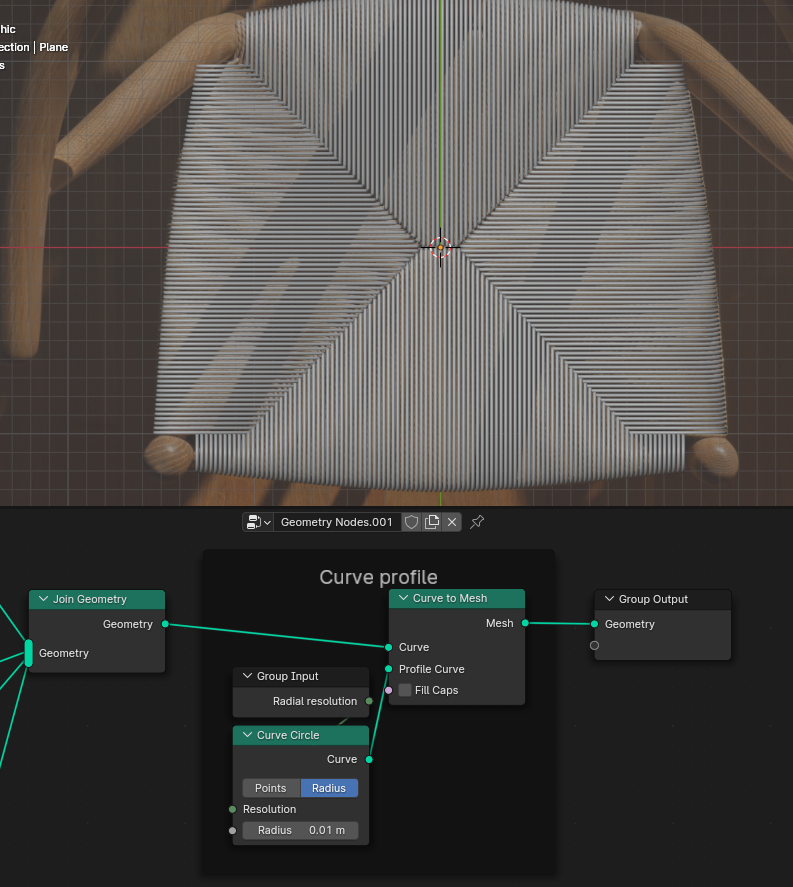
enter image description here

5. Final result and blend file

Then you can easily build on this to add randomness, twisted ropes, ...
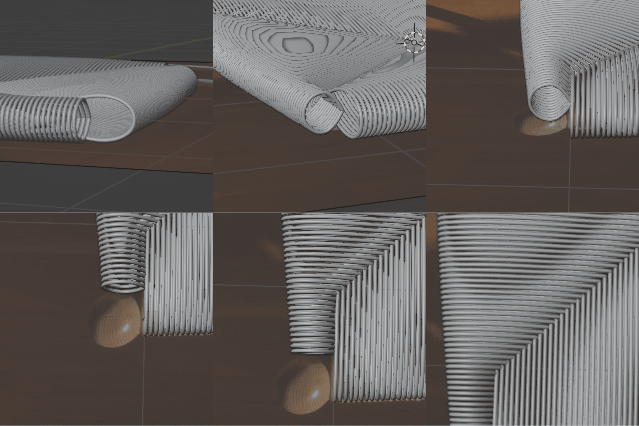
enter image description here

$\endgroup$
5
  • $\begingroup$ I am impressed, nice job! I figured geo nodes would make nice work of this. $\endgroup$ Commented Apr 24 at 21:20
  • 1
    $\begingroup$ Thank you ! Curves can be really flexible (pun not intended) to a lot of use-cases. Quick and easy interpolation tools. $\endgroup$
    – Lutzi
    Commented Apr 24 at 21:23
  • $\begingroup$ Oh yeah! I'm definitely going to study your solution. $\endgroup$ Commented Apr 24 at 21:52
  • $\begingroup$ wow, thats a neat solution. Thank you @Lutzi! i marked the question as solved with your Answer. I have not worked with Nodes and will take a while to get into it and follow your step by step guide. probably will through another question at you later in the process. Once again Thank you so much for putting the work in! that Helped a lot! $\endgroup$
    – Philip
    Commented Apr 25 at 10:07
  • 1
    $\begingroup$ You're welcome ! Geometry Nodes are one of the most powerful tool of Blender, but I'd say you'd need to have a little bit of a math brain. I'll gladly answer if you have any question about my solution. $\endgroup$
    – Lutzi
    Commented Apr 25 at 10:27
0
$\begingroup$

First off, you should apply the scale of your objects and curves with Ctrl + A. If the scale is not applied, it will mess up your modifiers and materiels.
Now, creating an entire weave of cord around your chair would be fairly difficult, and would probably be best solved by a crazy Geo node setup. However, if you're just wanting the wrapping in your file to better fit the object its wrapped around, here's one way:

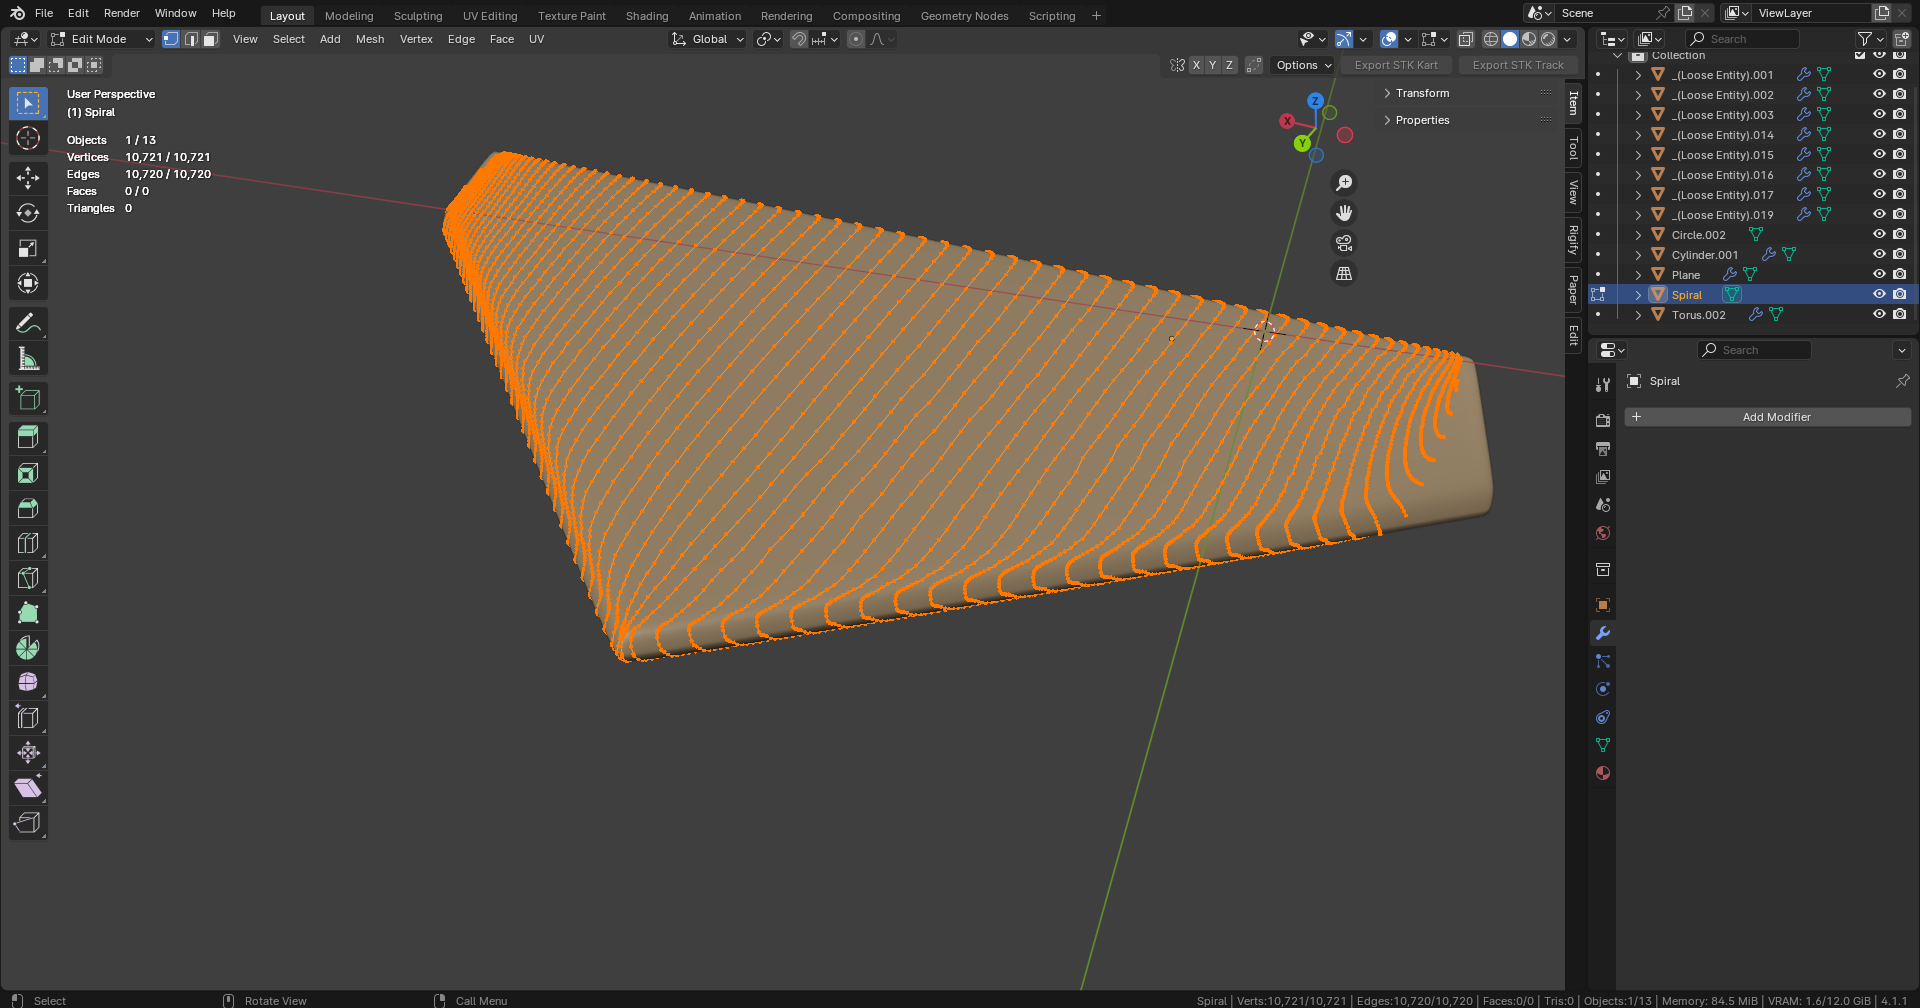
In the modifiers of your curve spiral, change the offset to zero. Then, at the top, with the curve selected, under Object > Convert, select Mesh. This allows you to apply materiels and other modifiers to the object.

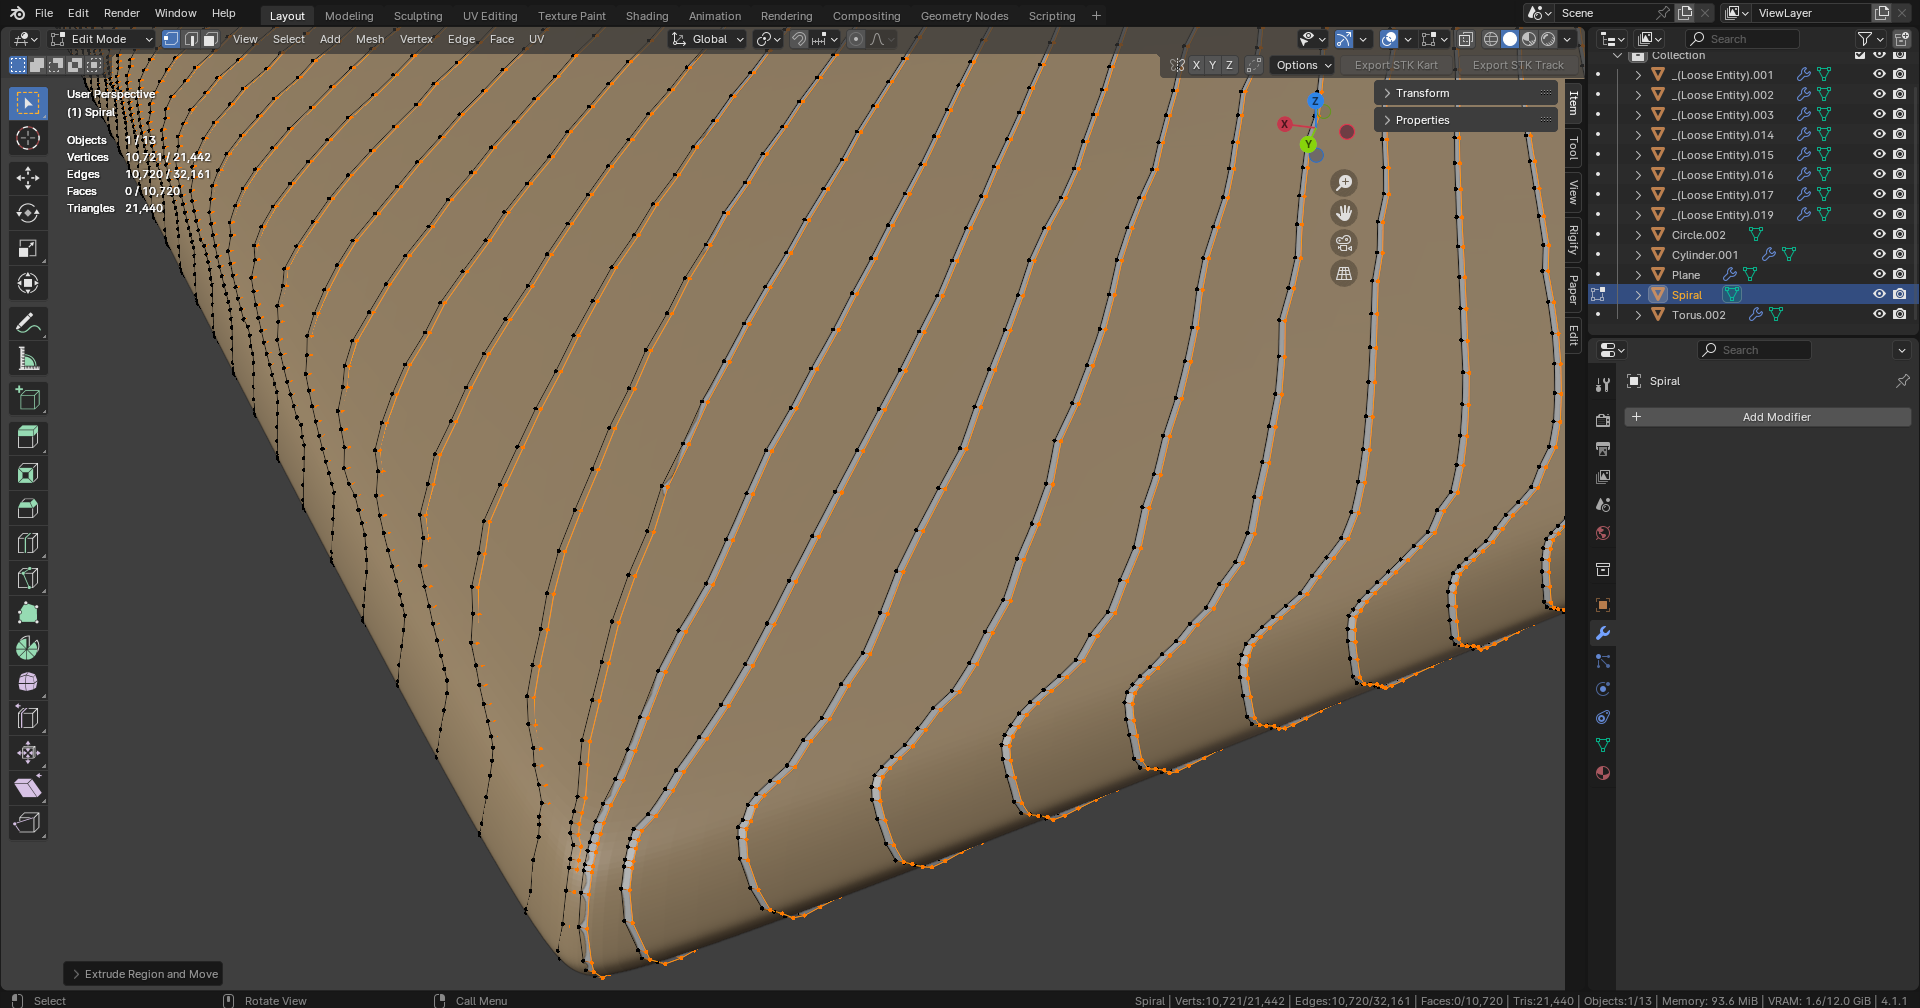
Then, Tab into edit mode and select everything. enter image description here Using E, extrude everything ever-so-slightly along the X axis. Just barely enough to give it some thickness. enter image description here

After that, add a Solidify modifier to the object, and set the Thickness to -0.0005. The negative is important, because otherwise it will thicken it the wrong direction.
Throw on a Subdivision Surface for good measure, and that should be good! enter image description here

Wrapping strings around stuff is a bit complicated, but you can use the same process anywhere. Also, you can use Proportional Editing to help tweak the positions of the mesh more easily.

Hope this is what you're looking for!

$\endgroup$

You must log in to answer this question.

Not the answer you're looking for? Browse other questions tagged .