0
$\begingroup$

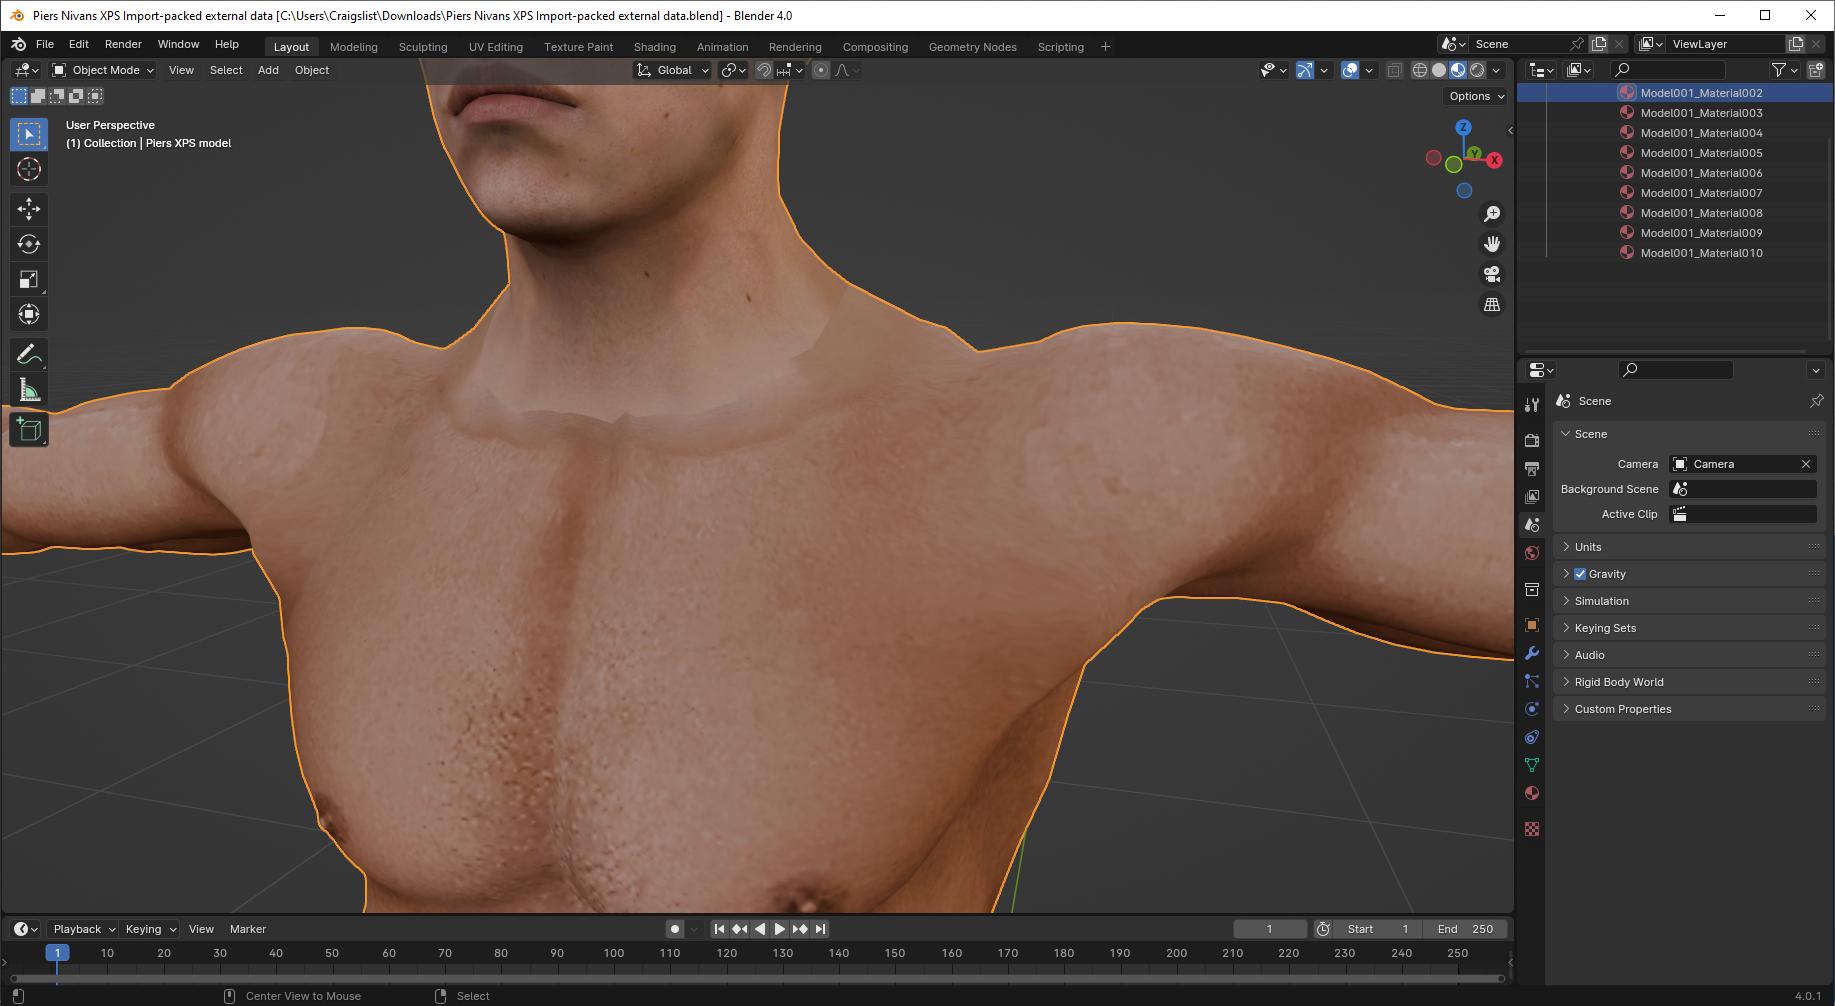
I downloaded an XPS model and imported it into Blender. I am trying to fix what appears to be a clear line where the head meets the body, even though the entire model appears to be only one mesh, already joined. I have tried using Mix RGB Node > Multiply > Hue/Shader to try and make the materials "blend" together seamlessly, but it doesn't work.

I'd like for the body and the head to blend into one. Not sure where to start.

Here you can see the line around the neck where the skin tone changes

here you can see the line around the neck where the skin tone changes

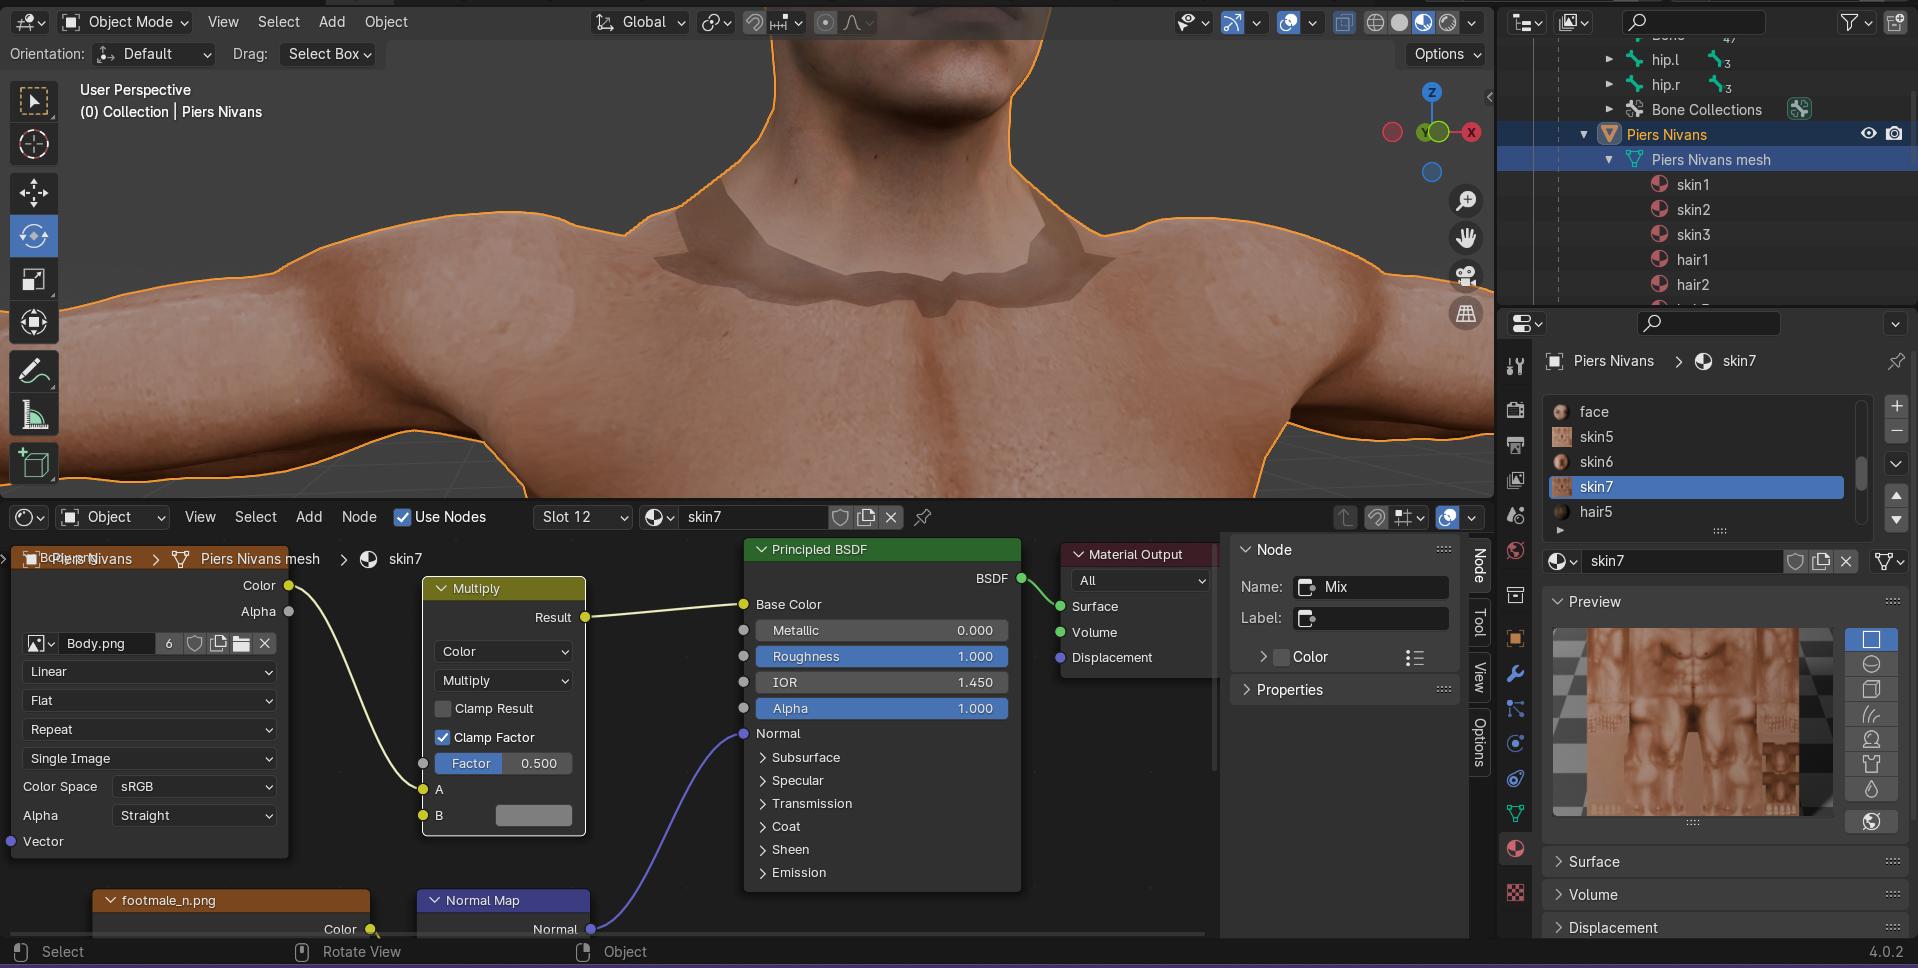
This is how the material looks when I use shader editor

enter image description here

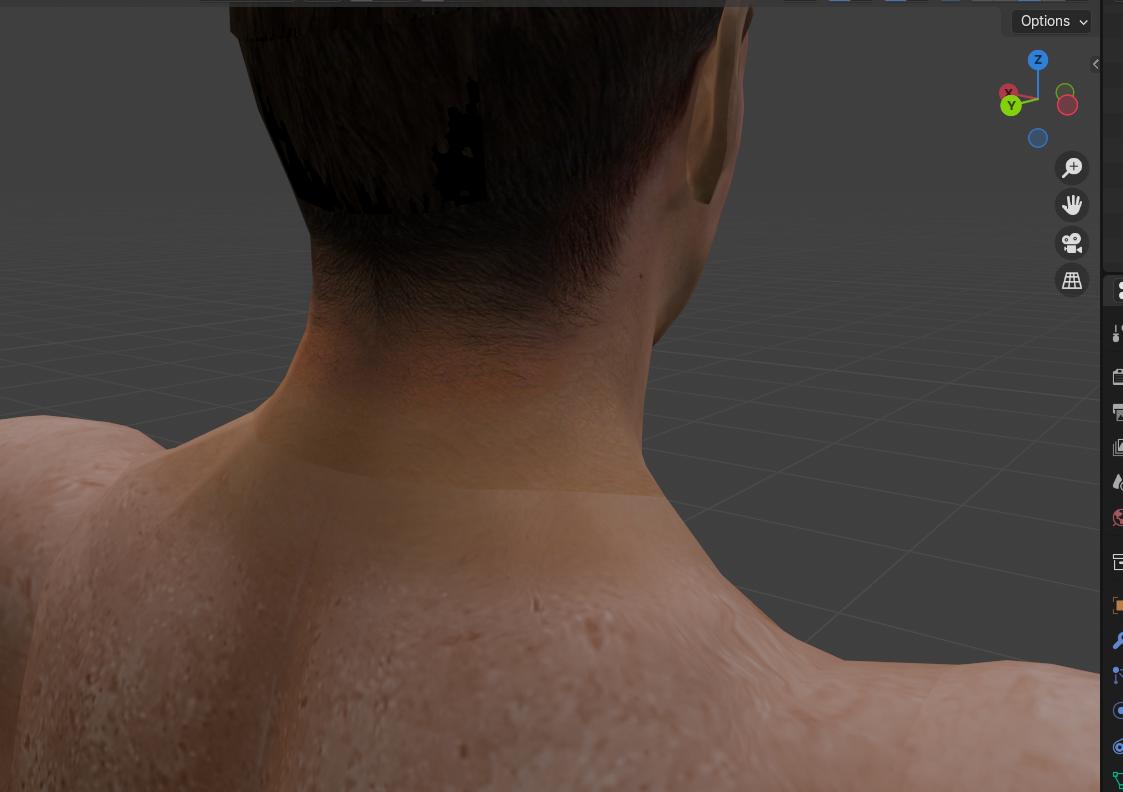
The line also continues around the back

enter image description here

Blend file with external data packed

EDIT

I followed the answer instructions and ALMOST fixed the seam, however, when I join the two meshes together, it recreates the seam. What happens is they become one object, but the faces become blurry, and when I select Shade Smooth, the seam is recreated and I am back at step 1. I'd like to rig the model for posing, but I cannot do that with 2 meshes. Is there a way to join the two meshes without recreating a seam?

$\endgroup$
4
  • $\begingroup$ You didn't include any textures. And the materials have different names than your pics. Your character is one object, but not one mesh (edges are split, aka vertices aren't welded.) It looks like several islands have different materials, and if you edit one material, you need to also edit the adjacent materials, or else, they won't look the same. Recommend: pack textures; use same names in pics as in file (just use the file to make the pics); if you've already made edits, like deleting what appears to be redundant geo, we need the original file. $\endgroup$
    – Nathan
    Commented Jan 26 at 22:54
  • $\begingroup$ Sorry about that! Very new to blender. I edited the post with the packed file. Please let me know if it works. This is the original file. I was making edits on a copy, but will use the original going forward. Yes, there are many vertices that are not welded. Will welding them fix the seam? $\endgroup$ Commented Jan 26 at 23:18
  • $\begingroup$ No, welding won't fix any seam. Hoping that there's some info in the original file that makes that unnecessary, but haven't looked at updated file yet. $\endgroup$
    – Nathan
    Commented Jan 26 at 23:55
  • $\begingroup$ Okay, let me know if there's anything else I can provide! $\endgroup$ Commented Jan 27 at 0:21

1 Answer 1

1
$\begingroup$

Looking at the original file:
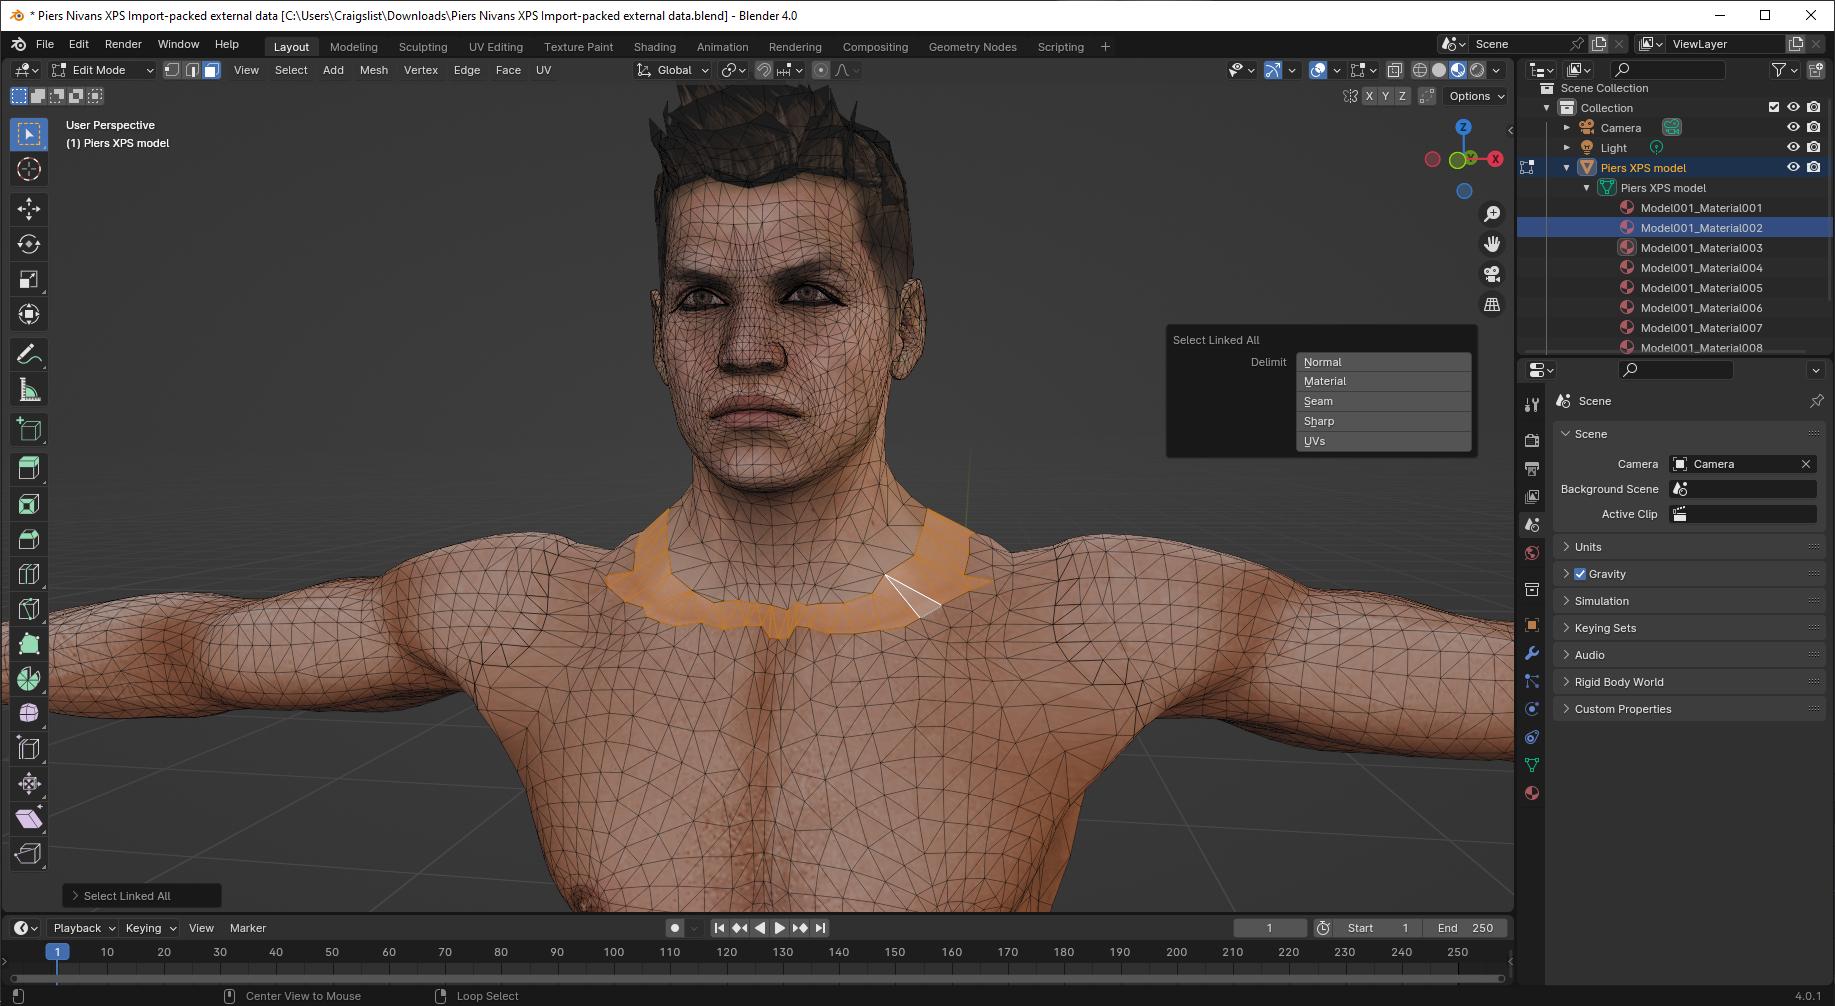
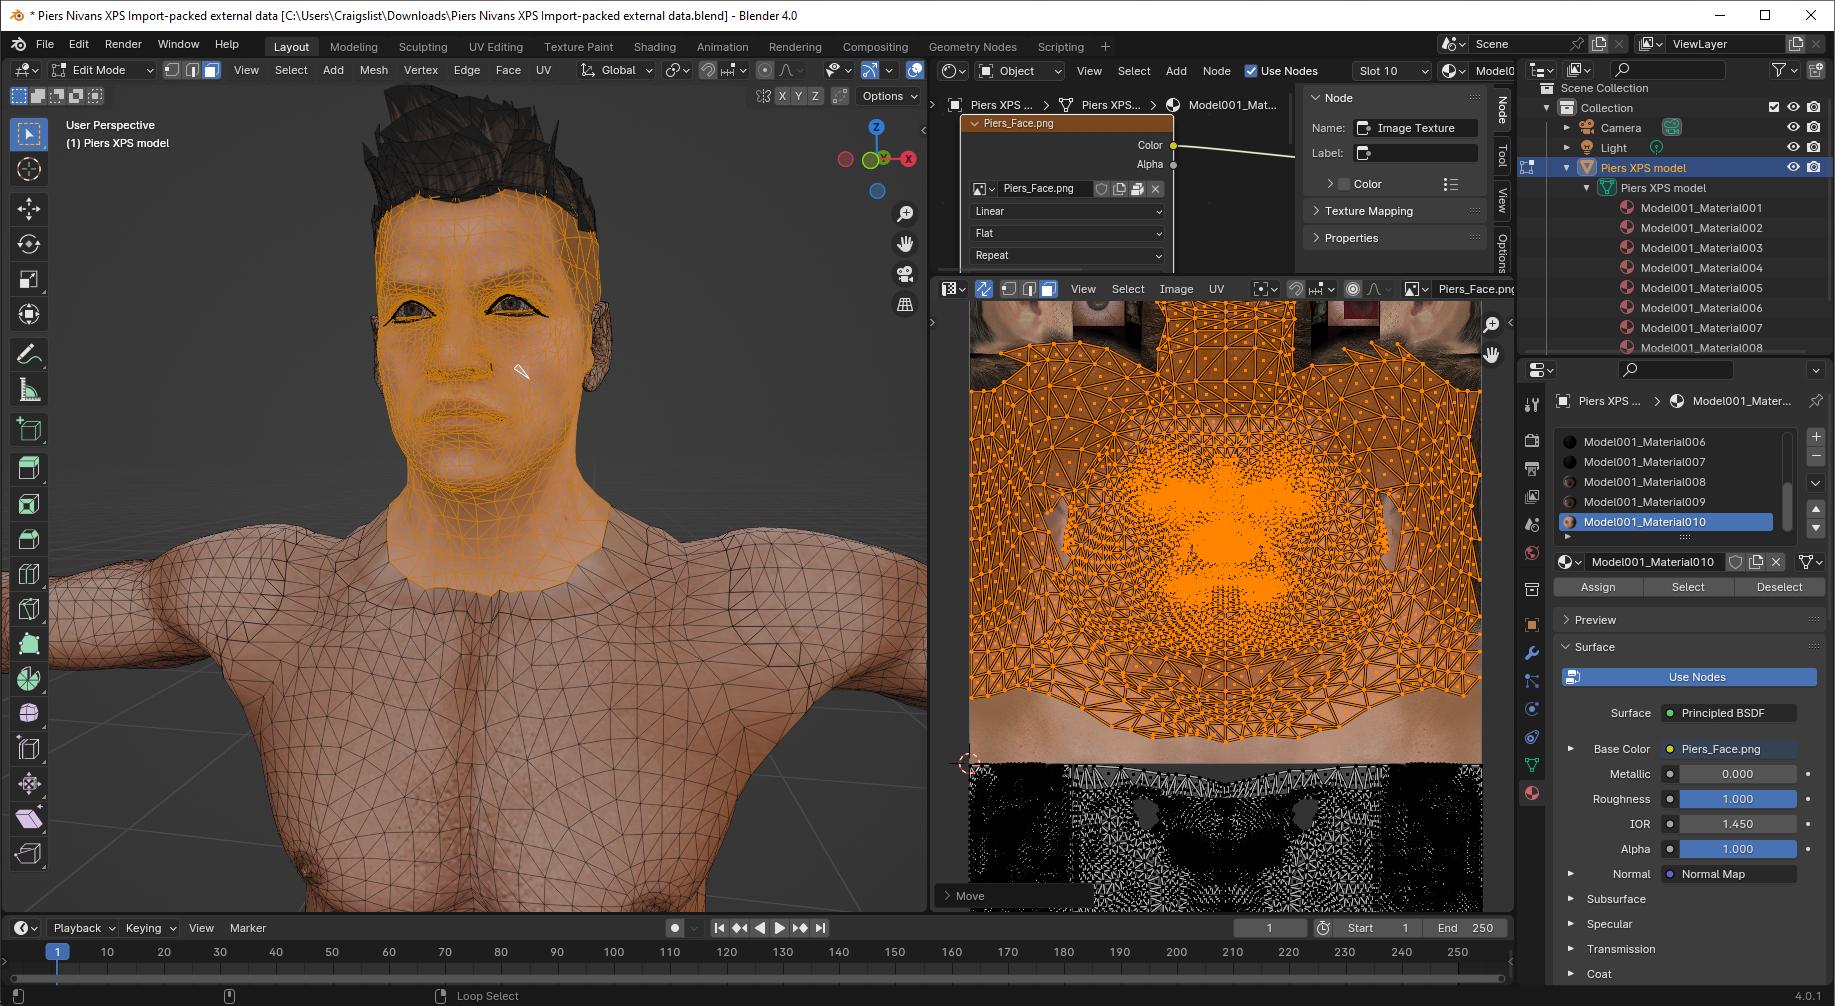
enter image description here

We've got a mesh with edges ripped along its UV seams. I'm showing one UV island with this linked selection. There is a visible difference in texture color. This might be the fault of the original model maker, but it's not impossible it's the fault of some importer that merged vertices that shouldn't have been merged-- this whole structure kind of looks like some techniques I've used to keep heads and bodies separate for convenience, but with some lost data that made it stop working.

Around the selected border, we've got three different mats. The head uses one image texture, this ring and the body below it uses another. But we can see that there's a healthy margin on the head texture, which means that this might be solvable:
enter image description here

Pic shown after moving head UV down a unit so we can see what we're doing. Tiling texture, so the only thing that matters is UV modulo 1, can move things in increments of 1 unit and nothing changes.

So, first, we'll reselect that original ring and separate it and the head above to a new object, then add a new UV map to this new object:
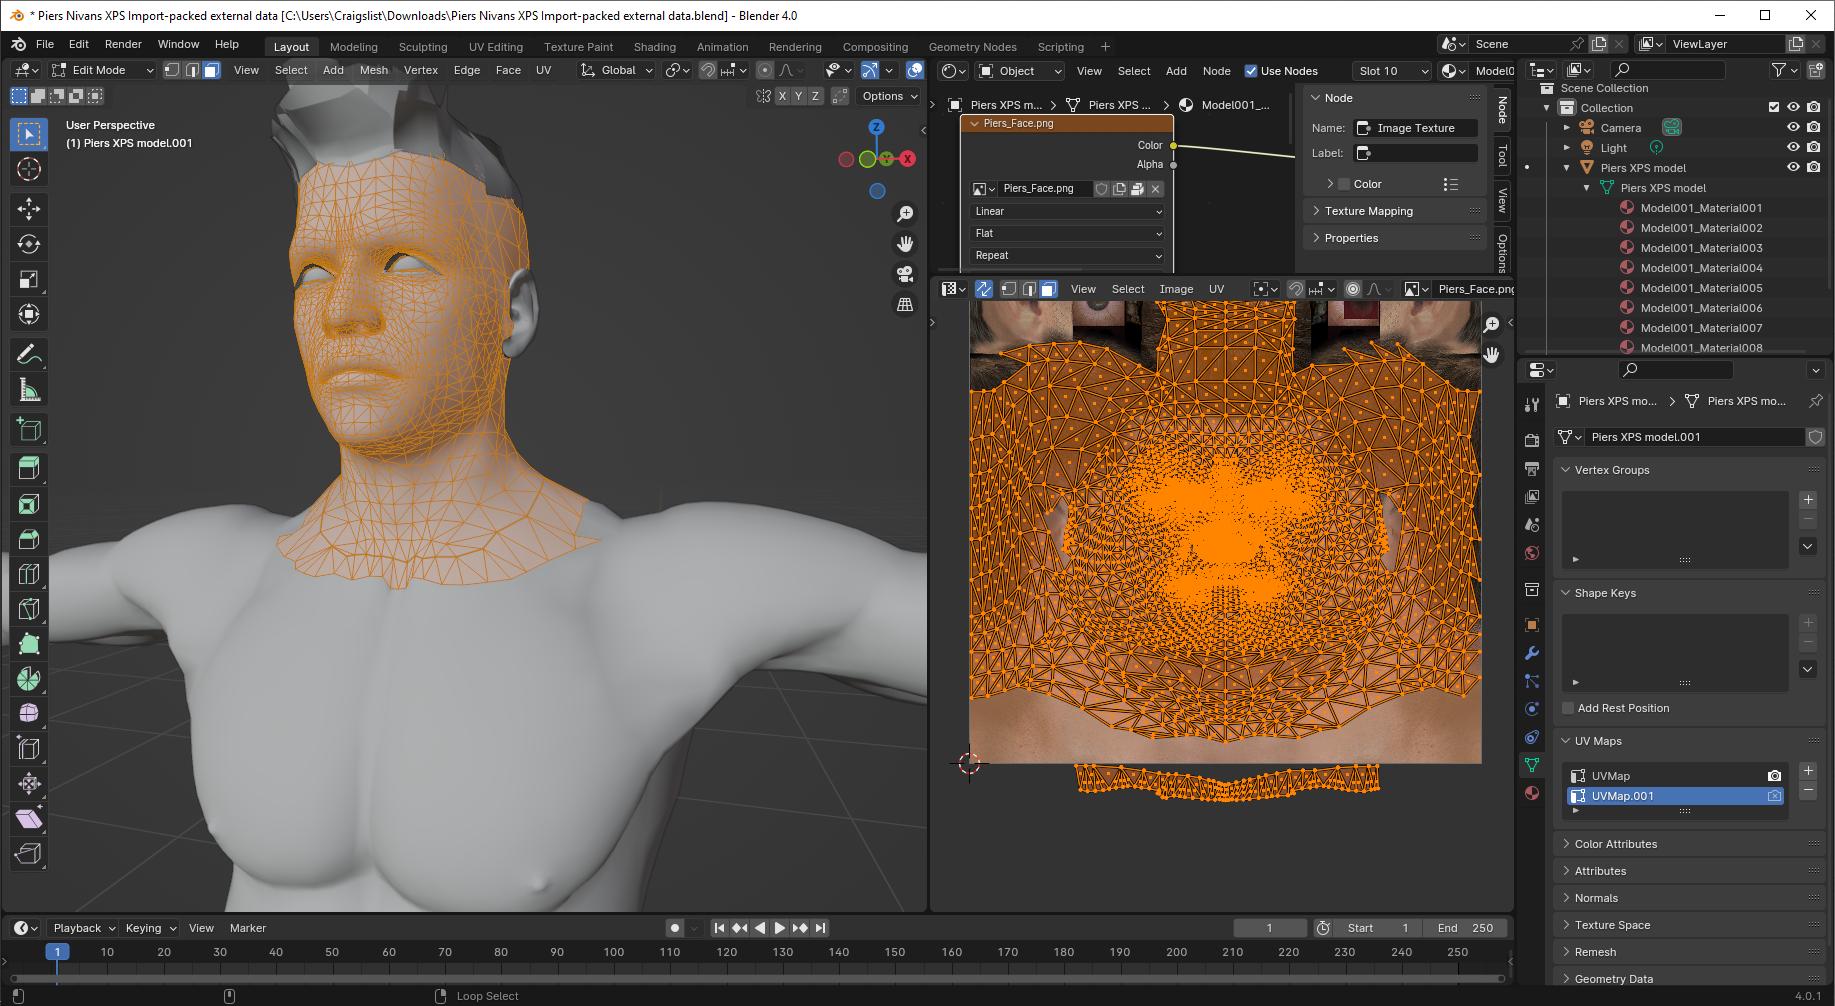
enter image description here

Merge vertices by distance-- careful, there are a few verts that have acquired a bit of distance greater than 0, that should still be merged. The head seam runs down the back of the head, so leave that edge ripped (or seamed) on the border faces. Pin the head vertices in the UV editor, then re-unwrap:
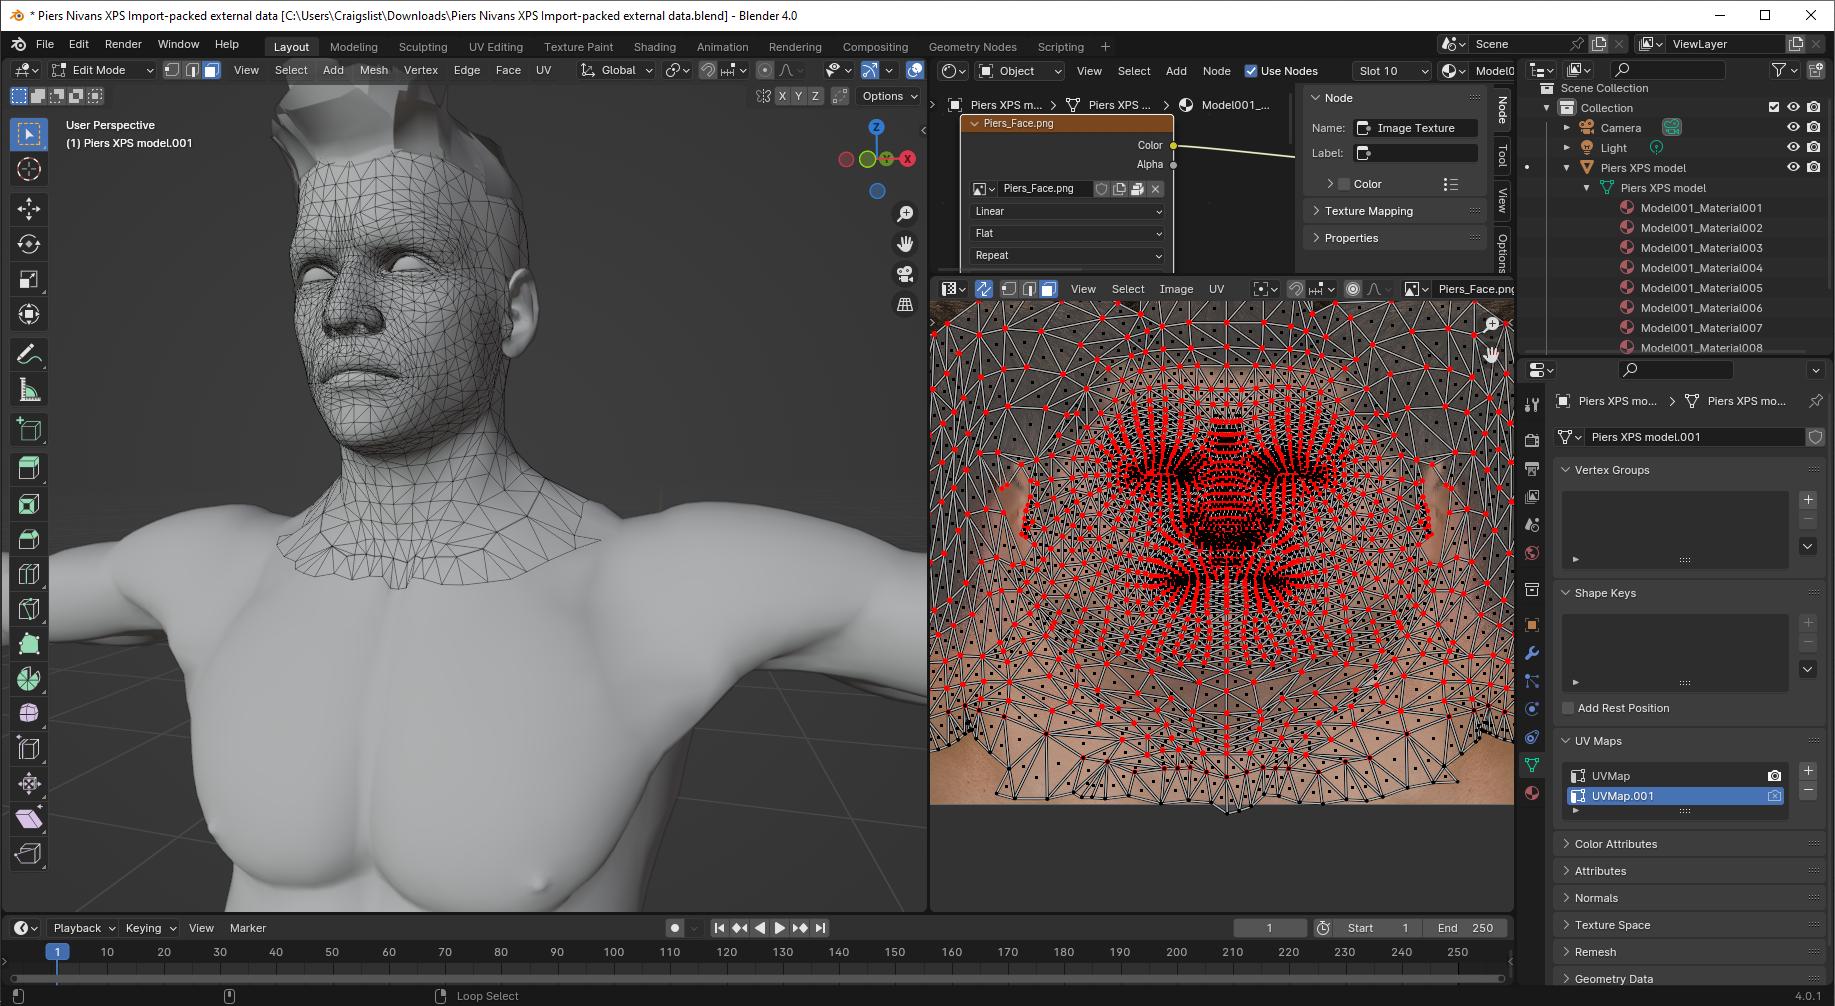
enter image description here

Some adjustments to eye to bring it into UV bounds:
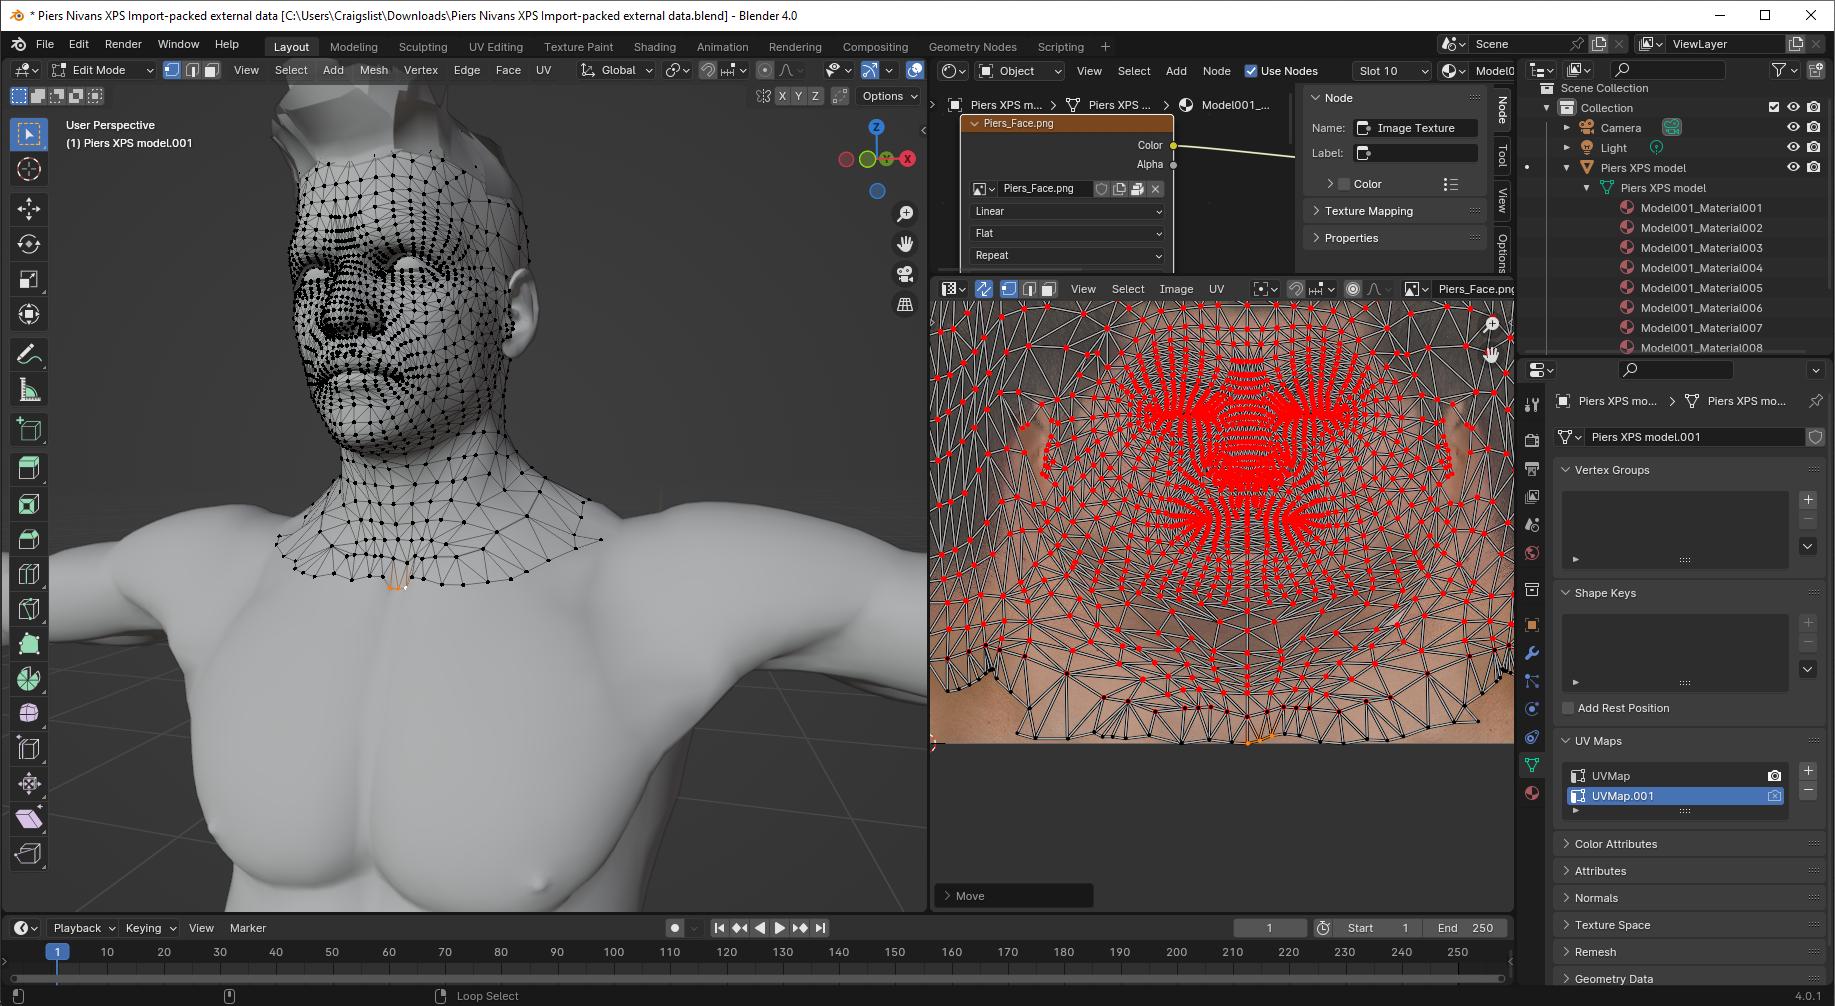
enter image description here

Now we'll create a vertex color layer and paint the margin black, and everything else white:
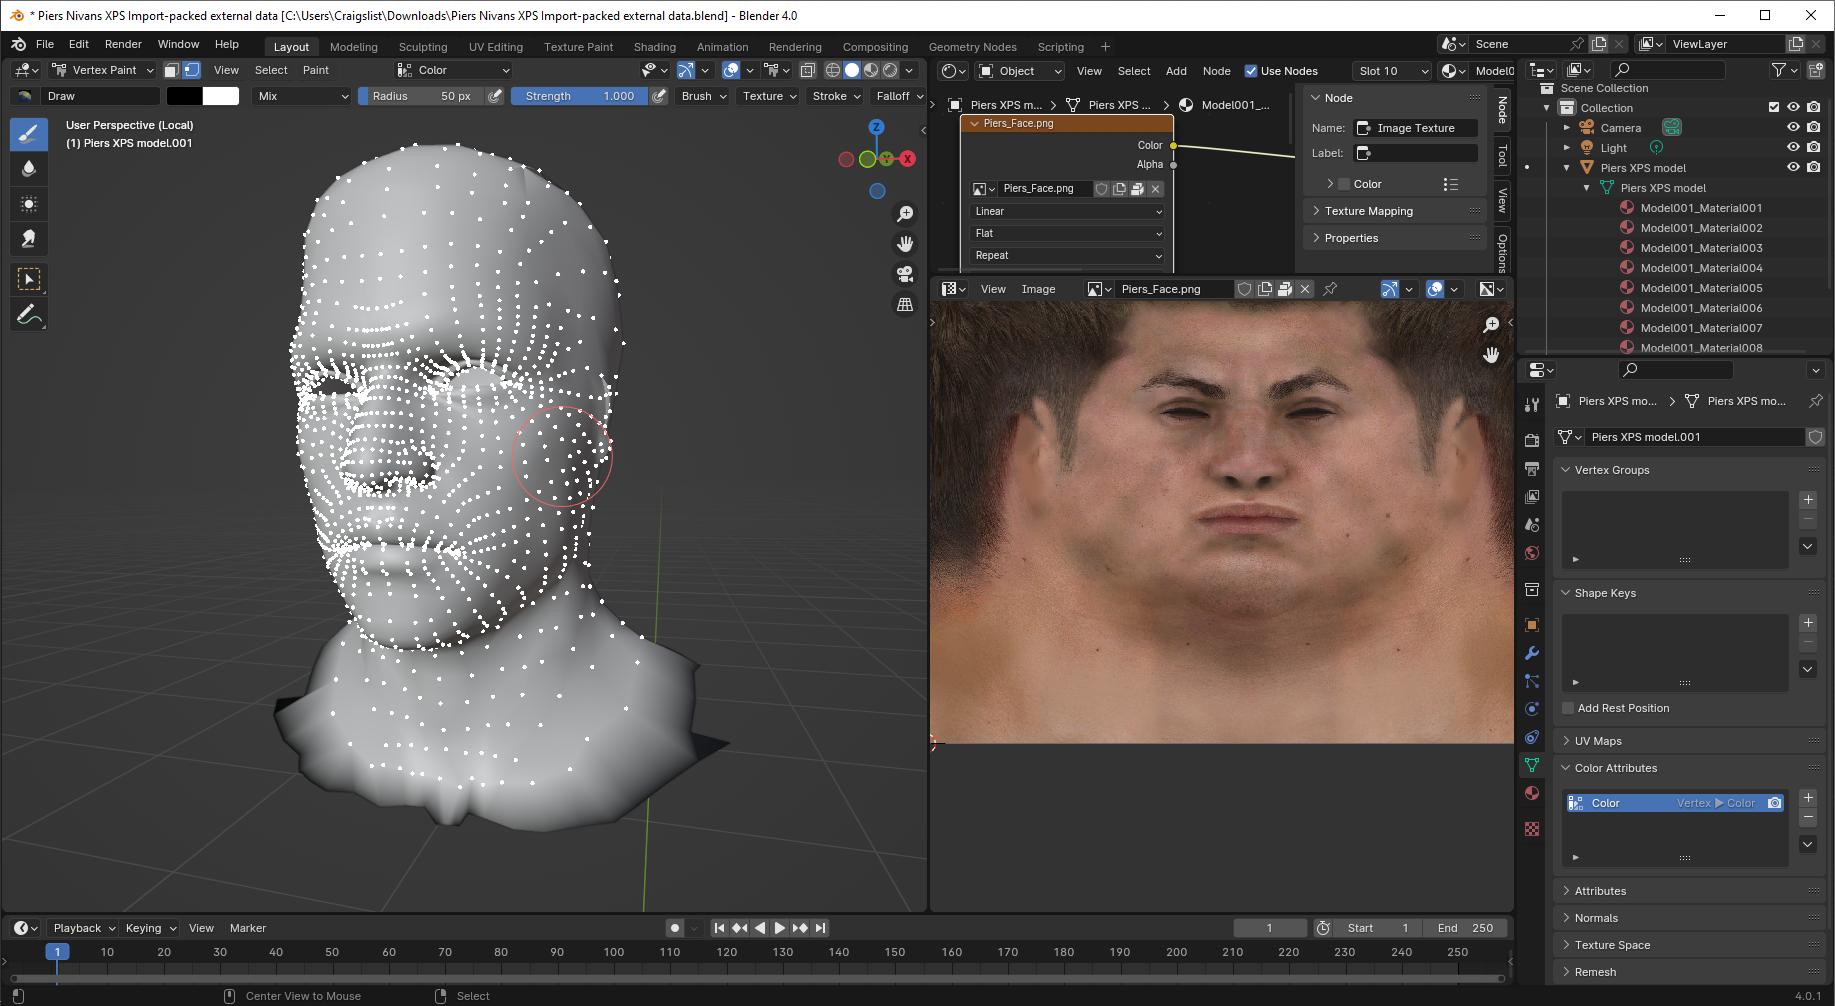
enter image description here

Some shader editing. We'll use the new UV map for the face image, and for the old material, we'll mix between old mat and face mat on the basis of our vertex color layer. We'll specify the old UV map for the old body image texture so that we don't have to worry about which UV map is "active".
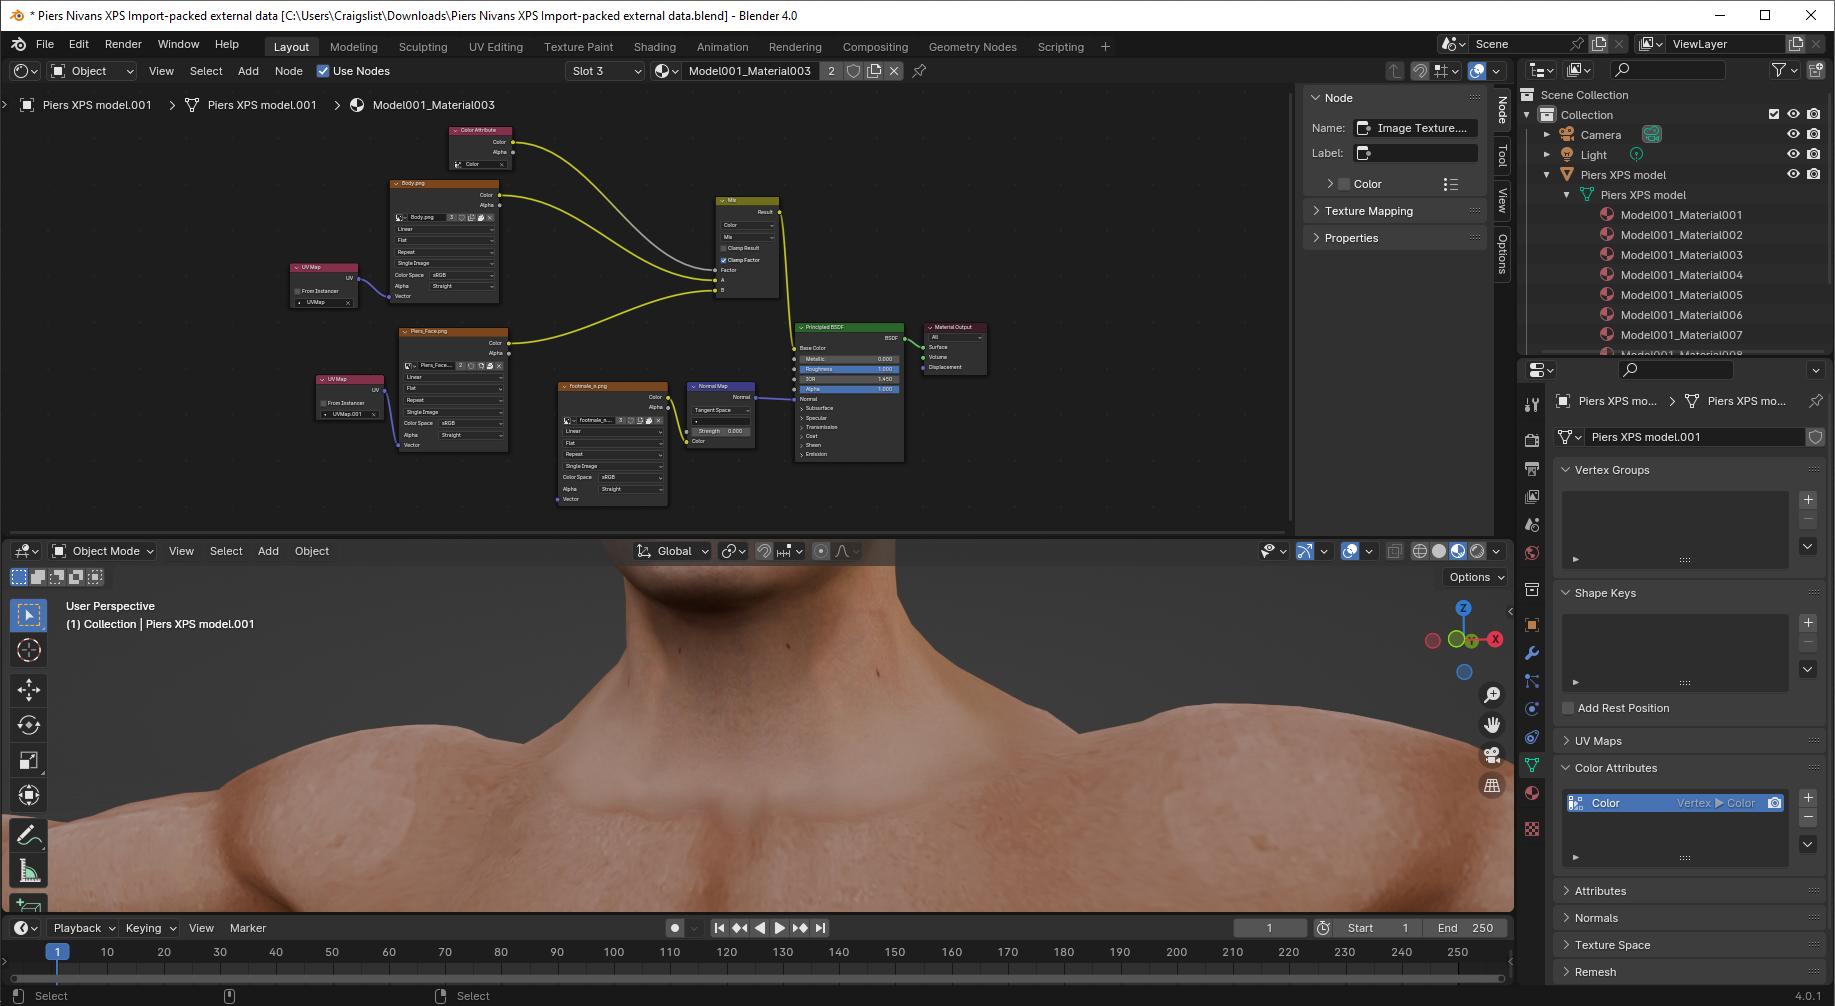
enter image description here

Perhaps add an RGB curves node to tune the interpolation from body texture to face texture:
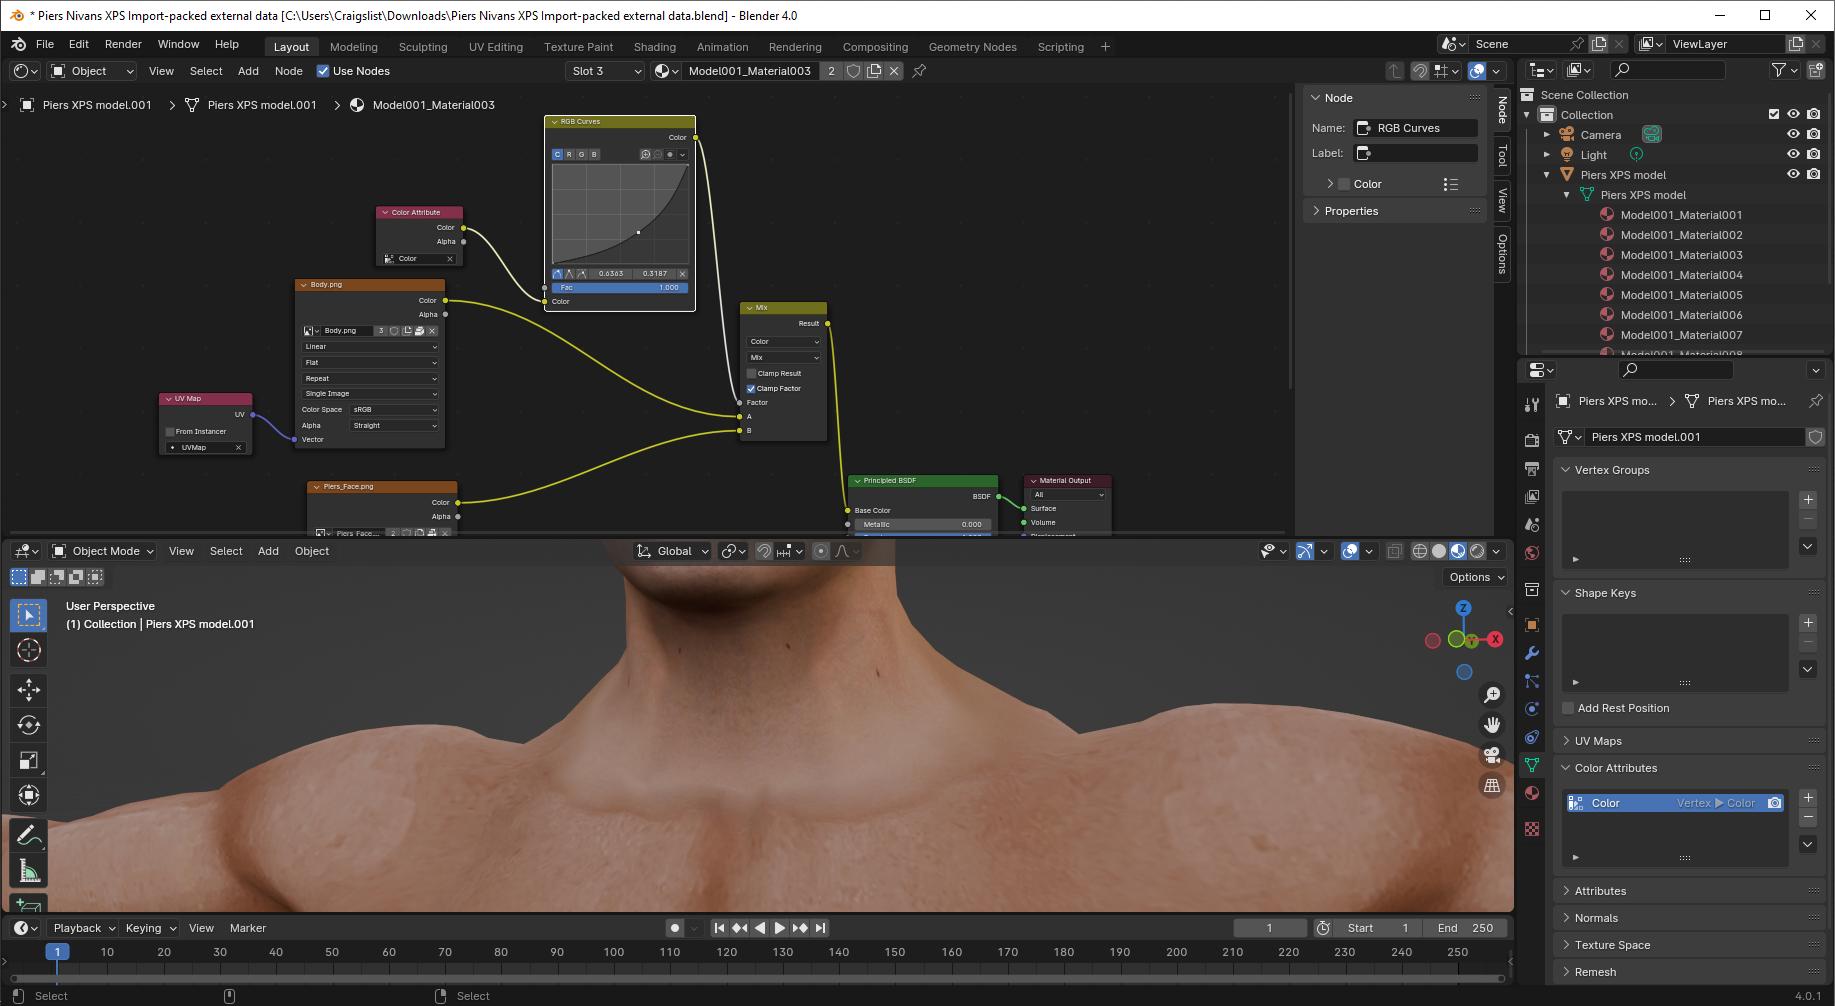
enter image description here

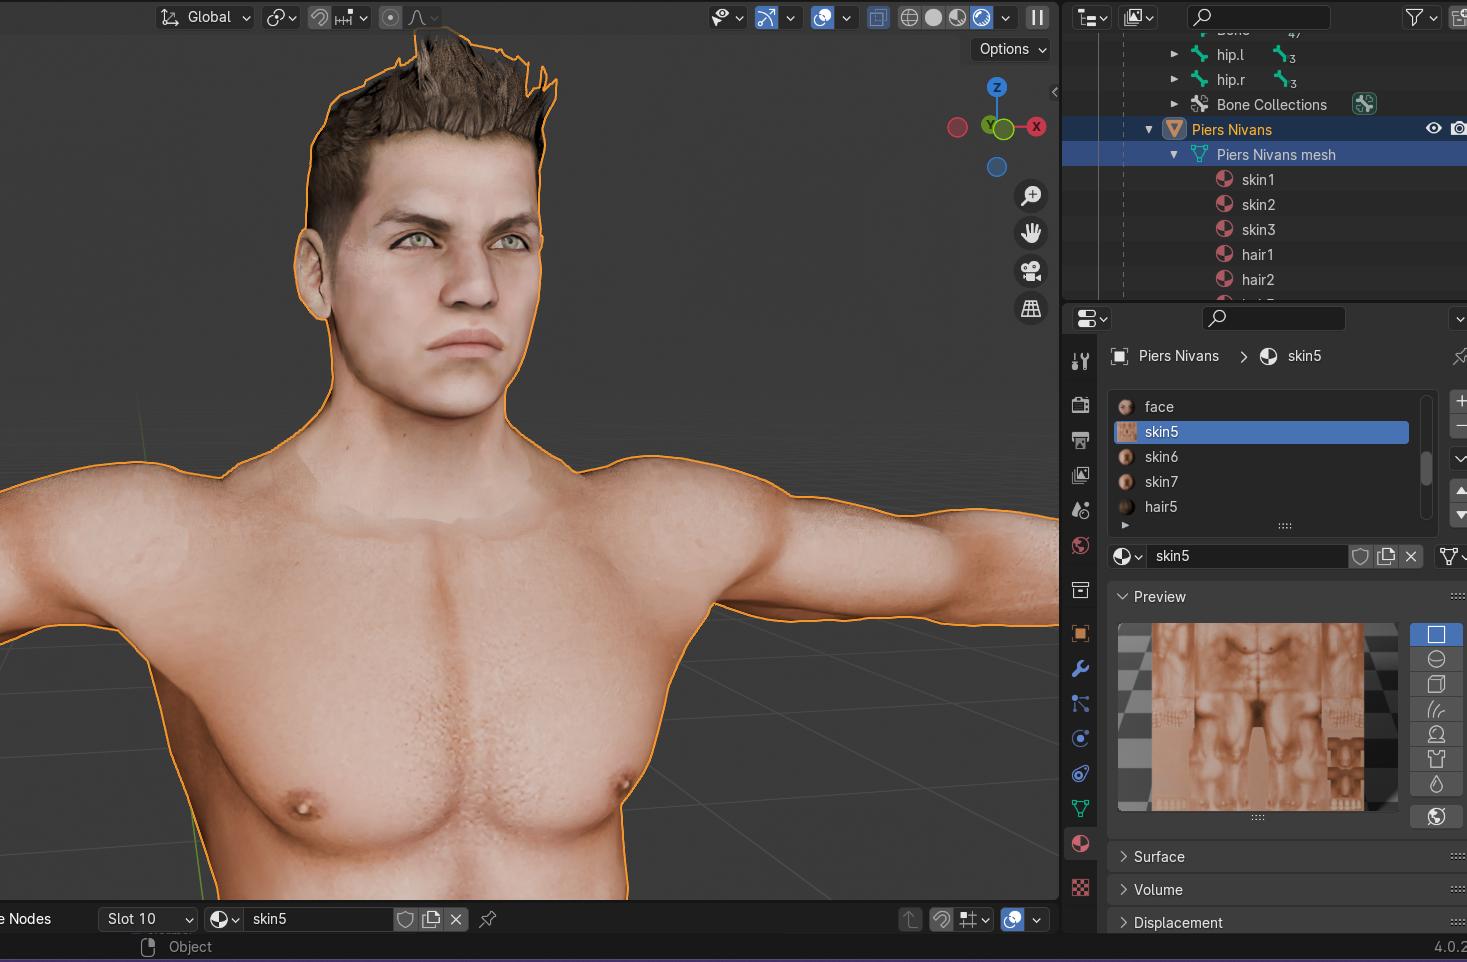
Compare to original:

enter image description here

We're smearing that border out by the size of a face. (In other circumstances, we might be able to do more, but here, that's about all the extra detail that exists on the texture images.) Any further blurring of the border, you'd want to do with texture painting, but doing so would likely blur some of the texture detail as well.

Can rejoin meshes if desired, that was just for convenience. Could look into the normal map to make sure it's okay, but I don't think it's a problem. If we wanted, we can bake this texture to a new map on whatever UV we want-- if you're interested in that, you'll want to be reading about texture baking.

$\endgroup$
3
  • $\begingroup$ I'm very grateful for your answer! This has helped me a lot already, but I think I am having trouble mirroring exactly what you did to achieve that. Is it possible you could edit and add what keys you selected for each step? I can get as far as separating the head and ring to a new object, but once I do that, I lose the UV Map and cannot select the head/ring vertices to merge them by distance. $\endgroup$ Commented Jan 27 at 21:56
  • $\begingroup$ The problem with adding hotkeys is that they depend on initial interface choices. I use 2.79 interface but most new users don't. You might be better off asking new, focused questions: why can't I/how to merge by distance, for example. $\endgroup$
    – Nathan
    Commented Jan 27 at 22:21
  • $\begingroup$ Hi, I edited my post after trying to join the 2 meshes. For some reason, joining them recreates the seam problem. $\endgroup$ Commented Jan 29 at 2:32

You must log in to answer this question.

Not the answer you're looking for? Browse other questions tagged .