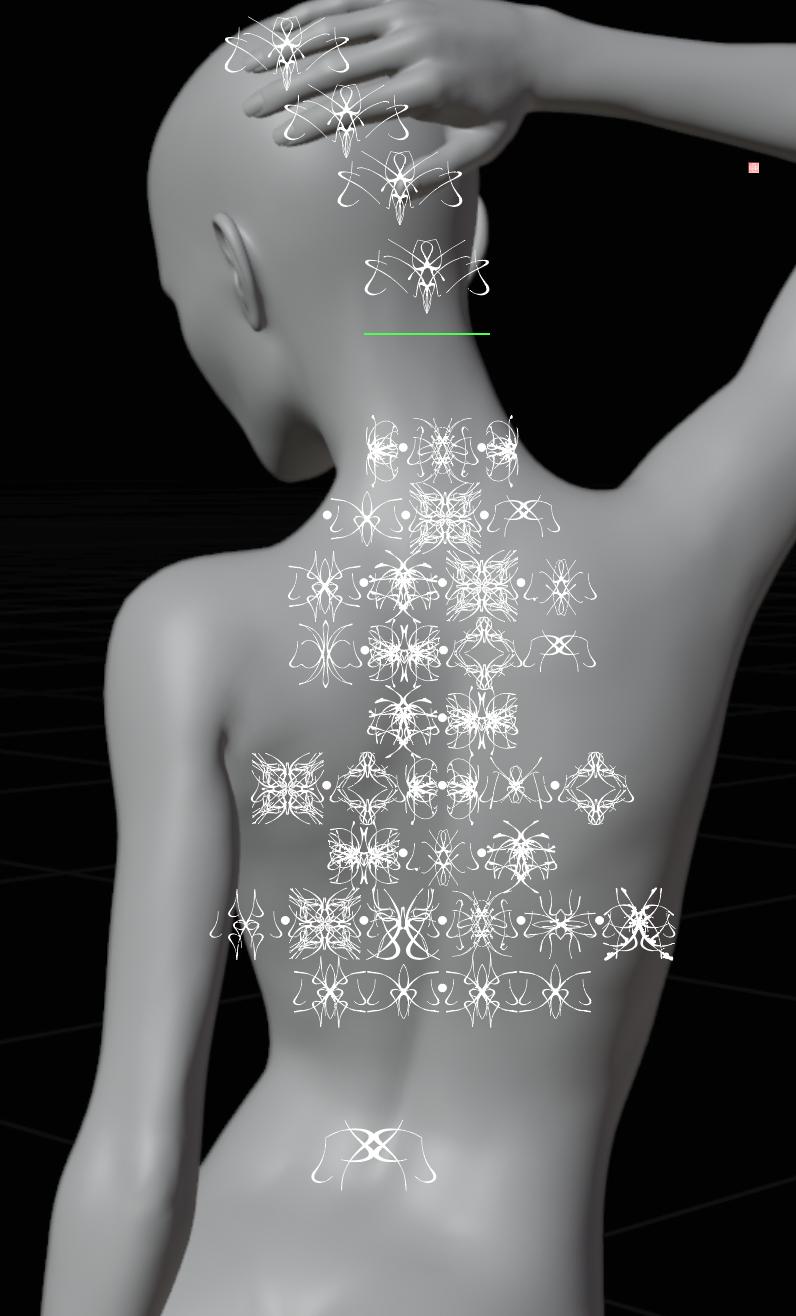
Is there a way to mask the shape on the model and extrude?
Yes, to some degree. You can UV map the faces that you want to have the motif to the image of the motif. Then, using a Displace modifier, you can apply the displacement according to the UV map. You will need enough mesh resolution to see the pattern.
Or does it have to be fully sculpted?
No, but if you want to sculpt it, it is definitely possible by using the image as a texture for the brush. You will still need enough mesh resolution to see the pattern. If you use Dyntopo, you may not need to subdivide the mesh beforehand.
Or possibly a way to bend the solid SVG motifs against the line of the body?
If you want, you can do that with modifiers. You will need to convert the imported SVG curve to a mesh and model it into a 3D shape. Then, you will bind it to a subdivided plane using a Surface Deform modifier. Finally, using a Shrinkwrap modifier, you will project the plane to the model's surface. This option won't require a dense mesh as the motif geometry won't be connected to the character's mesh.
Please let me know if you want to know more about any of these approaches.
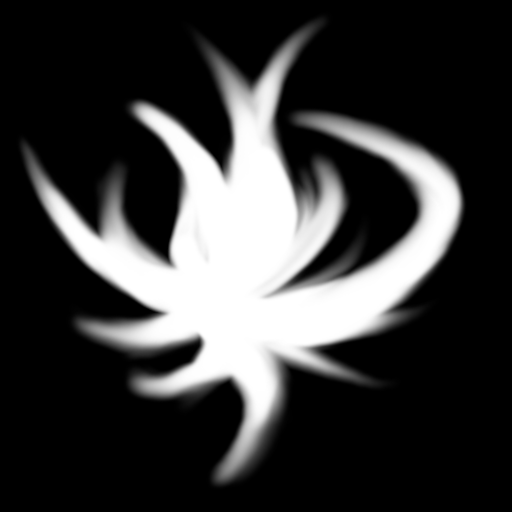
Update: The steps below cover the second approach. The motif needs to be a grayscale image where black represents no displacement and while represents full displacement. The image I used in my setup is attached below. It's 512 x 512. The resolution is not that important, but it should be square.

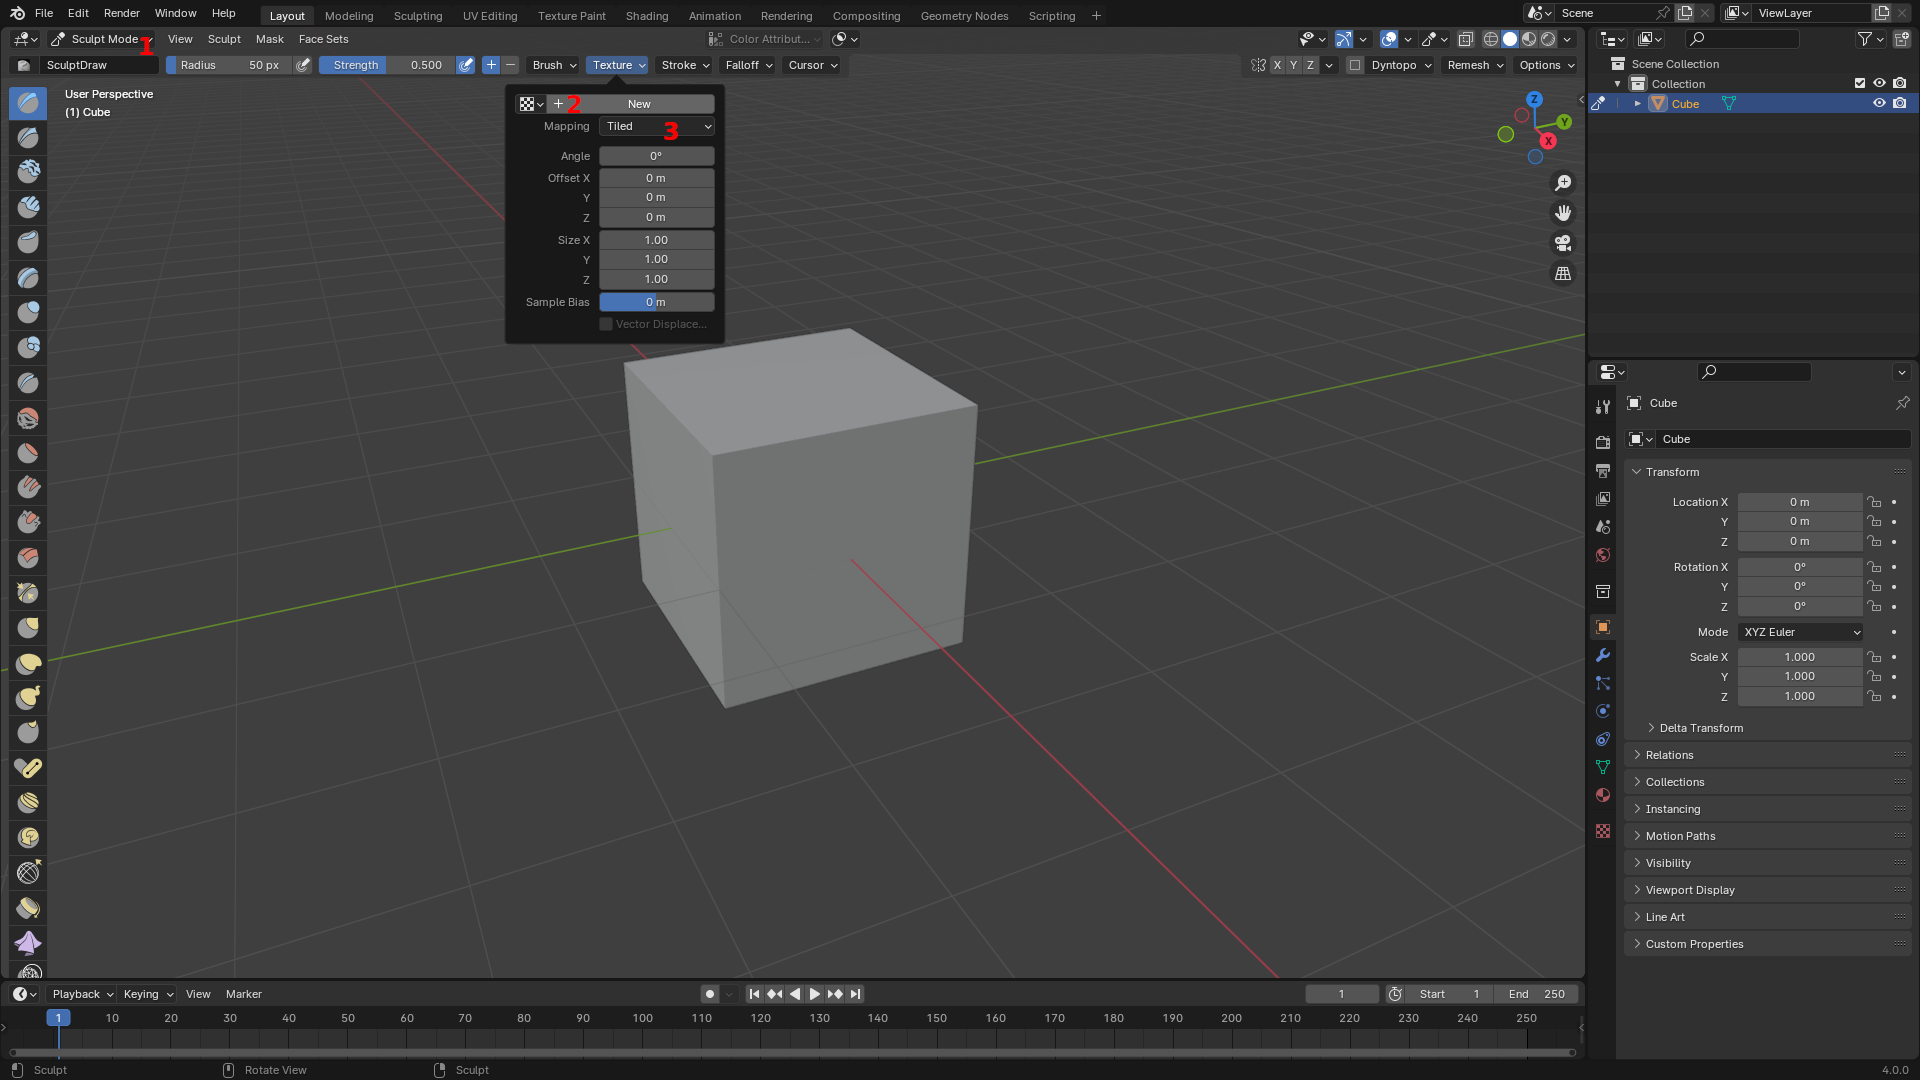
- Select the object and switch to Sculpt Mode.
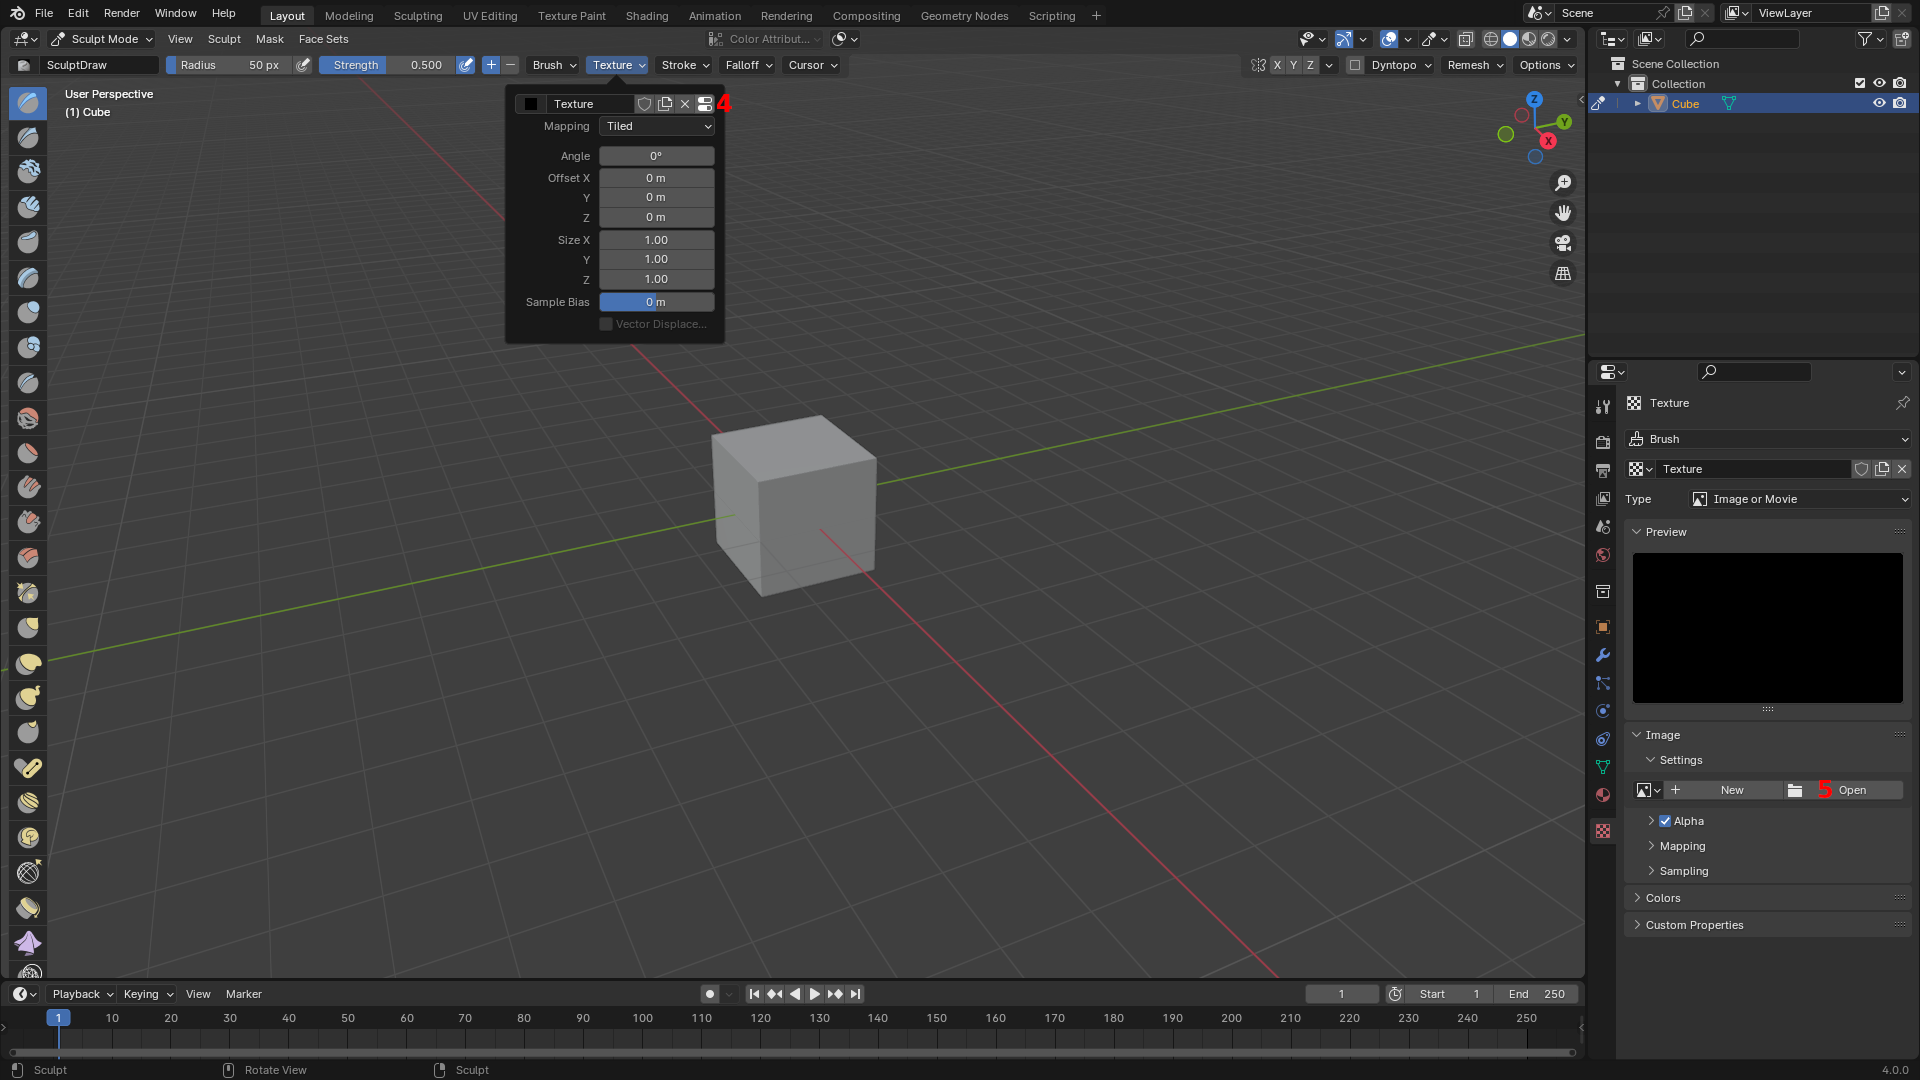
- Open the Texture panel, and click the New button to create a new texture.
- While here, set the Mapping to Area Plane.

- Once a new texture is created, four buttons will appear. Click the last one on the right. This will open the Texture Properties.
- Open the image by clicking the Open button and browsing to the image.

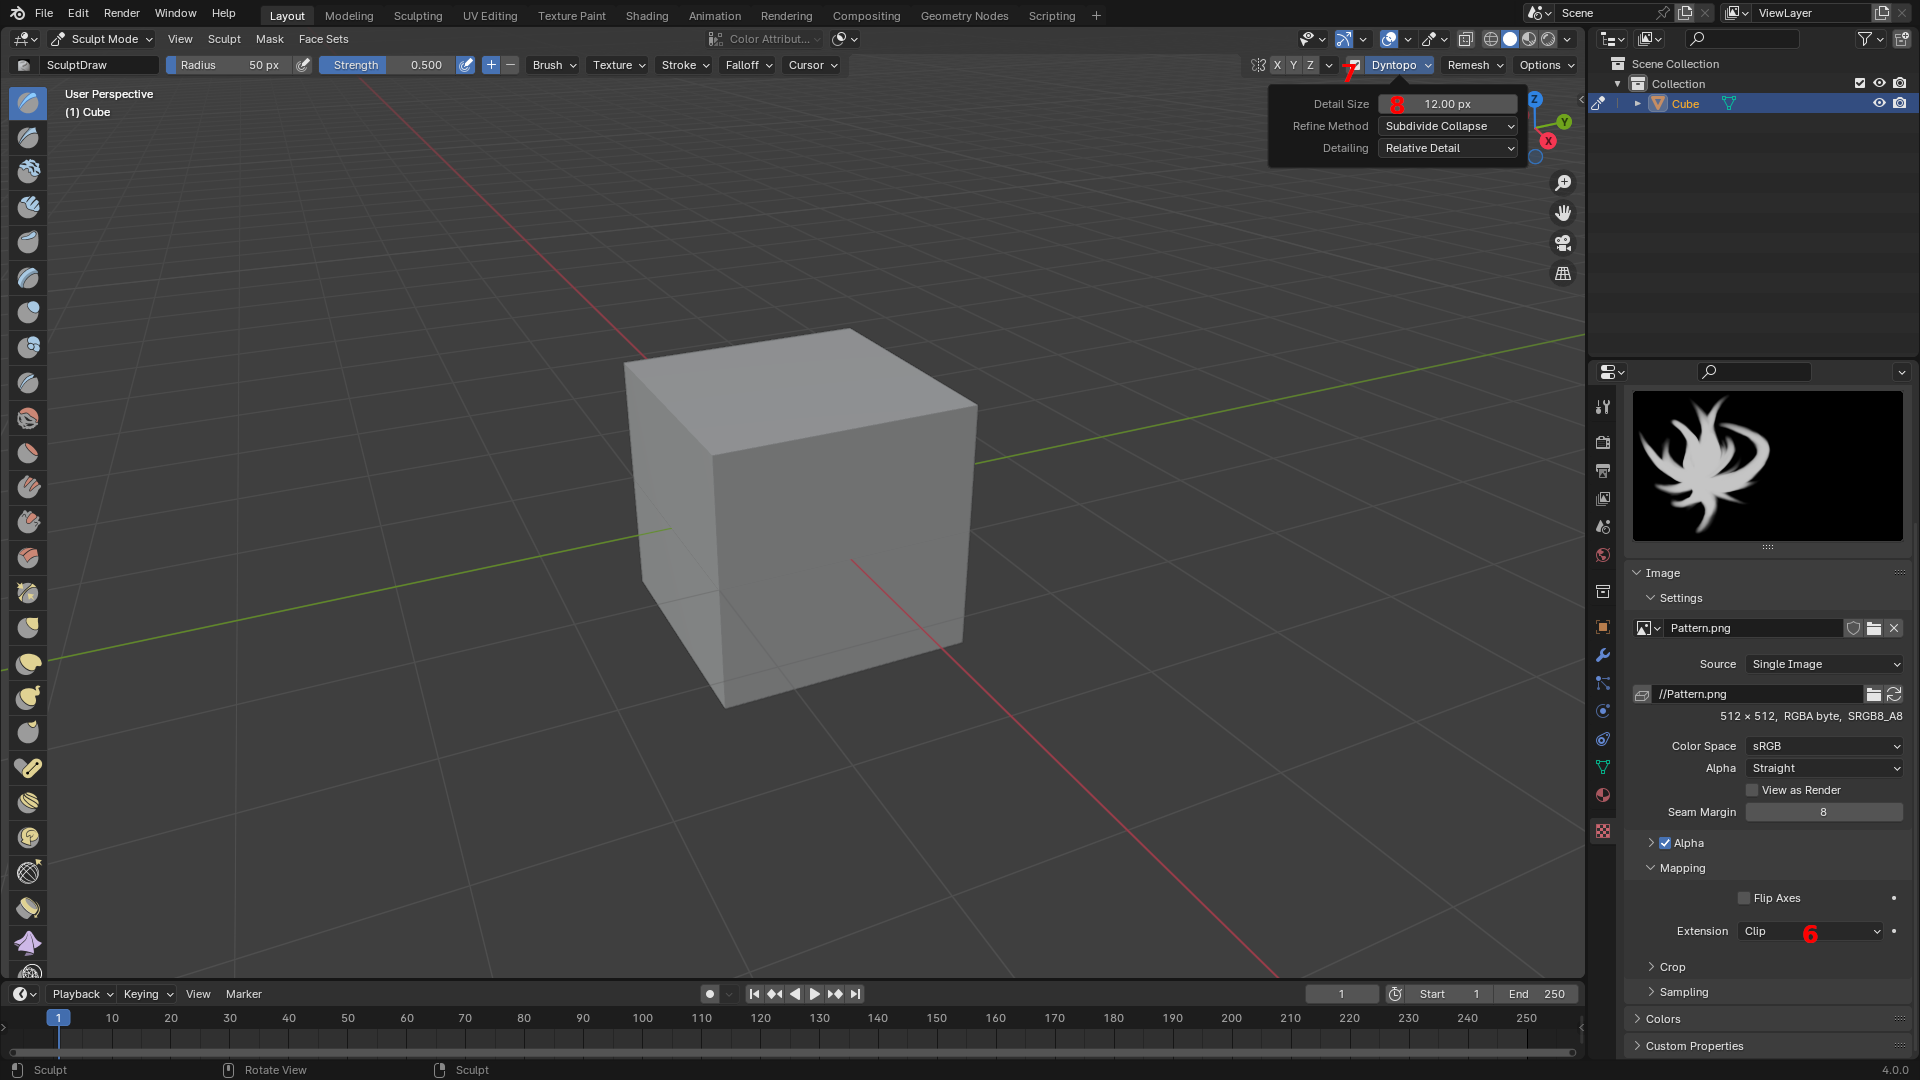
- Change the Extension under Mapping to Clip.
- Enable Dyntopo by clicking the checkbox next to its button in the 3D Viewport.
- Open the panel, and set the Detail Size to something around 4.00 px. You may need to decrease it further to get the resolution you need. The smaller it is the heavier it is to sculpt a motif, but the more resolution it will have.

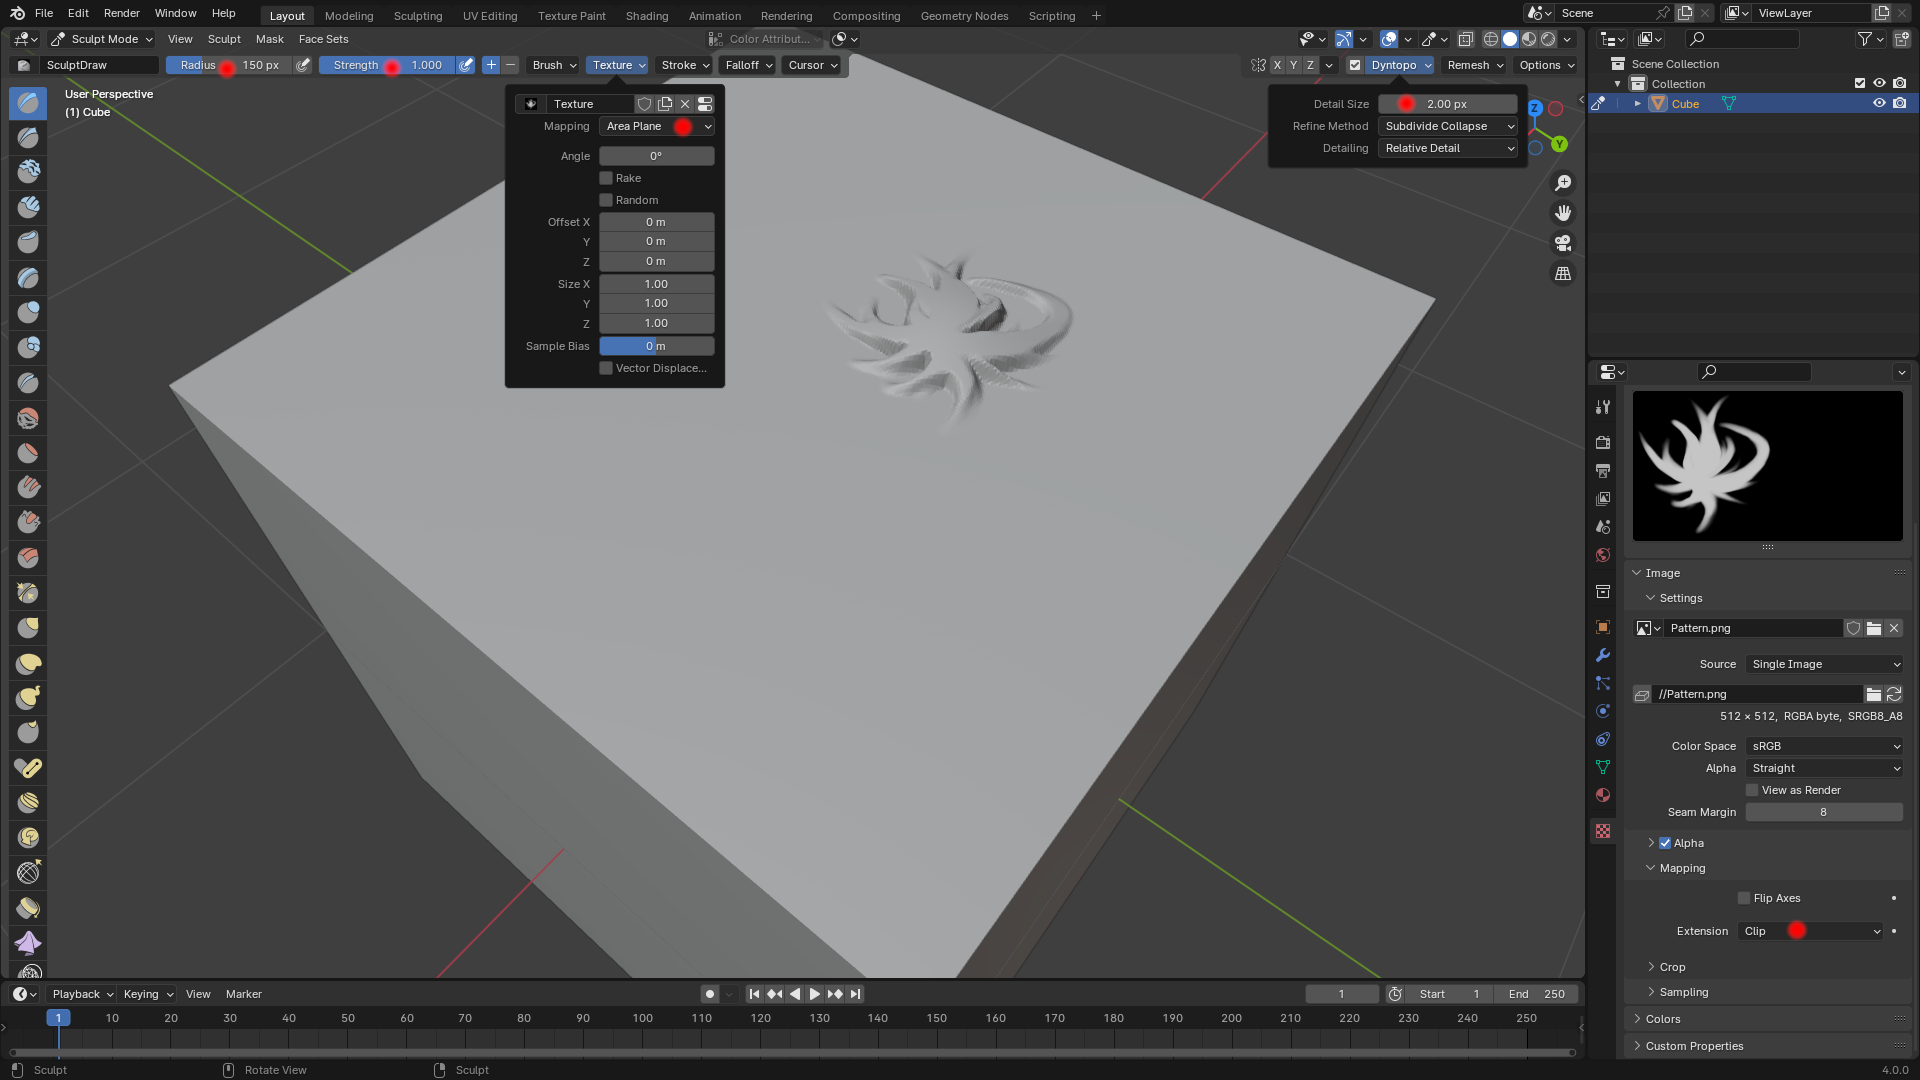
The setup is done now. You only need to click where you want the motif to show up. Please make sure not to click and drag. Also, don't forget to adjust the Radius and Strength of the brush.
The screenshot below show the settings I used and a sample achieve by clicking once with the brush. I marked the important settings.

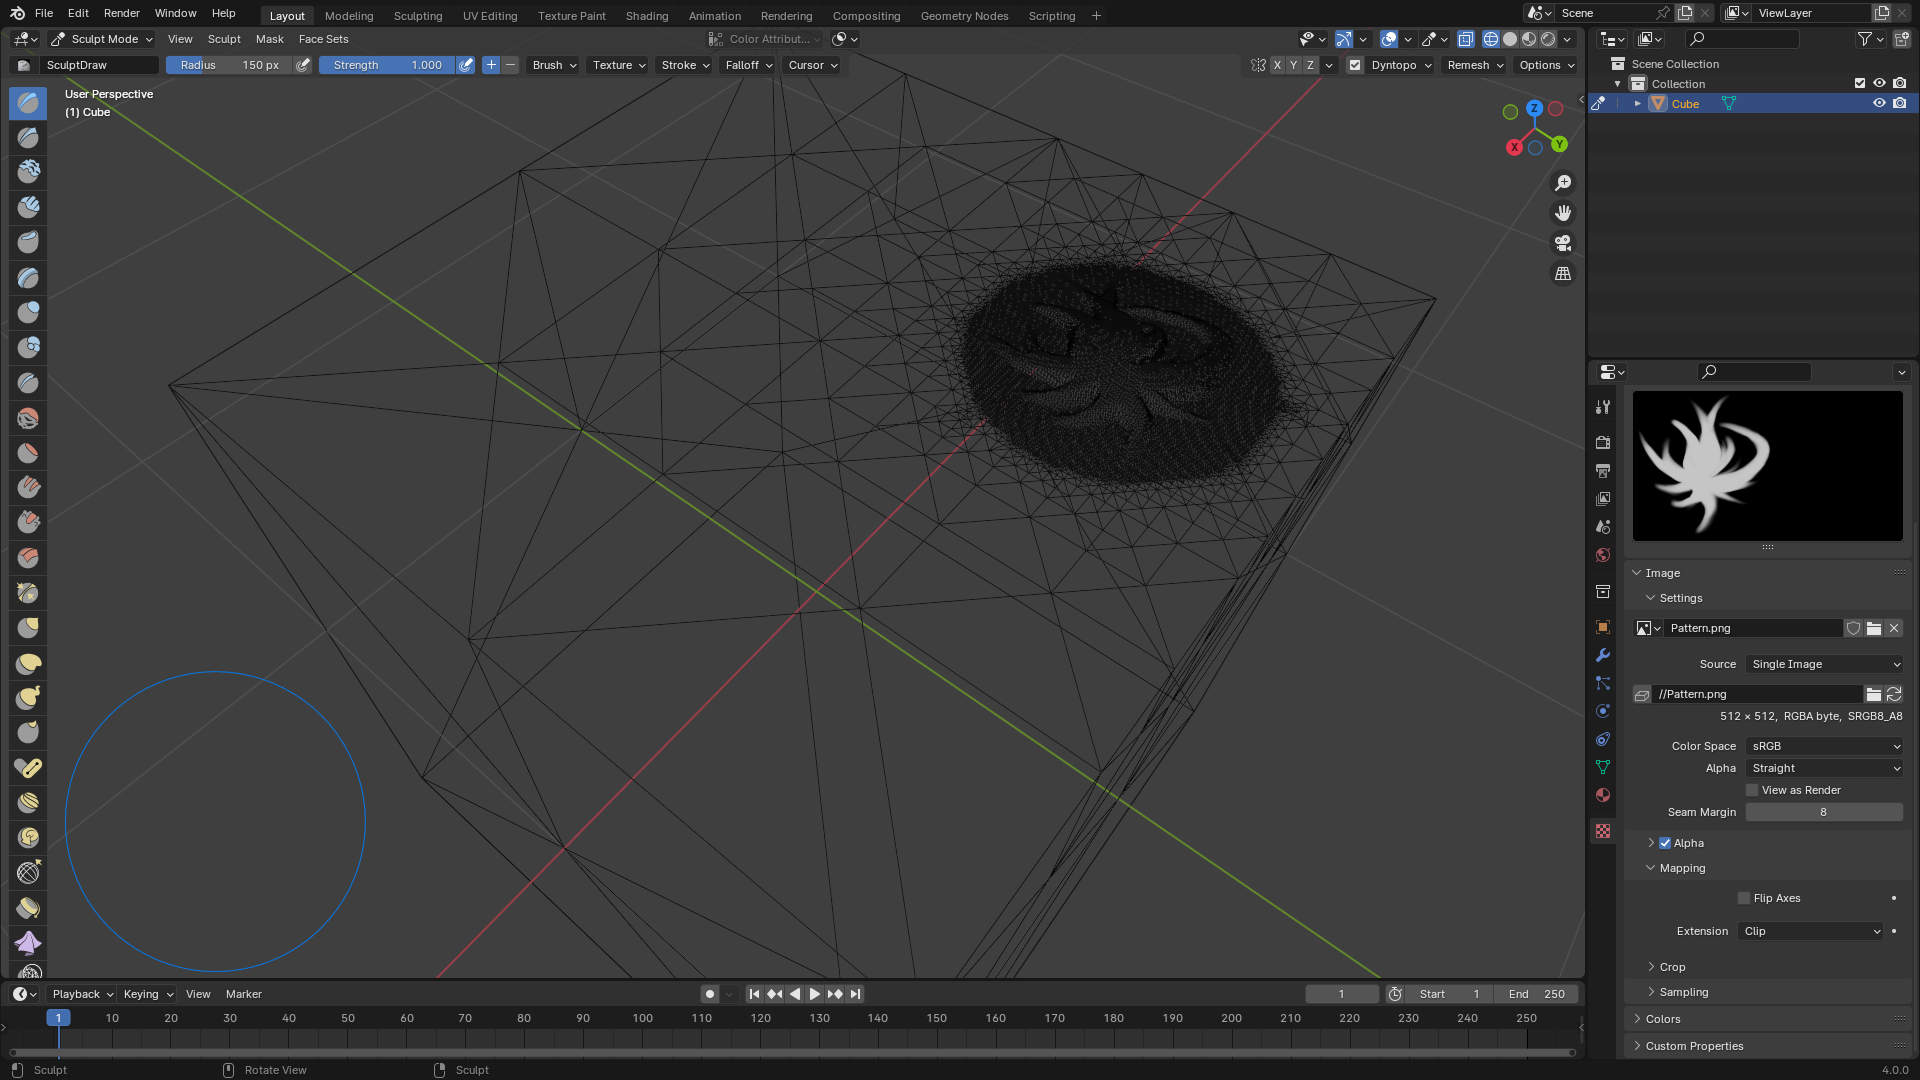
I attached one more screenshot that shows how a brush click modifies the geometry.
