2
$\begingroup$

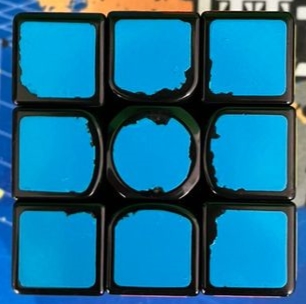
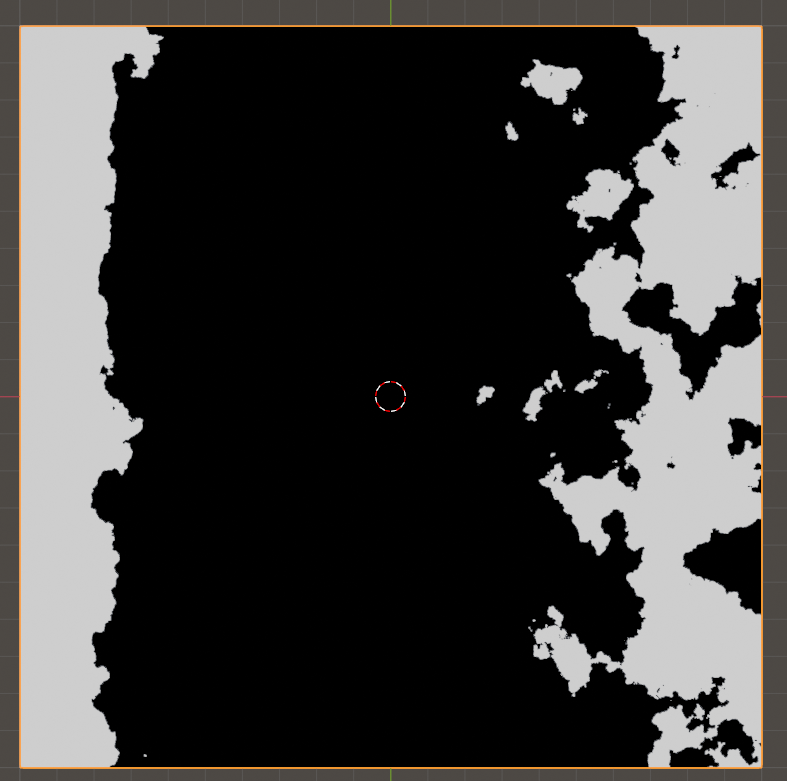
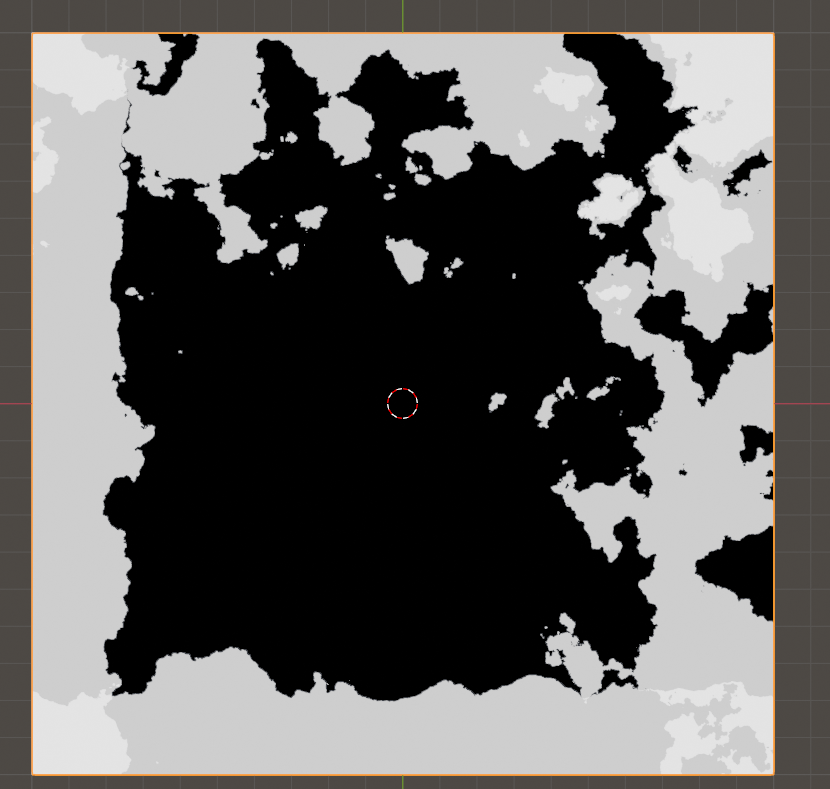
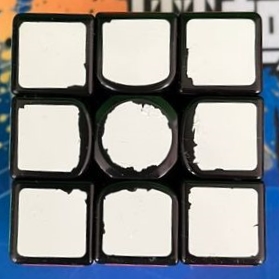
I asked this about edge wear, but I need to change my question to see if I can make a flat plane have random edge wear. Is there a way to do this to a plane with the shader nodes so make the edge wear random and I could change a value to give it more edge damage or none at all. I'm making stickers for a Rubik's cube and want to make it realistic. The damage is more on the sides closest to the center of the cube. I've already got my sticker shapes as a plane for each piece on the cube, so I don't need to use geometry nodes to make the shape. I have the idea that I can just add a solidify to the plane to give the sticker its thickness, and the solidify will thicken what's left after the edge wear makes some edge chip away. And maybe I can figure out how to use weight paint to mainly effect certain edges because as you can see the edge wear isn't all around the sticker and if it is, it's lightly chipped away and mostly focused on the edges towards the center of the cube. This last part is just an idea but not a must, I just thought it would be cool.

enter image description here enter image description here

Here is the link to the other question I did but I think I asked it wrong and I thought I should do the edge wear to a plane instead of a cube shape. create a damaged edge with shader nodes

$\endgroup$
2
  • $\begingroup$ "No geometry nodes" - why not? You say you want a shader solution, but you also say you want to then apply solidify to what's left. But solidify works before a shader, so it can't affect what happens after the shader, unless you render once, and then take the rendered image as an input to a displacement modifier before rendering the second time. $\endgroup$ Commented Mar 11, 2022 at 16:36
  • $\begingroup$ I just assumed since I already have the shapes made for each sticker that I don't need to remake them with geometry nodes, cause from what I've seen geometry nodes will make shapes. I may be wrong, I've only seen a few videos about geometry nodes. But if there is a way to make this effect and have the solidify apply after the shader to my existing shapes, then that would be nice. I just didn't think that was possible. $\endgroup$ Commented Mar 13, 2022 at 14:47

3 Answers 3

3
+50
$\begingroup$

Here's one approach that will give you roughly what you want:

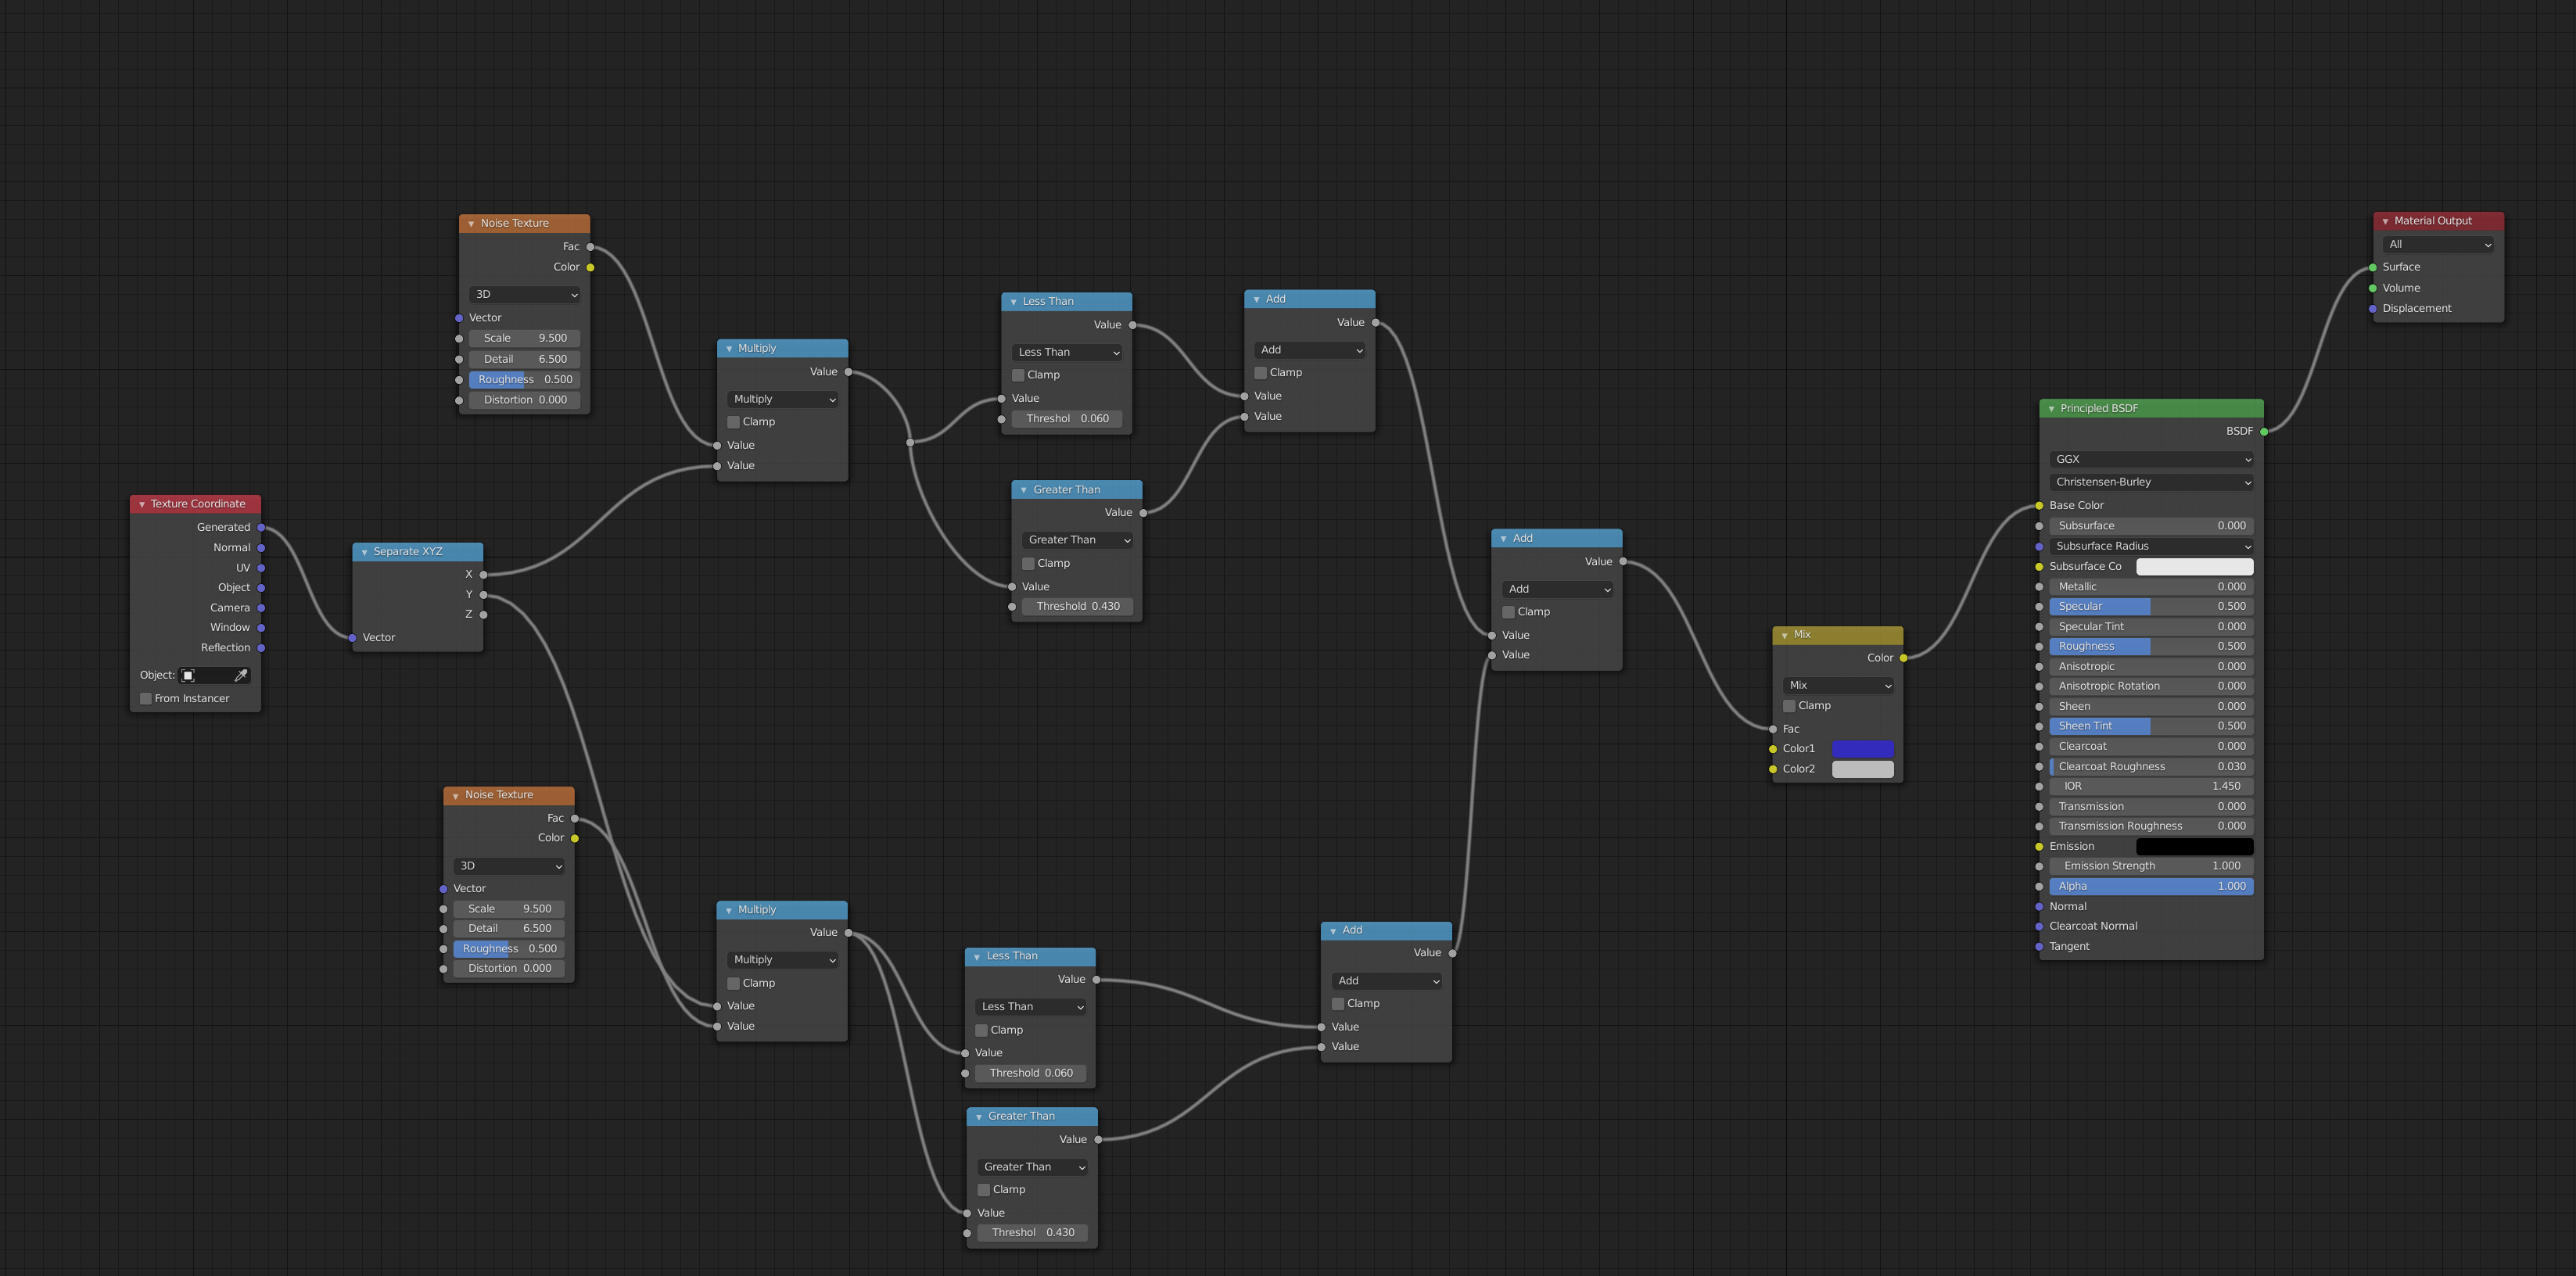
Boundary Math

If you adjust the threshold values for the Less Than and Greater Than Nodes you can change how wide the wear boarder is. If you adjust the noise textures, you can adjust how ragged the wear is and how much of it bleeds into the underlying surface.

This demo assumes a blue sticker on a white background, but you control the colors in the MixRGB node.

Texture Coordinates are separated into X and Y. I'll walk through X first.

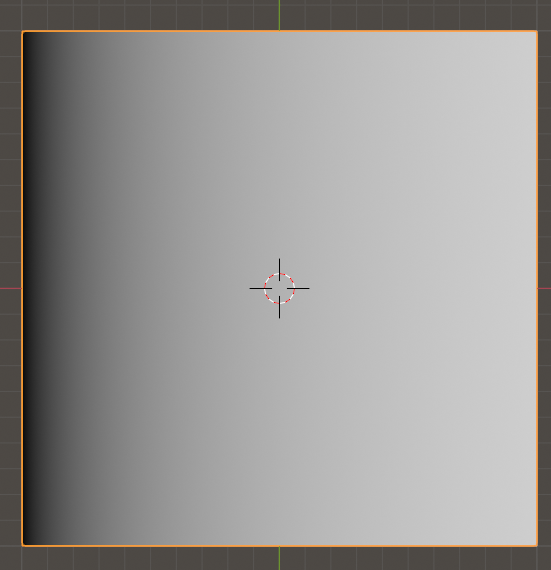
Because I picked the Generated output, the X coordinates will vary from 0 at the left edge of the plane to 1 at the right edge. Left alone, you get a plane like:

Plane derived from X coordinate only.

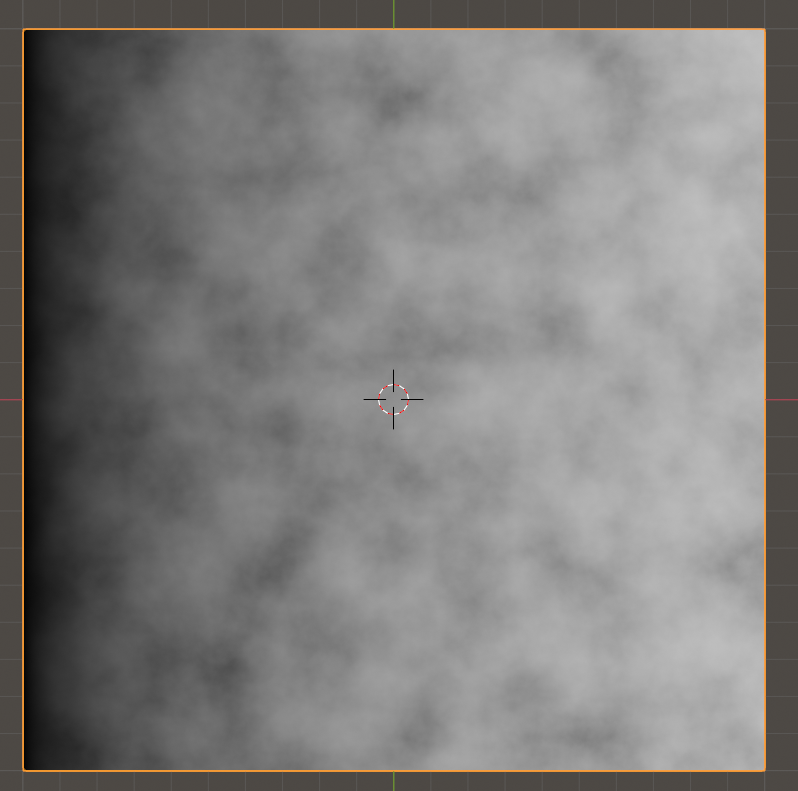
Multiplying by the noise texture creates the edge variation:

Edge variation

Comparing to values removes the noise from the interior:

Noise only on the boundaries

Doing the same for the Y coordinates and then adding the result produces borders all around:

Borders all around

And we use that to control the mix shader.

You can do variations on this. If you want a more circular border, replace the math with math that combines X and Y to create the circle, for instance.

You can also put a color ramp between the last math node and the mix shader to give you more control.

And you can do all sorts of other magic by changing out the MixRGB node for a Mix shader and driving it with two shaders. The later is used by Ian Hubbert in Making Aged Stickers in Blender, a 1 minute tutorial you might find useful as an addition to this answer.

$\endgroup$
1
  • 1
    $\begingroup$ Thanks for your example. I really liked how I can make different edges more damaged than others by adjusting the greater than & less than values. I'm currently adjusting them, so an entire side of the cube doesn't have the same noise texture on each sticker by adding a random and color ramp plugged into math nodes that are plugged into the location or scale values to make them all different. And that video you sent me was great. I'm trying to see if I can use the nodes from that video to add into your answer so I can get an even cooler look. I've been playing with it for 6hrs and no luck yet. $\endgroup$ Commented Mar 12, 2022 at 3:54
3
$\begingroup$

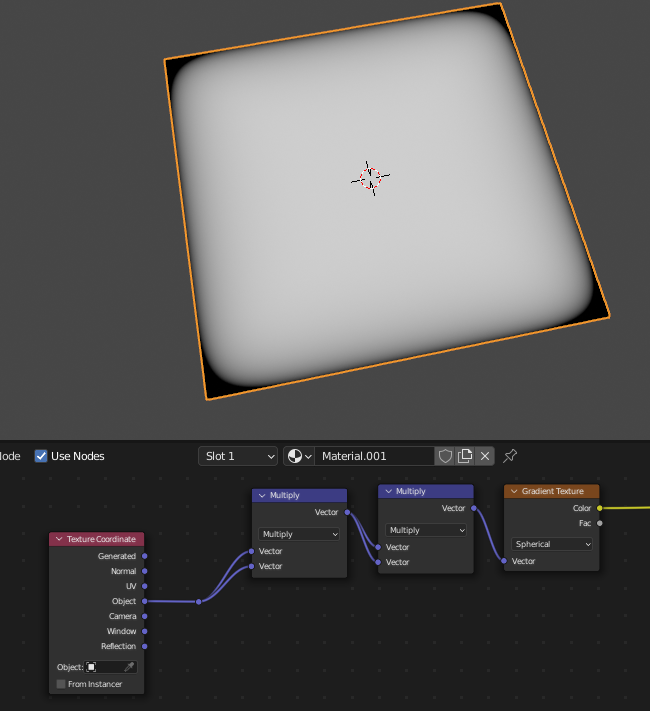
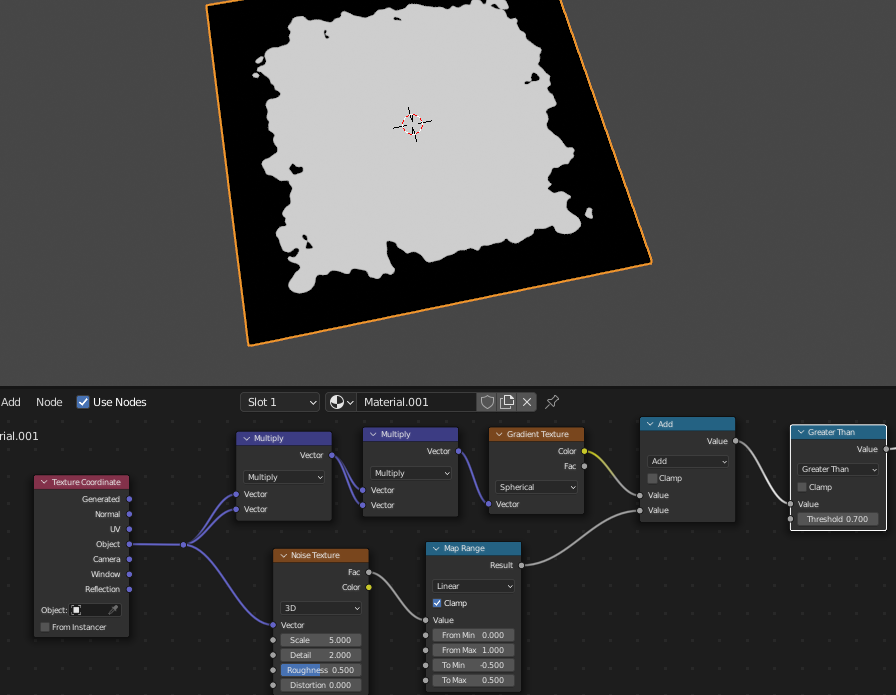
Use Vector Math -> Multiply to multiply Object Coordinates by itself a couple of times, and then use a Gradient Texture set to Spherical to get the overall shape.

enter image description here

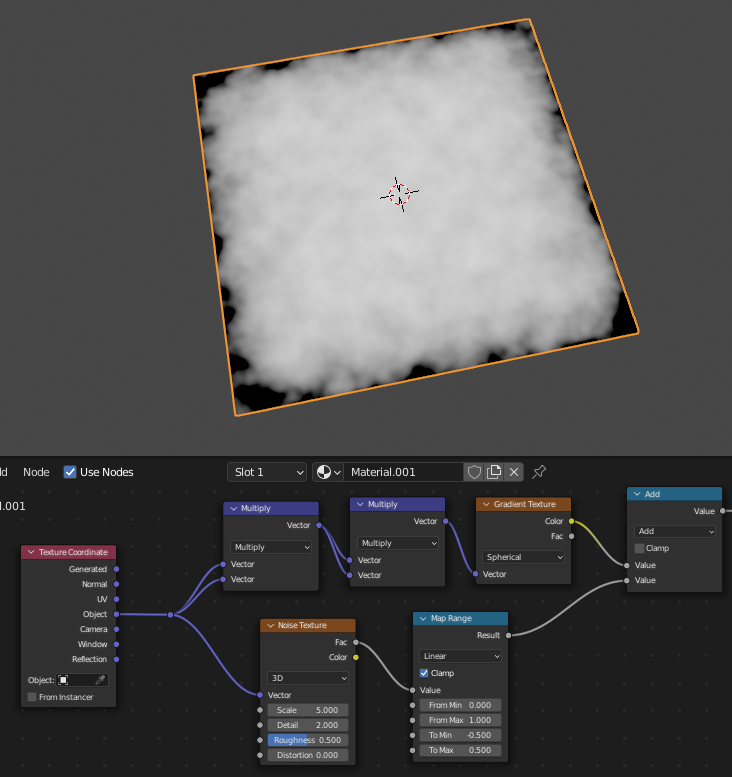
Noise Texture remapped to a range of -.5 to .5 can be added in with a Math node.

enter image description here

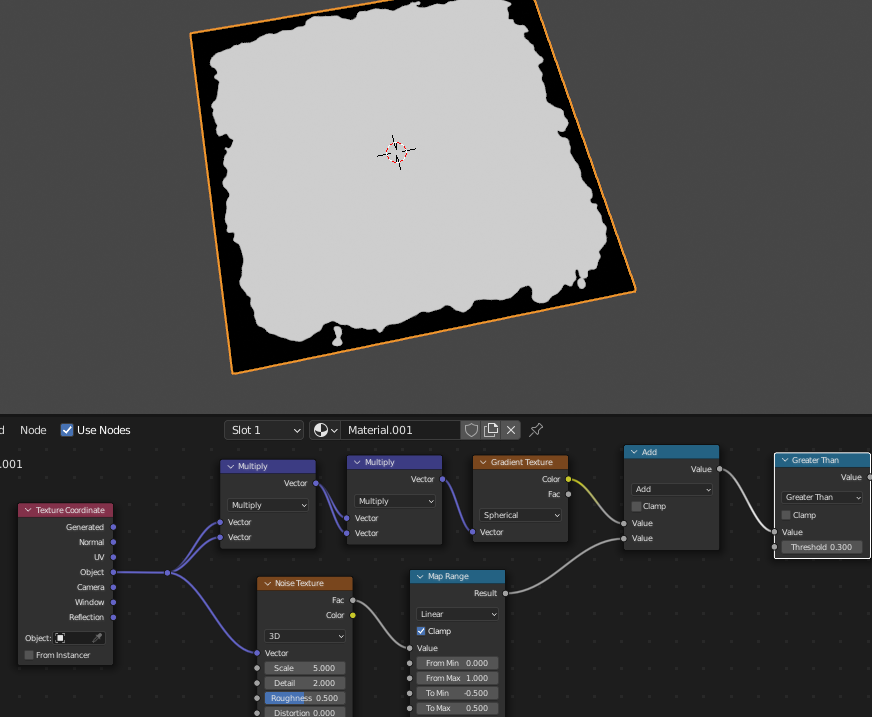
Then use Math -> Greater Than to dial in the value.

enter image description here

enter image description here

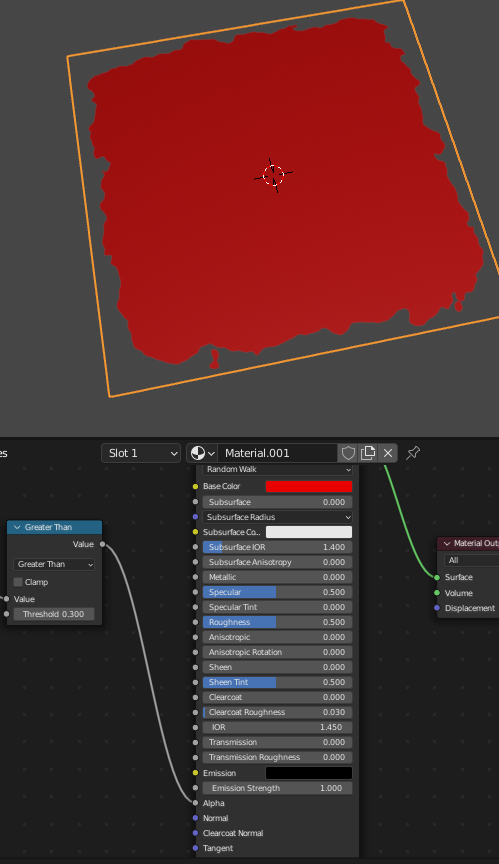
Finally, you can use this as an alpha mask for your Principled BSDF.

enter image description here

$\endgroup$
3
  • $\begingroup$ The remapping might not be necessary if you're willing to mess around with the values a little more. $\endgroup$ Commented Mar 11, 2022 at 20:48
  • 1
    $\begingroup$ Thank you, your example was helpful. I'm using both examples I was given to give multiple types of chipped Rubik cube stickers. I thought I could give multiple ppl reputation points but it only let me give it to one answer. $\endgroup$ Commented Mar 12, 2022 at 3:48
  • $\begingroup$ I have another question. How can I use your method on a sticker that is oddly shaped? rb.gy/ss43y1 I'm trying tho do this on another sticker that isn't shaped in a square now. $\endgroup$ Commented Jul 25 at 17:38
-2
$\begingroup$

You can create an edge-wear effect with a bevel map and a map range node. You can also control how much edge wear you want. This video might be helpful

https://www.youtube.com/watch?v=6ZOQxVYWLyg

$\endgroup$
1
  • $\begingroup$ This is nothing like what I'm asking. Not only because it's not about making edge wear on a plane but also because it's edge wear like dust, dirt, scratches, or rust. I'm not adding edge wear. As you can see by the stickers above in my question, I'm taking away from the mesh. $\endgroup$ Commented Mar 10, 2022 at 1:15

You must log in to answer this question.

Not the answer you're looking for? Browse other questions tagged .