1
$\begingroup$

I'm painting this vine stencil on top of this rock object with rock texture. I understand that right now I'm apparently painting on the rock texture, which makes it so that the vine stencil is repeated just as the rock texture is.

Rather I would just like the vines to be like one single column and not "randomly" repeated, but for that to happen I have to paint in some other way than on the rock texture.

I guess this link touches on the topic, not sure https://blenderartists.org/t/stencil-painting-on-top-of-existing-texure/1146213/2

Maybe some node magic? But I can't really imagine what could be done. This is what I've done myself - https://i.sstatic.net/dqYh5.jpg

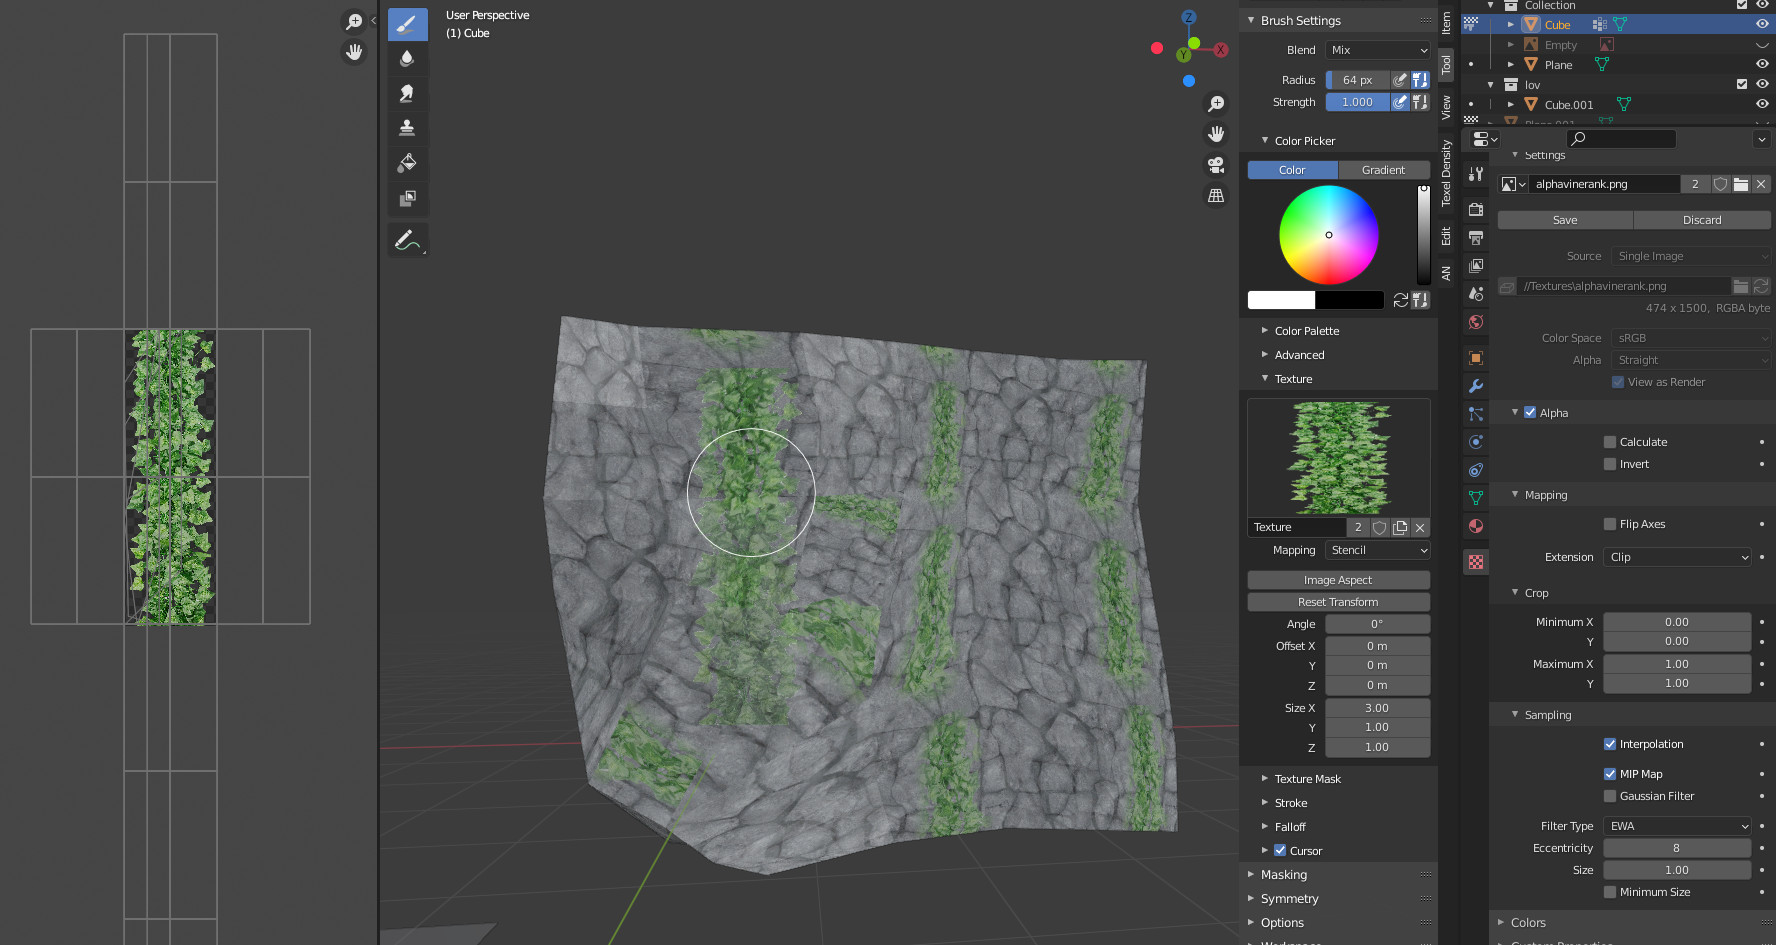
texture painting

$\endgroup$
4
  • $\begingroup$ You don't tell how you've made your unwrap, do your UVs overlap? But if I understand correctly your question, what you can do is create a second UV map that will be made of a second unwrap of your whole object (in object Data > UV Maps, create a second one, then select your object and for example use Unwrap > Smart UV Project), then use an Input > UV Map node in your material and load this second UV map $\endgroup$
    – moonboots
    Commented Aug 10, 2021 at 20:12
  • $\begingroup$ I think I follow the idea. Just that when I smart uv project, the texture is then very pixelated but seems to fix when I scale the selection in uv-editing window. However, I dont follow how I should node the UV map. But once that is figured out, I just stencil pain on this new UV then? But only 1 UV map can be shown on the object (rocks) at a time? $\endgroup$ Commented Aug 10, 2021 at 20:21
  • $\begingroup$ please pack your images and share your file, it will help to understand your current setup: pasteall.org/blend $\endgroup$
    – moonboots
    Commented Aug 10, 2021 at 20:22
  • $\begingroup$ I hope this works pasteall.org/blend/fe47aeb4d3c447f597f9566a5d05e4e4 $\endgroup$ Commented Aug 10, 2021 at 20:28

1 Answer 1

1
$\begingroup$

You have UVs overlapping, it repeats your rock pattern, if you paint over it, it will also repeat your new texture. If for some reason you want to leave your current UV setup as it is (the other solution would be to re-unwrap it), what you can do is create a second UV map:

  • Go into the Object Data panel > UV Maps, create a second map (you've already done it), keep it selected, unwrap your object with the Smart UV Project method.
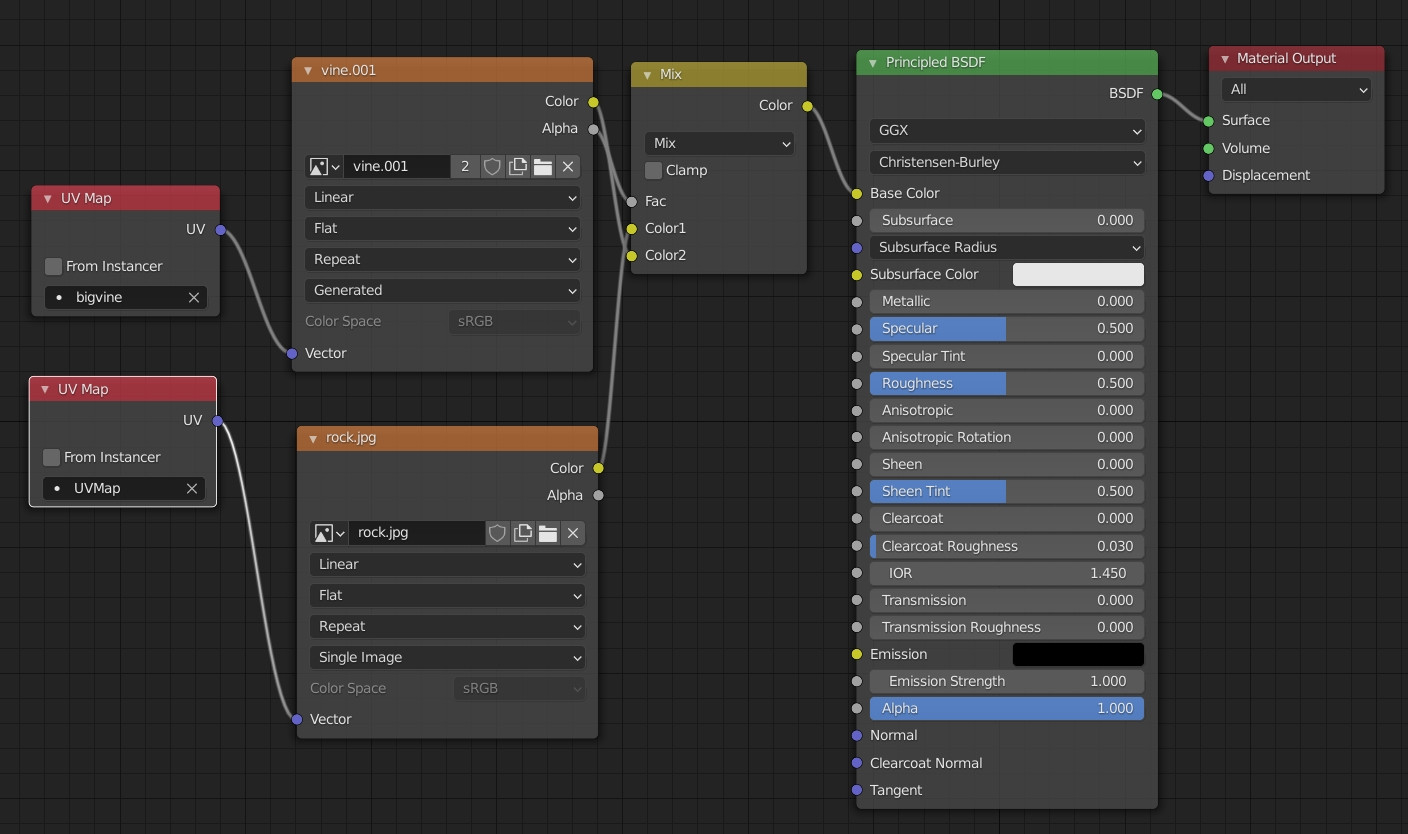
  • In your material, plug an Input > UV Map node into a new Image Texture node. In this UV map node, select the second UV map. In the Image Texture node, create a new image texture that is alpha transparent.
  • You can plug a UV Map node (with the first UV map selected) into into the rock Image Texture node but you don't even need to: if you don't plug anything into an Image Texture, the first UV map of your list will be the one that is taken into account.
  • Mix the 2 Image Texture nodes into a Mix RGB node, use the new Image Texture alpha output as a factor (swap the inputs if I'm wrong).
  • Paint on your new image with the Draw brush/Stencil. Make sure you've selected it in the N panel > Texture Slots.

enter image description here

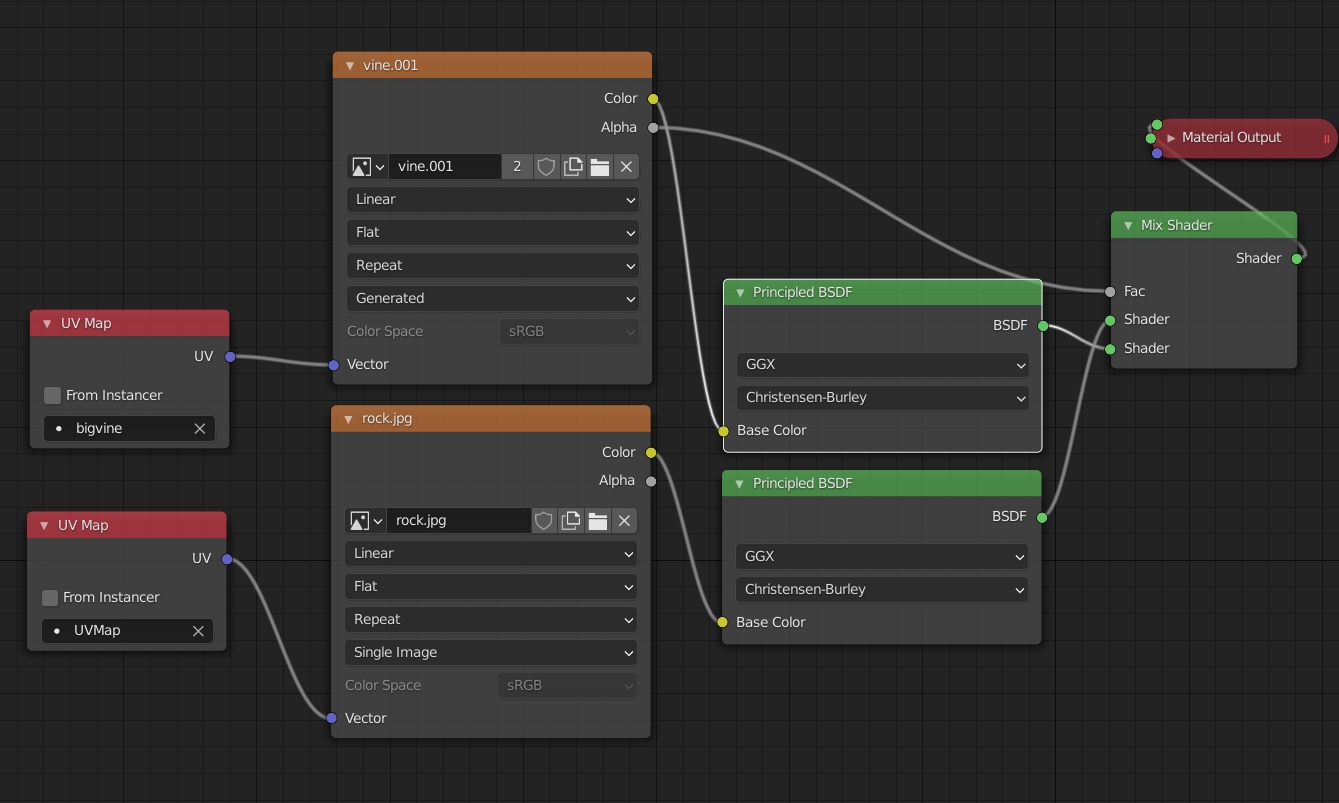
Other solution if you want to set up a different Principled BSDF for each texture, use a Mix Shader and the Alpha output into the factor of the Mix Shader:

enter image description here

$\endgroup$
1
  • $\begingroup$ Comments are not for extended discussion; this conversation has been moved to chat. $\endgroup$ Commented Aug 12, 2021 at 10:04

You must log in to answer this question.

Not the answer you're looking for? Browse other questions tagged .