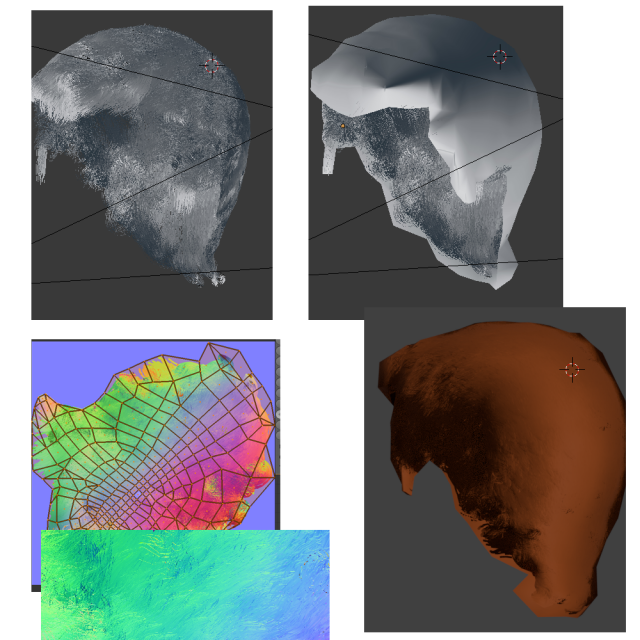
I set up hair in Blender and transformed it into a mesh with the 'screw' modifier, then decimated. The result is shown in the top left corner of the picture. Then I sculpted a low poly 'cap' (top right of the image). Then I used bake normals to create the lower left map which indeed shows hair strands.
 However the resulting render is total crap, with super dark areas, and areas that appear totally flat, that is regardless of normals flipped or not flipped, and light direction and source.
Is this a completely misguided approach or should it work in theory?
