4
$\begingroup$

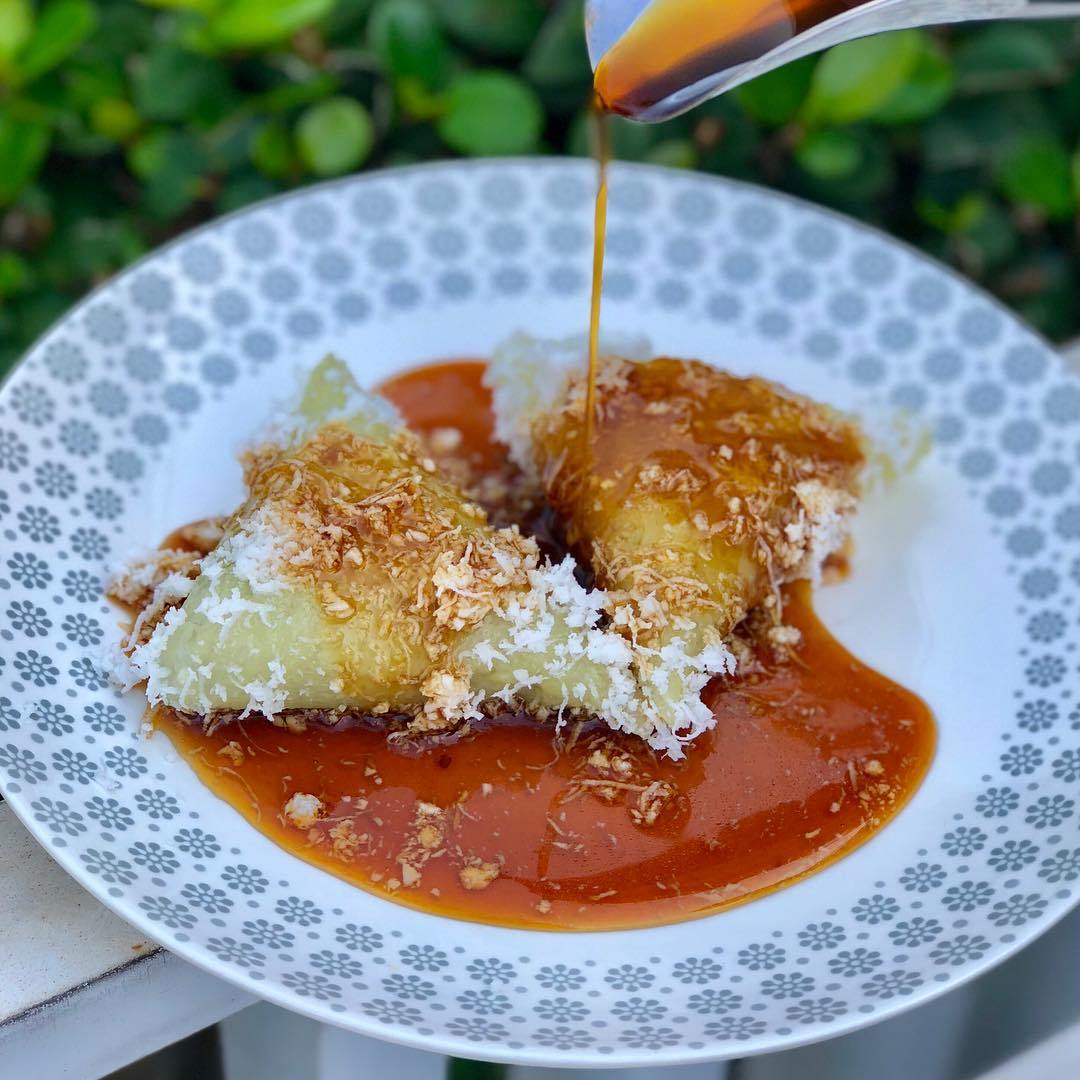
trying to make an object with a material that looks partially wet. like these reference photos.

enter image description here

i've tried using a "wet map" nodes group provided on a blender user's website. unfortunately, the material almost wholly became more shiny or glossy than before using that wet map. i wish the material can have two different characteristics; like different gloss/highlight/reflection, and different IOR perhaps.

any suggestion in the material setup with nodes that we can make for that? plain material without physics simulation to consider, maybe? *pardon my english. not a native speaker.

EDIT:

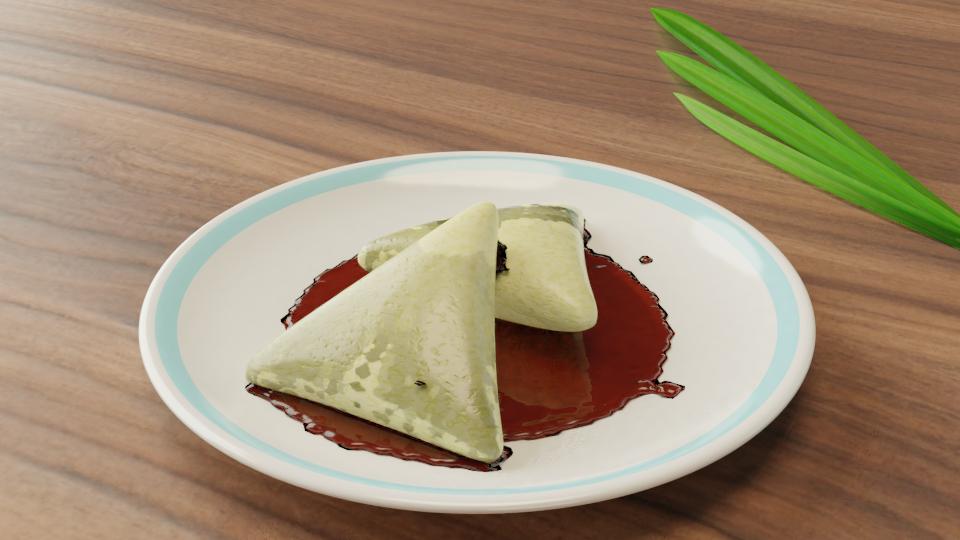
this what i've got with the fluid sim. and the whole thing get shinier all over it. also, the way the palm sugar syrup is flown on the surface was a bit weird. i wish there's a way i can learn how to achieve this. either with a better fluid sim. and, especially the way we can set the material up in the node editor. even if the model/scene doesn't involve fluid sim.

by the way, there are two parts of the fluid where it's wet on the surface. and they look quite dark as if close to black.

enter image description here

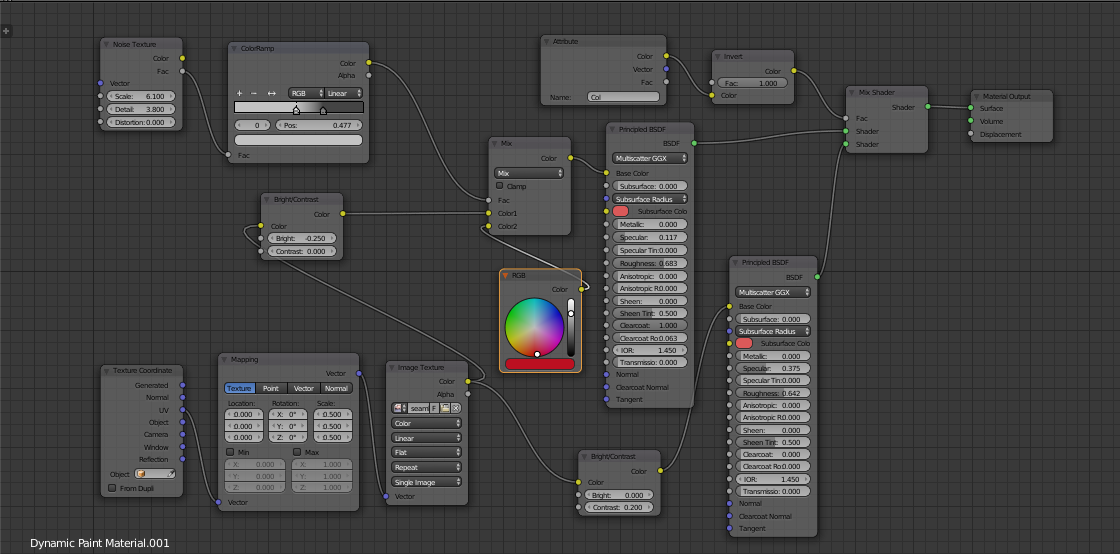
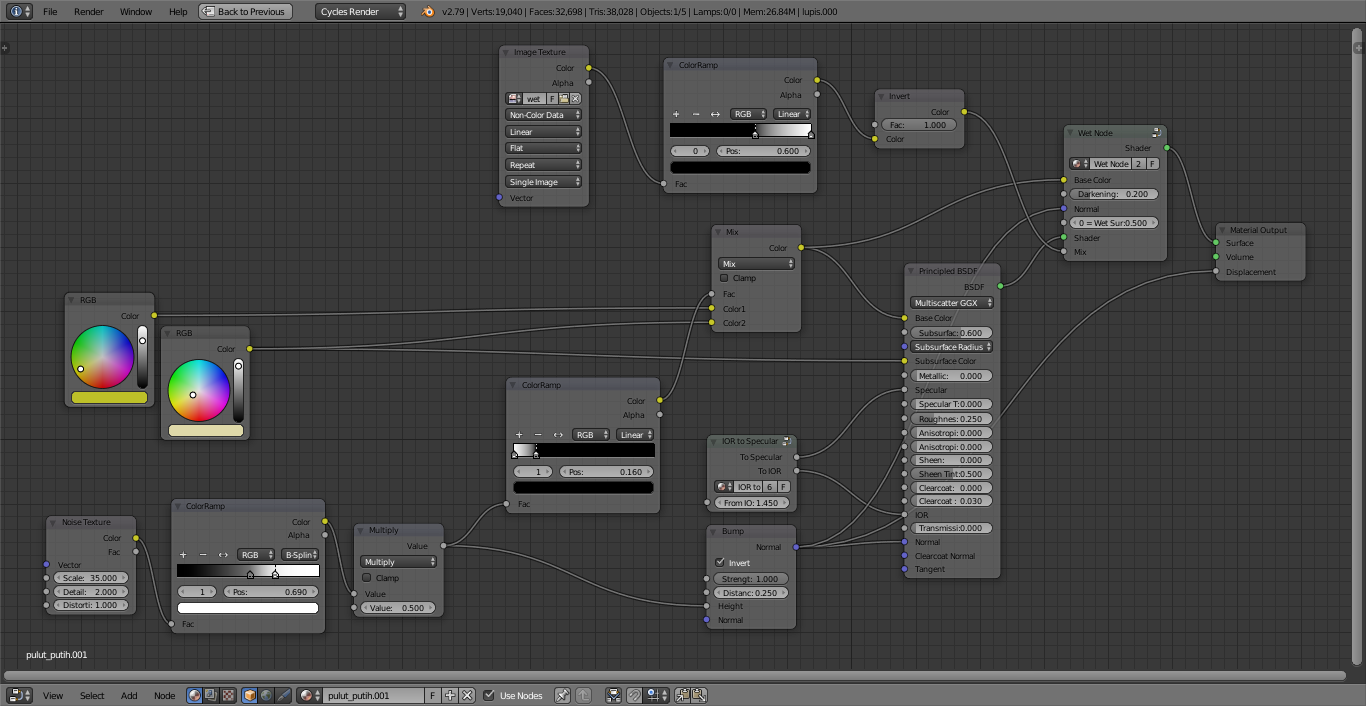
and this is how i made the material setup, using the wet map nodes group provided by planetblender. enter image description here
$\endgroup$
9
  • 2
    $\begingroup$ is it for an image or is it for animation? $\endgroup$
    – moonboots
    Commented Nov 3, 2018 at 8:28
  • $\begingroup$ for still image for now. $\endgroup$
    – irwan
    Commented Nov 3, 2018 at 8:36
  • 1
    $\begingroup$ also there was this nice tuto by CG Cookie that might help you (?): youtube.com/watch?v=zpgnNktugro& $\endgroup$
    – moonboots
    Commented Nov 8, 2018 at 11:50
  • 1
    $\begingroup$ Making a single object look partially wet can be done with a mix shader using a factor that differentiates your "wet" areas from your "dry" areas. It is more involved to make the "wetness" apply to a particle system as well as the emitter. The way I can think of involves Dynamic Paint and a Particle Instance modifier. I'm not sure this will look very realistic, the "fluid" will not "cling" to the particles and won't vary in opacity depending on fluid thickness, like in your photo. You may be better off with a fluid sim. However if you want a writeup I could probably do one. $\endgroup$
    – risingfall
    Commented Nov 18, 2018 at 3:10
  • 1
    $\begingroup$ I don't know exactly what you've done with your fluid sim, but it looks like you've let the whole thing run until all the fluid has slid off of your Lupis (?) then used the wetmap from dynamic paint to add "wetness" to the material on the Lupis. What I had in mind was to halt the fluid simulation partway while the fluid is still sitting on top of the objects--that is what creates the "wet" look, not the wetmap (and it will make coconut particles look wet too). You can pick a frame and apply the sim then "sculpt" the fluid mesh to your liking. Wetmap/dynamic paint can enhance the effect. $\endgroup$
    – risingfall
    Commented Nov 20, 2018 at 19:11

1 Answer 1

2
$\begingroup$

Although fluid simulation may be your best bet, here is a way to use dynamic paint to simulate an effect similar to your photo.

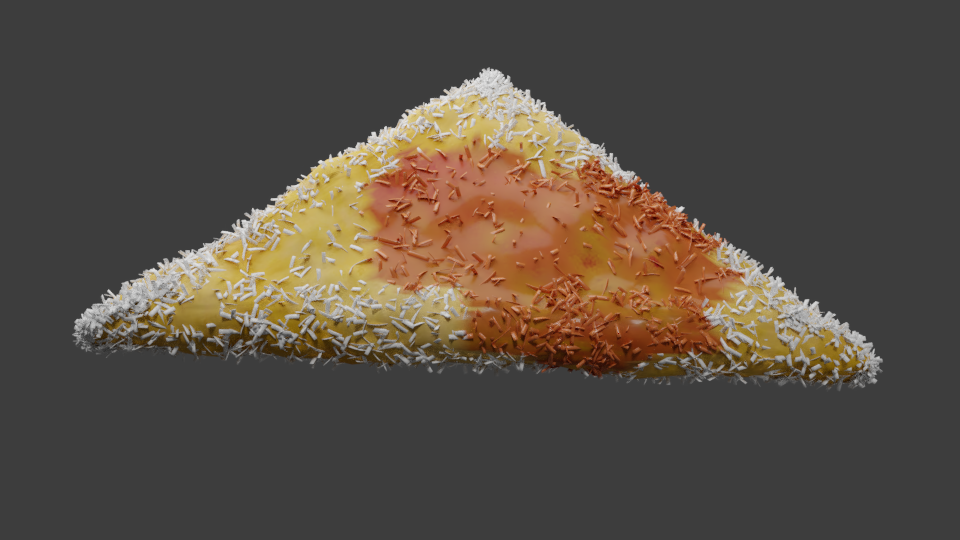
enter image description here

To create the dynamic paint effect, I made some blobby "fluid like" meshes to act as dynamic paint brushes. The lupi mesh (and a coconut flake mesh, for the particle system) were the canvas. From right to left: the meshes including the brush objects; the dynamic paint effect on the canvas; the result on the material.

enter image description here

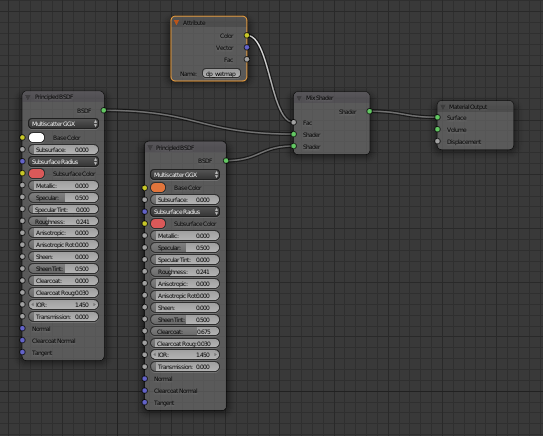
The material on the Lupi is what uses the wetmap as a factor to mix between two principled shaders. One shader, the "wet" shader, has a red tint (varied with a noise texture) and more glossiness via a clearcoat.

enter image description here

Getting the dynamic paint to apply to the coconut particles is more complicated. After the particle system is set up on the Lupi mesh (I used a "hair" type of particle system), it is necessary to apply a Particle Instance modifier to the coconut shreds - otherwise each particle will not act as its own separate Dynamic Paint canvas. As mentioned before, the coconut shred mesh has a Dynamic Paint canvas applied to it.

The coconut particle material is much simpler, it's just got a base color of white (for "dry") and a reddish tint plus a clearcoat (for "wet"), with the wetmap as the factor of a Mix shader.

enter image description here

The above is not a step-by-step but hopefully it provides guidance as to the general technique.

$\endgroup$
1
  • 1
    $\begingroup$ thanks very much @risingfall. i should've thought about using 2 principled bsdf as usual. though, i may understand a bit about how to do particles, i still haven't learn about particles instance modifier yet. i was using a method and wet map from planetblender.com on this page; planetblender.com/wetmaps just tried to follow that page tutorial. and used the provided wet map. thanks again, risingfall. it comes to my sense about the general approach to the case. i'll look into it again in blender. $\endgroup$
    – irwan
    Commented Nov 21, 2018 at 0:29

You must log in to answer this question.

Not the answer you're looking for? Browse other questions tagged .