0
$\begingroup$

I'm a-bit of a Blender newbie here so please forgive me if what I'm about to say sounds stupid, but I've been trying to solve this issue for far too long now and am becoming way too frustrated...so, on to my problem:

Main objective: I have a .blend model containing several objects, each of which I want to convert to a point cloud (i.e. I want to convert the scene in my model to a point cloud which needs to be contained in one file, preferably .ply format).

Progress so far: I have found a way to export the objects in my model into one .obj (+.mtl) file, convert it to a .ply file to use it in an algorithm which samples the object meshes to create a point cloud, and save this point cloud in another .ply file.

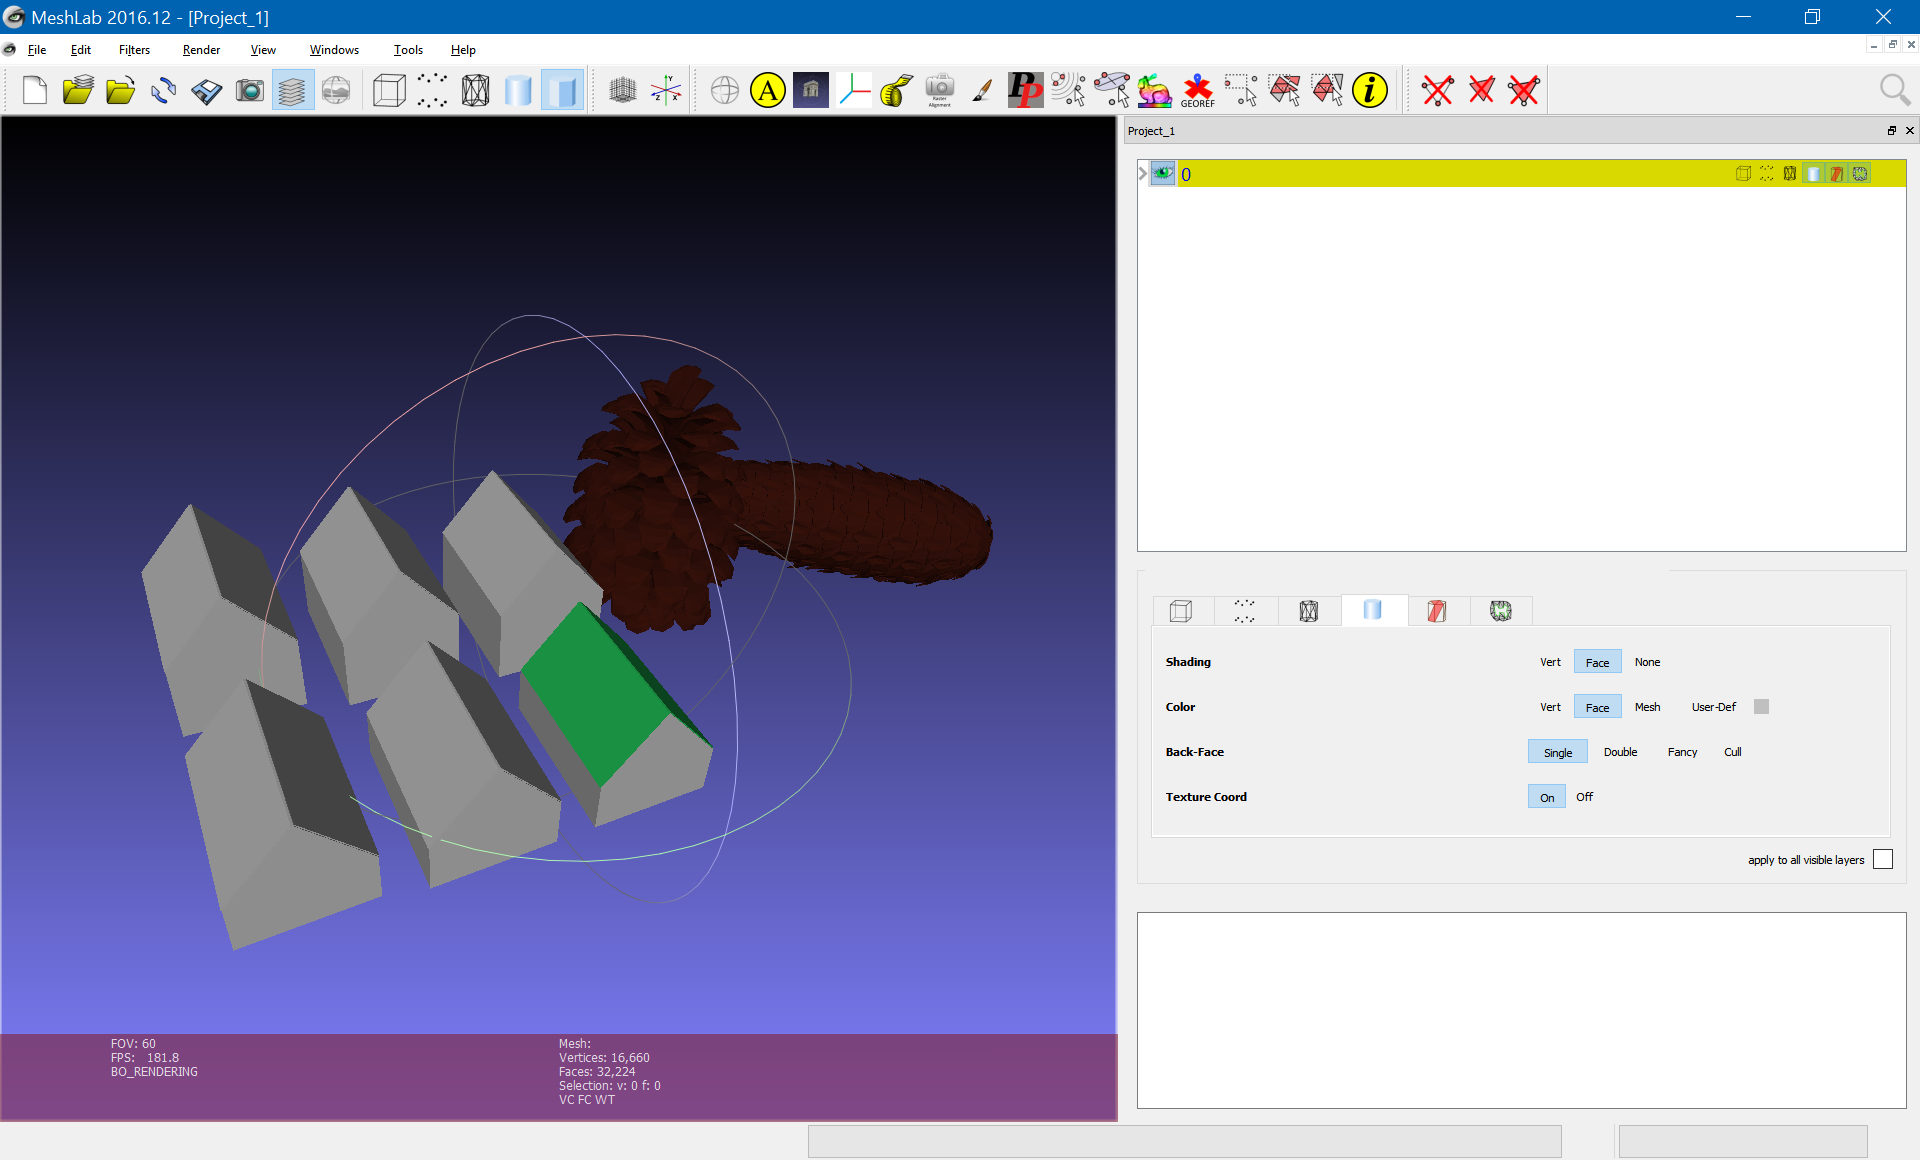
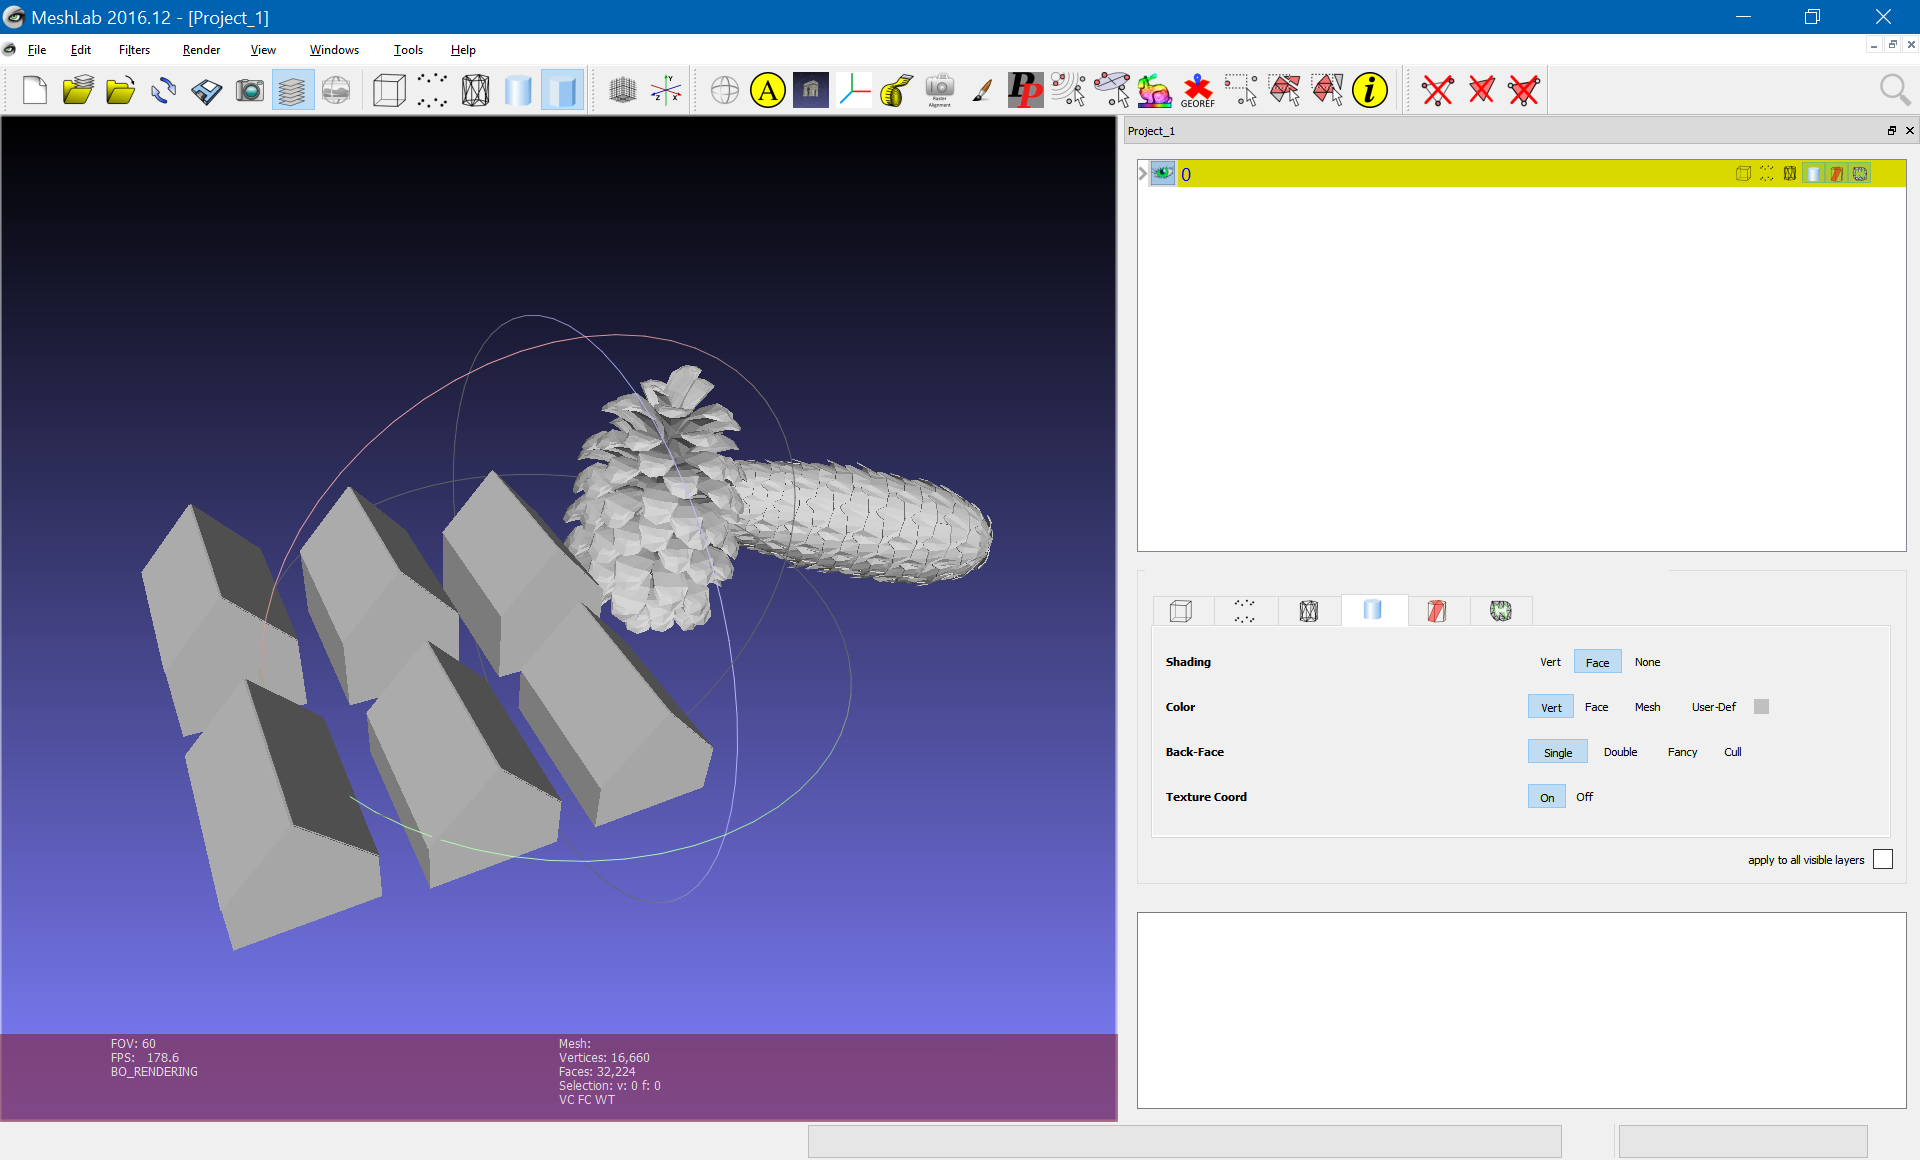
Great, you successfully converted your objects' meshes into a point cloud...so what's the problem? After saving the objects in my model to the .obj format, I found out that it is the faces which are coloured, not the vertices; i.e., the RGB values of the vertices are grey. I want to assign RGB colour values to my vertices too, so that the points in my point cloud are also coloured.

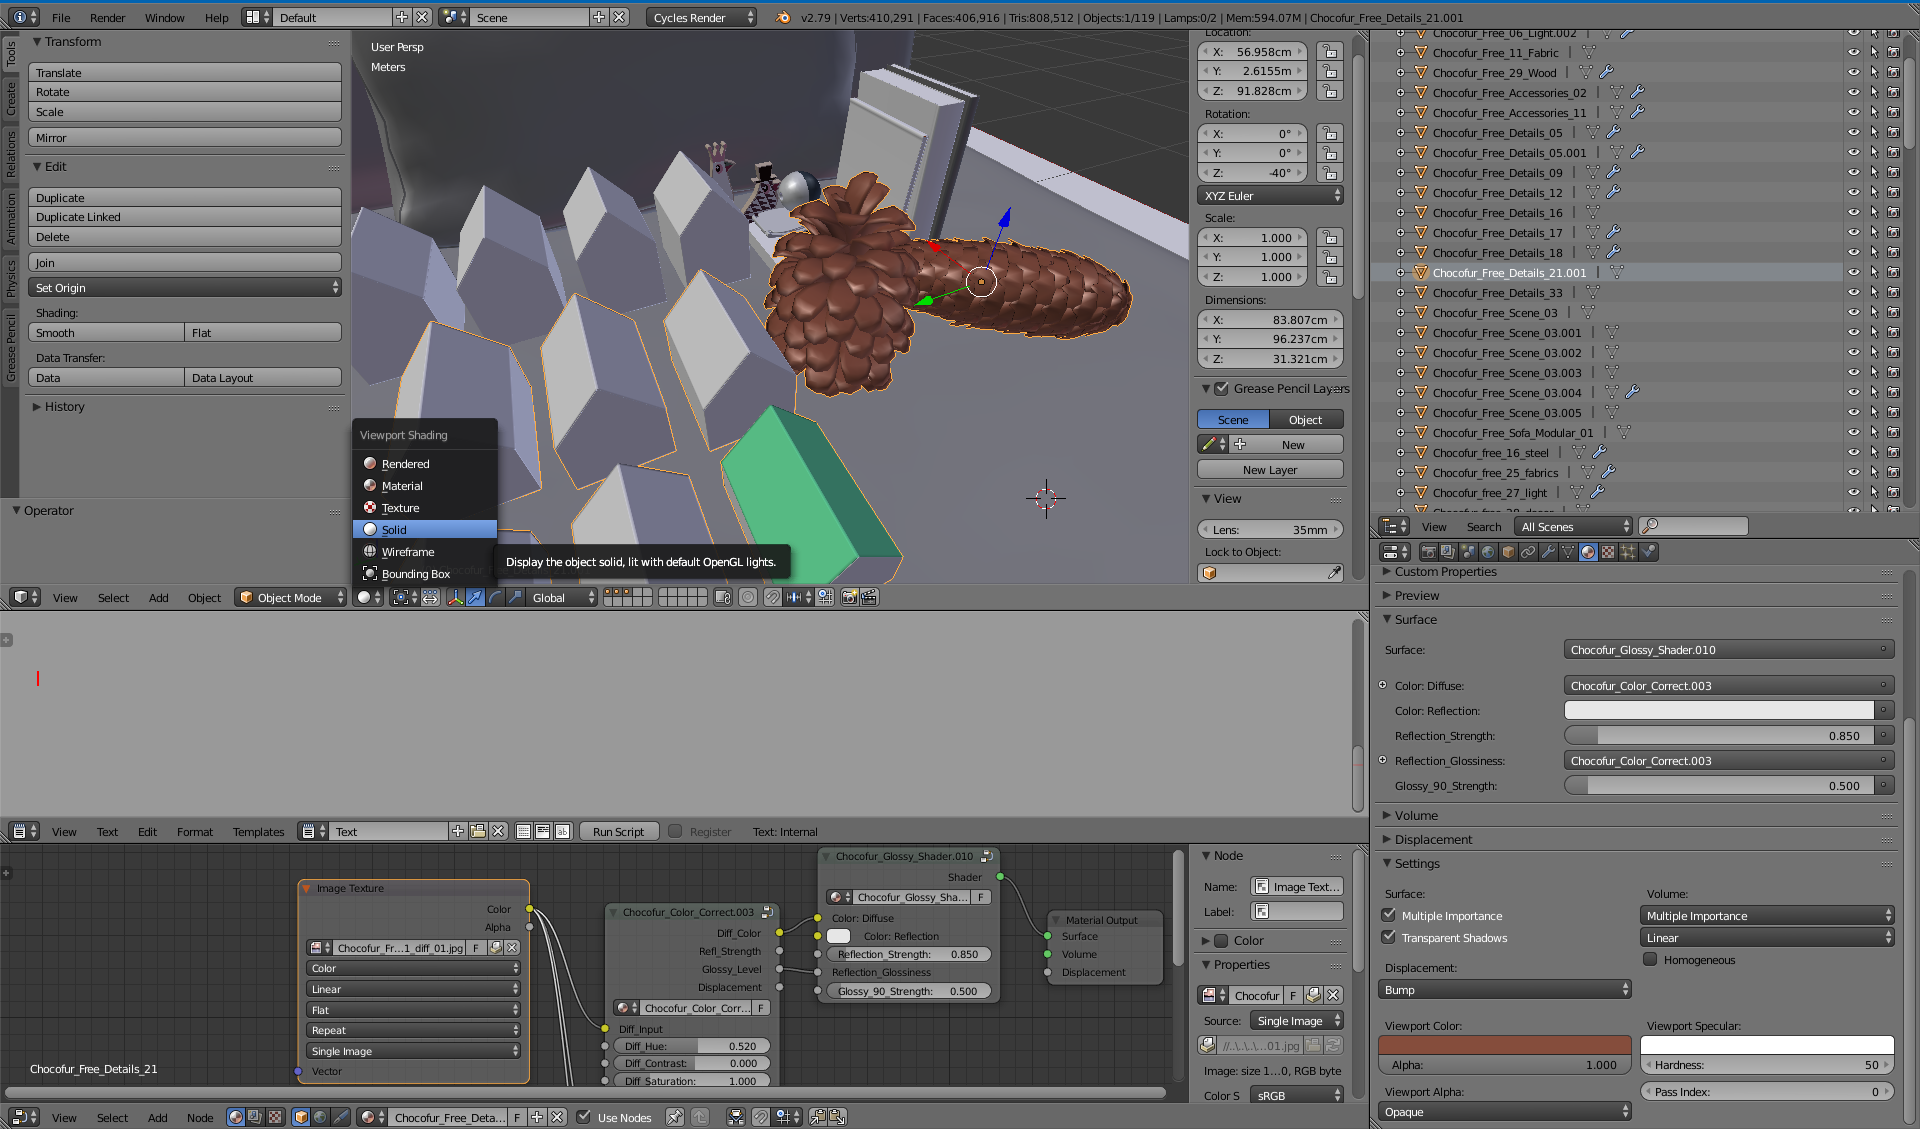
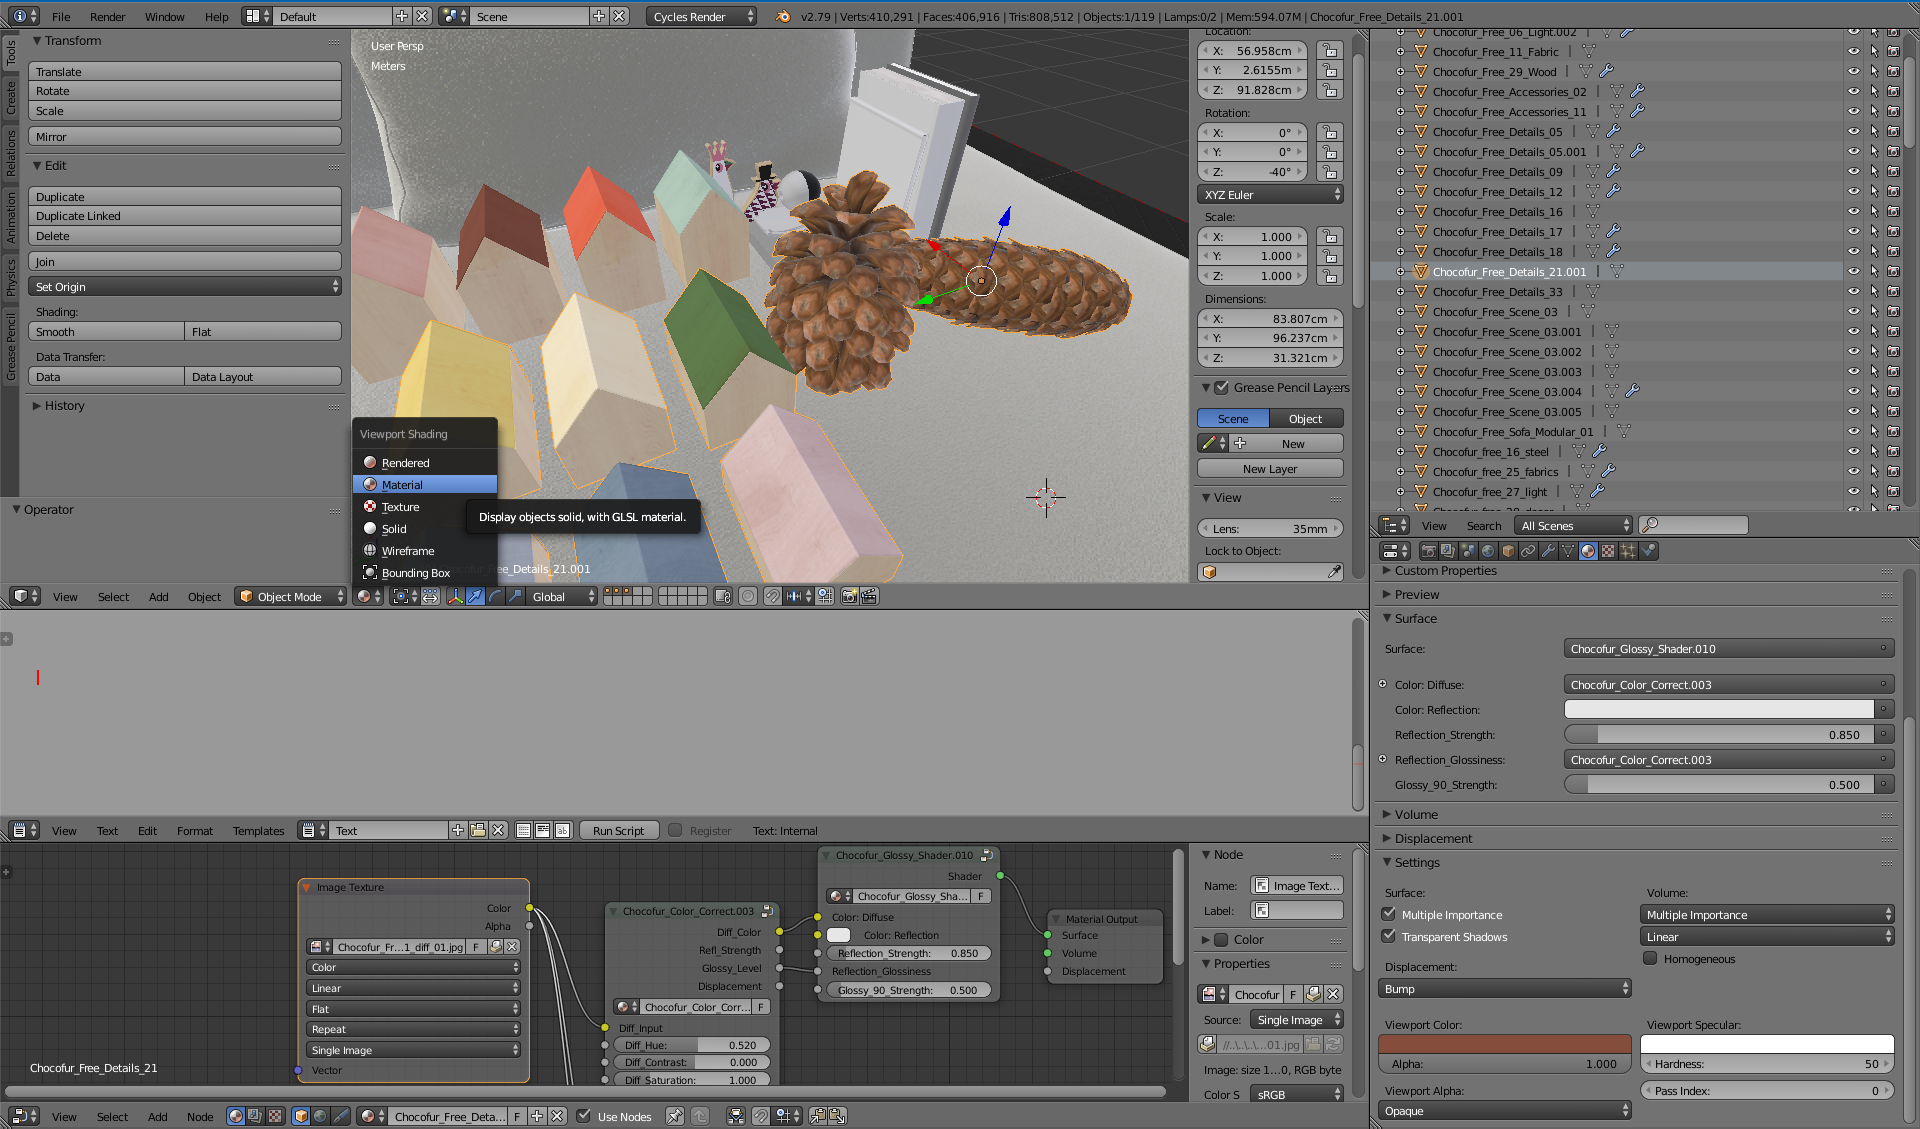
Other details: I am using the Cycles Render, and have noticed that when I select the 'Materials' viewport shading, all colours look fine, but when I switch to the 'Solid' viewport shading, most of my objects lose their colour; I understand this has something to do with only being able to view the Viewport Colour in Materials->Settings when viewing the 'Solid' viewport shading.

I have several models similar to this which I did not create myself, and all need to be converted to a point cloud in some way, so I'd appreciate if the solutions aren't too time-consuming. My options at this point are to get the point clouds without any colour information (which I have been able to do), or to see if you guys can help me with getting colour onto my vertices ;)

Of course, I am also open to other suggestions as to how I can convert my objects to a coloured point cloud.

Lastly, thank you in advance for any assistance that you could provide :)

Model in Blender using Solid Viewport Shading

Model in Blender using Materials Viewport Shading

Model in MeshLab, viewing face colours

model in MeshLab, viewing vertex colours

$\endgroup$
3
  • $\begingroup$ It is not quite clear from the question but looks like you have textured model and want its colors to be saved in the vertices. There isn't any color on vertices as texture uses image assigned via likely UV coordinates, so you want texture for the model to be saved into vertex colors instead. Blender can bake texture into vertex colors (Internal engine only), but quality of bake will depend on mesh density $\endgroup$
    – Mr Zak
    Commented Sep 5, 2018 at 14:54
  • $\begingroup$ "you have textured model and want its colors to be saved in the vertices" - yes, pretty much; I tried baking using the Cycles Render (since the model was designed using it), but to no avail; I presume that to use the internal engine, I would need to transfer the textures from the Cycles Render to the Blender Render in some way? $\endgroup$
    – Chris G
    Commented Sep 6, 2018 at 12:48
  • $\begingroup$ Would it be possible to elaborate a-bit, particularly how to "choose the image used as texture in Cycles, then create vertex color layer" please? Tried to do it all, but I think I'm doing something wrong...I apologise, but I'm a beginner and still find all of this a-bit overwhelming :p $\endgroup$
    – Chris G
    Commented Sep 10, 2018 at 11:42

2 Answers 2

0
$\begingroup$

If you want to make each vertex store color from the appropriate place from the texture you want to bake texture to vertex colors. In case of baking in Blender this means you want your objects to be unwrapped and have a texture assigned to faces of the starting mesh.

First, unwrap the mesh if it hasn't been already. Then, if Cycles render engine is chosen, create a new scene / project and somehow transfer your mesh object there (Ctrl+C > Ctrl+V between different files can be handy, or append it from File > Append > Objects).

In the new project choose Blender Internal as render engine (see how).

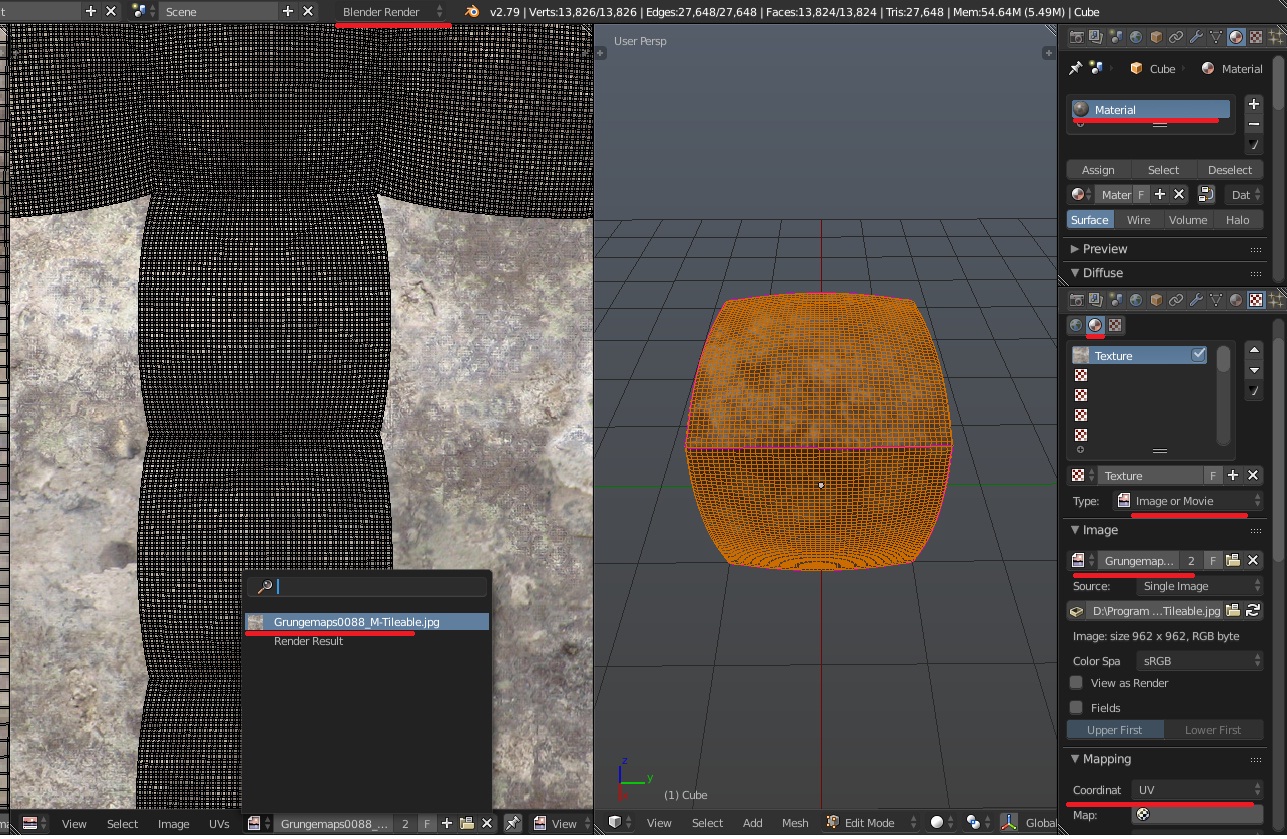
Then assign desired texture to faces of the mesh. To do so, open 2 editors in Blender window and choose one of them to be UV/Image editor (see more on this). In 3D viewport, enter Edit mode and select all. In the UV editor UV map should appear (see more info here if it doesn't). Choose your image texture you want to bake from in the UV editor via the dropdown list below the image. Create a material for the object (default one works fine), then create new material texture for that material, its type by default should be Image or Movie. Choose image to bake to once more, this time in the dropdown list in the texture settings, Image rollout. Make sure Mapping is set to UV.

enter image description here

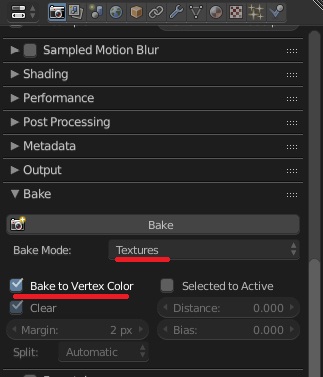
From this point you're left only to bake. In the Properties editor go to Render tab, scroll it to the Bake rollout and choose Textures. Below enable Bake To Vertex Colors option and press Bake button.

enter image description here

Note that quality of bake depends on density of geometry of the mesh.


Regarding the Bake UV textures to vertex colors addon. It makes it possible to bake in Cycles the same, but there's a small nuance - it expects texture to be assigned the same as in Blender Internal, i.e via UV editor to the face textures (however the addon doesn't require creating a material and assigning a texture to that).
Cycles doesn't do that since it doesn't use face textures to map images to mesh, so for baking with that addon in Cycles you'd need to switch to Internal, assign texture to faces with all selected in UV editor as explained above, then switch back to Cycles and bake.

$\endgroup$
4
  • $\begingroup$ Thanks! I do seem to have made it work because I can see the image that I baked when exporting to a .obj file and viewing in MeshLab; oddly, the texture does not seem to be exported when saving as a .ply file, although I got around that by opening the .obj file in MeshLab, then saving as .ply. Reading the contents of both .obj and .ply, it seems that the actual vertex colors still retain the greyish color of the surface; the color is represented as texture coordinates for each of the vertices forming a face...not ideal, but I think I can find a way to assign colour to a point within the face $\endgroup$
    – Chris G
    Commented Sep 12, 2018 at 11:41
  • $\begingroup$ Btw, I know it's not directly related to the question, but I'll ask just in case anyone knows; given values of a face in a .ply file, e.g.: 3 14374 14420 14405 6 -0.657338 1.307212 -0.541405 1.326640 -0.657338 1.326640 163 163 163 255 I know that [14374 14420 14405] are the indices of the 3 vertices forming a face, while [-0.657338 1.307212 -0.541405 1.326640 -0.657338 1.326640] represent the (u,v) texture coordinates of each of the 3 vertices; but which pixel is the reference (i.e. would [0 0] be the top left pixel)? And do values outside the range of [0,1] indicate wrap around? $\endgroup$
    – Chris G
    Commented Sep 12, 2018 at 11:46
  • $\begingroup$ @ChrisG it is strongly advised to ask separate questions as separate posts here; not only it allows more organized content for answerers, but also for those who search for similar questions. Regarding exporting vertex colors in PLY - make sure vertex colors are enabled for exporting in options. $\endgroup$
    – R El Clein
    Commented Sep 12, 2018 at 21:38
  • $\begingroup$ @R EL Clein Yes I know, but since it was related to my original question I thought it might be better to group the questions into one thread for anyone wanting to do something similar to what I want to do; re. vertex colours in PLY, I had indeed enabled vertex colours...but anyway, I found a solution to sample the mesh and retain the texture colours on my points, which I have posted as a separate answer; thanks again! $\endgroup$
    – Chris G
    Commented Sep 14, 2018 at 6:35
0
$\begingroup$

R El Clain's answer enables the exporting of the object textures in your Blender model; the exported object will be a mesh. If you want to then get a point cloud, the mesh needs to be sampled...I found that the best way to do this is to export to a .OBJ file, and open with MeshLab; then, go to Filters > Sampling > Texel Sampling, which will result in a layer with points sampled from the original mesh. The default settings worked fine for me (most important is to make sure that the RecoverColor flag is enabled).

Note that the number of points may be quite high; you could then use the Poisson-Disk Sampling to reduce the number of points (again, go to Filters > Sampling > Poisson-disk Sampling) and change the settings as required (however, ensure that Base Mesh Subsampling is enabled). Of course, you could also use other tools to down-sample the point cloud, such as the Point Cloud Library's Voxel Grid Filter.

Irrespective of whether you do the down-sampling or not, you can then export the mesh to a number of formats supported by MeshLab by going to File > Export Mesh As... and then selecting the desired format, such as PLY.

$\endgroup$

You must log in to answer this question.

Not the answer you're looking for? Browse other questions tagged .