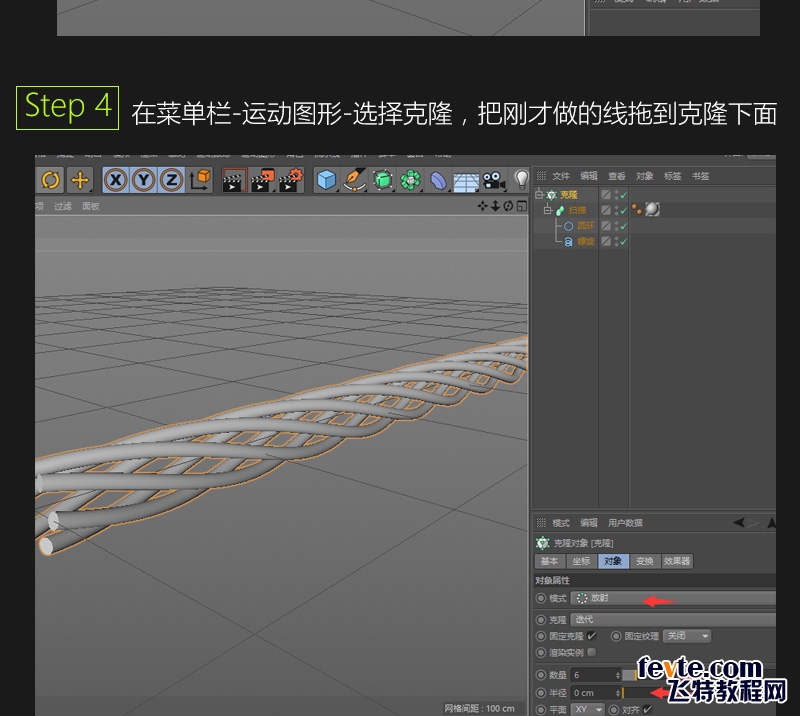
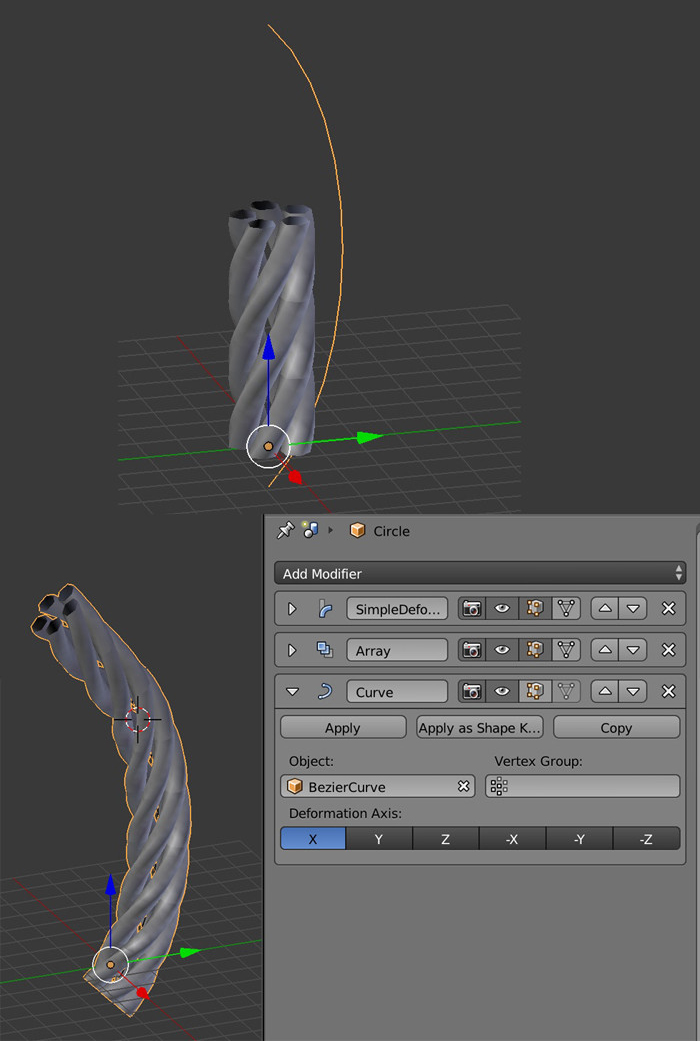
This object was created in Cinema 4D. How can you recreate it in Blender?
3 Answers
You can do it this way:
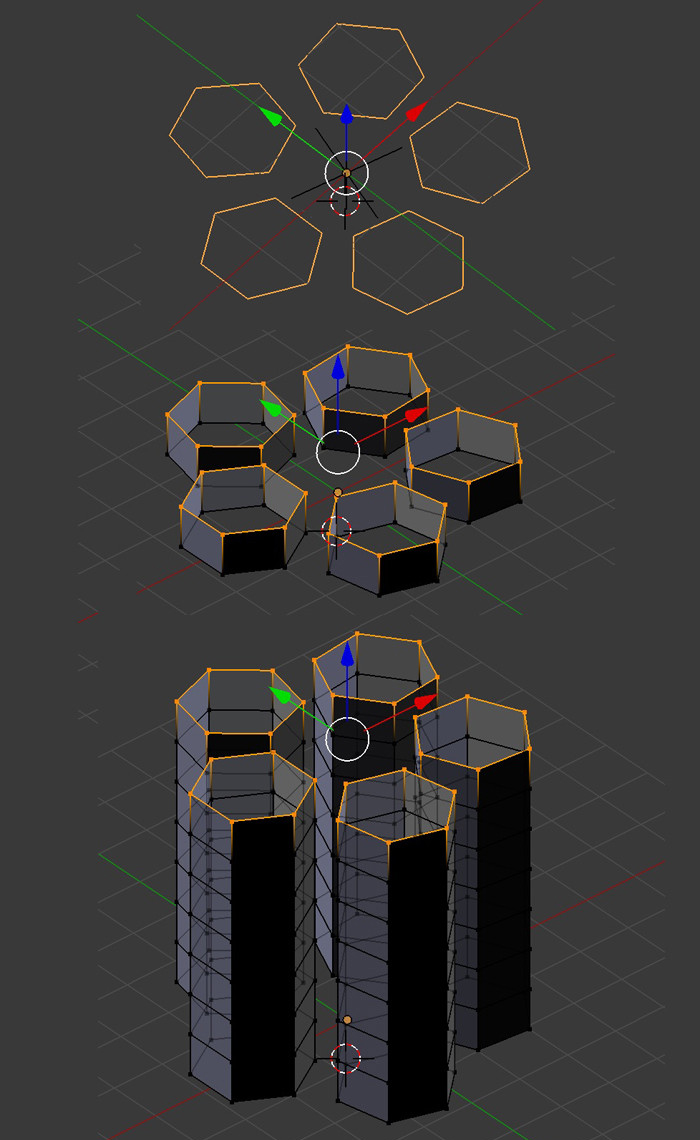
- Create a Circle, shift it from its origin in Edit mode, go back in Object mode, create an Empty on the same point as the origin of the circle. Assign an Array modifier to the Circle with a Count of 5, deactivate Relative Offset, activate Object Offset and choose the Empty. Rotate the Empty 72° on the Z axis. Apply the Array modifier, you now have 5 circles.
- Extrude one time your 5 circles and repeat with shift R so that you have several extrudes (of course you can also decide to make all these extrusions, or edge loops creation, on the original circle, before applying the first array).
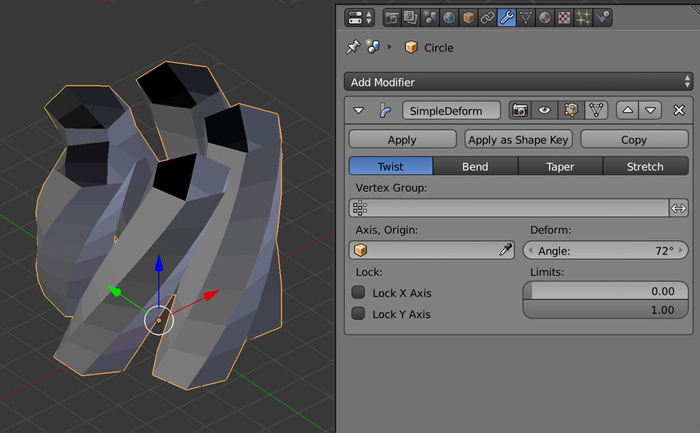
- Assign a Simple Deform modifier to your object, with a Deform Angle of 72°. You can Apply this modifier if you want.
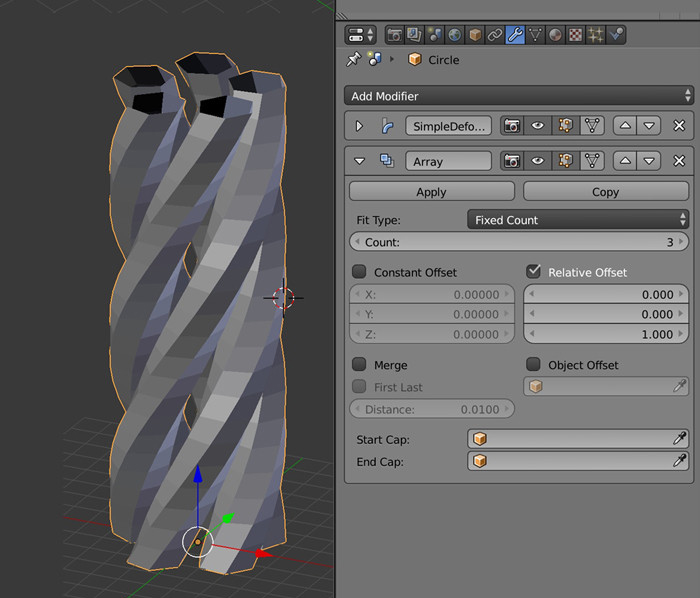
- Assign an Array modifier to your Object and choose a factor of 1 on the Z axis. Maybe enable Merge and First/Last so that the top sticks correctly to the bottom of the array copy. Choose the Count you want.
- Create a bezier curve, go in Edit mode and make sure the direction is the one you want, if not W > Switch Direction. Put the Origin at its starting point.
- Put your object at the beginning of the curve.
- Assign a Curve modifier to your object, choose your bezier curve as the Object. It should follow the curve.
- You can add a Subdivision Surface modifier to your object and smooth it.
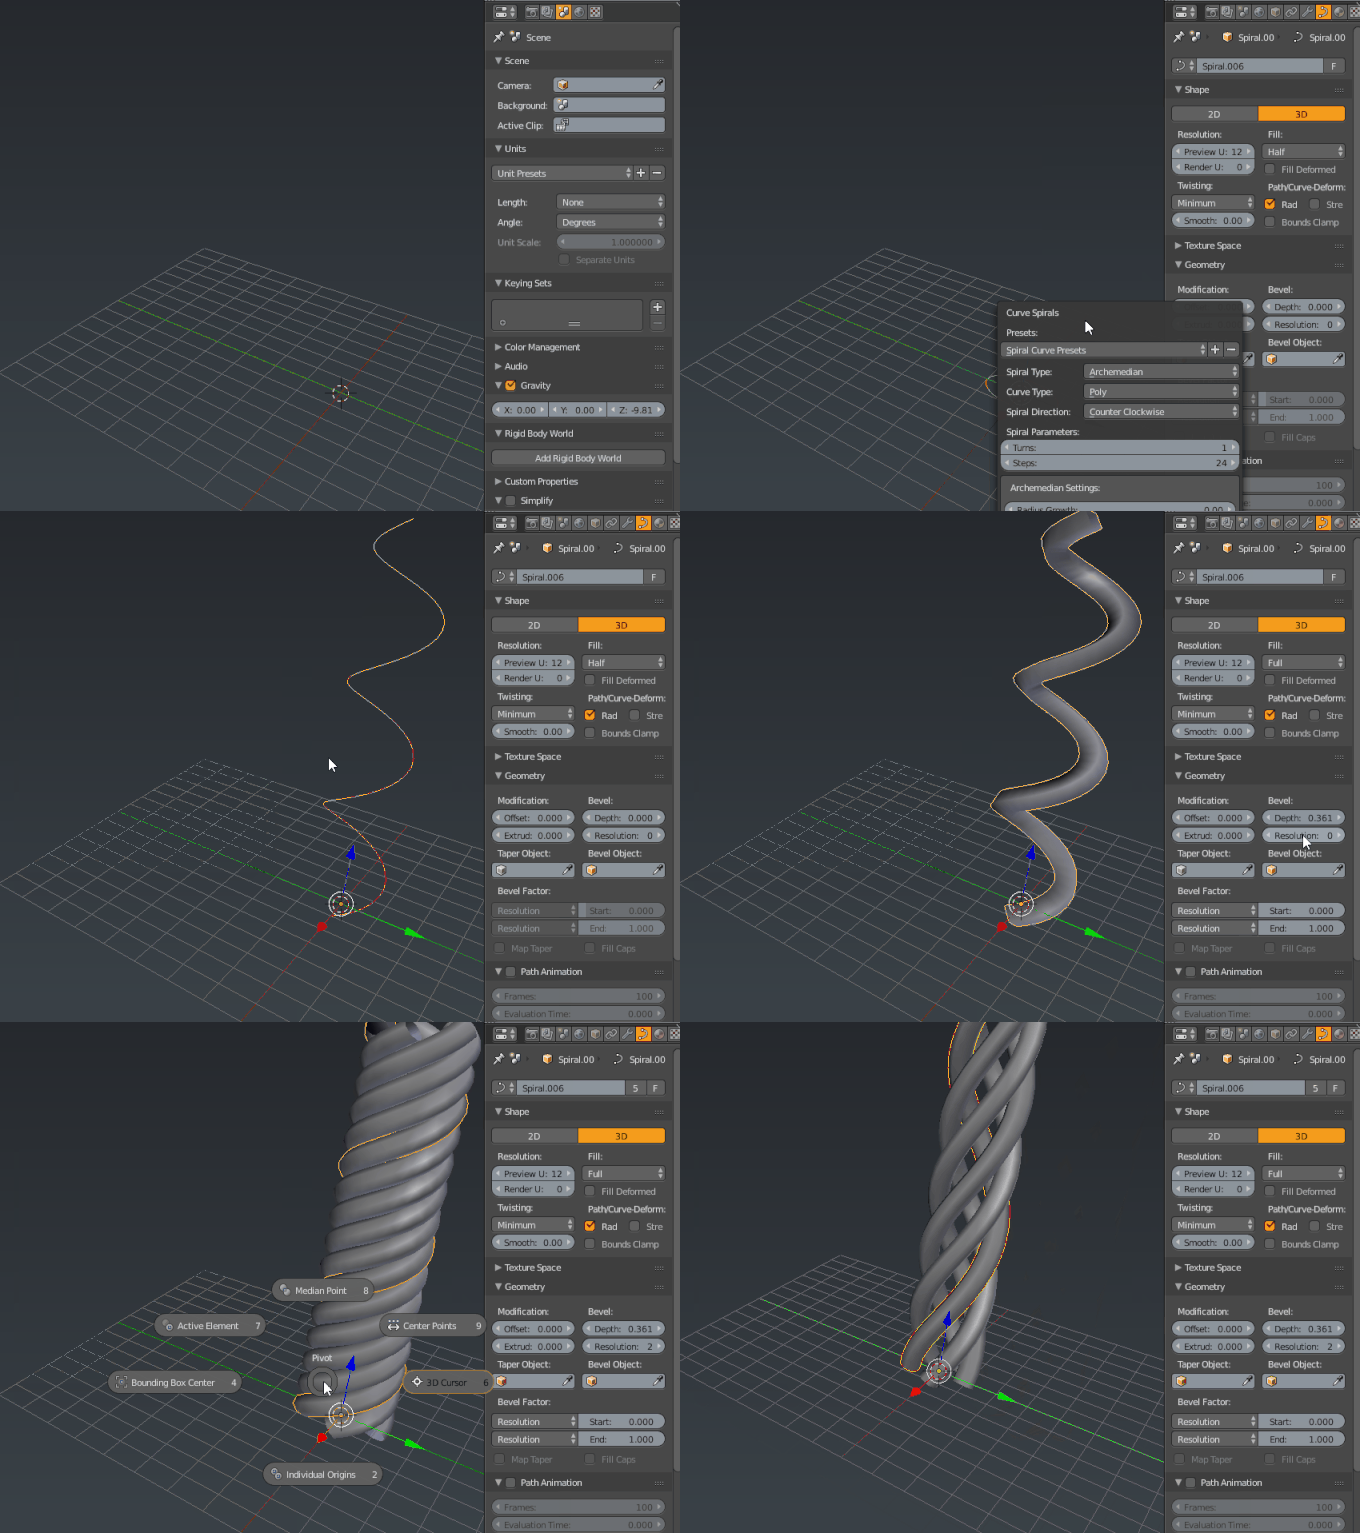
Here is one approach using addon: Add Curve: Extra Objects
1) Create archimedian spiral
2) Press F6 to toggle the Curve Spirals menu and adjust the curve
3) Bevel the curve
4) Create instance of the curve with Alt + D
5) Rotate R+Z+72 (360/5=72 if you want 5 elements)
6) Repeat 3 more times
7) You can additionally scale it (in edit mode)
-
6
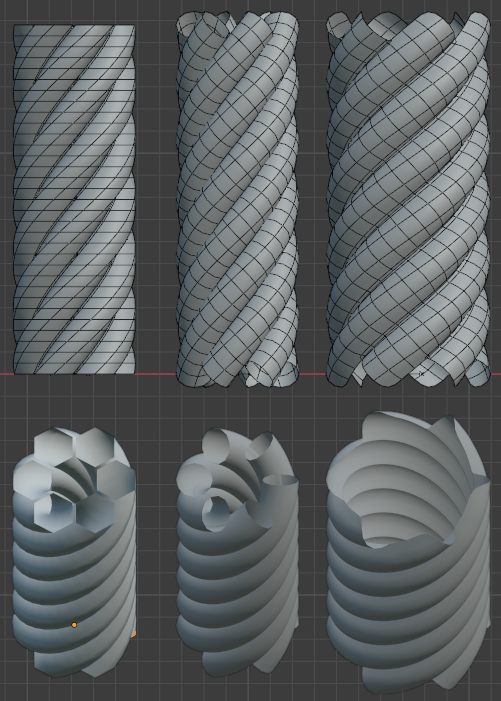
Just for completeness, another method. (This time, for a 6-fold braid, up in Z)
- Create a 6-sided circle at the origin
- Create an Empty at the origin
- Rotate the Empty by 60 in Z
- Give the circle an Array modifier, 6-count, Object-offset, based on the Empty
- In Edit mode, all selected, G X drag the circle away from its origin
- Give the array a Screw modifier, in Z, adjusting the modifier's 'Screw' parameter for height.
- Finish with a Subdivision Surface modifier.
The braid on the left should result. Now you have some options:
- in Edit Mode, with Pivot set to 'Median', R X and G X the circle to get better topology, with less-stressed quads, as in the middle.
- Delete the inner edges of the circle, and adjusting as above, bring connecting vertices together, adding Weld and Bevel (by angle) modifiers, to get a shell that will subdivide well. (Move the subdiv to the bottom of the modifier stack)

