1
$\begingroup$

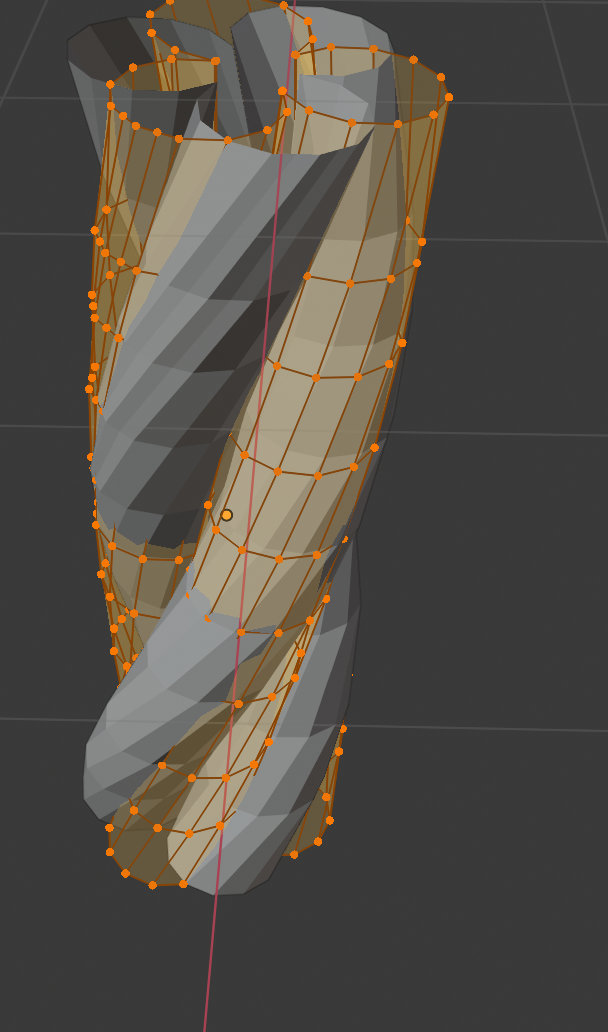
I am new at Blender, I want to design a mesh of a single twisted yarn, which is the best strategy to design this mesh. Sorry if my question sounds dumb.

I am attaching the picture ![enter image description here enter image description here
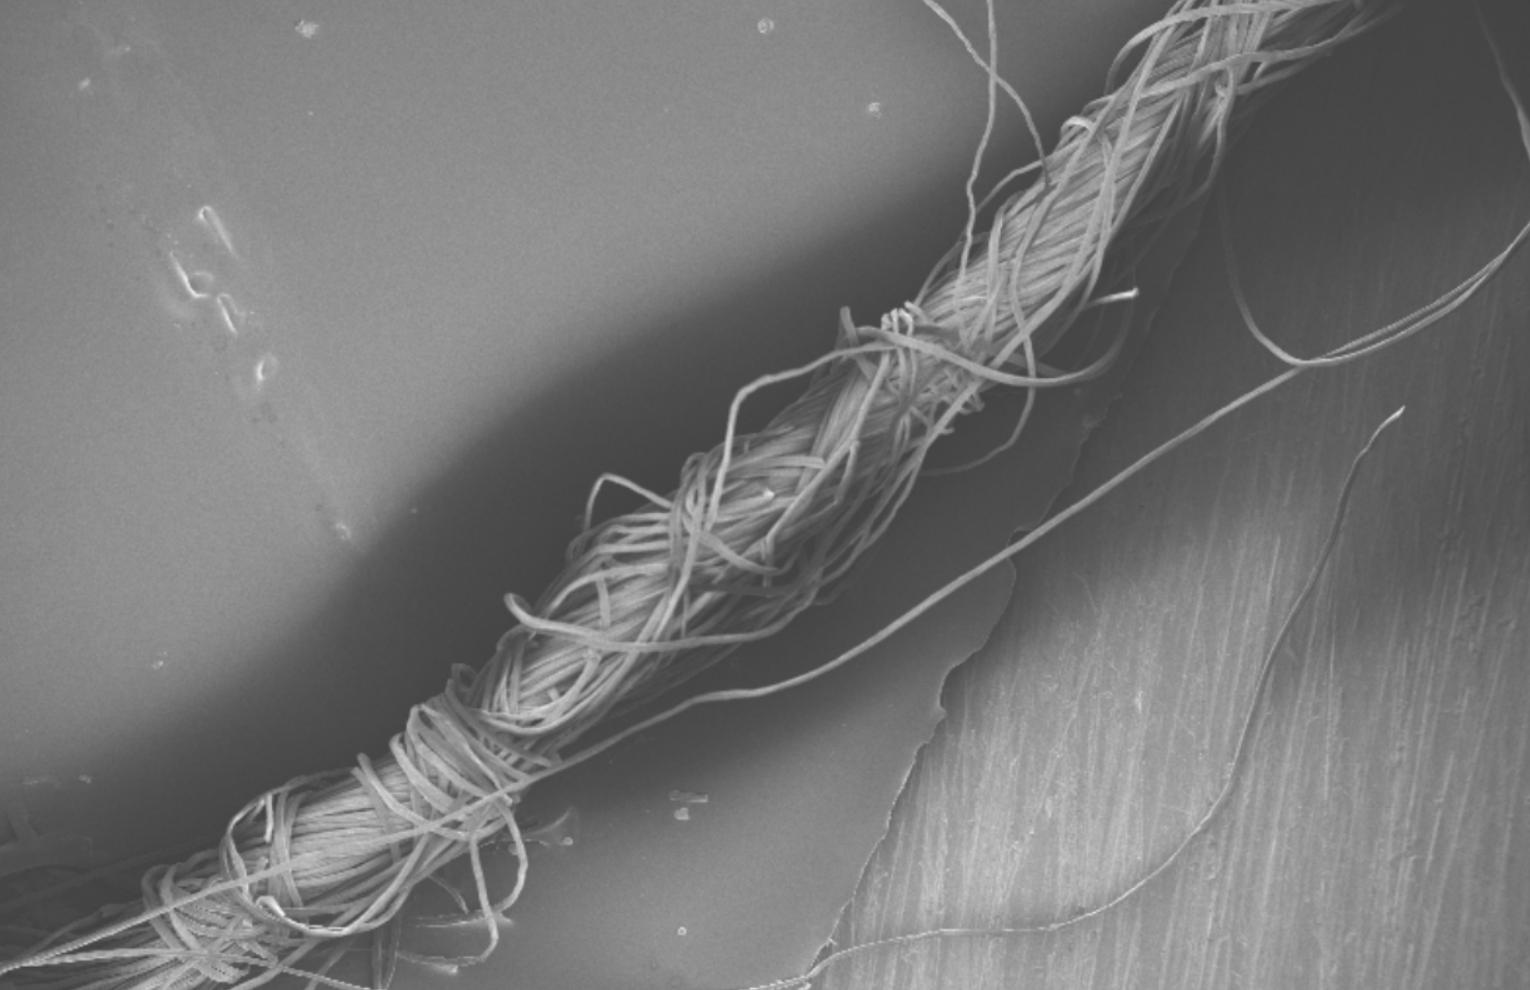
I foud a tutorial in youtube: https://www.youtube.com/watch?v=cP1pY14fVC4&list=LLuORS2hOBqsUJEgE645iWDQ&index=2&t=1026s, however, I dont know how to merge the mesh.

EDIT Is this mesh true, I am going to use it for physical simulation

enter image description here

$\endgroup$
12
  • 2
    $\begingroup$ please show an image of a single twisted yarn, how is it made exactly, several ropes? etc.. $\endgroup$
    – moonboots
    Commented Sep 30, 2019 at 13:33
  • $\begingroup$ @moonboots, I am attaching the picture. $\endgroup$
    – Monika
    Commented Oct 1, 2019 at 18:05
  • 1
    $\begingroup$ please tell me if that answer helps: blender.stackexchange.com/questions/114563/… $\endgroup$
    – moonboots
    Commented Oct 2, 2019 at 5:05
  • 2
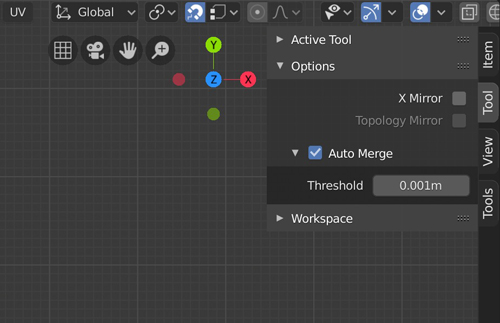
    $\begingroup$ you need to enable the Snap option (magnet icon) / vertex mode, (or press ctrl to enable the Snap while you move your mesh) and also the Auto Merge option, which, in 2.8, is in the 3D view N panel (top right) > Tools > Options, tell me if it works $\endgroup$
    – moonboots
    Commented Oct 3, 2019 at 10:40
  • 1
    $\begingroup$ also, make sure you're in Vertex select mode $\endgroup$
    – moonboots
    Commented Oct 3, 2019 at 13:35

1 Answer 1

2
$\begingroup$
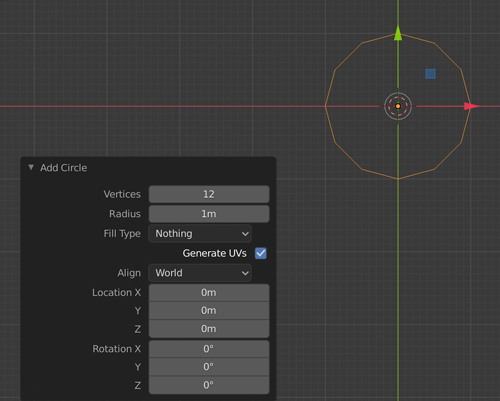
  • Create a 12 vertices circle.

enter image description here

  • Enable the Snap option (Vertex mode), or just press ctrl when you'll need it, enable the Auto-Merge option.

enter image description here

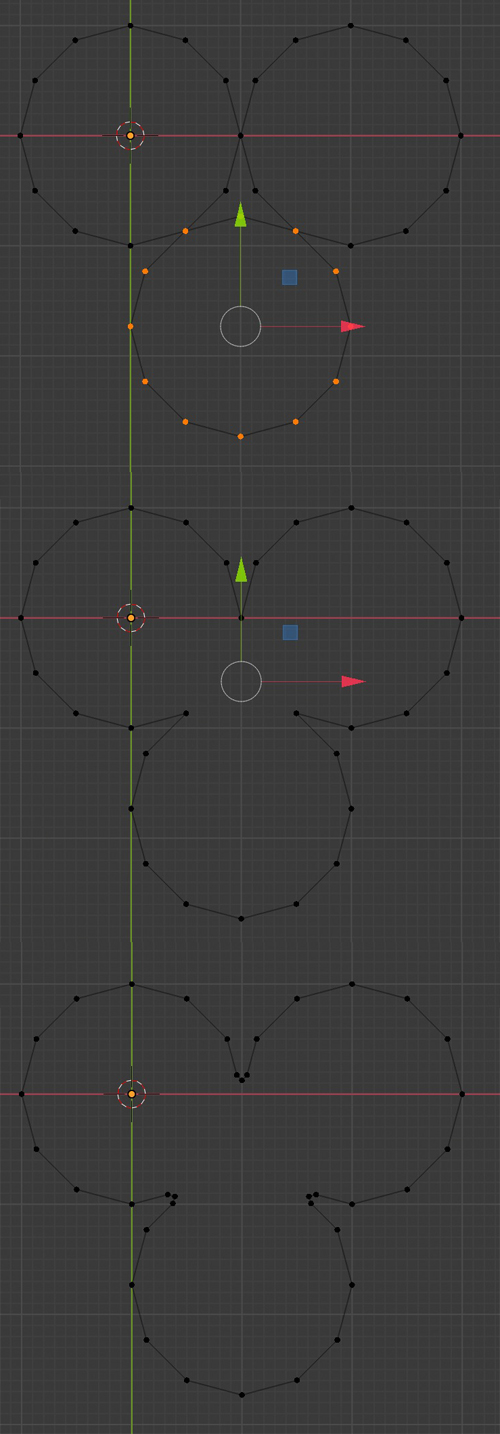
  • Duplicate your circle, with Snap and Auto-Merge it will snap and merge the vertices. Delete the inner vertices, bevel the 3 central vertices with a shiftctrlB.

enter image description here

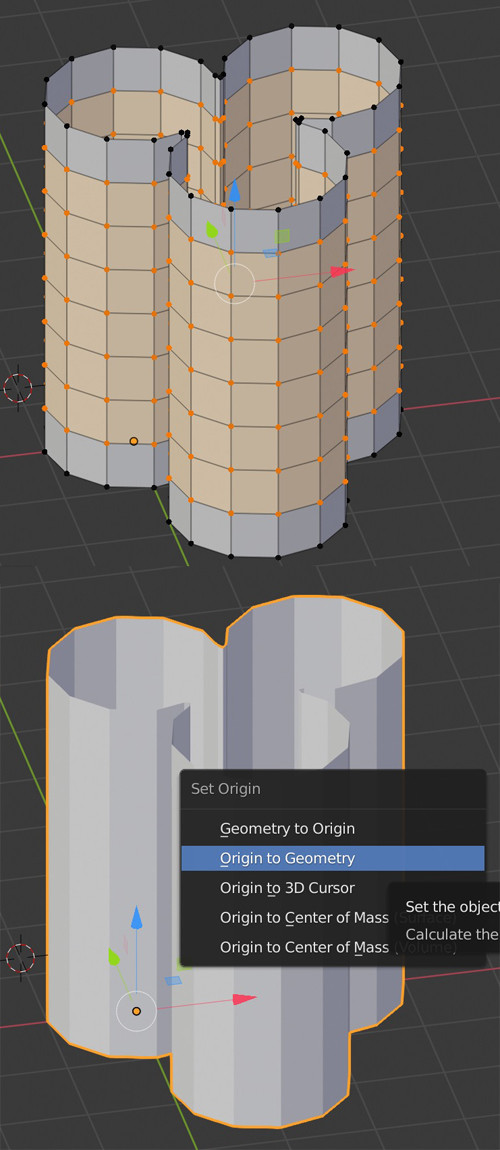
  • Extrude up, create horizontal edge loops with ctrlR. To make sure you don't have flipped normals, press shiftctrlN. Back in Object mode, move the origin to the geometry.

enter image description here

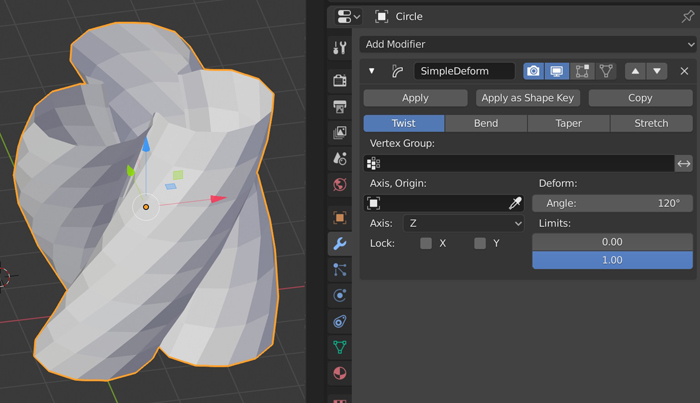
  • Give your object a Simple Deform modifier, Angle 120°, Axis Z.

enter image description here

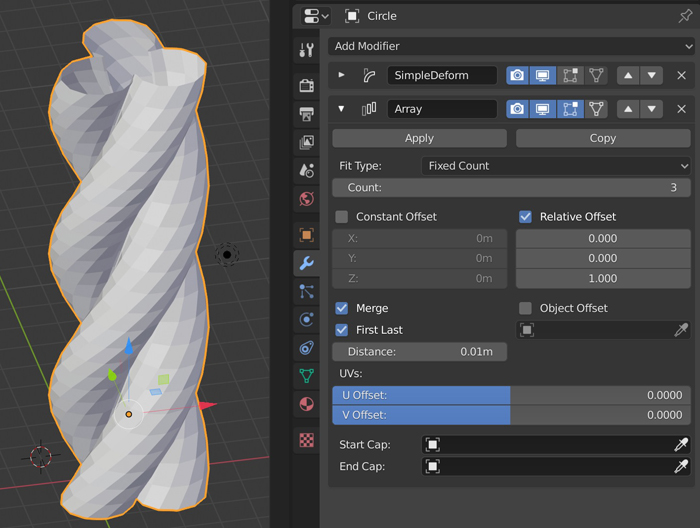
  • Give it an Array modifier, enable the Merge and First Last options.

enter image description here

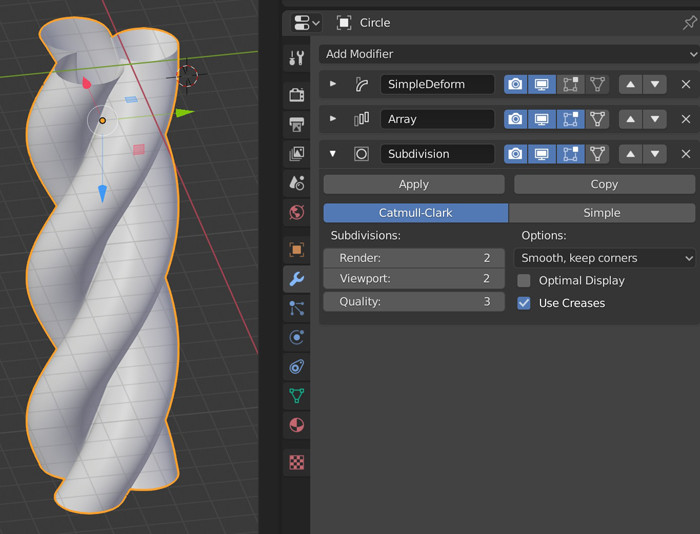
  • Give it a Subdivision Surface modifier, and also smooth it: Object > Shade Smooth.

enter image description here

  • To make it follow a curve, give it a Curve modifier. Make sure that the curve's origin is at its beginning, put the object at the same point.
$\endgroup$
19
  • 1
    $\begingroup$ I'm also on Mac, Auto-Merge should appear once in Edit mode, are you in Edit mode? $\endgroup$
    – moonboots
    Commented Oct 6, 2019 at 20:17
  • 1
    $\begingroup$ Plus, if you're not familiar yet with basic blender operations you should work on some beginners tutorials ;) $\endgroup$
    – moonboots
    Commented Oct 6, 2019 at 21:03
  • 1
    $\begingroup$ at 18:40 he uses the Proportional Editing option (little blue sphere icon) with the Linear setting, but the Simple Deform modifier is more precise $\endgroup$
    – moonboots
    Commented Oct 8, 2019 at 10:32
  • 1
    $\begingroup$ Sorry I don't know anything about these formats so I can't answer $\endgroup$
    – moonboots
    Commented Oct 8, 2019 at 10:57
  • 1
    $\begingroup$ Maybe create a new question as it is a completely different issue ;) $\endgroup$
    – moonboots
    Commented Oct 8, 2019 at 15:43

You must log in to answer this question.

Not the answer you're looking for? Browse other questions tagged .