7
$\begingroup$

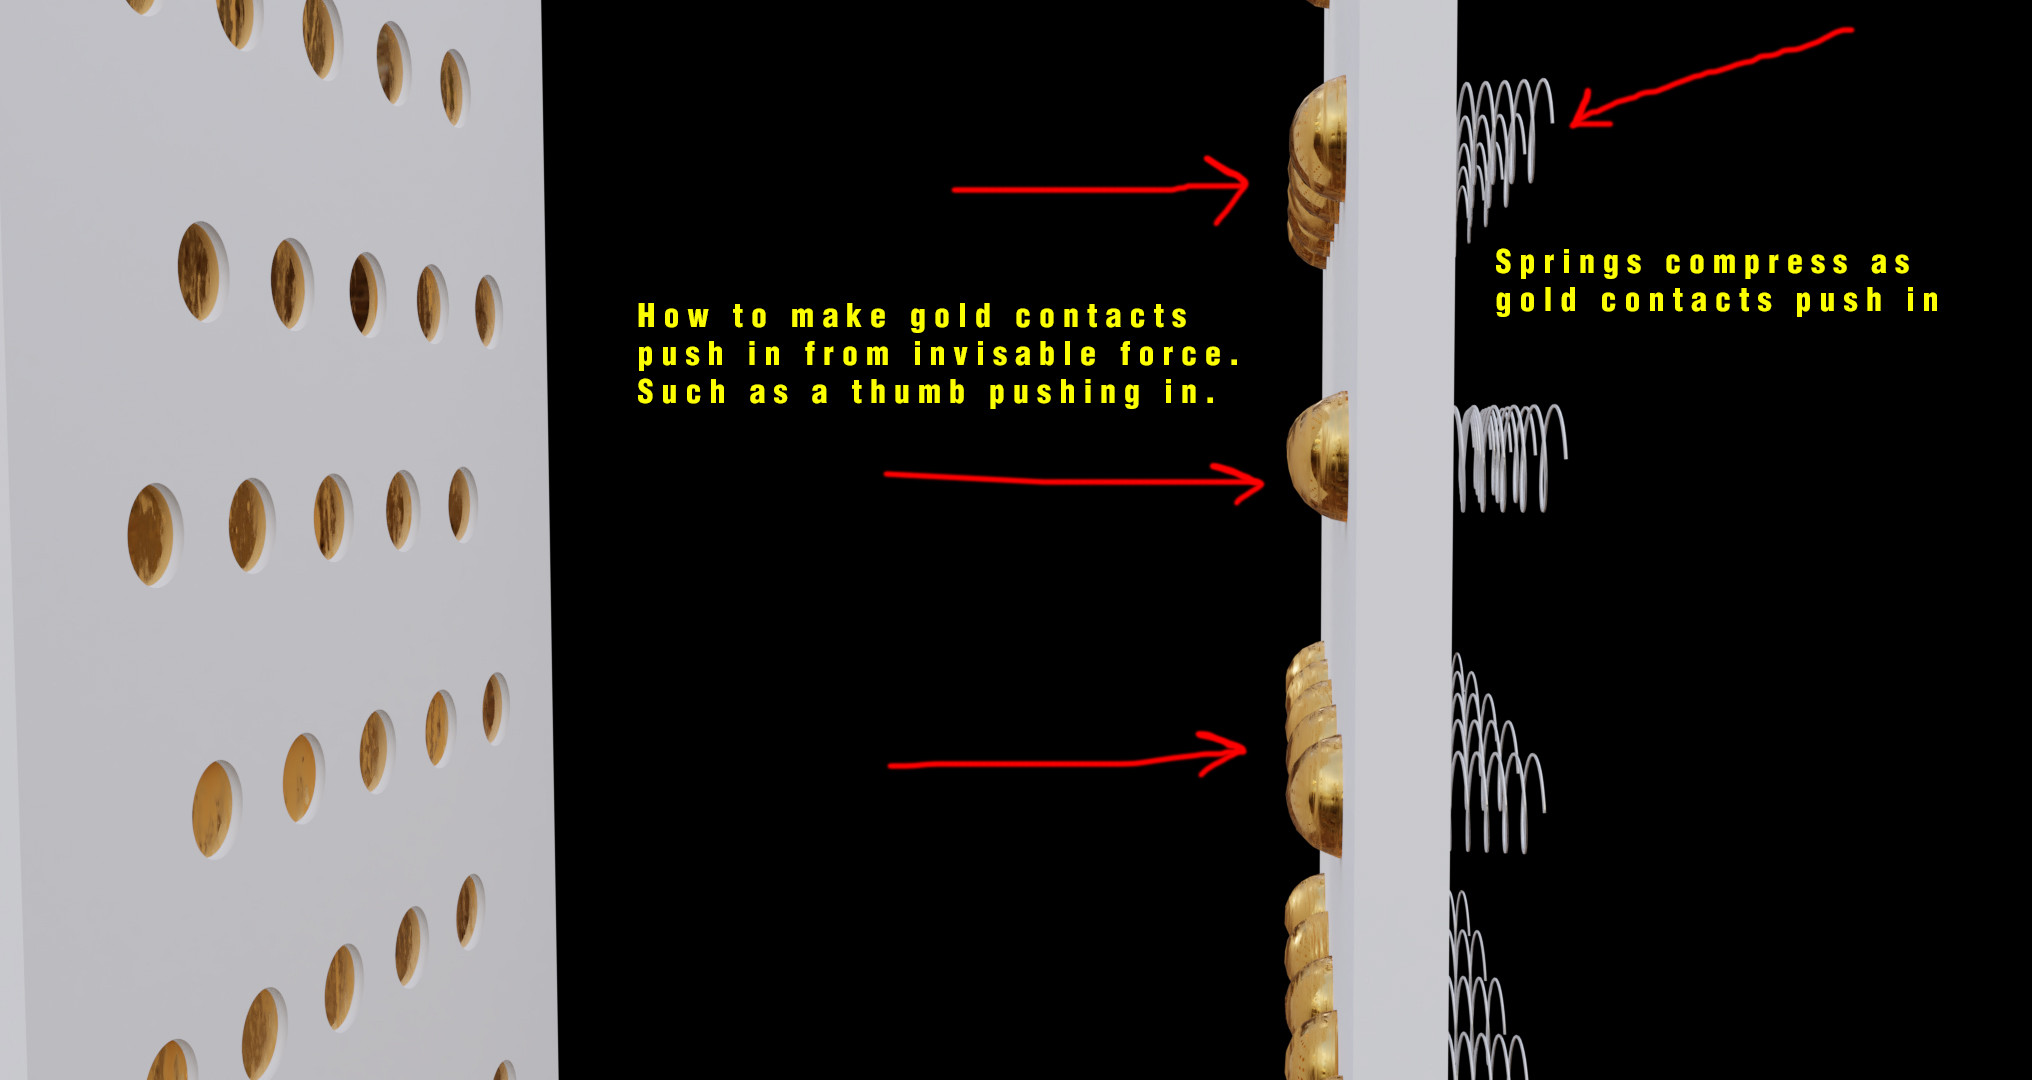
So I am creating an animation that will show an invisible force (such as a thumb) pushing down on the gold contacts to show that they are set on a spring. I need the gold contact to be slightly pushed in as the force is moving over it. The springs do not need to compress but I think it will add to the realism of the animation. So if this can easily be done I would like to add that feature as well.

I have tried force fields and magnetic field, that didn't seem to do anything (probably using it wrong).

I am not even sure the path I should go down, Do I set the gold contacts as rigid body and get a force field to move them or is it better done as a weight proximity modifier? I just don't know what my next step should be.

Just to clarify:

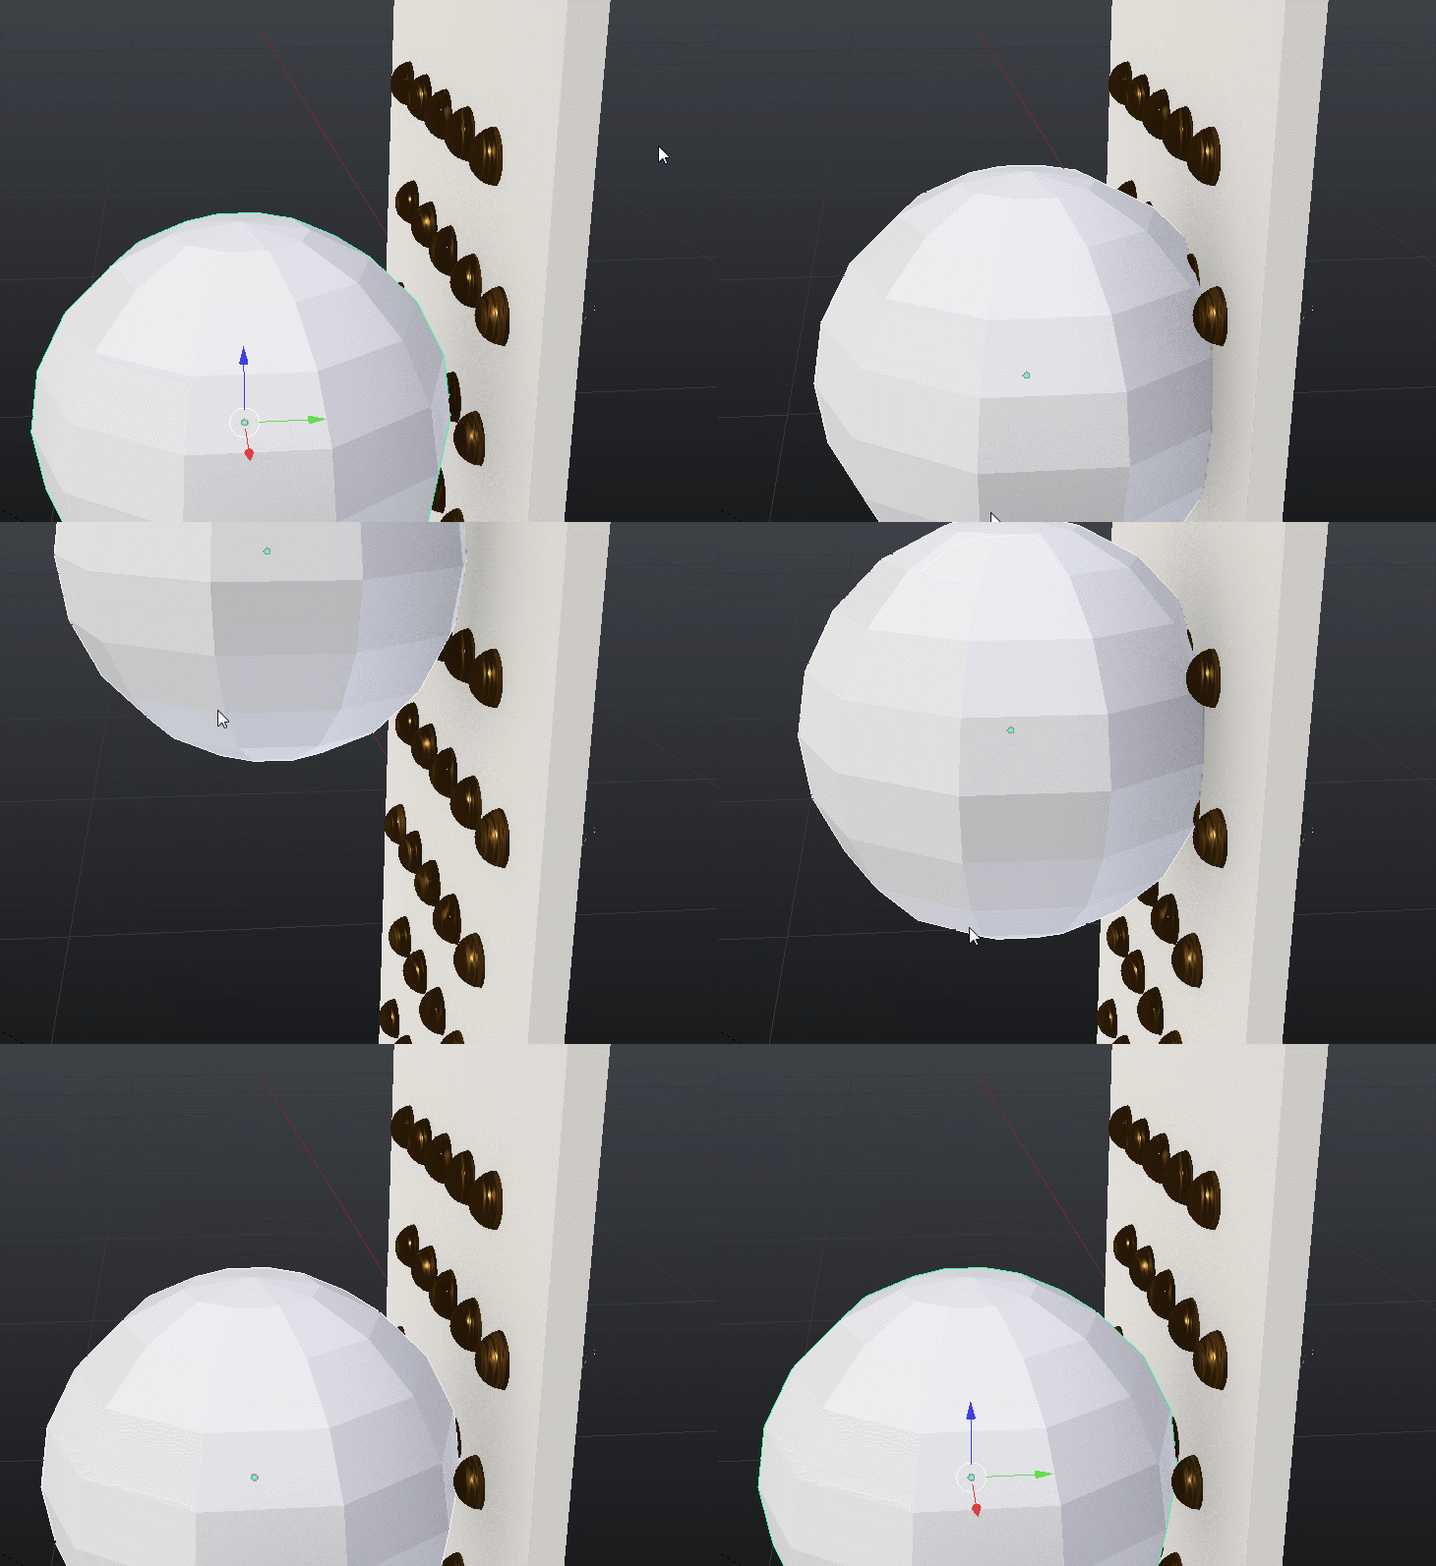
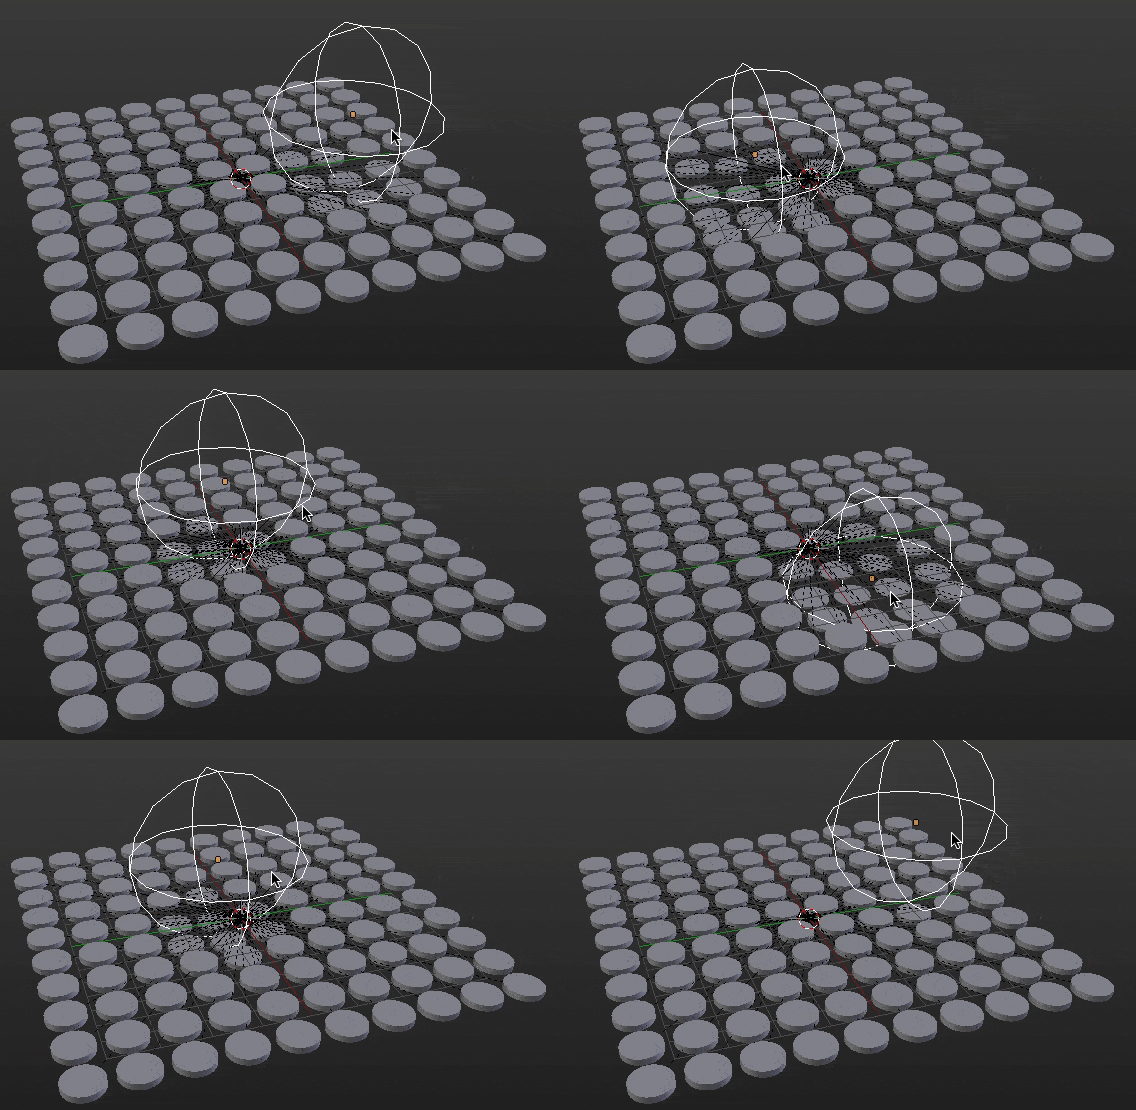
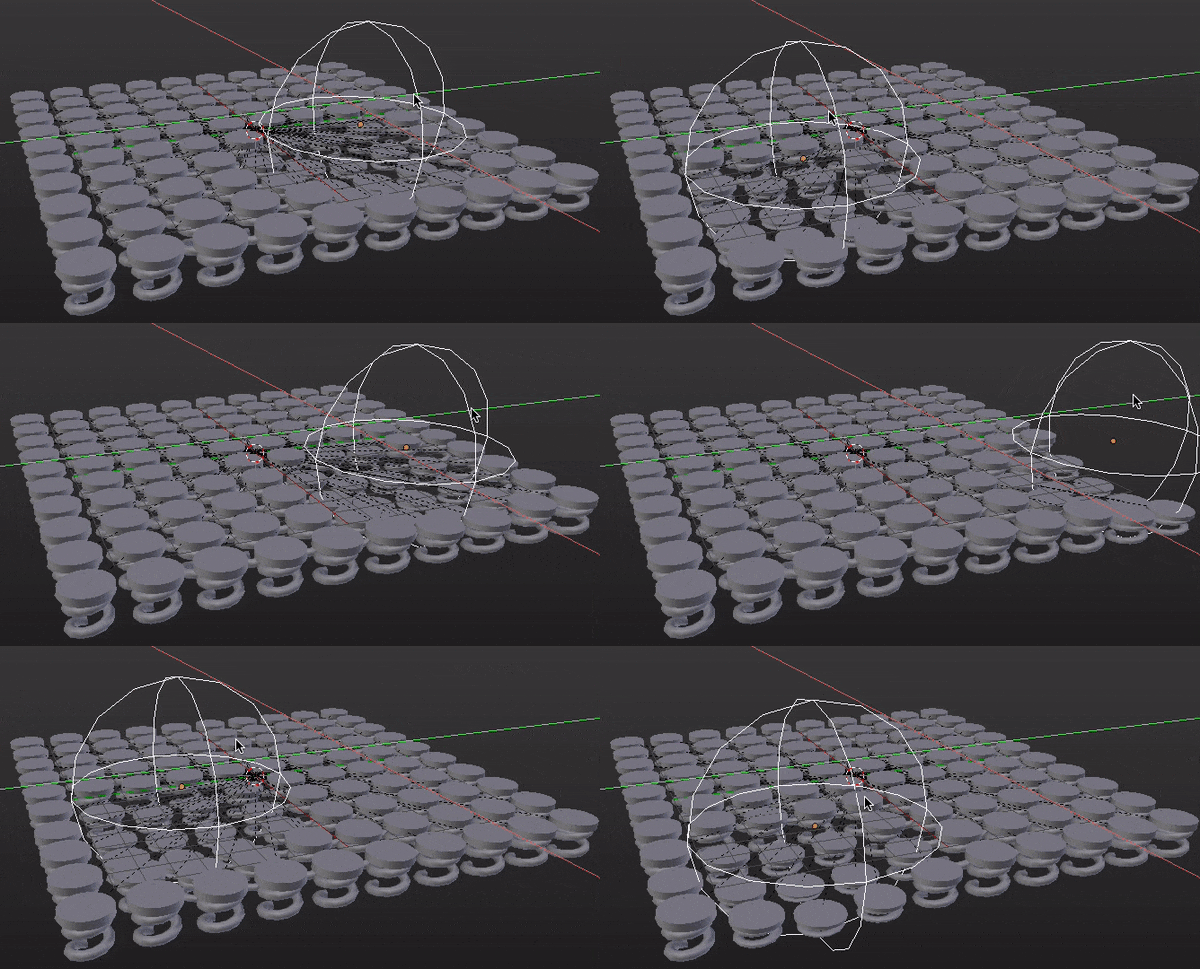
In the below GIF, imagine the sphere is invisible but everywhere it touches the gold contacts it should slightly push them in, causing the springs to compress. And they should pop back to their original position once the force passes it.

enter image description here

enter image description here

$\endgroup$

1 Answer 1

7
+200
$\begingroup$

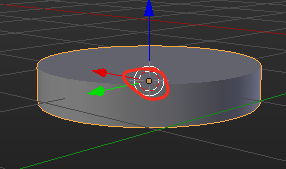
This isn't too hard with Animation Nodes. Once you've installed the add-on, check a couple of things on your pins. First, make sure the "head" has an object origin in the object:

enter image description here

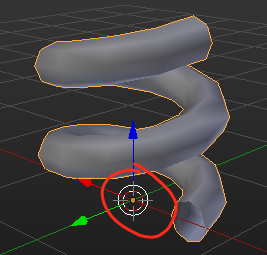
Second, make sure that the spring's object origin is at it's base:

enter image description here

Now, let's open up a Node Editor panel and create a new Animation Nodes tree.

enter image description here

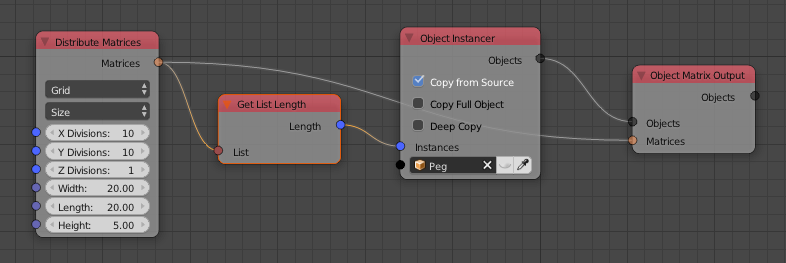
Let's create our array of pegs, like this (you can search for nodes with Ctrl + A):

enter image description here

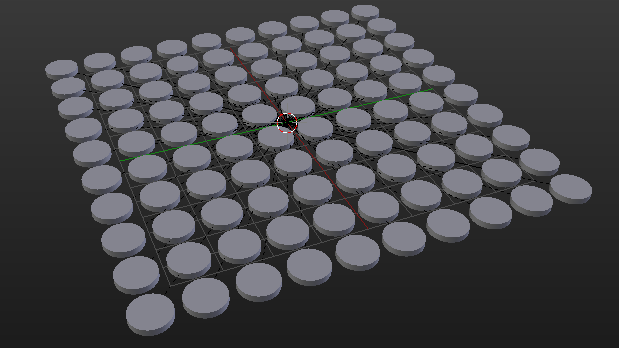
Explanation: The Distribute Matrices node creates a the locations of a grid of objects with the properties we set, the Object Instancer node creates the objects, then the Object Matrix Output node puts the objects into the scene. You should now have this lovely grid:

enter image description here

Now, lets create our "force sphere". Create a Sphere empty and give it a radius of 4. (You may need to adjust to your scene's scaling).

Now, to make the pins interact, add these nodes:

enter image description here

Explanation: The Object Matrix Input node gets the transformation attributes of the Empty. Decompose Matrix gets the location vector. The Point Distance Falloff node creates a 3D "gradient" radiating from the set origin (the location of the Empty). The Offset Matrix node applies the transformation of (0,0,-1) at the value determined by the Falloff.

It should look like this:

enter image description here

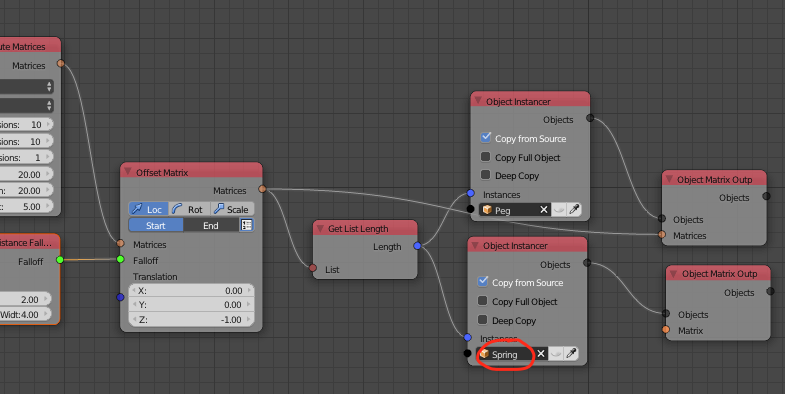
Next, we need to create the springs. Create another Object Instancer node for all the springs:

enter image description here

We want to offset the springs' matrices differently, though:

enter image description here

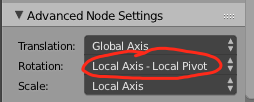
In the N panel of the second Offset Matrix node, under Advanced Settings, change Rotation: to Local Axis - Local Pivot:

enter image description here

Here is the final result:

enter image description here

Edit:

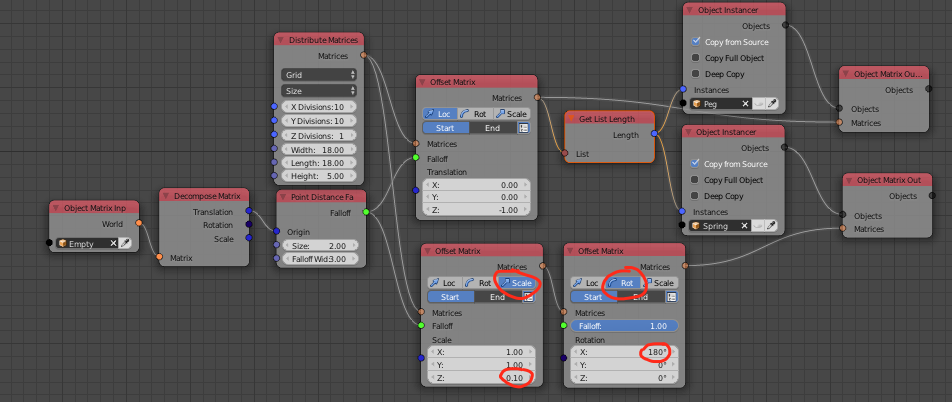
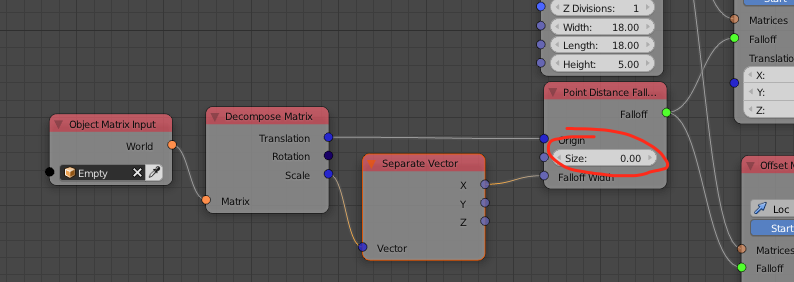
I've gotten better results with the Empty size set to 1, and the following node setup:

enter image description here

This way, it also responds to scaling the Empty.


Blend file:

(Requires Animation Nodes)

$\endgroup$
2
  • $\begingroup$ You're the man!!! I appreciate it, this is exactly what I needed. I already have animation nodes installed just didn't know much about it. It is making me wait till tomorrow to give you the bounty, but I will make sure I do that!! $\endgroup$
    – icYou520
    Commented Aug 18, 2017 at 18:03
  • 2
    $\begingroup$ Thanks! You should check if you have Animation Nodes 2.0 installed, not 1.6, since a lot of the nodes changed in the update, and I don't know if my solution is backwards compatible. $\endgroup$ Commented Aug 18, 2017 at 18:05

You must log in to answer this question.

Not the answer you're looking for? Browse other questions tagged .