0
$\begingroup$

This time, I began to rig a mesh through weight painting and deformations so I could achieve an accurate effect to my liking. For all my characters before, I have used object rigging, (Without Vertex groups as I never needed to have some).

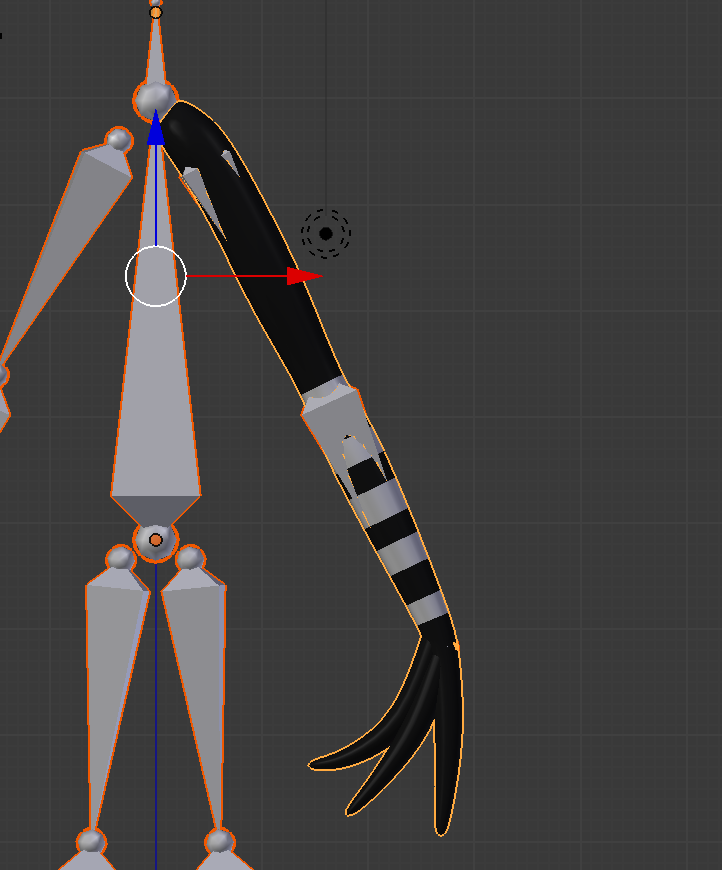
However, this time I have an arm with two bones, One for the forearm and one for the wrist. When I rotate the wrist, it works correctly, but once I rotate the forearm, there are a specific pair of circular vertices that work strangely.

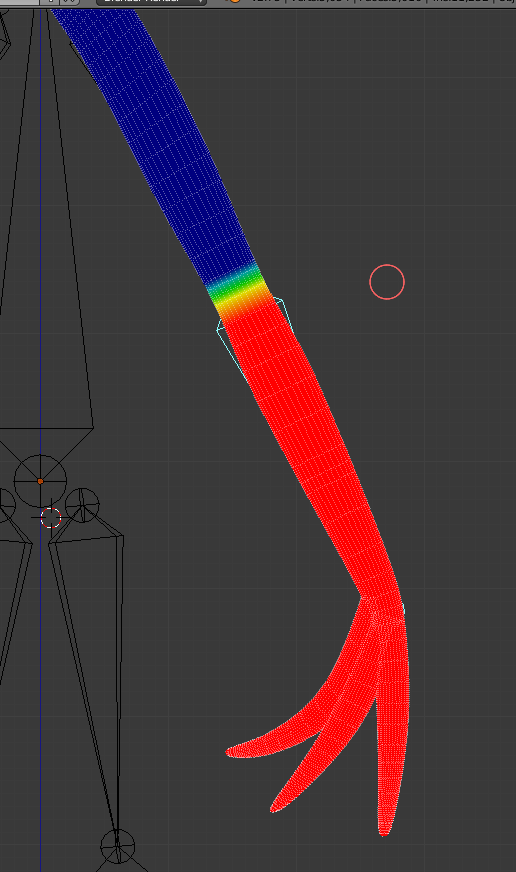
Here is the weight paint and arm at rest position: enter image description here
The Yellow and light blue ones deform once I rotate the bone. enter image description here
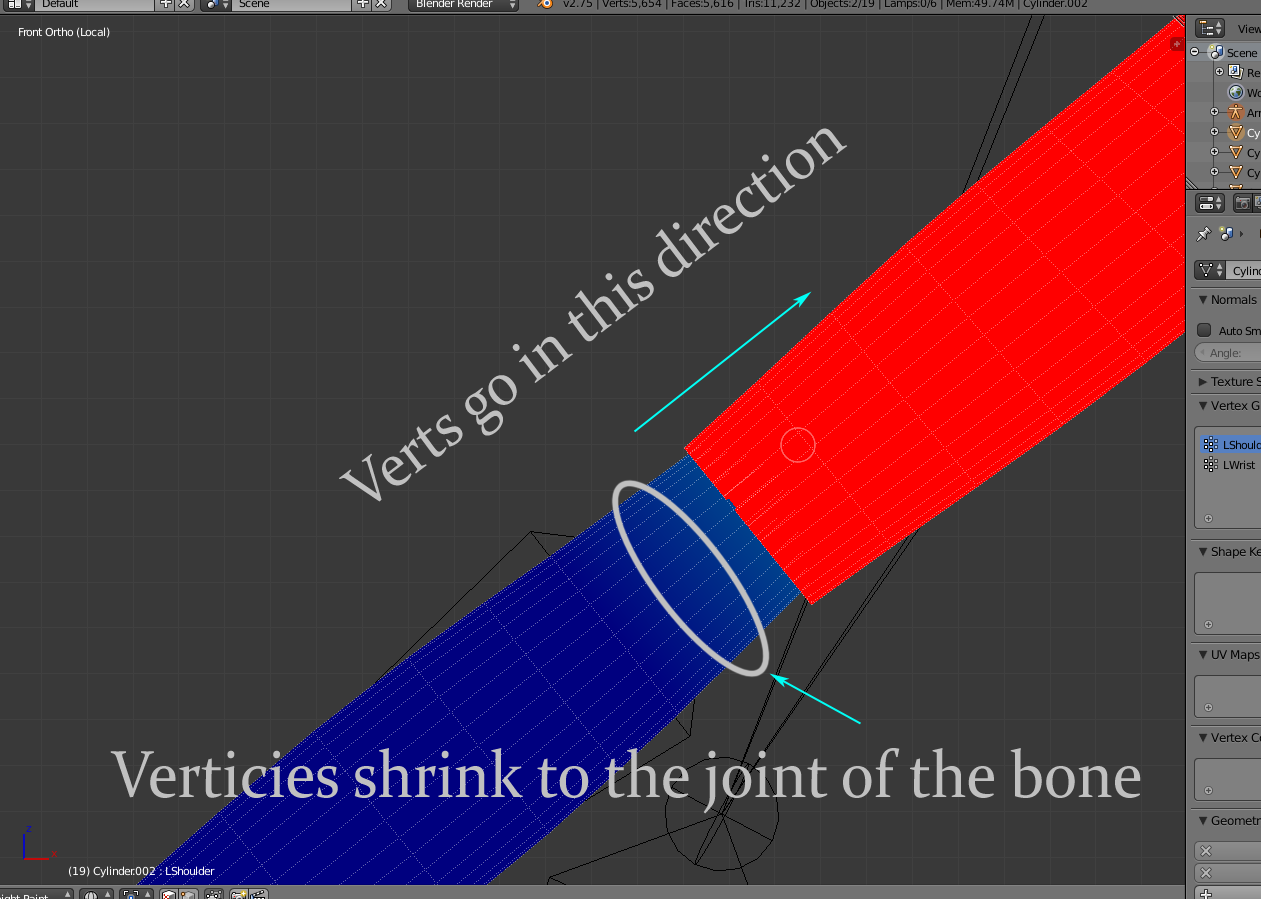
Like so. It is strange because I have an armature modifier applied to the object with preserved volume checked. Yet it seems as if those sets of vertices do not follow the command; they seem to be moving closer and closer to the joint whilst shrinking as I rotate the bone.

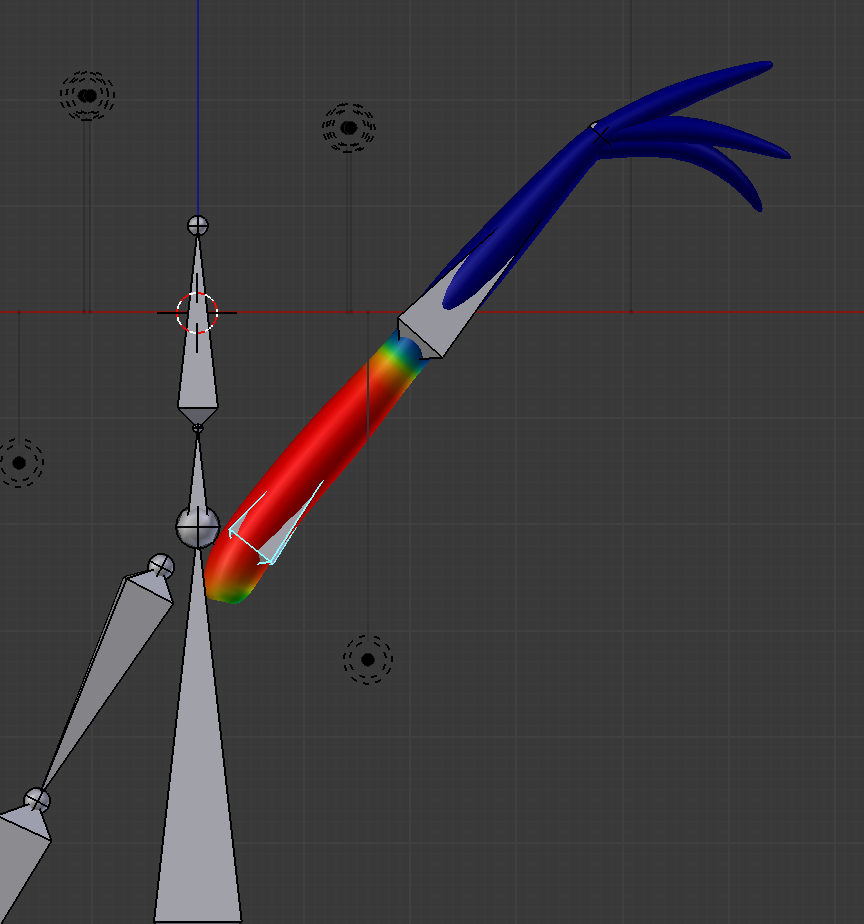
Here is what the weight values of the second bone are: enter image description here
Any suggestions or wisdom would be appreciated, and I can always upload the .blend if you ask me to. Thank you.

Here is the .blend file:

$\endgroup$
5
  • $\begingroup$ Could you provide your .blend file on blend-exchange.giantcowfilms.com to be able to help you? $\endgroup$
    – Tak
    Commented Apr 17, 2017 at 23:21
  • $\begingroup$ Added it for you $\endgroup$ Commented Apr 17, 2017 at 23:41
  • $\begingroup$ I'm confused what is the exact problem? Can you highlight it in the screenshots? $\endgroup$
    – Tak
    Commented Apr 18, 2017 at 0:24
  • $\begingroup$ There are a set of vertices that continue to shrink towards the joint of the bone whenever it is moved. If you rotate it, you'll see them, I don't know how to fix them so that they follow the shoulder bone and have the appropriate relations to the wrist bone so they do not deform unnaturally. $\endgroup$ Commented Apr 18, 2017 at 0:44
  • $\begingroup$ Answer provided with screenshots, you can accept and upvote it if it solved your problem. $\endgroup$
    – Tak
    Commented Apr 18, 2017 at 1:08

1 Answer 1

1
$\begingroup$
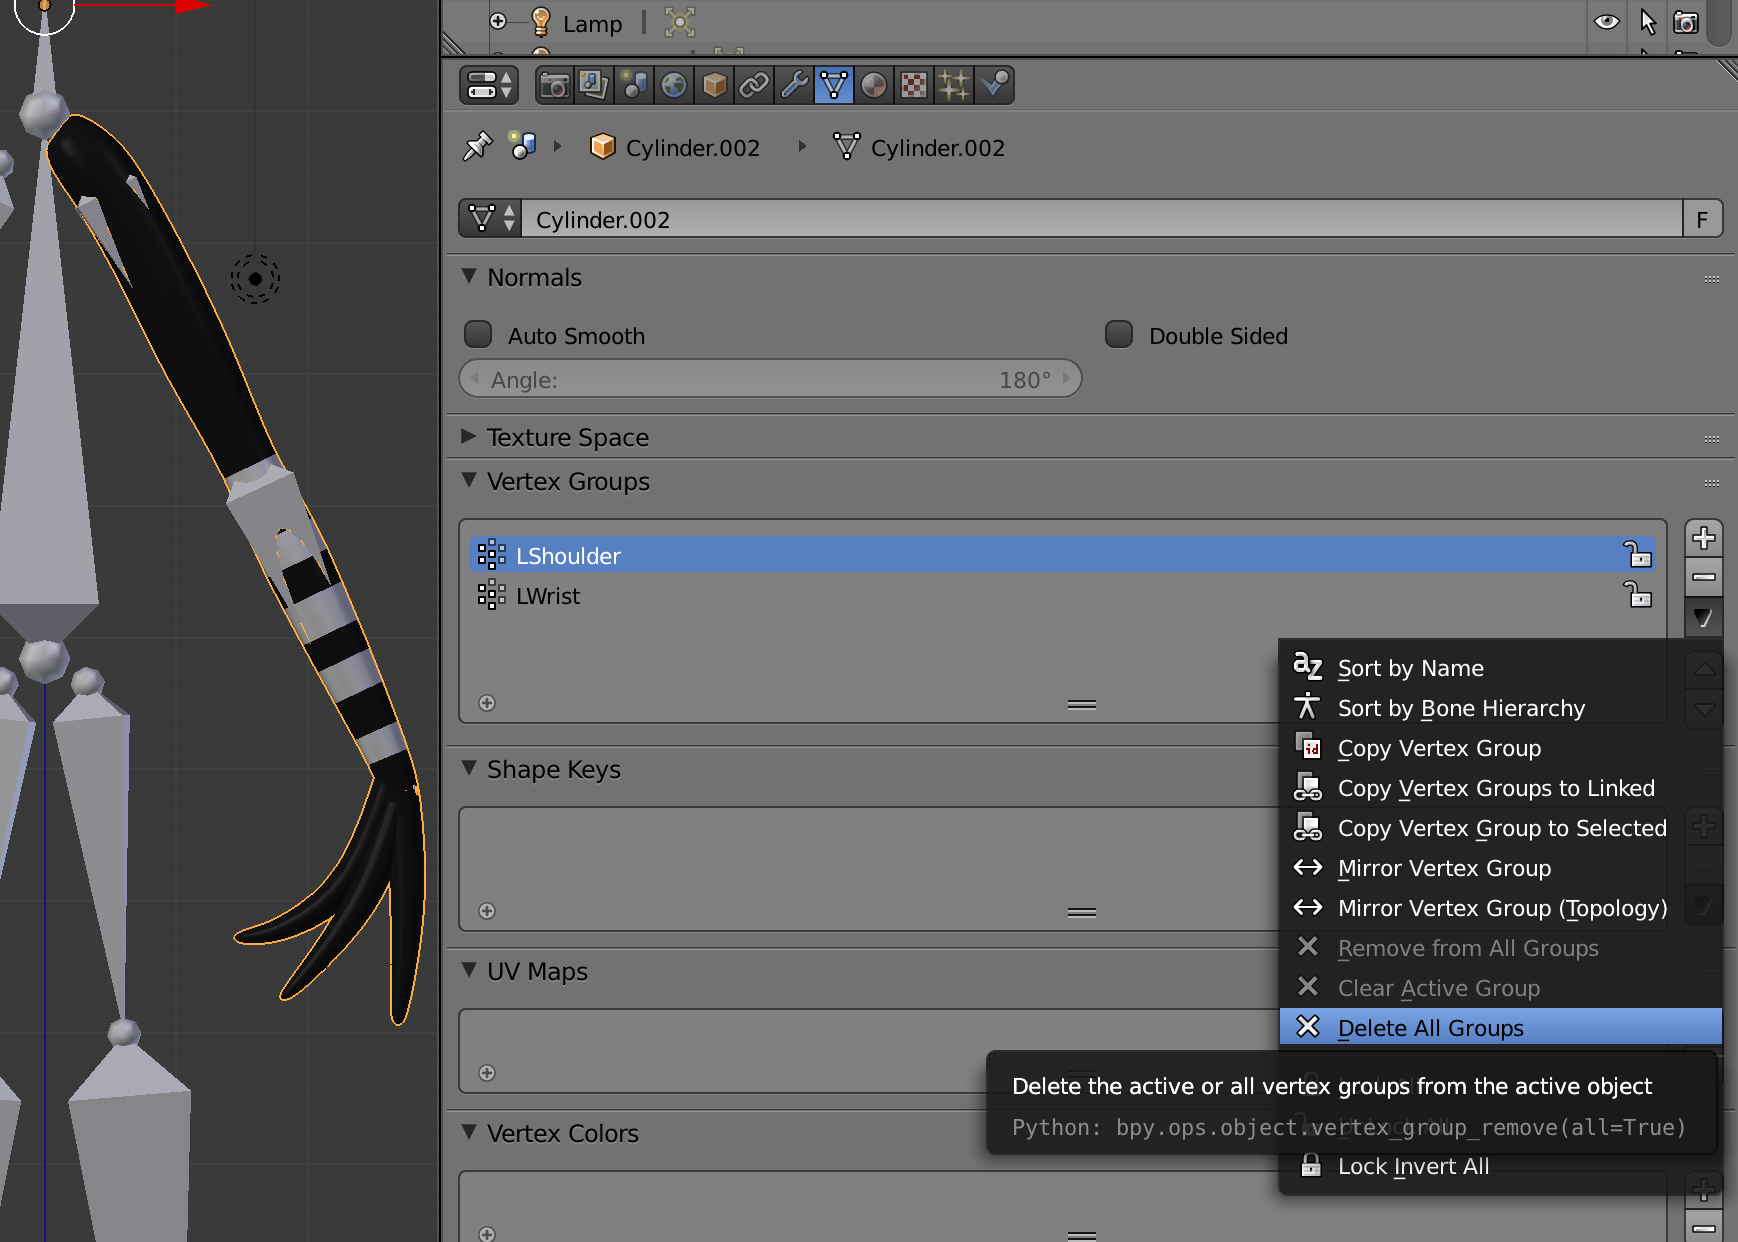
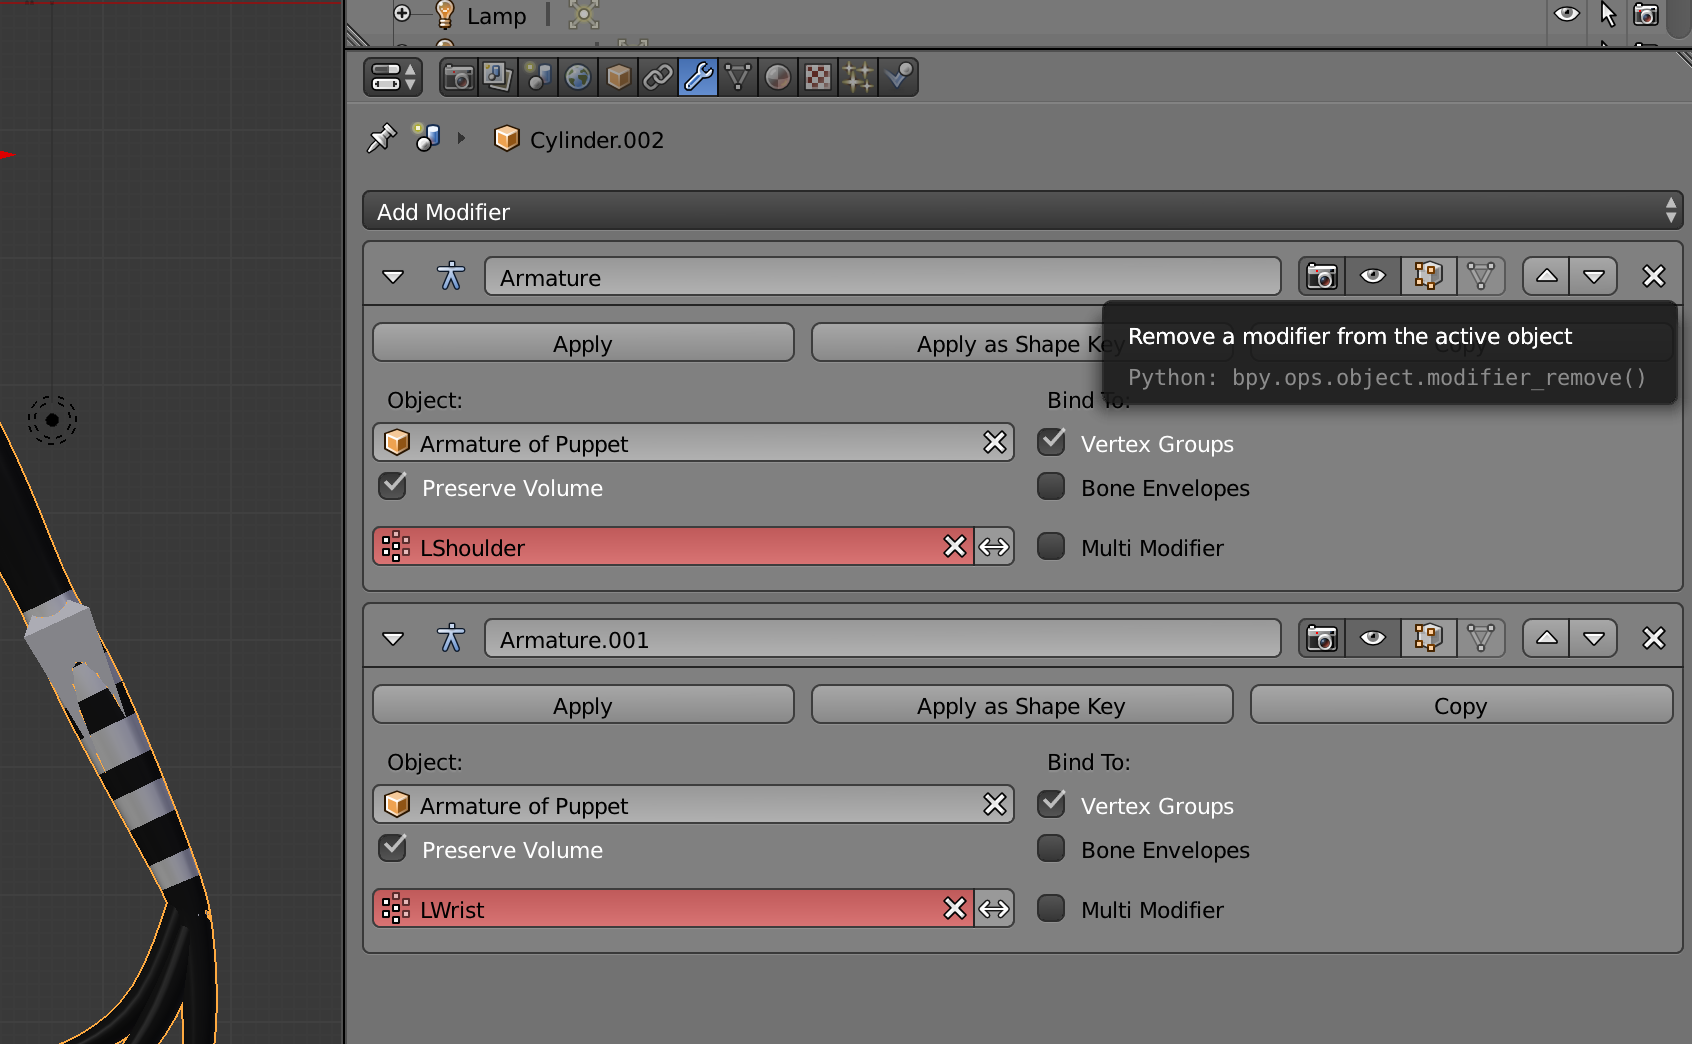
  1. Select your Mesh and delete all vertex groups and all modifiers as shown: enter image description here enter image description here
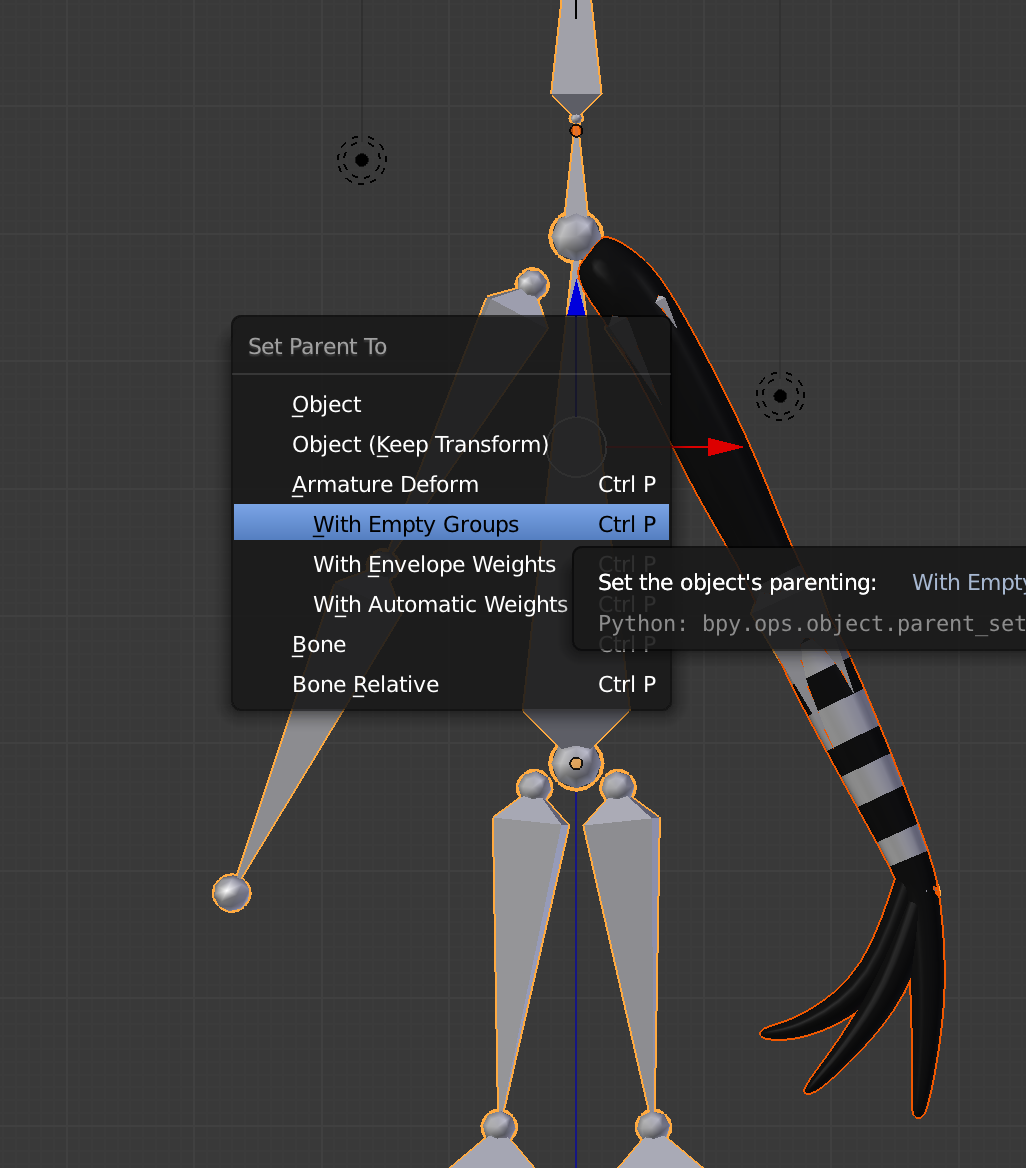
  2. Select your Mesh then select your armature using Shift+RightClick and hit Ctrl+P then choose With Empty Groups: enter image description here
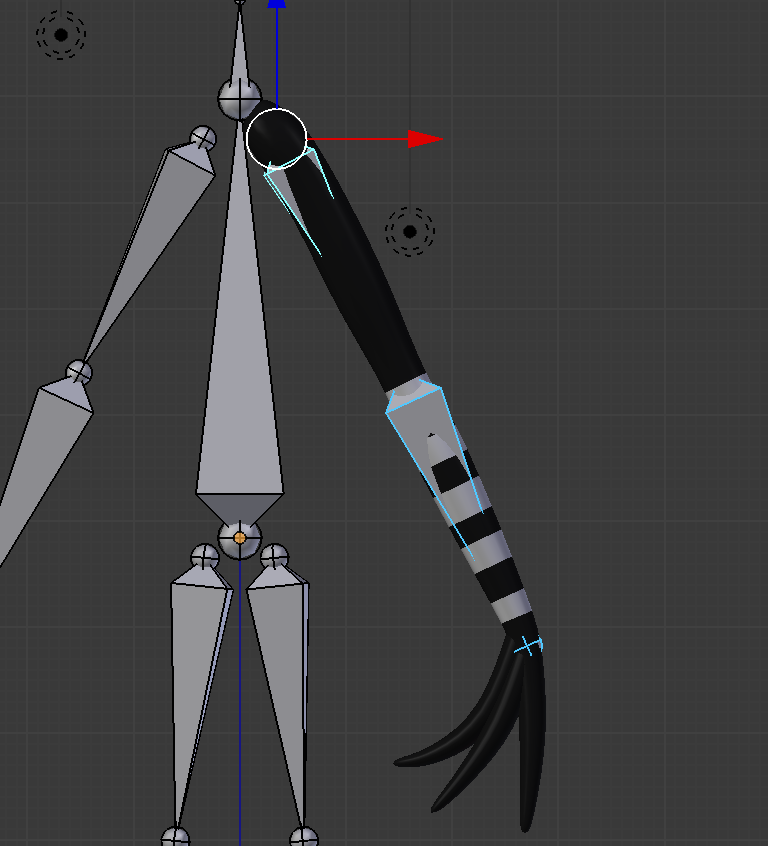
  3. Switch to Pose Mode then select the two bones LWrist and LShoulder then select the mesh using Shift+RightClick as shown below: enter image description here enter image description here
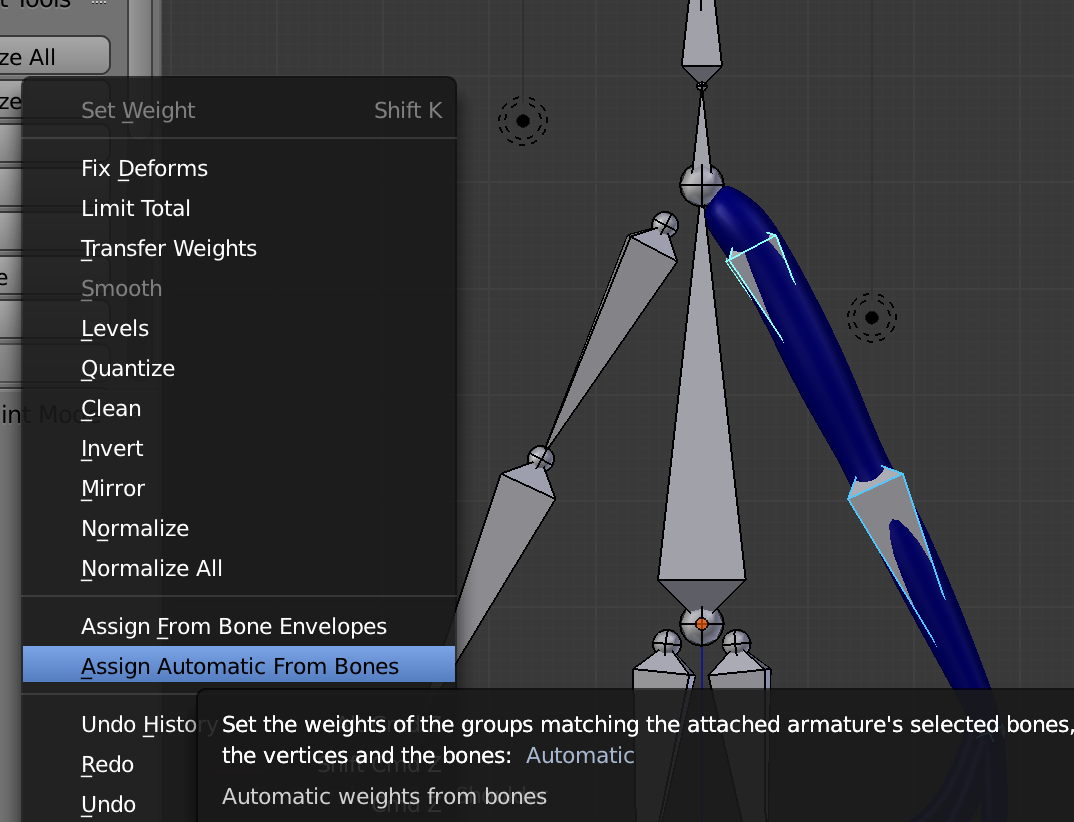
  4. Switch to weight painting mode and select Assign Automatic From Bones from the Weights menu as shown below: enter image description here

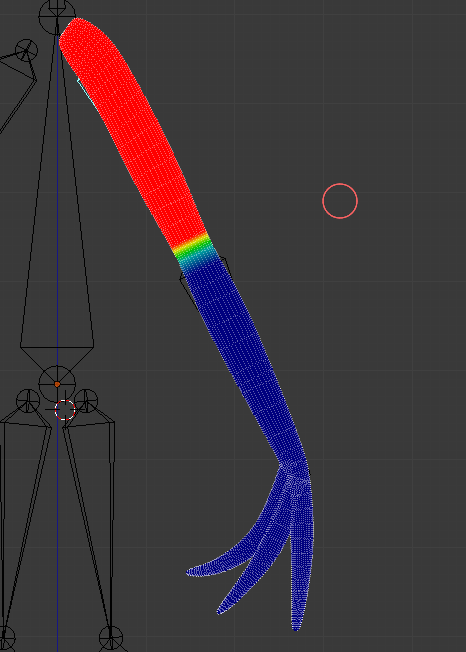
Done, now the mesh will have weights assigned to these bones with good deformations as shown below:

enter image description here

$\endgroup$
0

You must log in to answer this question.

Not the answer you're looking for? Browse other questions tagged .