6
$\begingroup$

I will be explaining this as best as I can, however I will be actively updating with more detail if necessary.

End Goal: I want to have a circle roll in from the left of the screen (a logo will be on the circle so it will have to be actually "rolling" across the screen), stop shifting horizontally but continue the rolling motion about 1/4 from the left of the screen. I want to have text "slide" out of the circle as the stationary roll is occurring to look as if the roll is extending the text out of the circle.

Question: How can I get text to extend in such a way? I know that this is harder because the text has to appear out of thin air as opposed to sliding from off-screen. What is the best way to do this?

Second Question: If possible, can I import a pre-made circular 2D logo into Blender to use as the circle? I already know that making the roll motion is just a matter of repeatedly rotating it 90 degrees and using animation keys (may not be correct term, but I know how to do that part).

Thank you!

$\endgroup$
3
  • $\begingroup$ So, you don't want to see the text until the stationary roll? $\endgroup$
    – cmomoney
    Commented Jan 27, 2016 at 15:12
  • 3
    $\begingroup$ @Ninjamaster4427 Welcome to Blender.StackExchange! Please restrict your Question to a single question. You can ask as many separate questions as you need and link to a previous question if it carries some useful context. $\endgroup$
    – zeffii
    Commented Jan 27, 2016 at 15:47
  • 1
    $\begingroup$ 1. what is the exact 'extend' effect? the characters are getting out of the circle in a radial way (centrifugal)? or they are streched out (elastic). 2. I don't understand when the text appears. Does it not come with the disc? It's generated only when it's extended? 3. Does this text appear at once or fades or letter by letter? How? .... A handmade drawing/schema could be enough, like a little storyboard. Sorry, but the solutions are very different for each case, simpler or more complex $\endgroup$
    – o.g.
    Commented Jan 27, 2016 at 17:06

3 Answers 3

11
$\begingroup$

Here is a quick method for that:

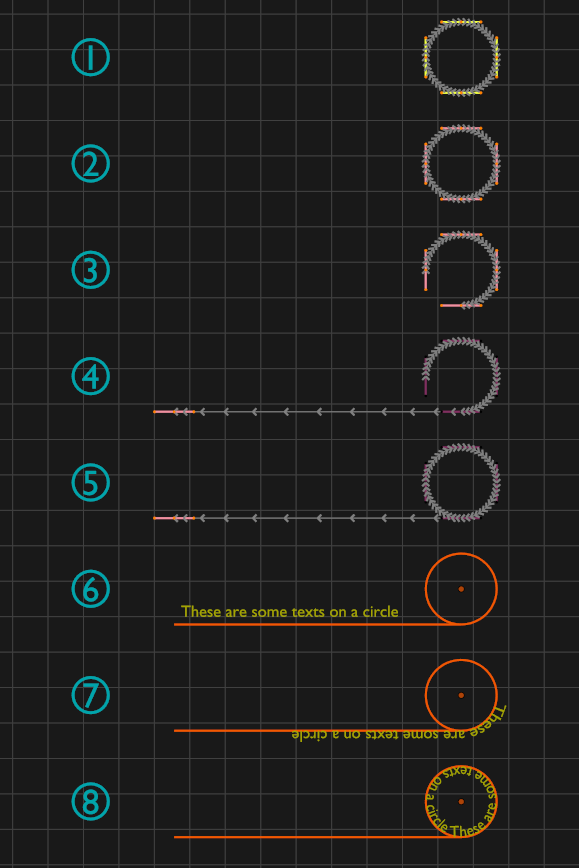
  1. Create a circle curve object.
  2. Enter Edit Mode, make sure all points are selected, then V to switch handle type to Aligned.
  3. AltC to make it an open curve (acyclic).
  4. Select the tip point, then E to extrude it. Note that the length should no less than the length of the text.
  5. You can manually tweak the shape by extruding and transforming points to make it a circle (or several circles for a longer rolling later).
  6. Add a Follow Curve modifier to the text object, and choose the curve as path object. You may also want to scale the text to match the curve.
  7. If the text appears flipped, you can select the path then enter Edit Mode, then W > Switch Direction.
  8. Then move the text horizontally to the expected location.

enter image description here

Finally, you can key the movement for path object to get the result:

enter image description here

Example File:

$\endgroup$
4
$\begingroup$

I believe this is the sort of effect you are looking for, right?

enter image description here

Though there are several possible methods of doing this, I would probably use this method with some Cycles node tricks.


First set up your scene. You will need a text object for the text to be revealed and a disc placed directly in front of the text and animated to move and rotate from left to right (or vice versa). Something like this:

enter image description here

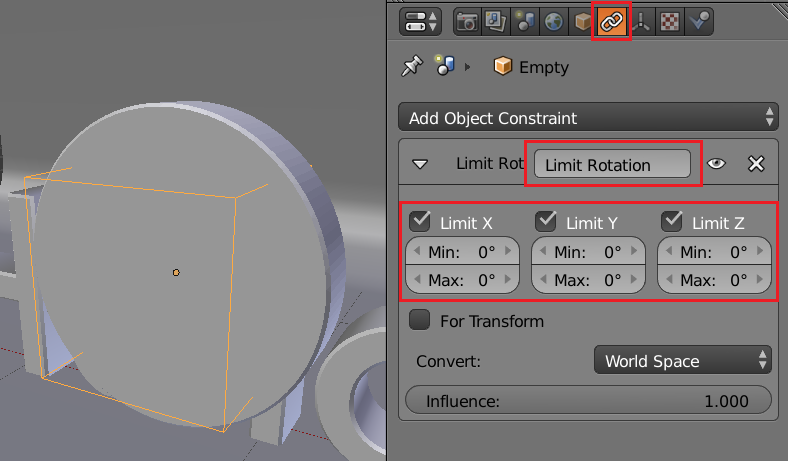
To test the location of the disc in the text material I will use the disc's local coordinates. However, since the disc is rotating as it rolls its coordinate space will be too. To fix this add an empty and parent it to the disc. Then, in the Constraints properties panel for the empty, add a Limit Rotation constraint to the empty and check all three limits X, Y, and Z (leaving all the Min and Max values at 0).

enter image description here

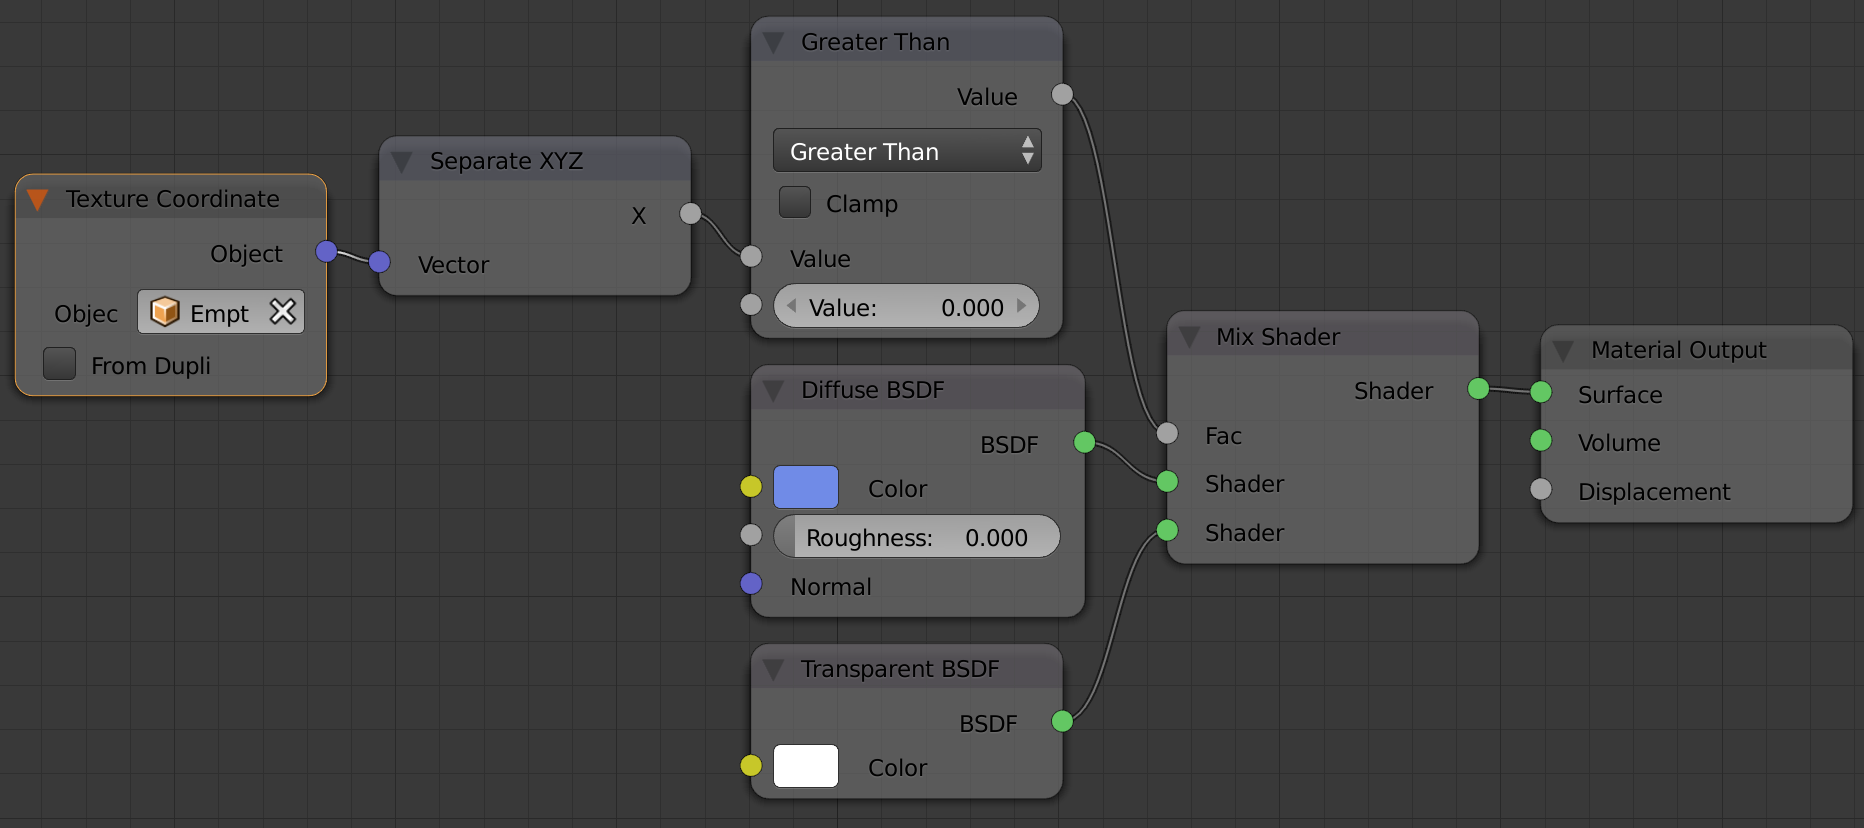
Now you need to set up the material for the text. To sample the empty's location use the Object output from a Texture Coordinate node and select the empty in the Object selector box. Split out the X component with a Separate XYZ node to test if it is greater than 0 (meaning that this part of the text is to the right of the disc/empty) and plug that into a Mix Shader with a Transparent shader in the bottom input.

enter image description here

$\endgroup$
1
  • $\begingroup$ FYI, if you use a vertex parent you would not need the constraint. $\endgroup$
    – David
    Commented Feb 2, 2016 at 17:32
3
$\begingroup$

Font Text on Curve Feature

enter image description here

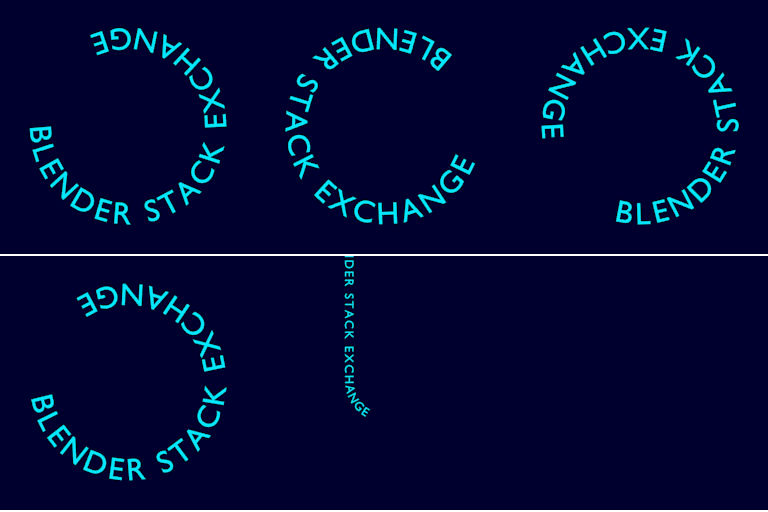
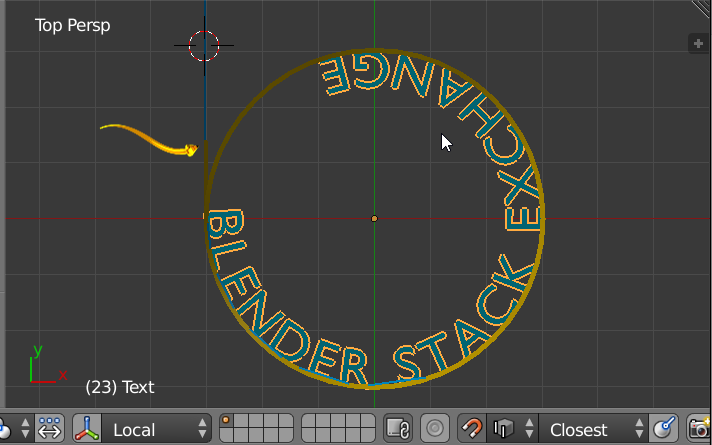
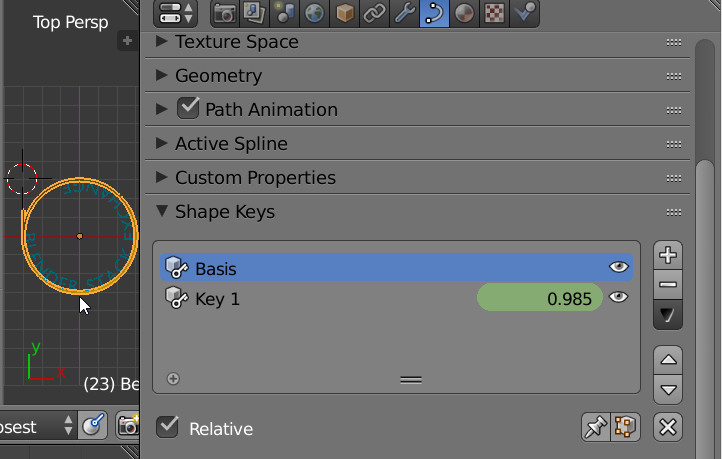
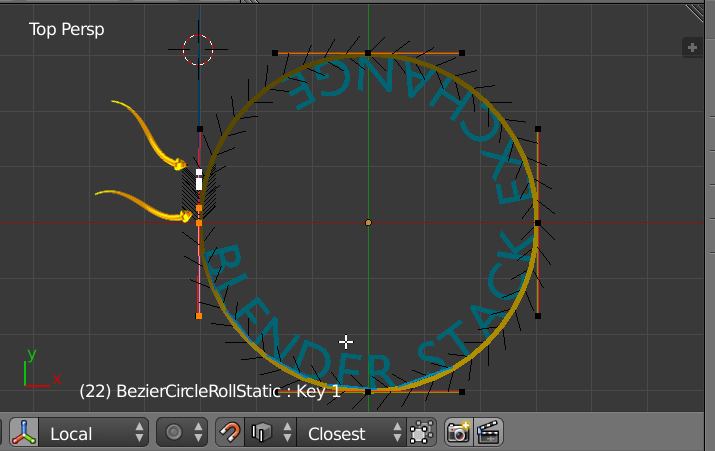
Image below. Text is placed on a single yellow curve which has a circular portion and a tail. The tail is very small for this image, it is indicated with the yellow arrow. The curve has two shape keys. A basis with a long tail. A Key 1 with a short tail. The Shape Key Value [Influence] is animated with keyframes to dynamically change the curve.

enter image description here

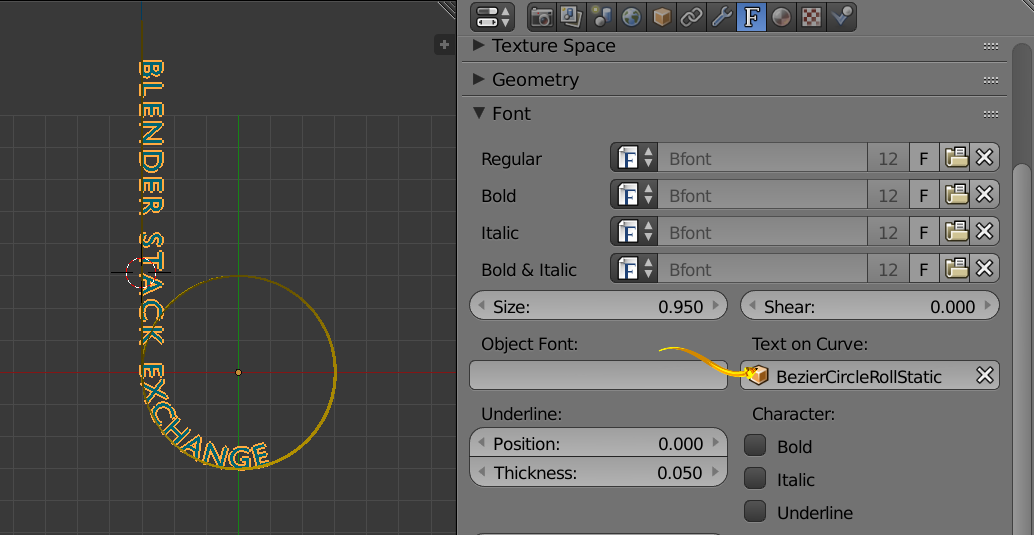
Image below. You can see the curve shape is animated so that some of the text is placed on flat portion of curve and some is placed on circular portion.

enter image description here

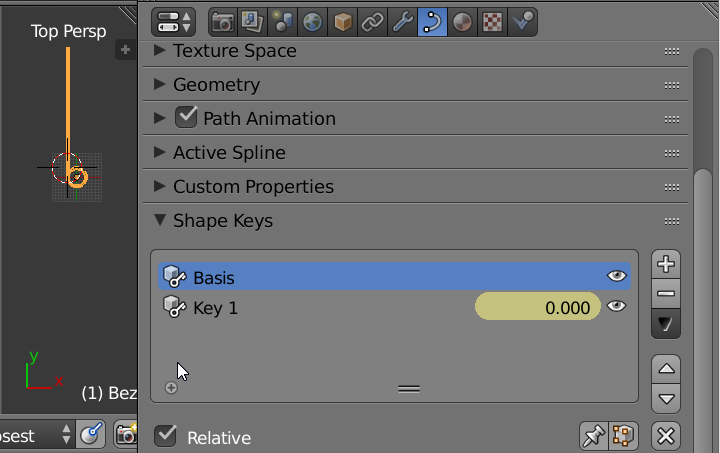
Image below. The curve has two shape keys. Here is the long tail on circle shape key basis. Its often difficult to see long skinny hair lines in explanations. The grid is present in the image to give sense of scale. Key 1 value 0.

enter image description here

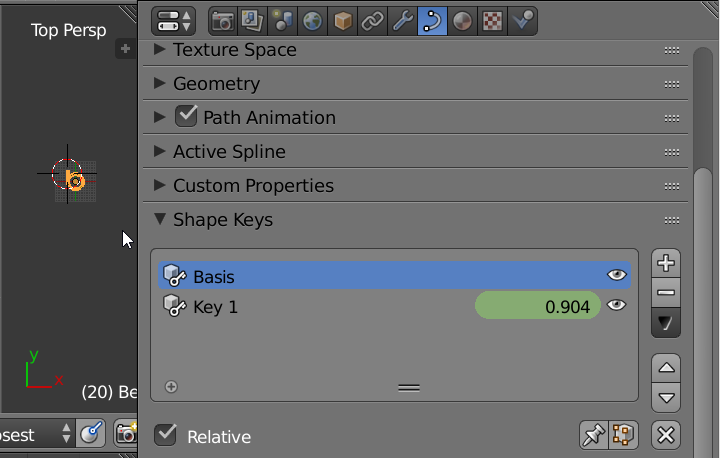
Image below. The Key Value 1 has value near 1. The the resulting curve is closer to just a circle. Just a little tail.

enter image description here

Image below. Close up. Curve emphasis Tiny little tail. Text is visible.

enter image description here

Discussion

The goal here is to place text on a curve efficiently. Curve direction can be changed. Text is left justified. Some text [spaces] are added before the visible characters to ease the transition between text on flat part of curve and text on circular part of curve. The curve is treated differently than the concept of Blender [parent/child]. If you rotate the curve it will have no effect on the text. To achieve rotation animation, rotate the text object.

To create the curve start with a Bezier Circle. [Cyclic U] set to false since we want circular shape with tail. Add a new vertex to complete circle and then added tail vertex. 5 on curve vertices.

Image below. Where the tail meets the circle please reduce the handle lengths to ease visual manageability.

enter image description here

$\endgroup$

You must log in to answer this question.

Not the answer you're looking for? Browse other questions tagged .