5
$\begingroup$

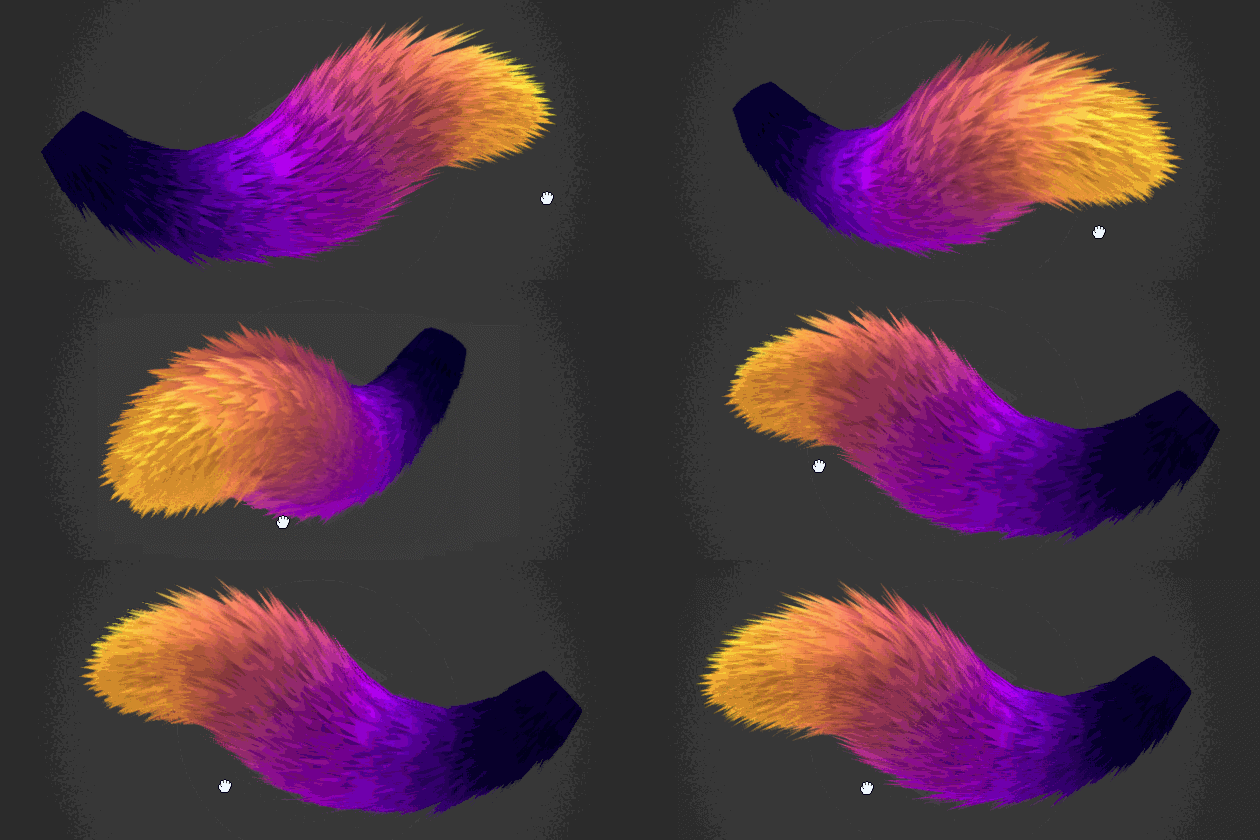
I came across this model on Sketchfab, enter image description here

which claims that it was done via geometry nodes in Blender. I've tried to accomplish the same, but so far I wasn't able to get the rotation right.

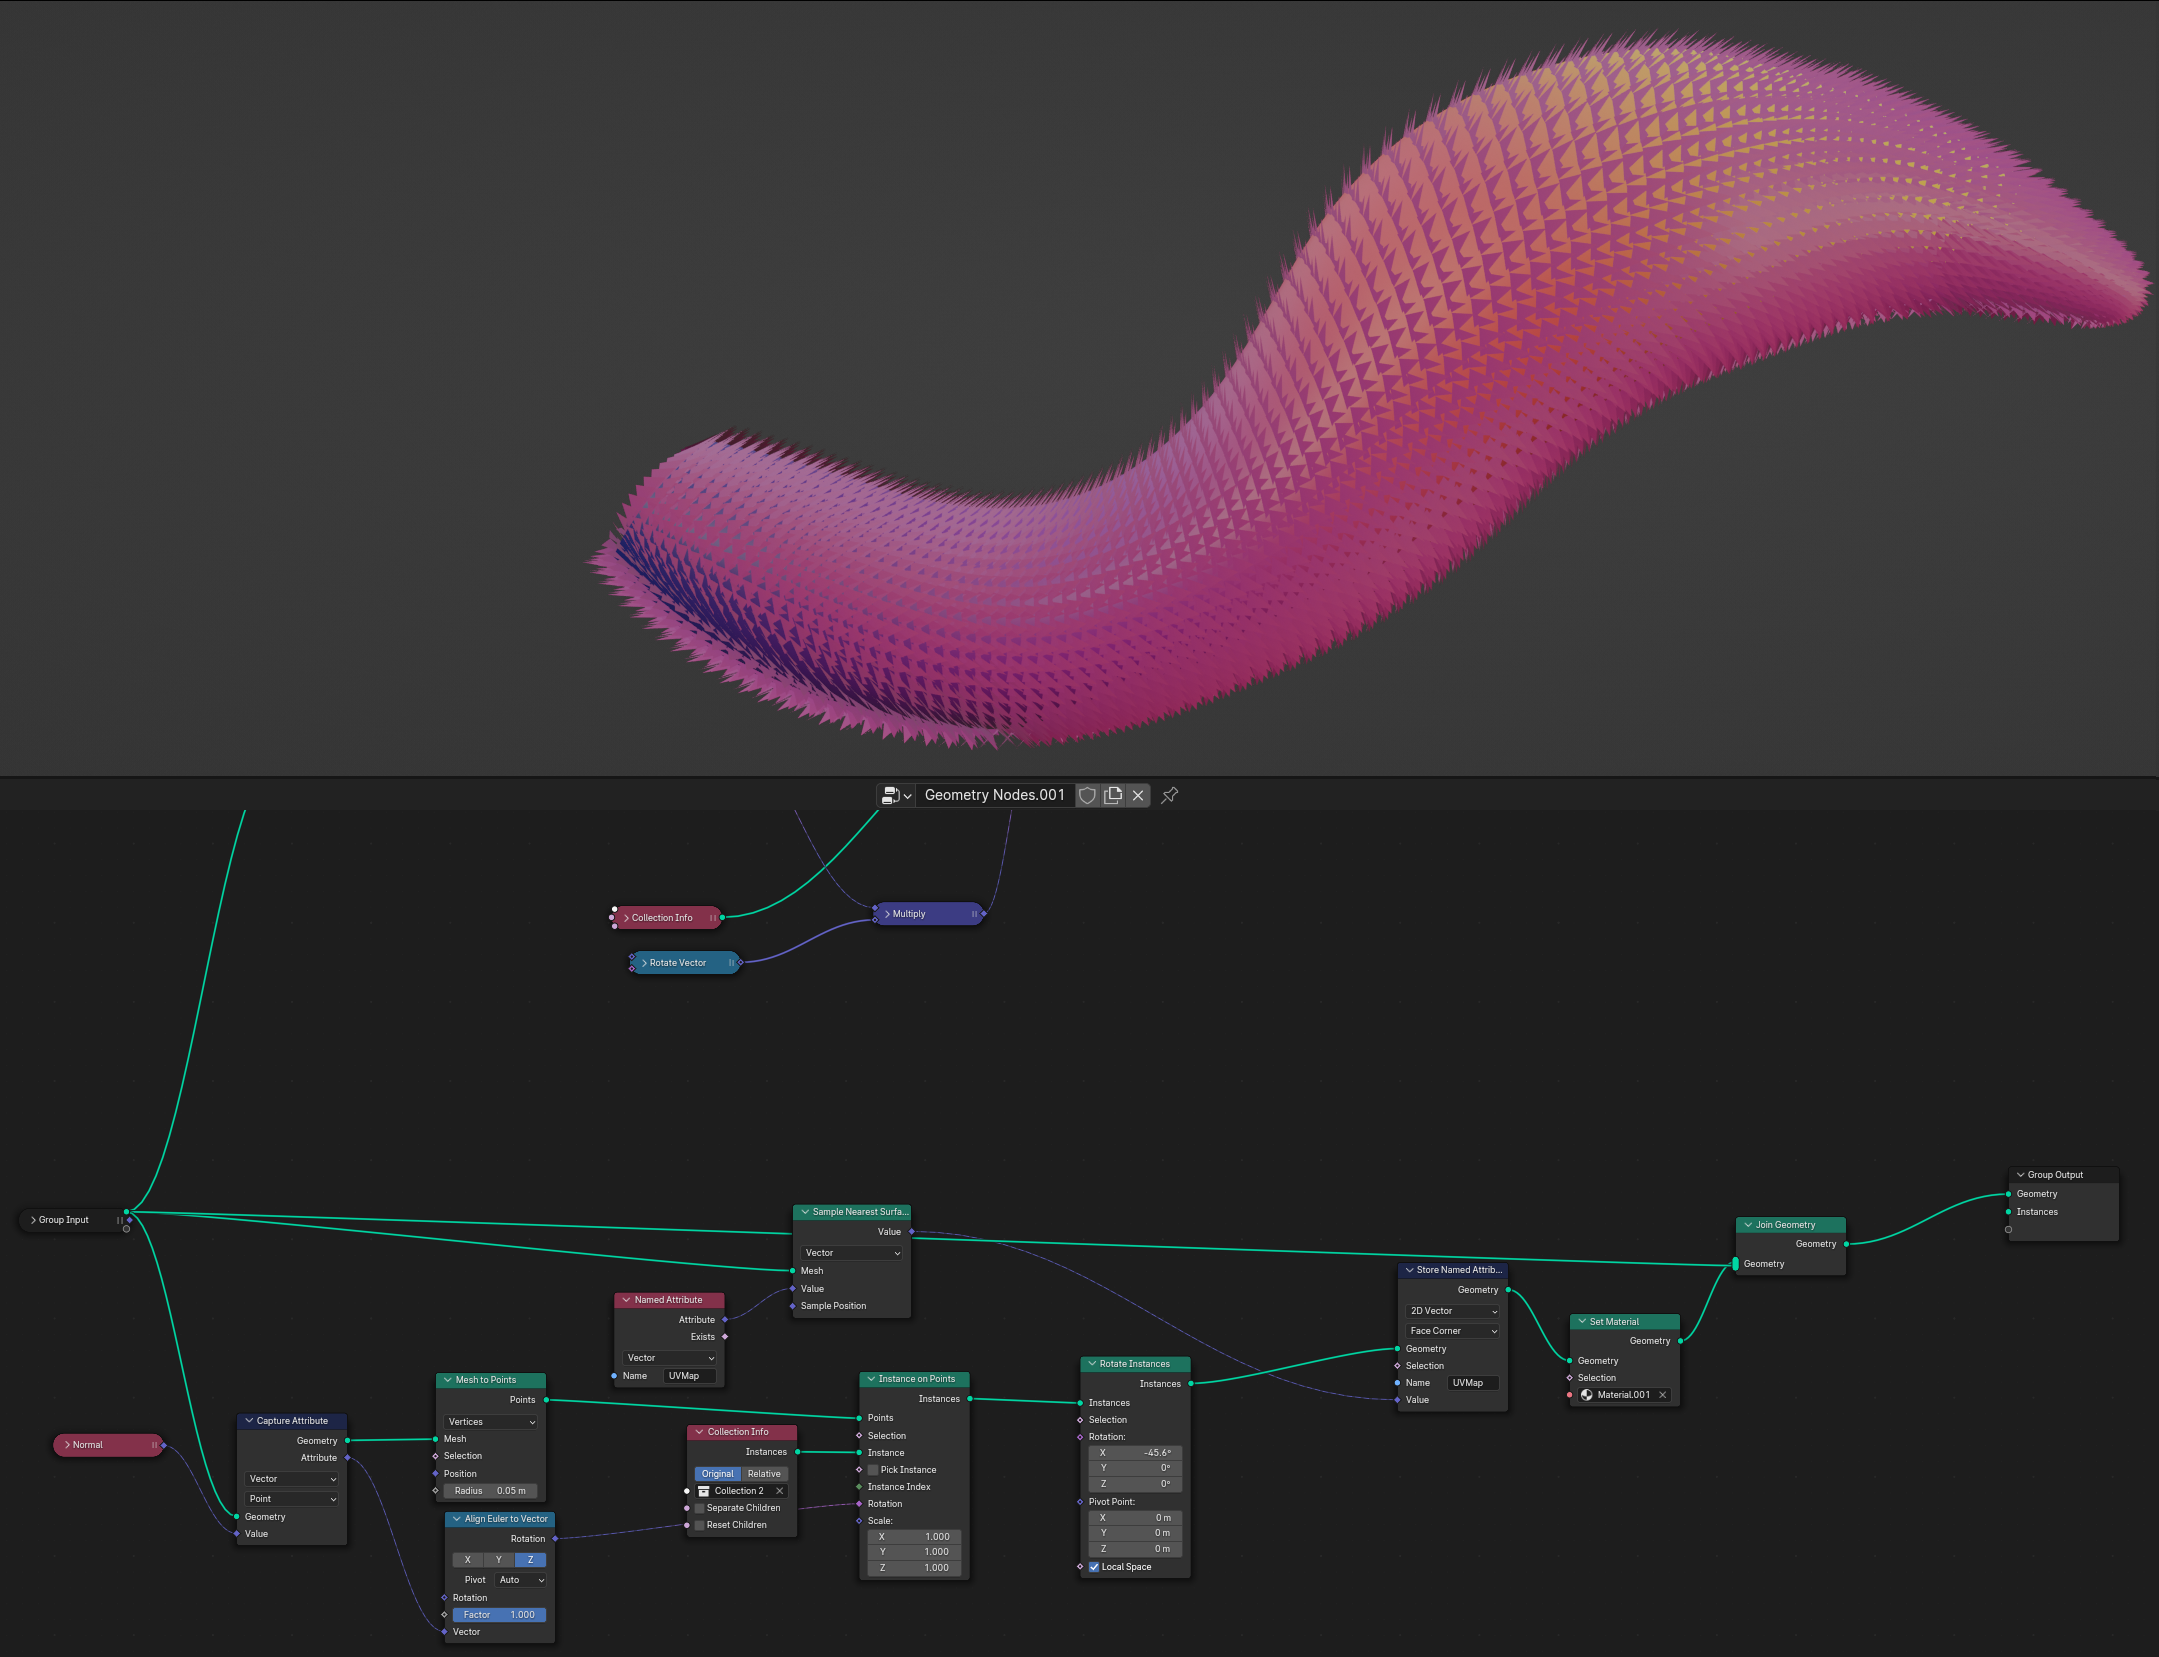
My rough setup currently looks like this, unfortunately I broke my UV-Map generation at some point and like I said, the rotation is incorrect. I would be really happy to recieve some intel on how the rotation can be established correctly with geometry nodes.

enter image description here

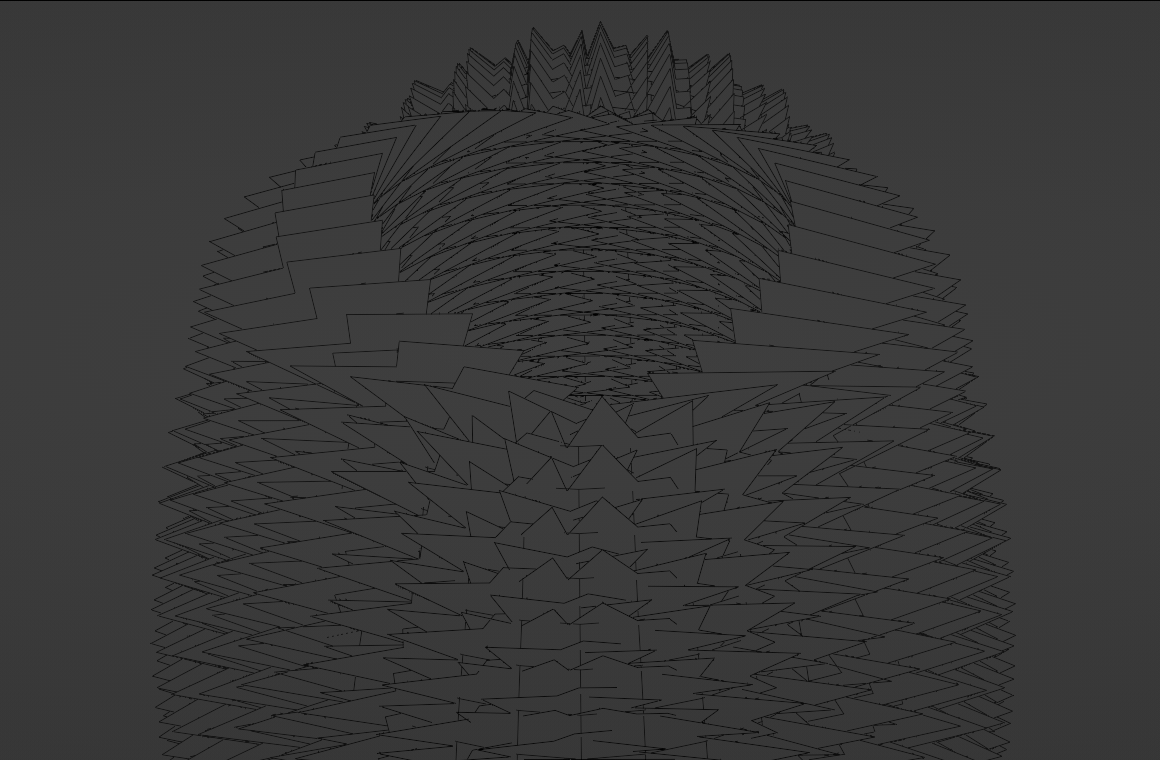
enter image description here

$\endgroup$
1
  • 1
    $\begingroup$ I think you need more info to align the stylized hair plane correctly. You need the normal obviously. The Auto option of the Align Euler to Vector node does a good job most of the time. But the plane can be rotated around the normal randomly & when you tilt it then it points into the wrong direction. It's like you say "hair grow here straight up" (=along the normal). So the plane is facing south, that's just as correct by definition as if it's facing east. To determine the direction of hair growth you also need the "tail direction" (root->tip). The UV map could help, maybe. $\endgroup$
    – Blunder
    Commented Apr 14 at 12:58

1 Answer 1

8
+50
$\begingroup$

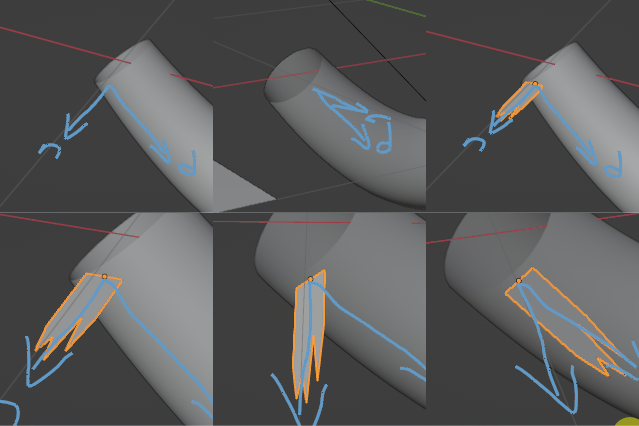
To align properly the hair to the surface and to the flow from blue to yellow, we can use 2 vectors : the normal of the surface, and the direction of the tail which is the tangent of the curve. The normal in itself isn't enough to align the hair. Here is an example of rotations to achieve our goal (not actually the same order as my nodes) :
enter image description here

$n$ is the normal vector pointing outwards, $d$ is the direction of the curve, pointing from the base of the tail (blue) to the end of the tail (yellow). In my nodes these vectors come from here :
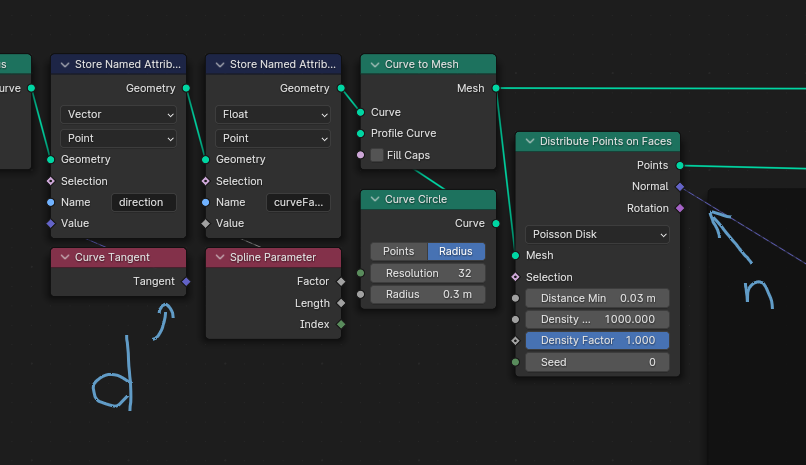
enter image description here

I also save in the geometry the factor of the initial curve as curveFactor. It is used both to drive the spreading of the hair outwards and in the material to drive the color gradient.

The rotations are done as follows :
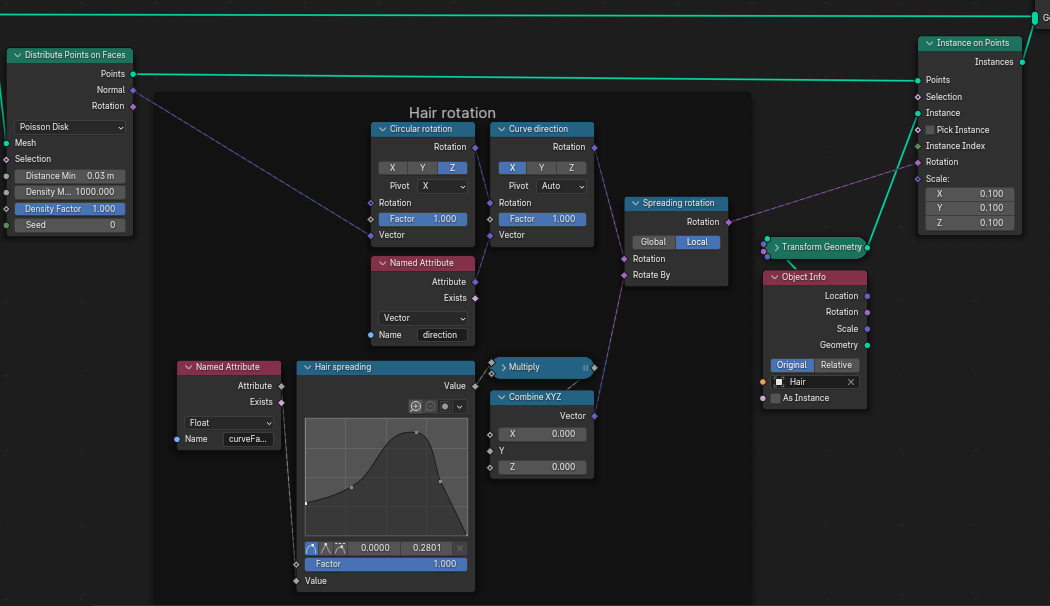
enter image description here

I encourage you to disable/enable the 3 rotation nodes to understand what they do. I'm achieving this result by playing with the parameters until I get what I want, so I won't be able to explain more than that.

The Rotate Rotation node (spreading rotation) is especially useful if you want to rotate with local coordinates.

Final result and blend file
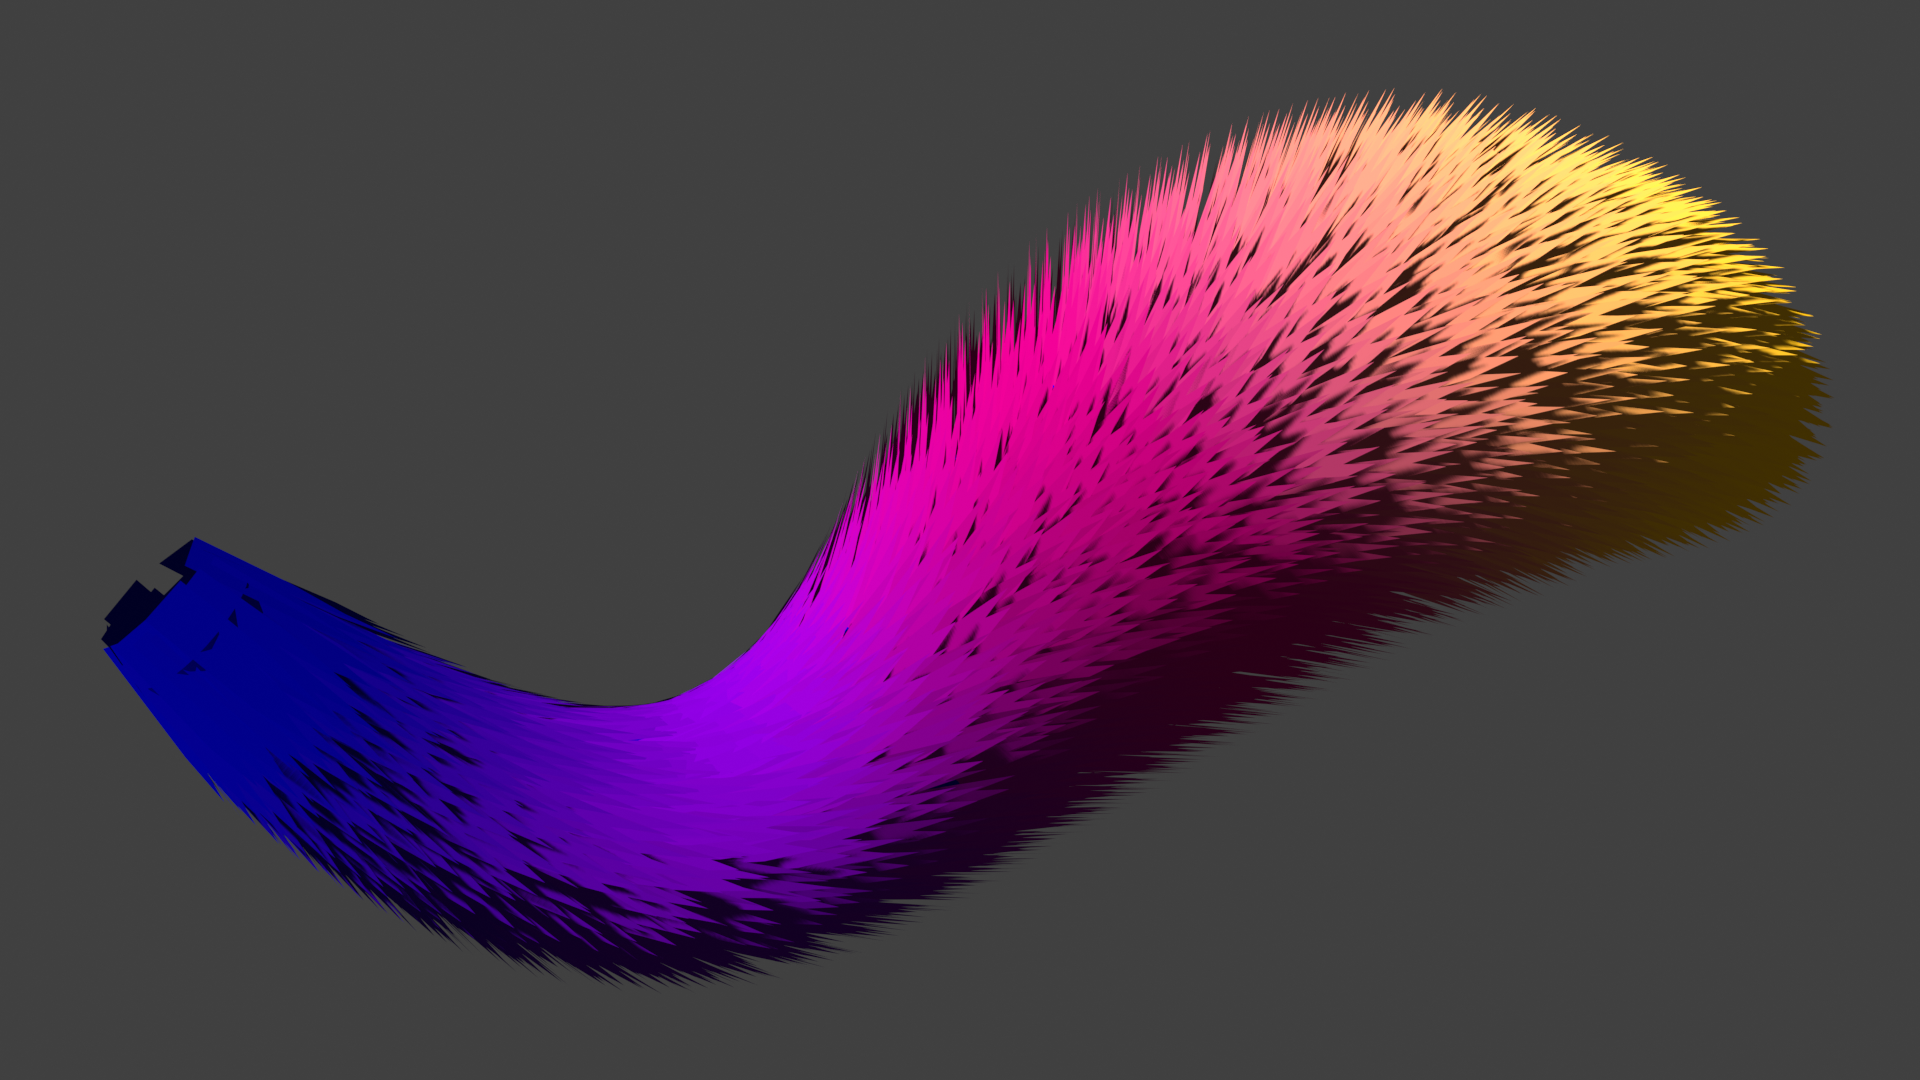
enter image description here

$\endgroup$

You must log in to answer this question.

Not the answer you're looking for? Browse other questions tagged .